

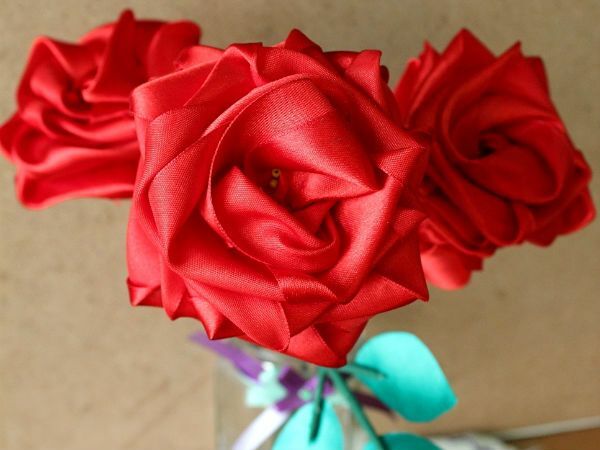
Roses made of ribbons can become quite an original accessory or decorative element, especially if they are made by themselves. Moreover, in the manufacture of such handicrafts there is nothing difficult. And in today's master class we give you the opportunity to learn how to create several types of satin roses.
You will need: - ribbon of any color from any material,;
- sharp scissors for needlework;
- "superglue" for different surfaces;
- thin needle and thread( one or two).
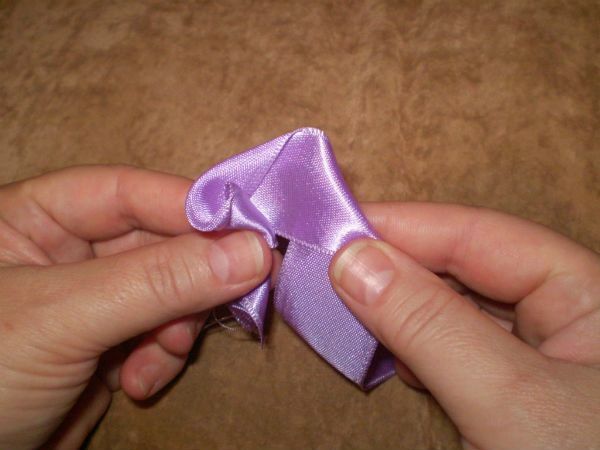
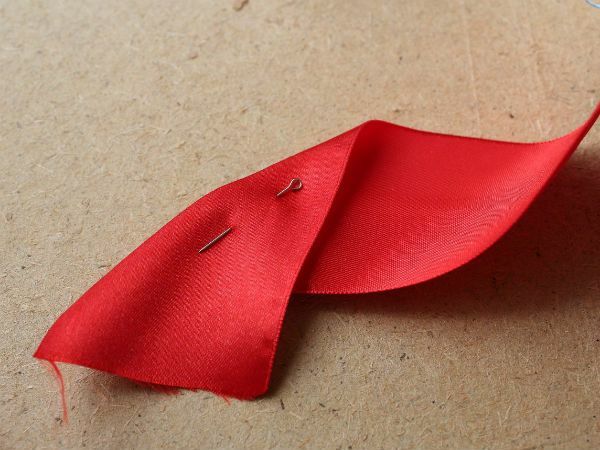
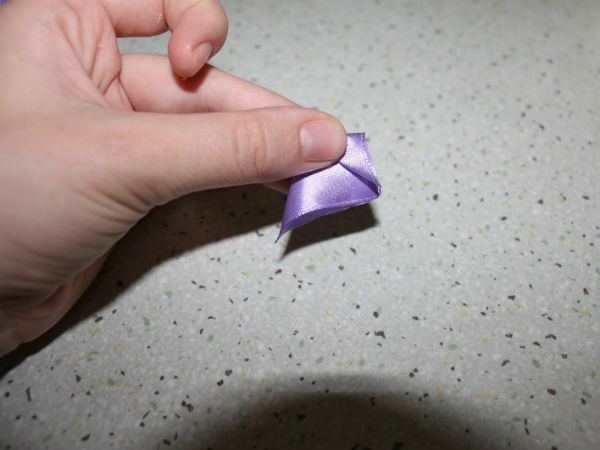
Take the tape in your hand and bend it in the middle.
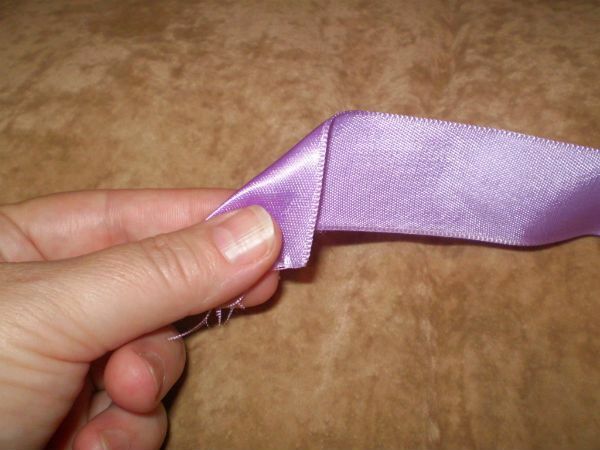
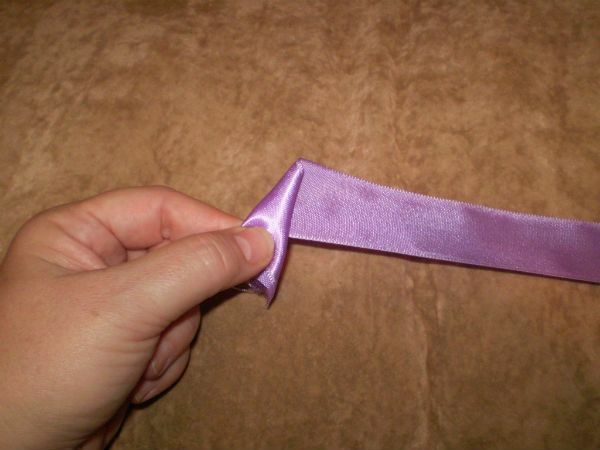
For a small rose it will take somewhere forty to fifty centimeters of tape. The fold should form an ideal angle of ninety degrees. Now put the second edge of the tape over the first fold at the same angle. As a result, the angle should look up from you.
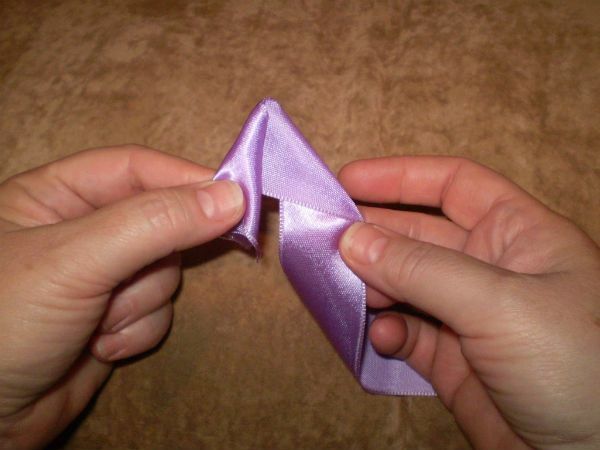
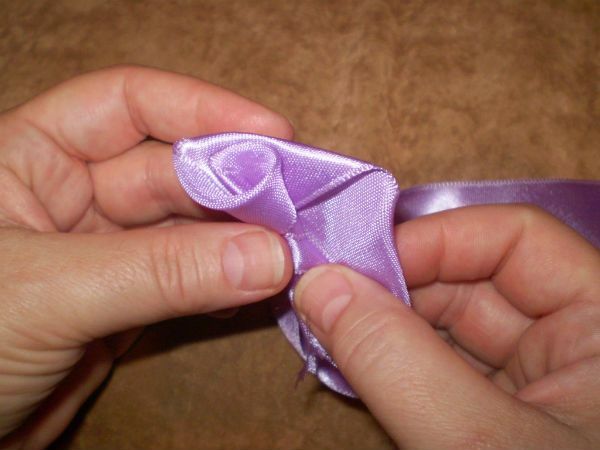
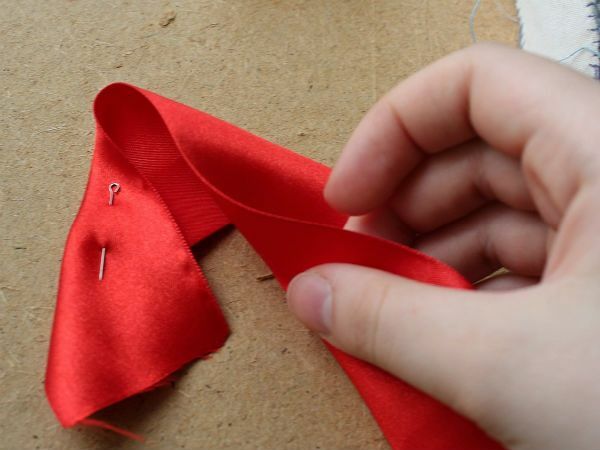
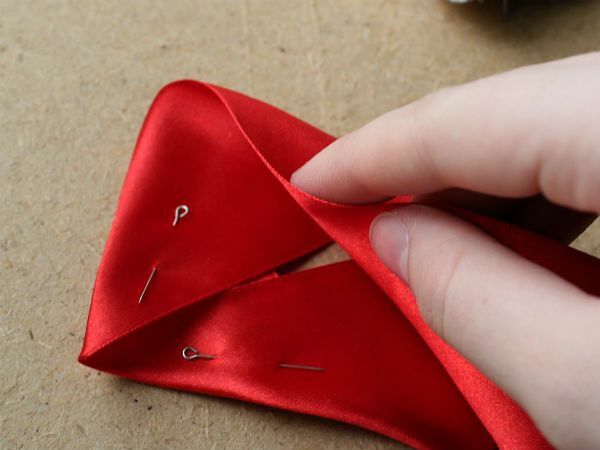
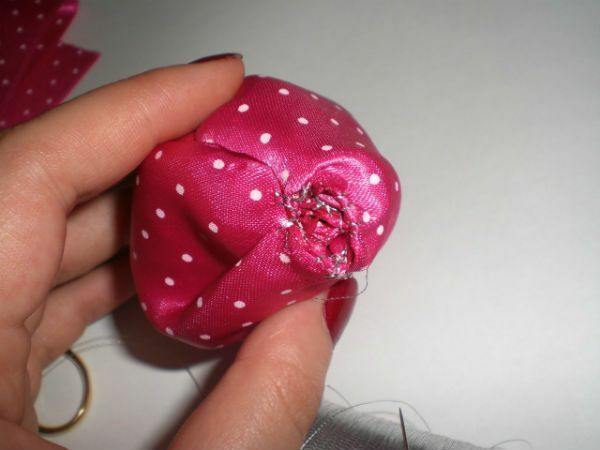
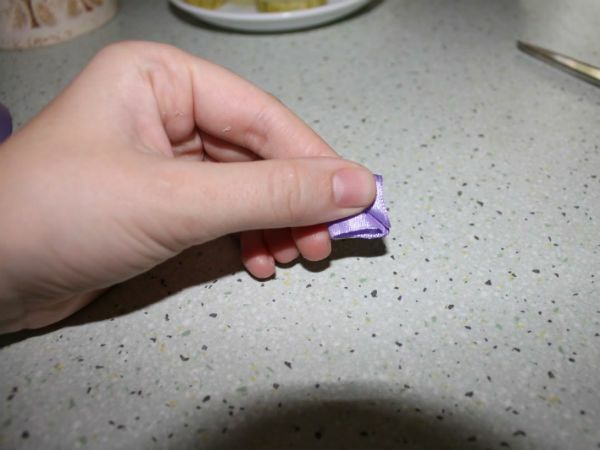
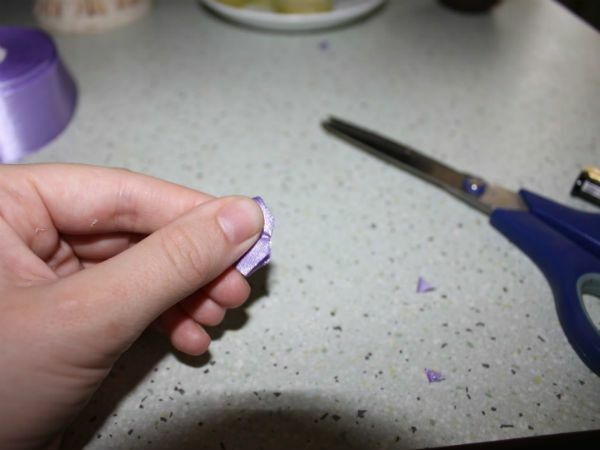
Take it with two fingers and place the tape on the left above the end of the tape, which is to the right. Cut in the place where the tape goes beyond the edges and "tails" of the ribbon. As a result, the design should visually resemble an envelope. It must be fixed. To do this, walk along its edges with a thin screed and pull the thread to fold the ribbon into the bud.
Then start baiting the bud layers of the petals.
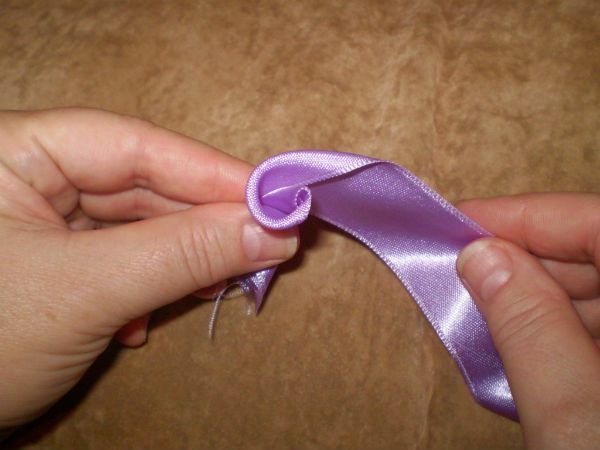
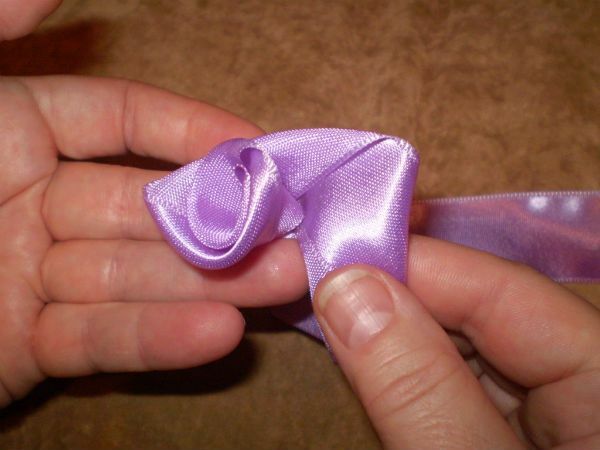
Roses from narrow bands are created in a similar way. Grasp each corner with two fingers and start circling the material around the circle, reaching the end, set the edges down and sew at the base of the rose.
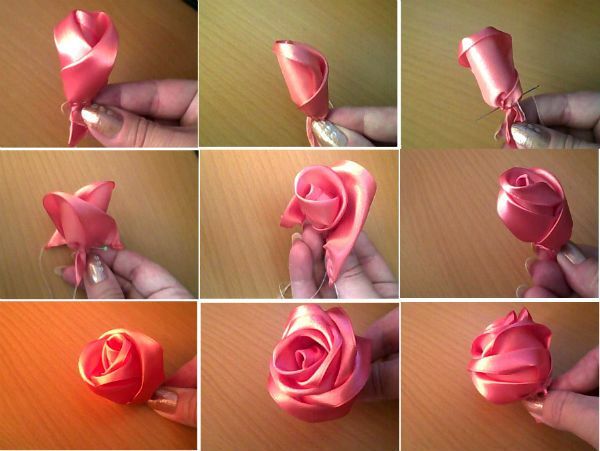
Composite flowers from wide ribbons begin to make like small roses - this will be a bud. When the bud is ready, begin to wind a wide ribbon. If you want to create a rose from a ribbon with a lot of petals, you have to gradually expand it, making the petals larger. However, two or three turns are enough to simulate this flower.
A ready-made rose from the tape should always be fixed so that it does not fall apart. It is best to sew it in the base.
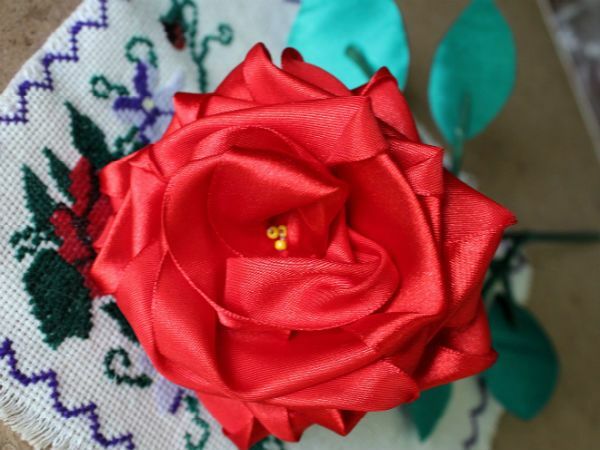
Volumetric rose
To make one rose you will need:
- red satin ribbon( 5 cm wide, 1.5 meters long);
- green satin ribbon;
- threads are red and green;
- beads;
- needle and pins;
- wooden skewer;
- gouache;
- brush;
- glue PVA;
- newspaper;
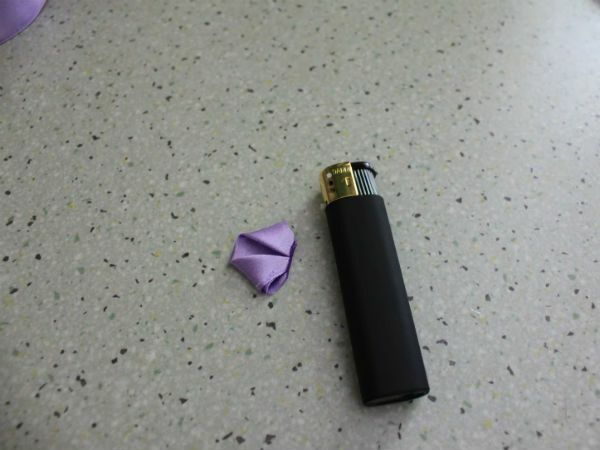
- candle or lighter;
- foam rubber.
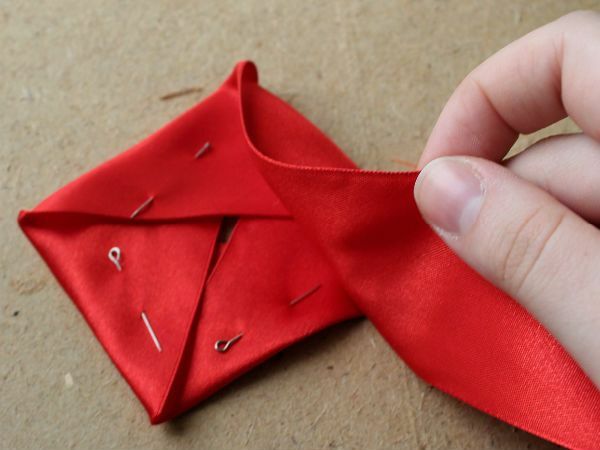
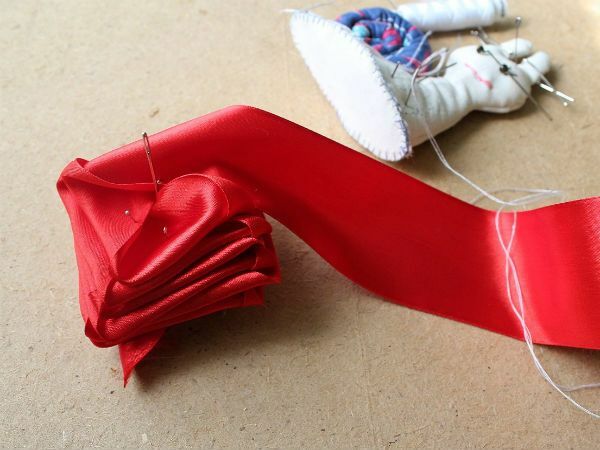
Take the red ribbon, bend one of its edges at an angle of 900 with the satin side up and fix it with a pin.
The longer edge of the tape also bend by 90 degrees, but in a mirror image and pin it with a pin. It turns out a kind of triangle.
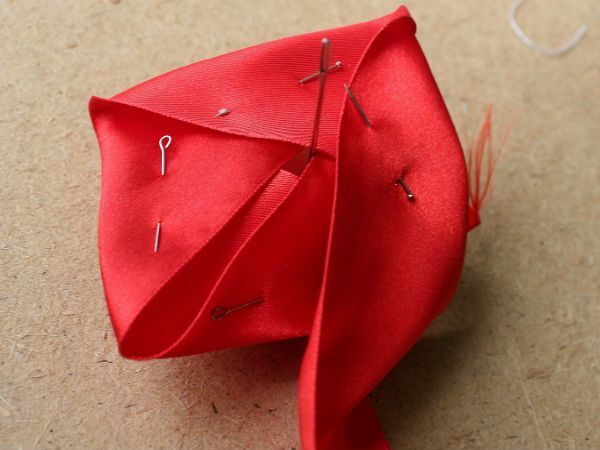
Now, the long edge of the tape again bend at 90 degrees, but already with respect to the second fold and again fix with a pin.
Make the fourth fold at an angle so that the shape of the square is obtained and secure the tape with a pin.
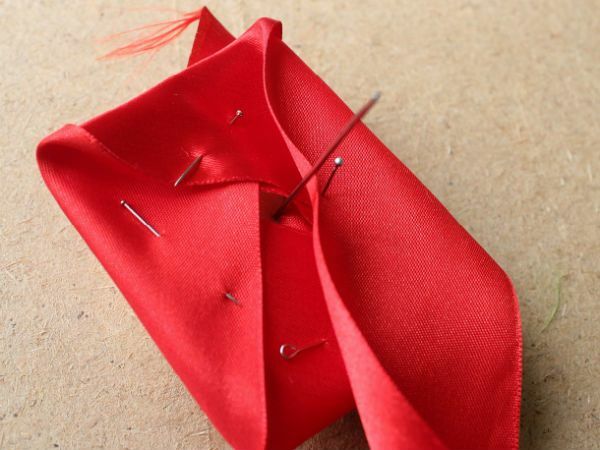
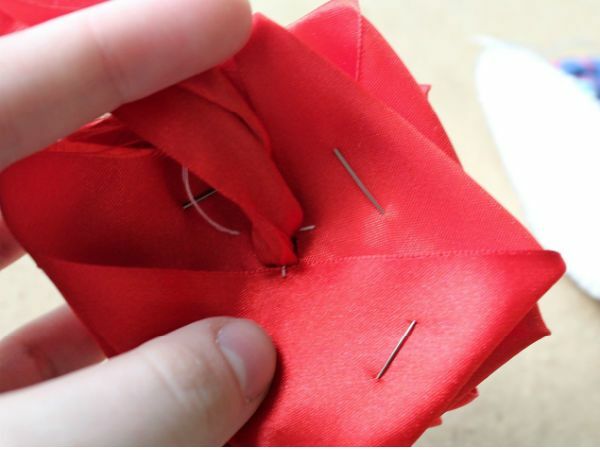
The resulting blank must be placed on a piece of foam rubber. The center of the flower should be marked with a large needle.
After this, continue to bend the ribbon in the same way as you did in the front row, but now each triangle you get is pierced through with a pin.
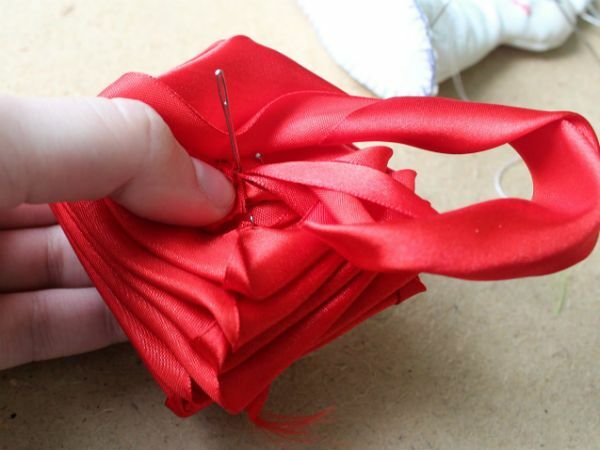
Turning to the folding of the third row of petals, remove the pin from the first triangle of the second row and fix it with a new triangle of the third row.
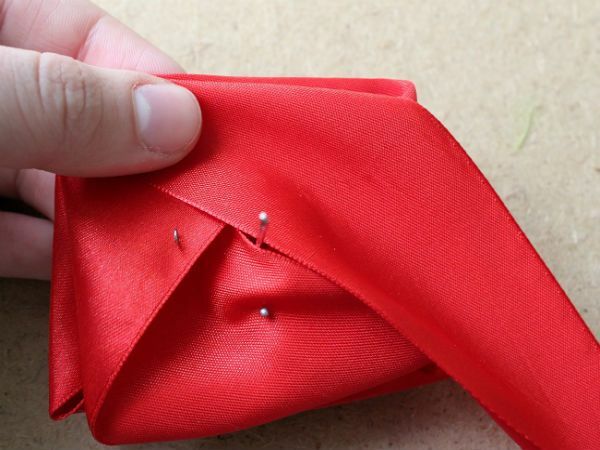
It should be ensured that each successive series is slightly smaller than the previous one.

Continue to lay the tape in layers until the 15-20 centimeters remain to the edge of the tape.
Slightly twist the remaining edge of the tape into the tube with a bright side outward.

The end of the tape is passed through the center of the craft along the large needle.
Remove the entire workpiece from the foam rubber together in pins, without removing them, and gently pull the edge of the tape from the underside.
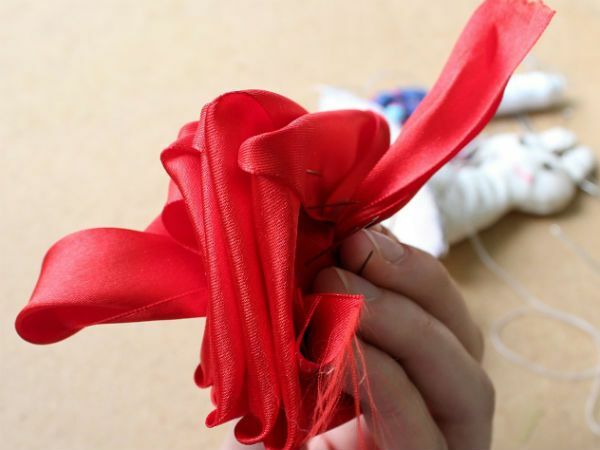
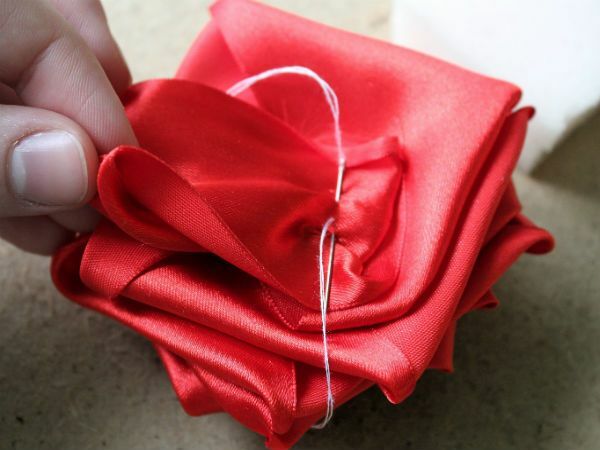
Take the red thread and pull all the layers together, grabbing the middle of the twisted tape. Bottom thread until trimmed.
Now you can remove the four top pins and fluff the rose, slightly scrolling the rows relative to each other.

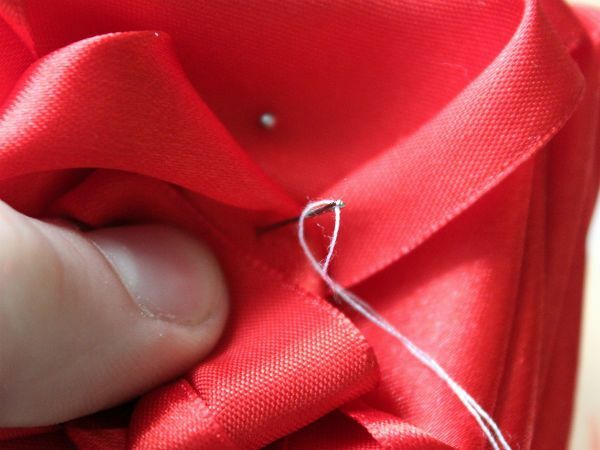
Now sew each part of the squares by passing the needle vertically up and back.
While sewing each layer, take the needle vertically to the center of the flower, threading the beads onto it, and returning it.
The remaining ribbon, fold in half and sew to the lower petals.
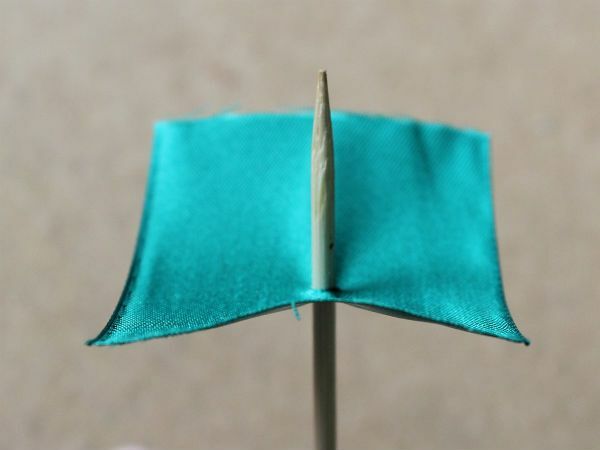
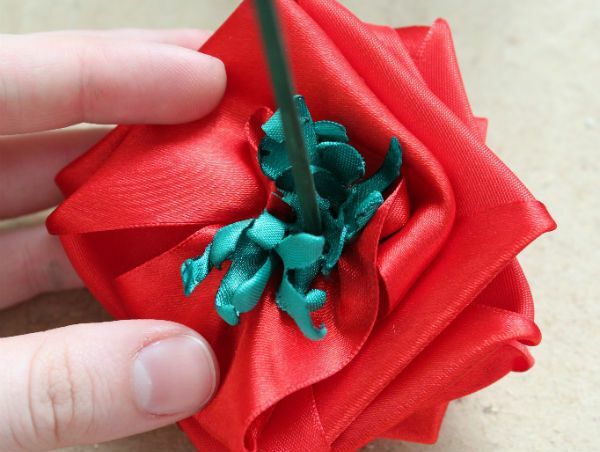
Now take a small piece of green ribbon, a bit larger than a matchbox and, after making a hole in the center of this piece, put it on the wooden skewer.
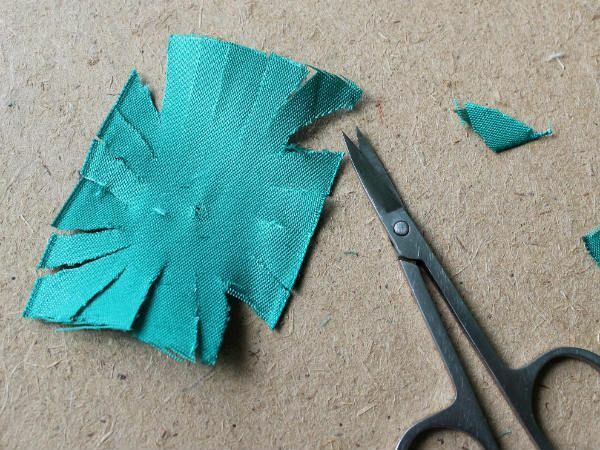
Then use the scissors to make the edge of the fringe, making cuts one centimeter in the direction of the center.
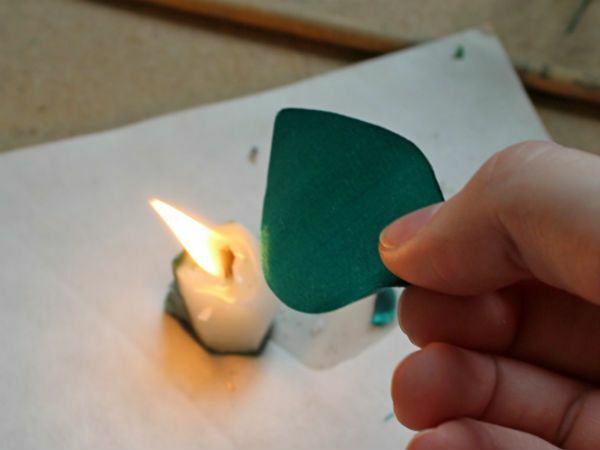
Turn the resulting green preform flip the bright side down and carry over the flame of the candle, thereby removing all irregularities and villi.
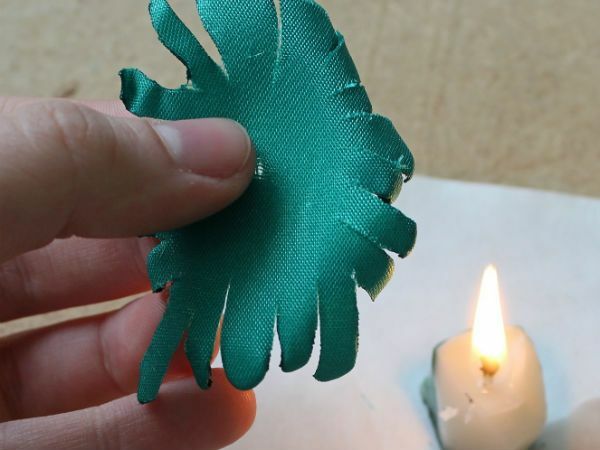
Hold the workpiece over the fire for a few seconds so that the petals are bent down. Do not hold the cloth close to the fire, otherwise it may blacken and melt.
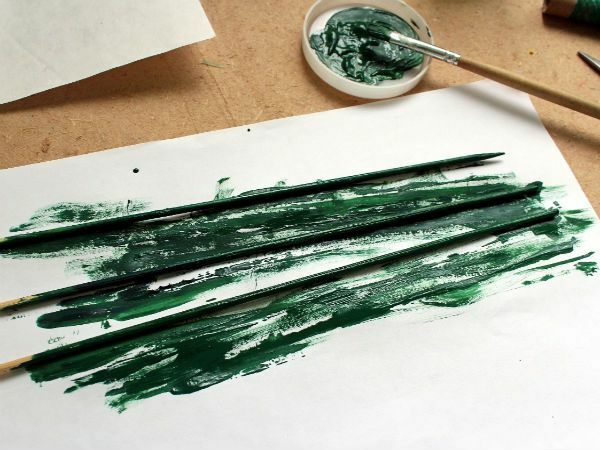
Now make a mixture of green and blue gouache and PVA glue.
Gently hold the edge, cover with this dark green compound wooden skewer. When the skewer dries, paint the remaining light edge.
To the bud from the bottom, with a few stitches, grab a small piece of foam rubber.
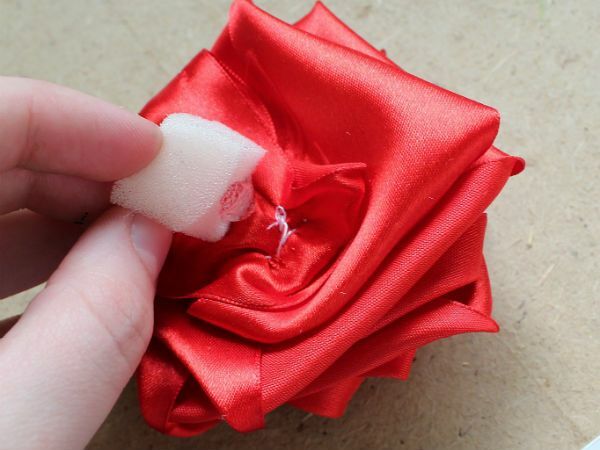
For the depth of cuts on the green workpiece, go around the circle with a green thread. Do not cut the thread yet.
Place the green workpiece on the painted skewer and place it at the level with the foam that is sewn to the bottom of the bud. Now you can tighten the thread.
Foam must be hidden under the green workpiece. For this, with small stitches around the circle, sew a few green leaves to the nearest row of rose petals.
Tighten and thread the thread.
From the green ribbon, cut 6 leaves, of any shape.
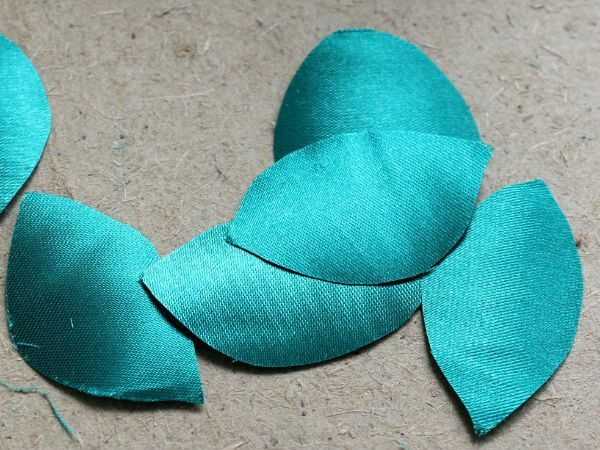
Treat each leaf over the fire so that its edges do not pour.
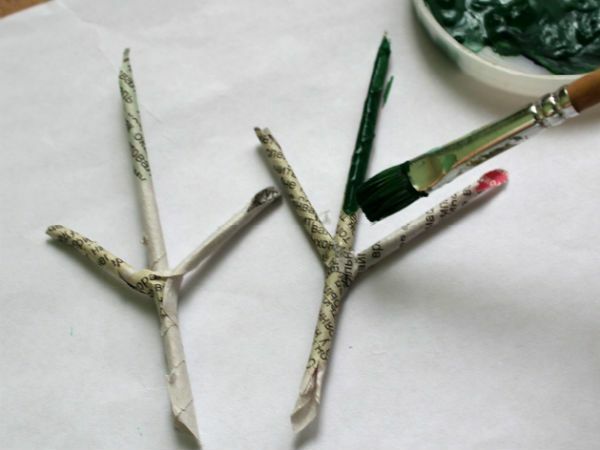
From the newspaper, cut several strips: two sizes of 5 by 6 centimeters and four - 2 by 4 centimeters. And with the help of a thin rod twist them into the tube diagonally, always fixing the edges with glue.
Cut each tube a little from one edge. For these places they will be attached to each other.
Cut the other edge of each tube at an angle.
Now glue the smaller blanks to large blanks.
The resulting twigs should be painted in a dark green color with a previously prepared mixture.
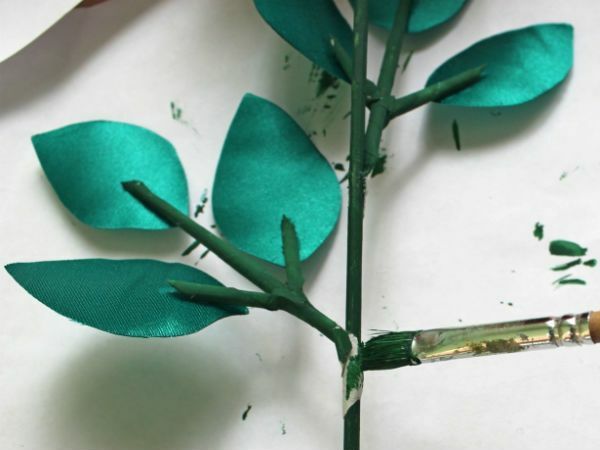
After the twigs have dried, spread each top slice with PVA glue.
And glue the green leaves to them with the front side.
Finished branches with leaves attached to the stalk using glue.
Now you can finally cover the stem with green paint, hiding all the connection points.
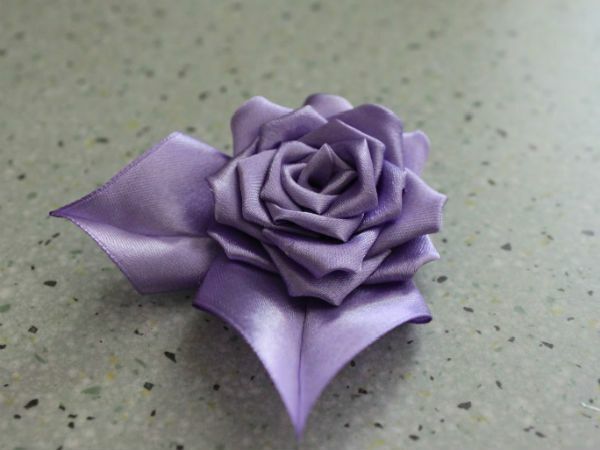
Composite rose
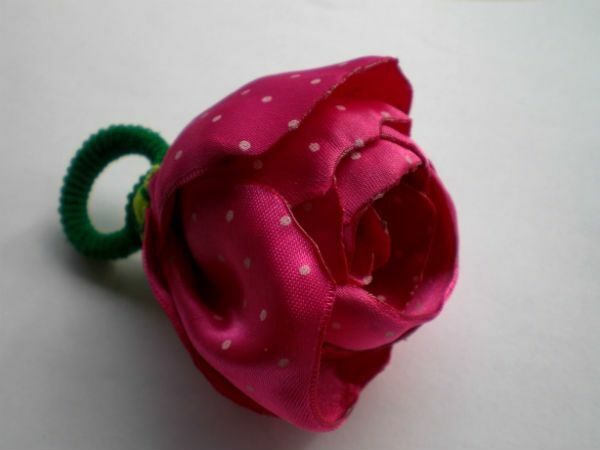
We propose to make a wonderful composite rose, which can easily become a decoration for hair, a brooch or a bright accessory to a bag, bracelet or belt.
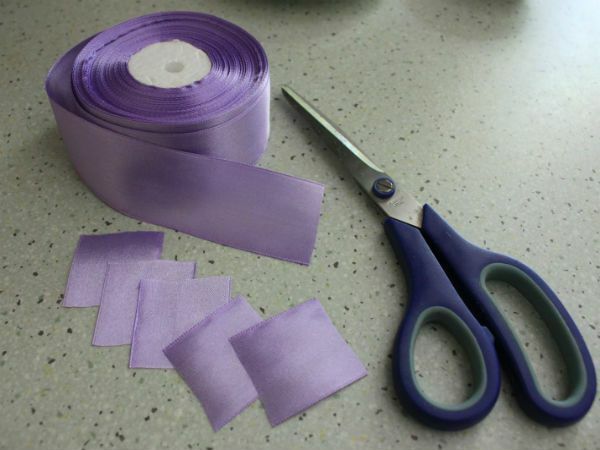
You will need:
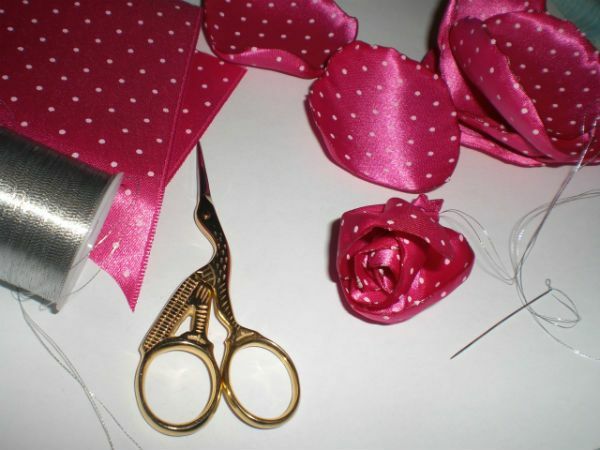
- bright satin ribbon;
- small piece of green cloth;
- sharp little scissors;
- needle and thread;
- candle;
- matches or a lighter.
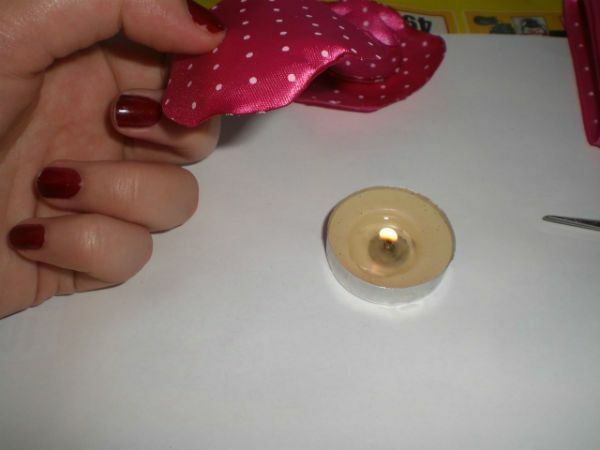
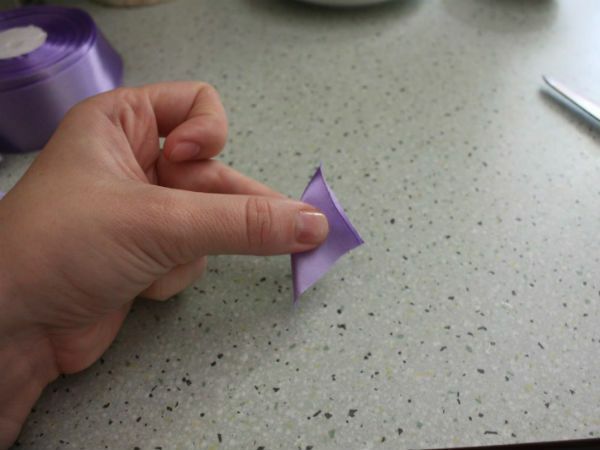
At the first stage, cut out 12 round lobes from the tape. After that, light the candle and hold each petal over the flame, treating the edges. Ideally, if the petals begin to bend in the middle, but do not turn black at the edges.

In the second stage, you can proceed to collect the product.
First petals fold in a dense bud, sewing together. All the other overlap consistently on each other, forming a flower that opens.
Sew each petal with small stitches to the base of the rose.
To make it natural, close the base of the flower with a piece of green cloth, collecting it in an accordion.
In conclusion, you can sew a rubber band to the finished flower.
to the table of contents ^In Kansas technique
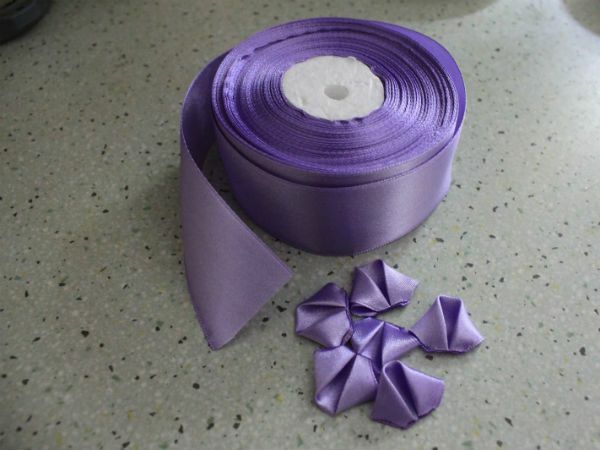
To create a neat rose in Kansas technique it is necessary to take:
- satin ribbon 5 cm wide;
- scissors;Soldering iron or lighter;
- universal adhesive.
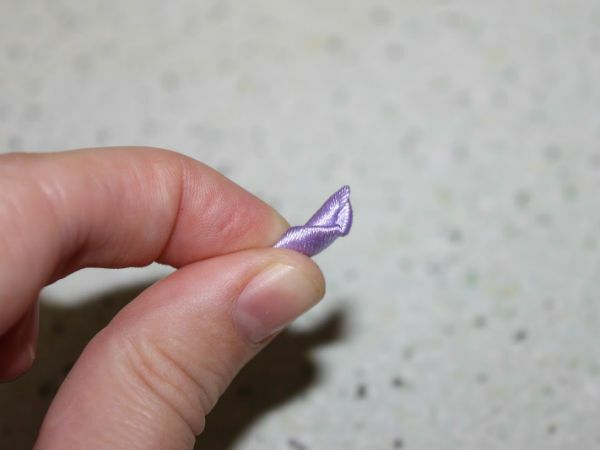
Ribbon is cut into squares measuring 5 by 5 centimeters. It will take 22 squares.
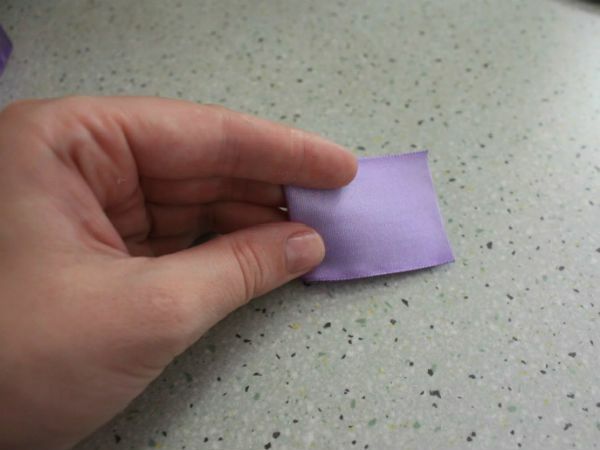
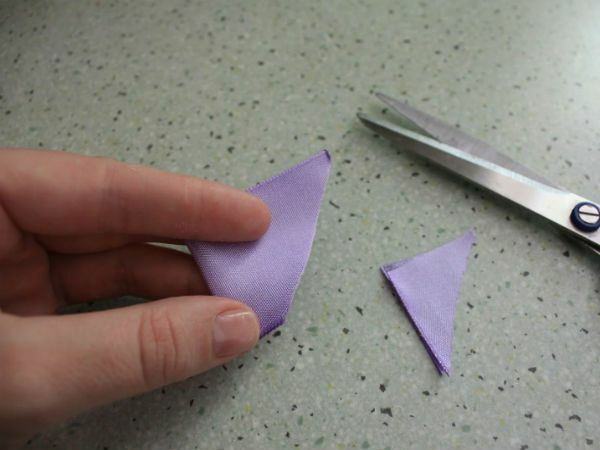
One square fold in half in a triangle. The edges of the resulting triangle fold again in the middle. Lower the sharp part and cut it gently on the fire. The petal will turn out. Similar actions with the other squares.
Now we need to cut two pieces of 10 centimeters from the ribbon, from them we will make the leaves of the rose.
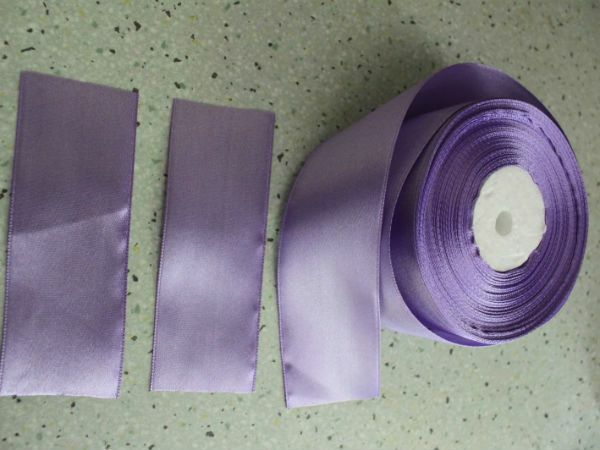
Each segment should be folded in half with the front side inward, cut off the lower right corner, and cut the cut line. Turning the products on the front side, we get cone-shaped leaves.
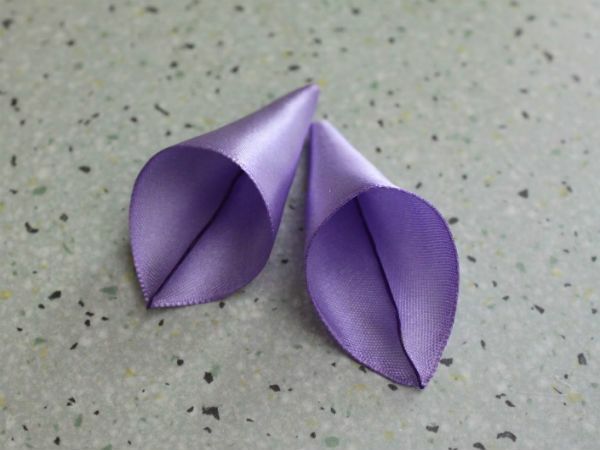
You can collect hand-made articles. Apply a small amount of glue on the bottom of the petal. The first petal is rolled into a tube - it will become the center of the flower, and paste all the other petals in a circle. Last, attach two large cone-shaped leaves.
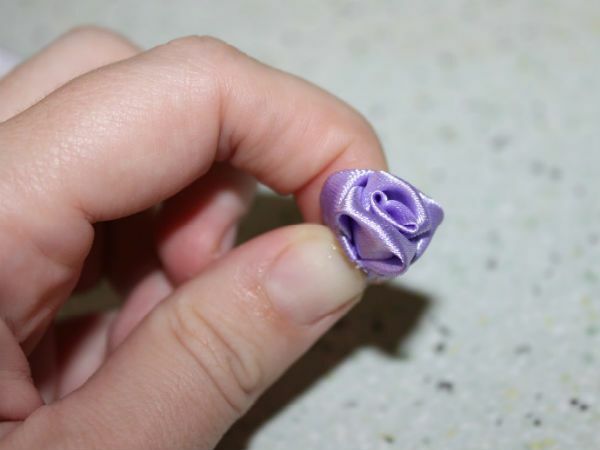
After the flower is collected, cut out a small circle from the ribbon, burn its edges and glue it on the back of the craft to hide all possible flaws.
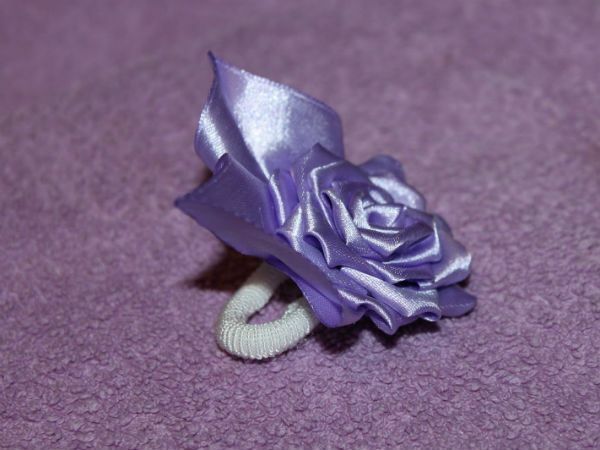
Such a rose can be an ornament for elastic bands, hair clips or hoops.