Refined nail art is an ideal way to show the surrounding femininity and impeccable taste. Liquid stones on the nails - this is one of the ways to create an original refined manicure with a spectacular design.
Liquid stones - what is it?
Many women think that this unique nail art is made with rhinestones. However, in the design of nails, as a rule, only small stones are used, since large and voluminous rhinestones are very inconvenient to operate, create a certain discomfort due to their massiveness and quickly fall off, thus violating the integrity of the composition.
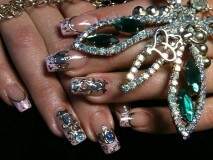
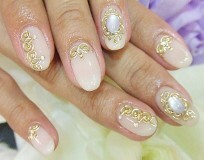
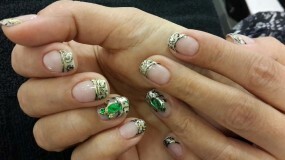
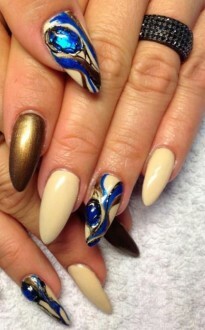
The newest technology allows you to create on the nails with gels and other materials the true works of art with magnificent volumetric stones visually very similar to jewelry made of real gems in gold and silver frames.
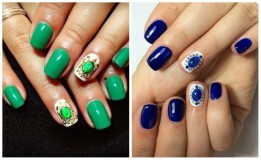
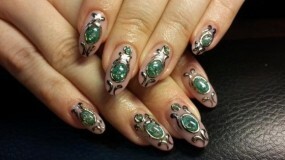
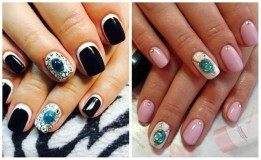
Decorating nails with liquid stones was developed by Russian designer, master of nail art Ekaterina Miroshnichenko. It was she who invented to combine several techniques( casting, gel sculpting and building up) into one. Catherine also developed special sets, necessary for work.
The most popular jewelry that modern women want to wear on their nails are rubies, emeralds, sapphires. Using a sculpted gel, you can make a stone of any color.
Advantages and disadvantages of this design
This exquisite nail art has many advantages:
- Attractive nail design. You can create original patterns yourself, decorate your marigolds, without making them heavier, with stones of different shapes, sizes and shades and enjoy their delightful brilliance.
- Simplicity of execution. Do not think that a manicure can be done only in a beauty salon. After practicing a little and stuffing your hand, you can create beautiful compositions on your nails at home. Often liquid stones are combined with casting. If you can not make them, you can use ready-made polymeric pebbles.
- Strength and durability. Neil-art is performed using a gel coating, so it lasts much longer than a regular varnish. However, the manicure is fragile enough, so all homework should be done in gloves, so as not to damage the stones.
Along with undeniable advantages, manicure also has a disadvantage - a decent cost of materials and the work of the master. If you do nail art in a beauty salon, then prepare to lay out for this pleasure a pretty sum. So, the design of one nail in the beauty studio will cost ladies on average from 200 rubles. In addition, this is a filigree work, so not every professional will be able to fulfill it.
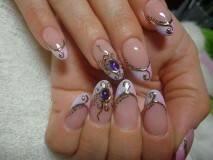
 Nail design with stones
If you decide to risk and learn how to create liquid stones yourself, then you are unlikely to save, as the set also costs a lot. However, the design looks on the nails so admirably that any costs are dimmed before the spectacular glow of imitation gemstones that will decorate your fingers.
How are liquid stones made?
Manicure is a technique of three-layer application on the nails of the first contour, then stained glass gels and, finally, a sculpture gel recreating the effect of a magnifying glass filling the created stone with an exquisite glow from the inside.
Materials and tools needed to create liquid stones:
- gel-free dispersion protection;
- colored gel for creating a back jacket;
-
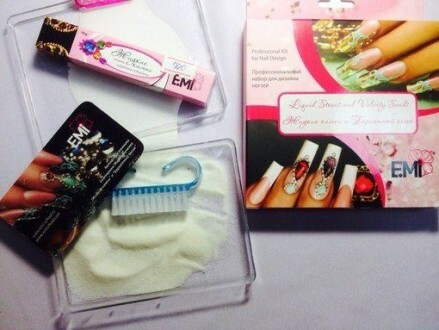 black gel for making a circuit with oil-free dispersion, in order to print the foil;
 - stained glass gel to give the stone a certain shade;
- sculpted gel;
- angular brush for the basic contour( up to 6 mm);
- fine brush for the execution of other contours( up to 2 mm);
- basic brush, which will be used to apply layers( up to 6 mm);
- special manicure tear-off foil for gold or silver casting( if not, then you can use the usual);
- ultraviolet lamp, which speeds up the drying process( it is not cheap, but it will come in handy if the art of manicure takes you seriously).
Beginners, who are just trying their hand at the art of nail art, professionals recommend first practice on nails, and after reaching certain results, go to your own nail plates. In any case, you need to have long nails, so that there is enough space to place the pattern.
Liquid stones with a jacket
To begin with, you can practice on the simplest design - liquid stones with a jacket.
Step-by-step instruction:
- With a corner brush and a white gel at the tips of your fingernails, draw a jacket. Its color can be any, but it is better to use pastel shades - white, light pink, ivory, beige.
- Fix in an ultraviolet lamp for two minutes.
- Apply gel protection to the nails, dry in the lamp( if the instructions do not specify another time, each new layer must be dried for two minutes).
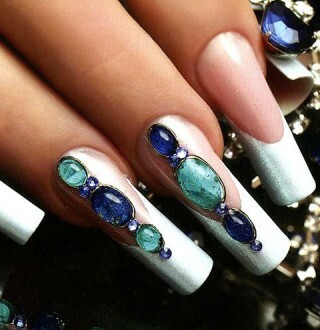
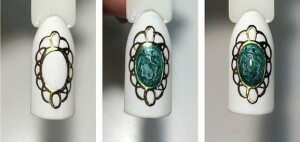
- Fine brush and black gel medium-thick lines to draw a pattern on the technique of casting. The basis for the design is the design of the metal frame of any decoration, brooch or ring. On the place left in the center there will be a shining stone of oval, round or square shape.
- Dry the nail in a UV lamp.
- Apply gilding with foil. Gold or silver foil cut into pieces that are larger than nail plates. The resulting pieces are tightly pressed against the nail plates with a matte side and tear off with a sharp movement. Thus, on the contours there will be gilding( or another shade, depending on what color of the foil was chosen).The nail after this layer should not be dried.
- On the free space left for the stone, apply colored gels - yellow and silver. This is done with a fine brush. It is necessary to achieve a smooth transition of one color to another in order to give the stone a natural depth of color. Dry the layer in a UV lamp.
- Apply a stain-colored colored gel with a fine brush. The shade depends on what kind of jewel you need to create. For example, a saturated emerald color can be achieved by applying an azure gel on the yellow background;for a beautiful sapphire, the azure is superimposed on a silver hue;For a blood-red ruby, the black substrate is covered with scarlet gel. Dry your nails.
- To form the volume of the jewelery on the colored substrate, apply the sculpted gel with a thin brush giving it a hemispherical volume. The gel has a very thick consistency, so one small fingernail is enough for one nail. Due to its unique properties, the gel creates the effect of a sculptural image of a full-fledged stone, which shimmers with the shades of the substrate. This layer also needs to be dried in a UV lamp, so that the liquid stone hardens.
- With the help of a basic brush, apply a finishing gel with light movements from the cuticle to the tip of the nail. Secure in an ultraviolet lamp.
Manicure with liquid stones - master class in the video
That's all, the luxurious design of nails liquid stone created. I had to work a little, but once you get the experience, the procedure will not seem so complicated.
Wedding manicure
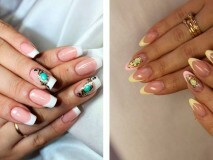
With the help of liquid stones it is possible to make not only an ordinary jacket, although the word "ordinary" here is not entirely appropriate, since it is nyl art highly festive and elegant. Modern girls are increasingly decorated with liquid stones and casting their marigolds for the wedding celebration.
Jewelry does not need to be adorned on all nail plates. In order not to overload the gentle image, it is enough to create stones on two nails, for example, on nameless. The shade of gems should not be too bright, it is best to choose a color the same as the eyes of a beautiful bride. For example, amazon amber will suit a brown-eyed girl. To make the stone look as natural as possible, and manicure - exquisite and unique, the gel is added with gold grains of sand.
The sophistication and mystery of the East
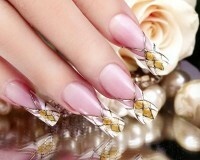
Neil art with oriental motifs is one of the most beautiful and original. An obligatory condition for its fulfillment is the use of saturated colors - red, blue, emerald, gold. The stones are adorned with an ornate edging of a dark color resembling an eastern ligature.
For such a case, casting is ideal. With its help, a silver and gold frame for a jewel is created.
Nail art for short nails
Certainly, this magnificent nail art looks excellent on elongated nails, but this does not mean that owners of short ones should give it up. Professionals recommend fashionable women to perform elegant and stylish, not overloaded with elements of design and decorate with stones not all nails, but only one on each hand.
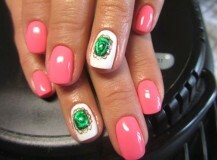
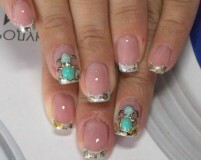
Precious gems need to be created not in bulk, but small in size, on non-long nail plates they will look more harmoniously and naturally. For example, for neat little marigolds, a pearl placer is ideal, or the positioning of liquid stone as one key element.
Than to remove liquid stones
- To get rid of a manicure that has lost its appearance is much easier than creating it. Since the décor is made of polymeric materials, it is removed using a special liquid in which the gel layers are soaked. The remedy removes stones and casting without harming the nails.
-
 Also for removal you can use a special machine for cutting or a hard file. Gradually, cut stone after stone, until you remove them completely. This is a very laborious and time-consuming work, besides, the casting is very difficult to cut.
 - Never try to tear off liquid stones from nails, otherwise you can seriously injure plates.
- After the removal of the decor is recommended the implementation of a medical manicure.
So, now you know how to do an exquisite manicure, which will be a worthy decoration of your image. With the proper level of preparation, the availability of the necessary tools and adaptations, you can create on your nails true masterpieces with gorgeous liquid stones.
Video on the subject:
 18:30
18:30  11:54
11:54 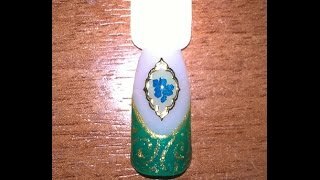 3:13
3:13 