
We bring to your attention a number of master classes on the creation of a wide variety of airplanes made of paper in the technique of origami and kirigami. Such airplanes will be a great opportunity for you to play an unusual toy or to remember children's and school years. Stock up on paper and patience, and you will surely succeed.
- Classic version
- Fighter
- model propeller
- Dolgoletayuschy
- Planning
- Quick and dive in the art
- kirigami
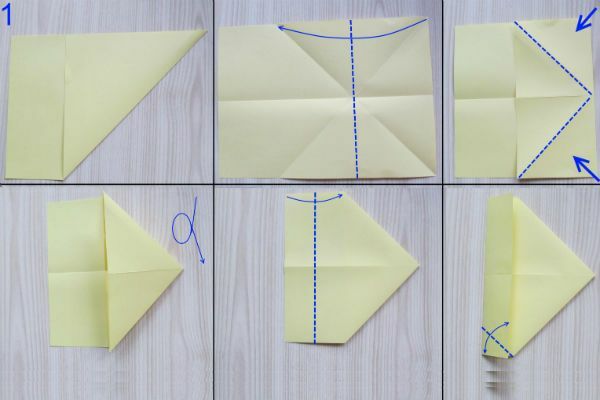
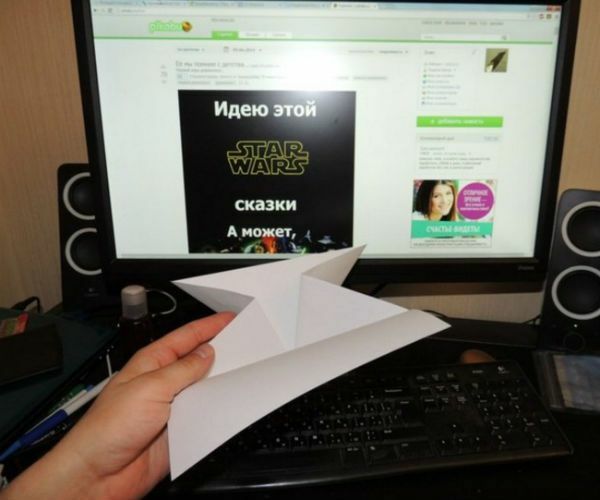
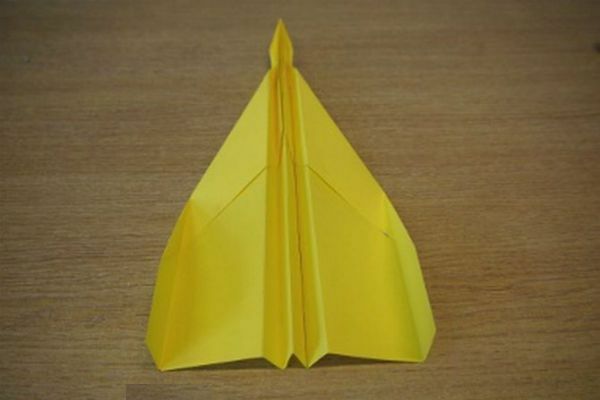
Classic
option to create a jet you will need only one material - paper. Paper for printers( A4 size) is best.
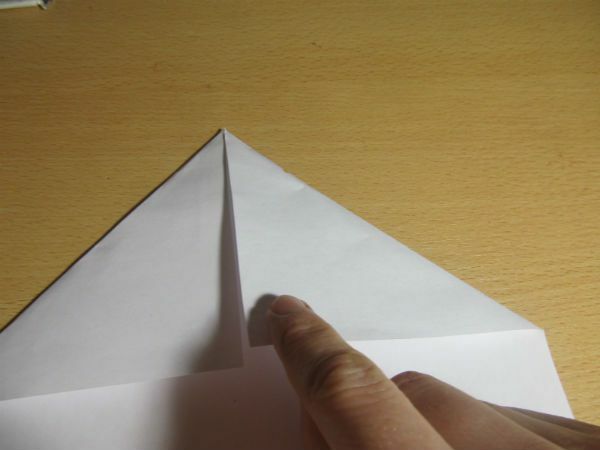
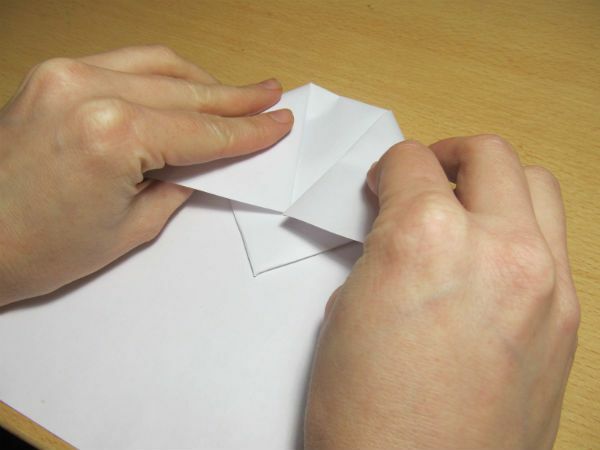
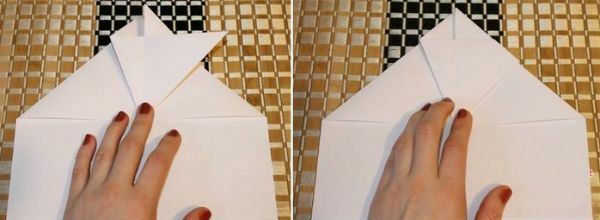
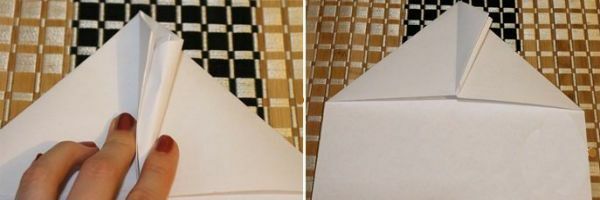
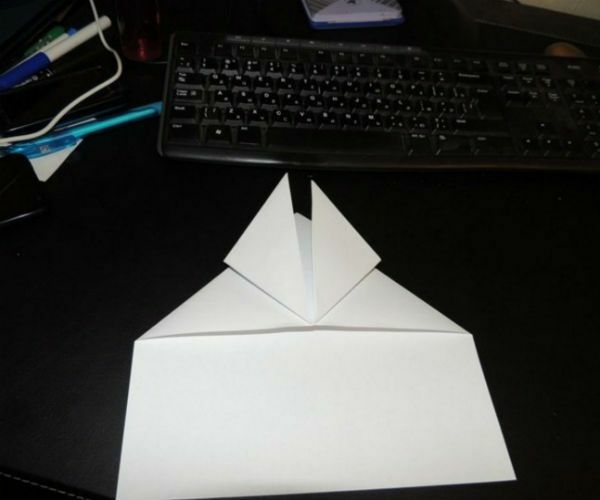
Fold the two outer upper corners inside, so that they "met" on the crease.
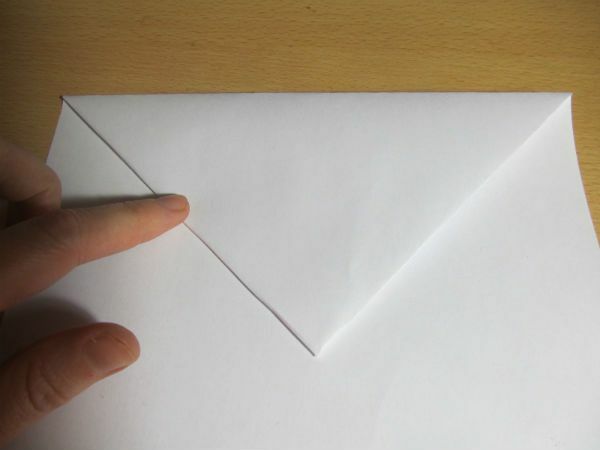
Wrap the top of the future aircraft down. Now the sheet should look like an envelope.
After this, again, fold the top two corners inward towards the center, as shown in the figure.
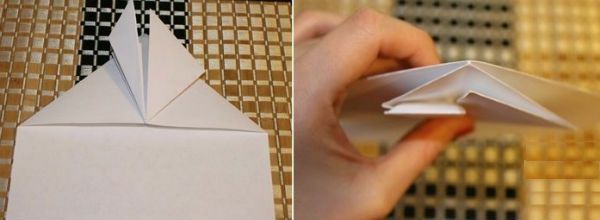
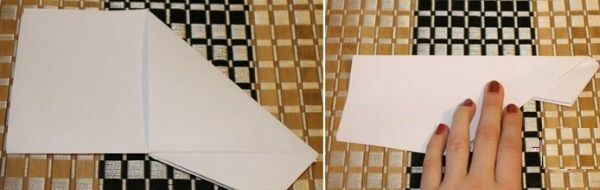
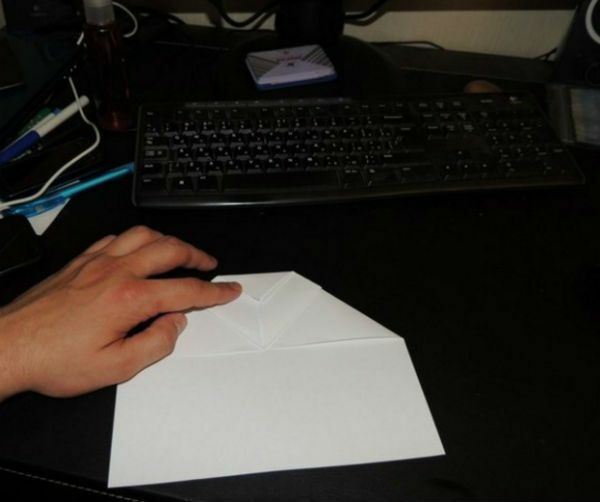
Lower the corner gently upwards.
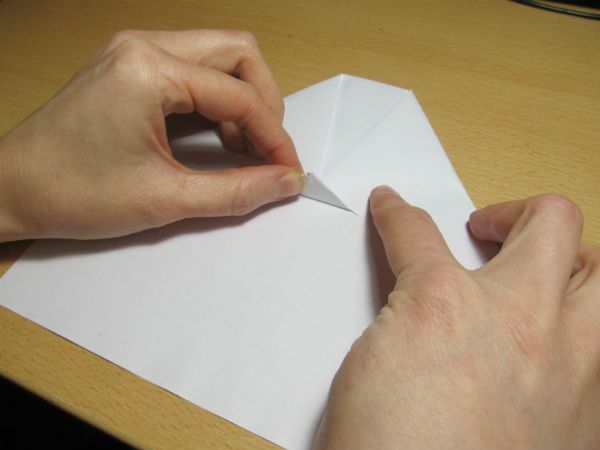
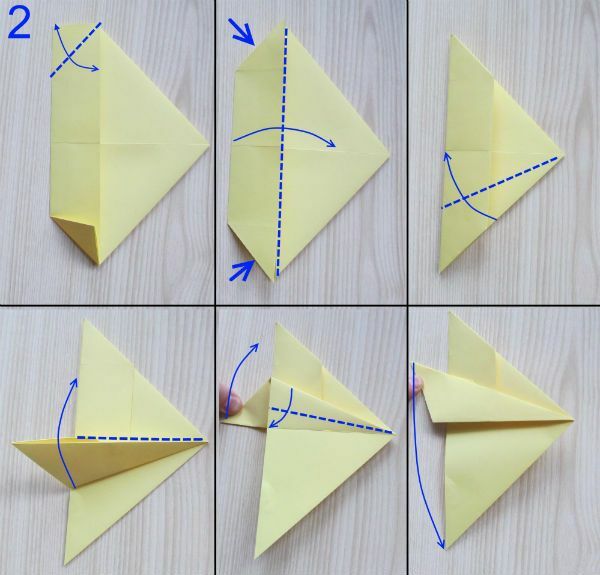
Fold the sheet in half( along the vertical fold that was made in the first step).
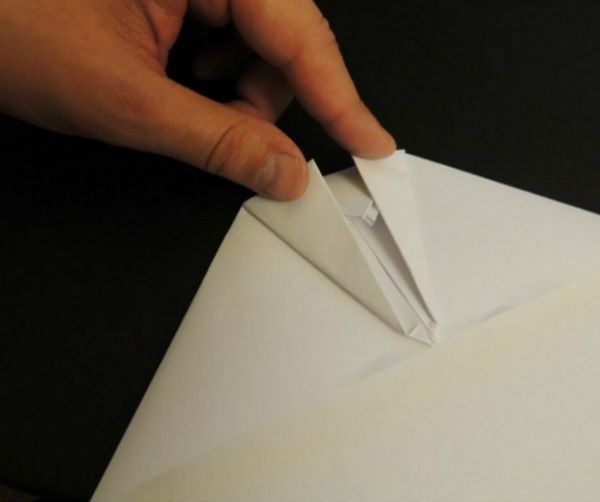
The small triangular fold should be on the bottom.
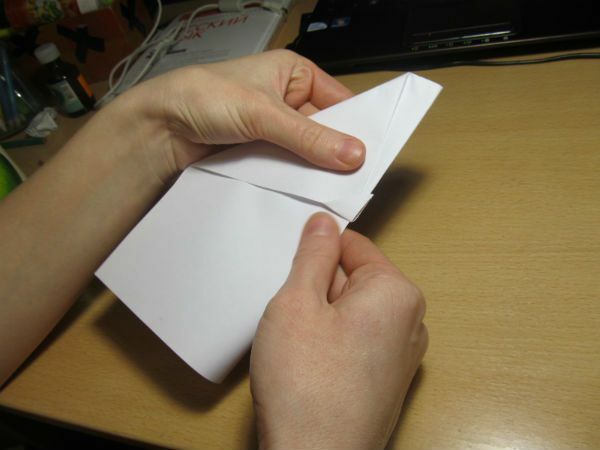
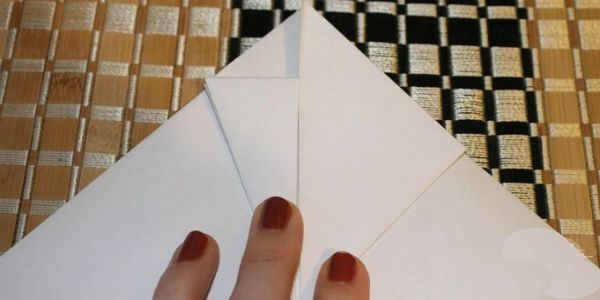
Fold the two side lapel down, so you get the wings of the plane.
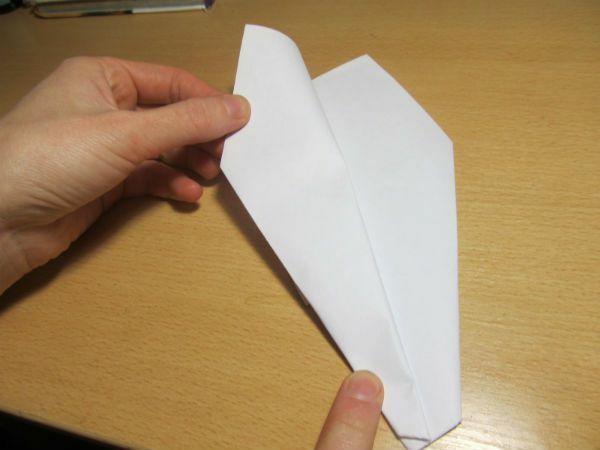
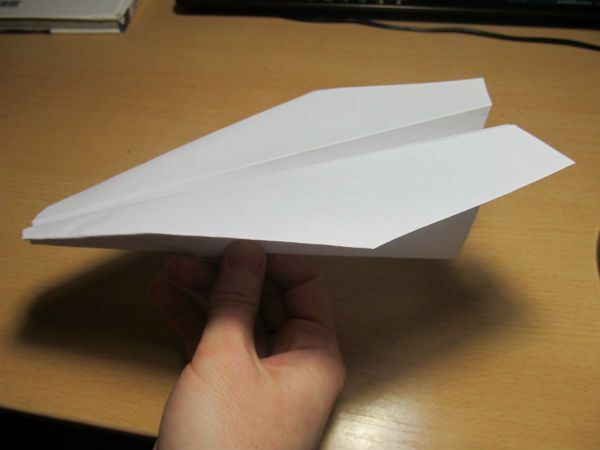
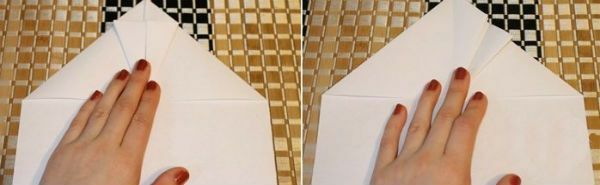
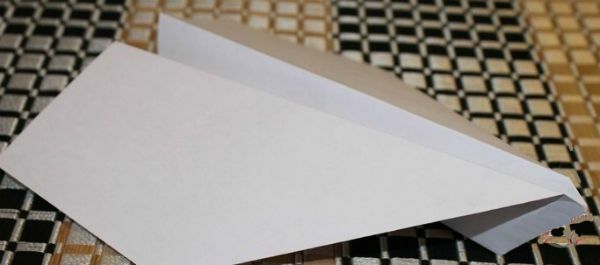
Slightly deploy the wings so that they are perpendicular to the main part of the aircraft, and the aircraft is ready.
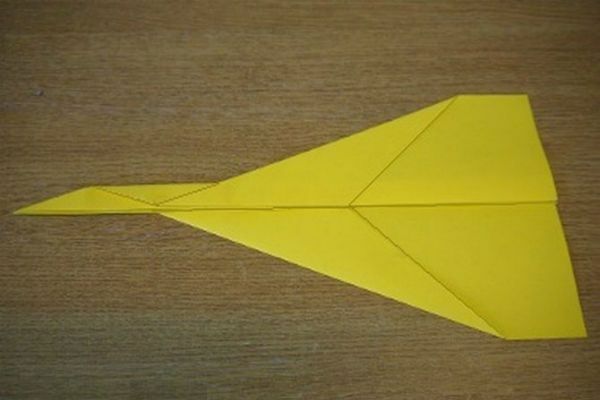
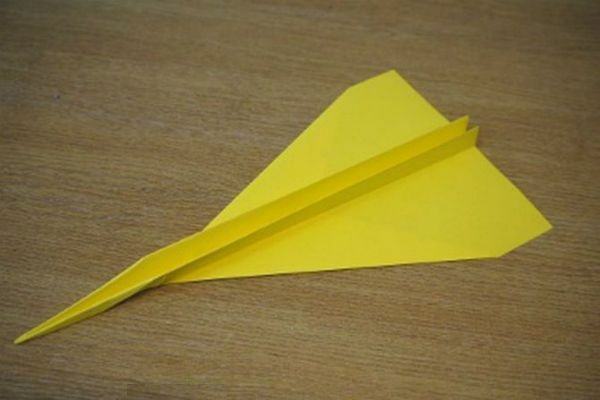
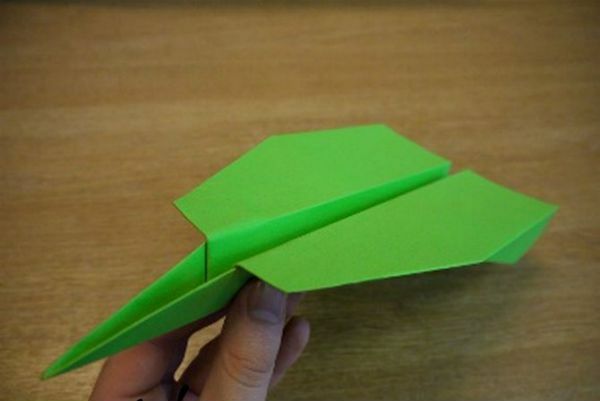
Fighter
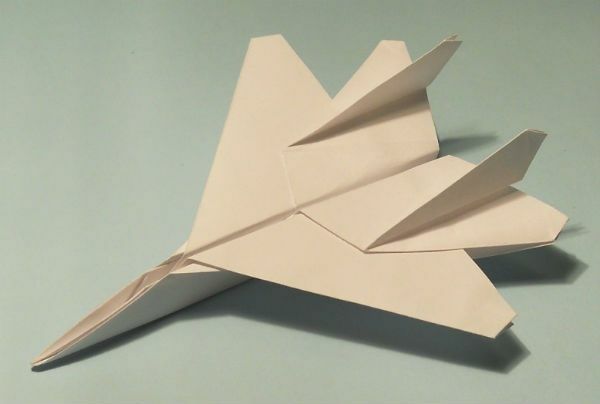
To create this model of military aircraft, you will need a simple sheet of A4 paper.
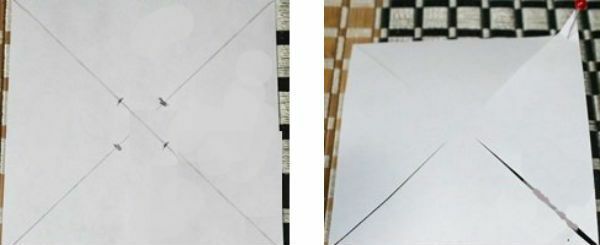
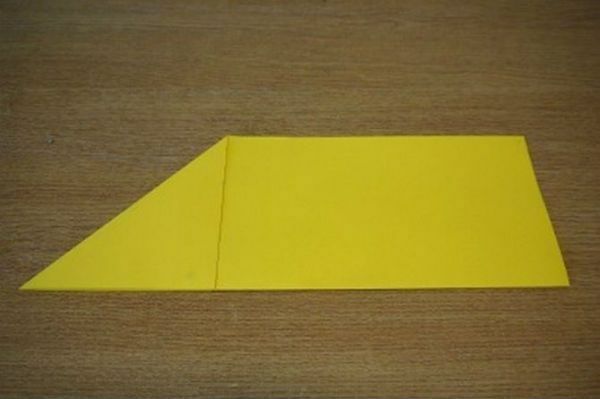
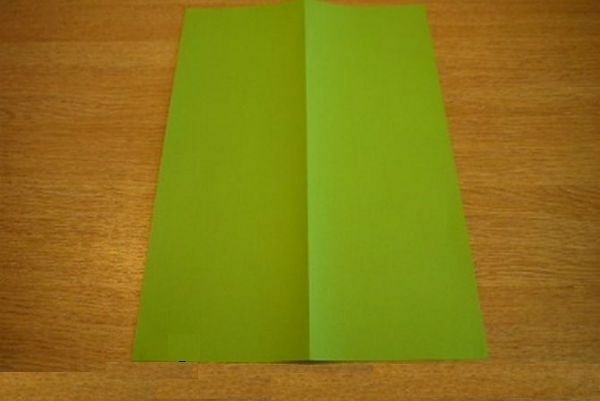
Bend the rectangle of paper angle of 45 degrees.
Bend the sheet initially on the diagonals of the square. After bending horizontally, observing the intersection of the diagonals.
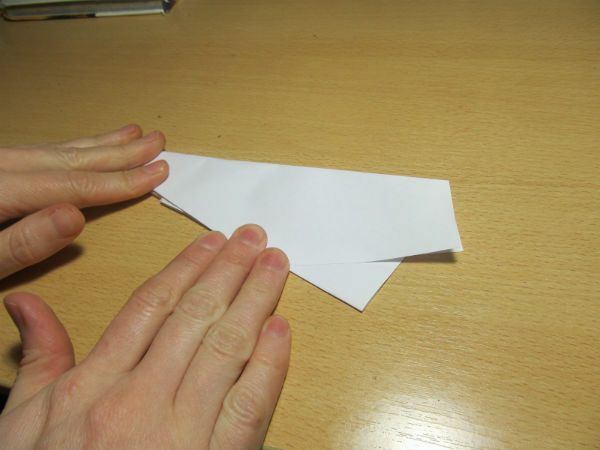
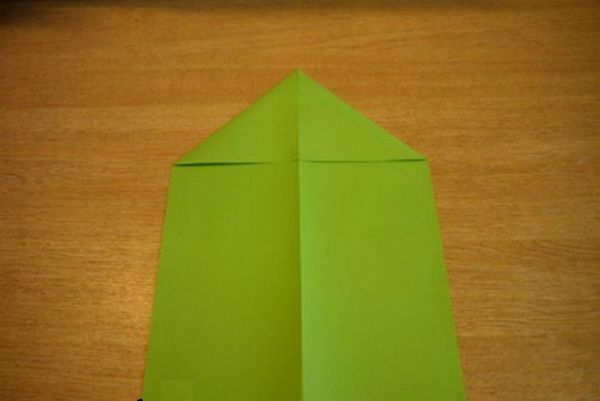
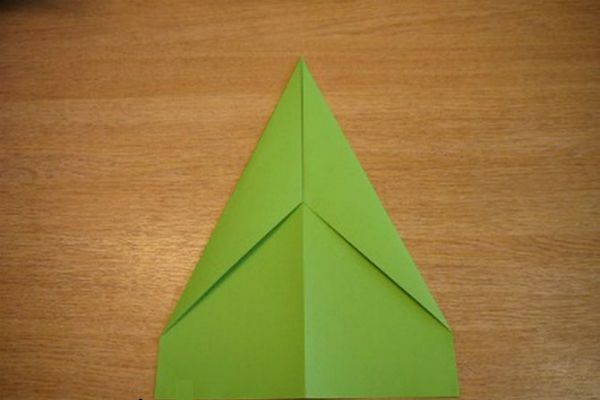
Fold the sheet on a small horizontal. On each side, bend the corners, as shown in the figure. It turned out a large triangle.
Turn the resulting and bend the bottom of the sheet, which is below the main triangle, to its lower base.
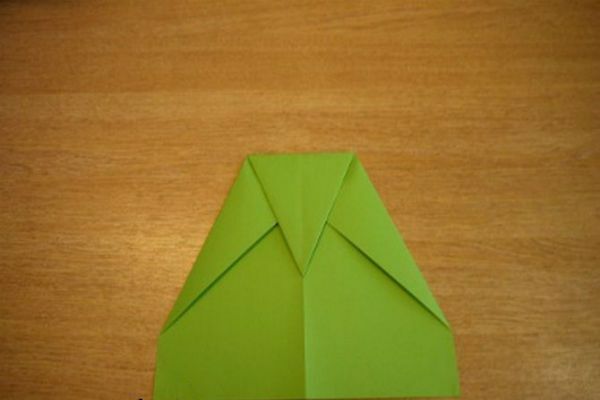
We bend the corners, which are on the left to the cut of the broken strip. All the bends are thoroughly ironed. The received corners are put inside the part. We add the vertical strip along the planned line to the right. We have a triangle.
The lower corner of the top triangle is added to the bottom horizontal. The part that is folded, as it were, leafing up. We divide this part in half by the reverse addition. Thus, we combine the edge with the horizontal part, but we do not add the bottom part, but straighten it upward.
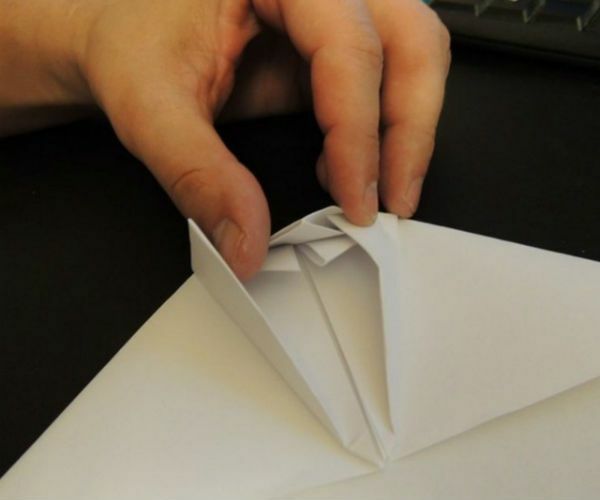
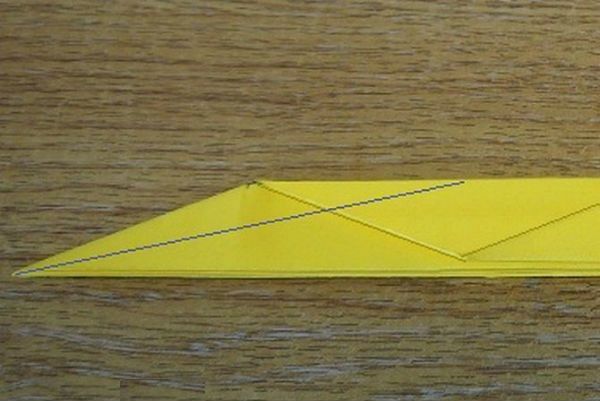
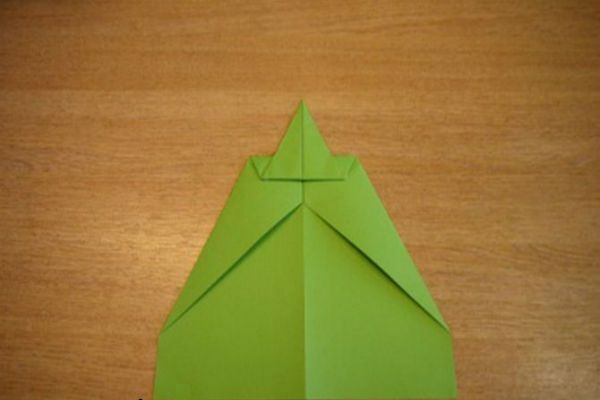
Foldable corner, take it down and straighten it to the previous position. We perform similar actions with the upper corner. Remove the paper strip to the left. We add the future airplane on all the planned points. On the blue lines - "mountain" on the red - "valley".In this process, the left side automatically goes to the background, and the upper and lower to the horizontal. We, by such folding, get a swept detail of the future aircraft. Turning over, you can observe that we have formed the tail of the aircraft.
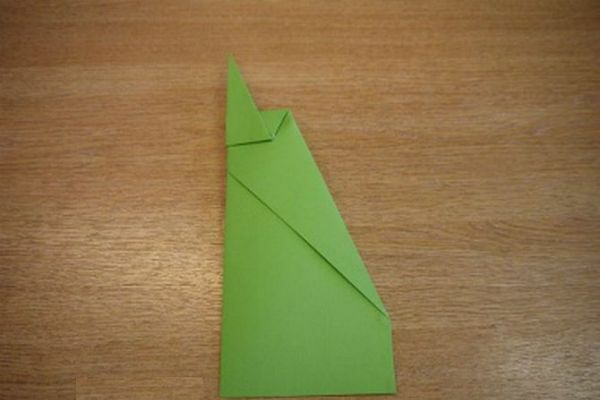
On the horizontal line that passes through the corner of the tail base, bend the top corner to the bottom. Performing this manipulation, you need to raise the top layer to the left of our part. On the line that passes through the horizontal, you need to lay the wing up. In the same way, we add the lower wing. Fold the corners to the horizontal, thereby sharpening the nose of the aircraft.

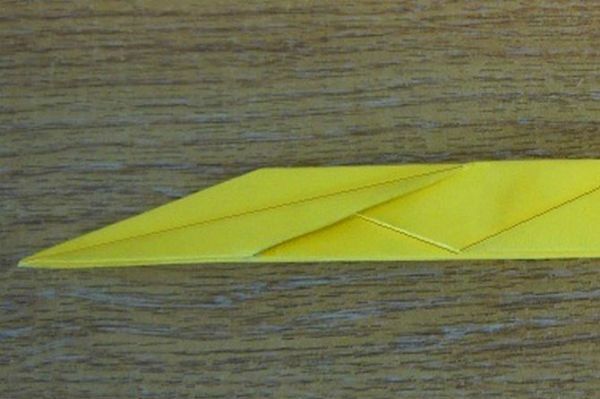
All the details horizontally fold the "valley".We retreat to the width of the base of the tail, bend the wings of the aircraft in different directions.
Perpendicular we raise the tail of the aircraft, and the corners of the stabilizers and wings of the airplane refueled inside the main part.
Model with propeller
Materials required:
- simple sheet of A4 paper;
- square of paper with a side of 8 centimeters;
- pin;
- scissors;
- ruler;
- pencil.
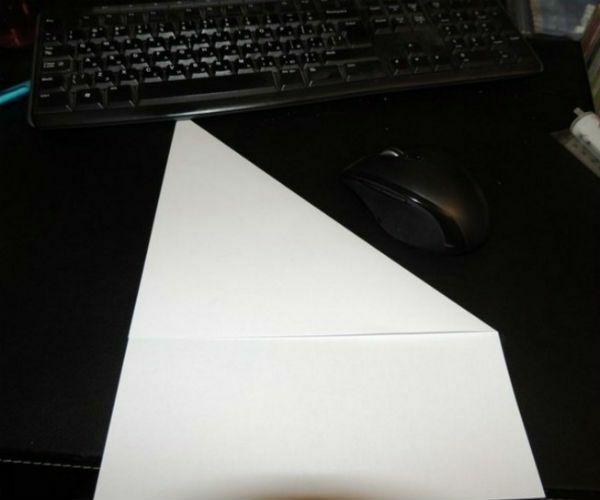
This is a sheet of A4 paper. The sheet must be folded along two diagonals.
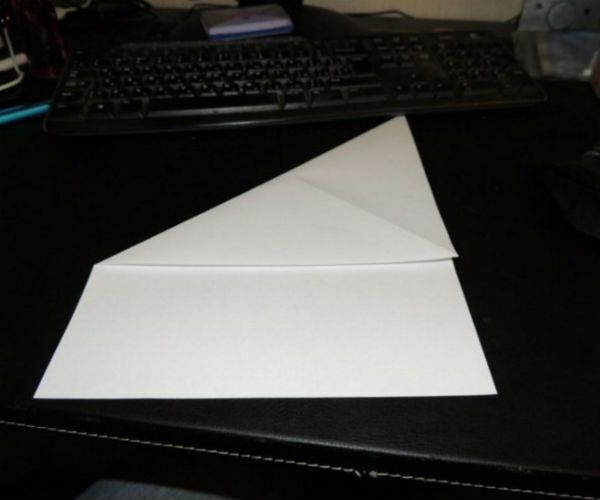
Turn the sheet and bend it so that the diagonal intersection is divided in half. Again, turn the resulting and bend the upper corners.
Turn the right and left edges alternately to bend and smooth the top.
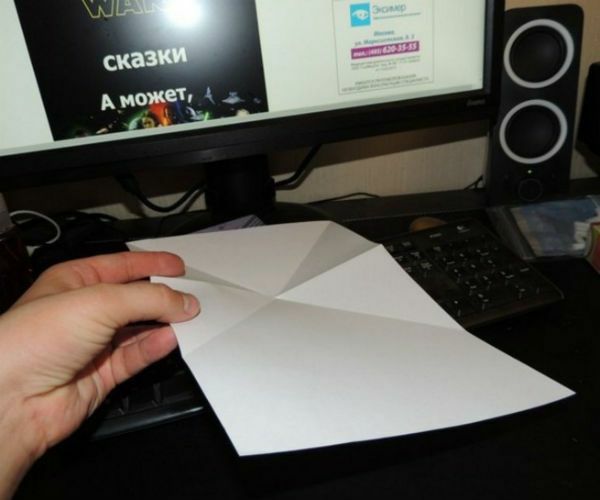
We need to make the bottom side fall on the bend of the previous triangle. To do this, add the left edge, as shown in the picture. The edge of the corner that remained is bent behind the main triangle.
After doing all of the above, return the right side back and bend to the center.

Make sure that all the bends are made exactly and bent to the center of the large triangle.
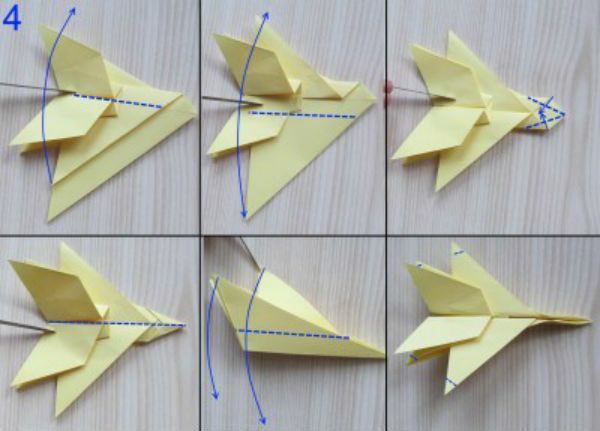
The upper corner is bent inward.
Take the right corner and bend it to the center, and then return to the previous position.
We turn the next plane and insert the corner of the protruding edge into the hole on the right side.
Kink the future airplane, as shown in the picture.
In this way we get the central line, from which, parallel, by bending, we form the aircraft wings.
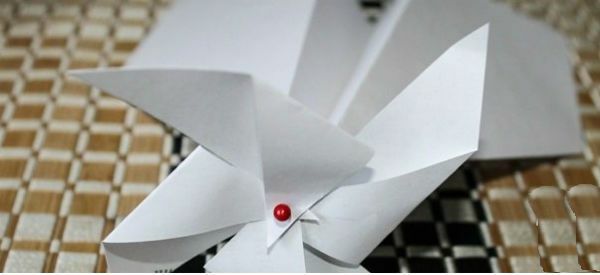
Let's proceed to the process of creating the propeller itself.
Take our square of paper with a side of 8 centimeters. Divide the sheet diagonally with a ruler and a pencil. From the center of the intersection of the diagonals on each line we place the notches in a segment of about 5 centimeters.
We cut the diagonals with the scissors.
Fold the corners and fasten them with a pin.
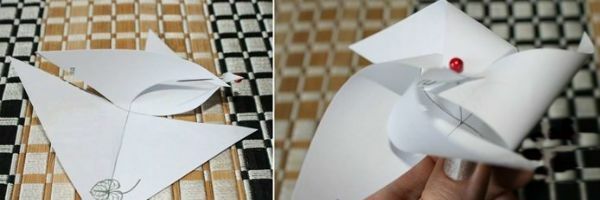
Propeller is ready and it can be attached to the aircraft.
Sleek
We bring to your attention an airplane made of paper that can fly for a long time. To create it, you need a simple piece of paper and a little patience.
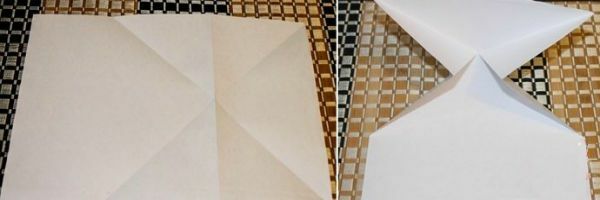
Take a sheet of A4 paper and bend it, as shown in the pictures, along two diagonals of the square.
We bend the resulting diagonals in half so that the bend line passes clearly through the center of the intersection of the diagonals.
Fold the pocket, as shown in the picture, using previously folded lines.
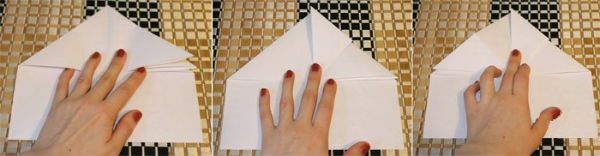
We bend both corners of the upper triangle to the center of the upper spout. Should be a diamond on top of the triangle. Make sure that all lines coincide, and the corners are even.
Next, you need to bend down exactly half of the previously obtained diamond. This is a very important point, you need to turn half.
Now on the remaining triangles we make smaller triangles.
In the folded half from the diamond there are two pockets in which you need to enclose the angles of small sharp triangles.
Bend the wings to the top.
The aircraft is ready for its long flight.
Planning

In order to create a planning plane origami from paper, you need a sheet of A4 paper, a pencil, a ruler, a little patience and a huge desire.
Take a sheet of paper. We divide it in half along. We bend the divided.
Then bend the corners.
Turn the plane over and do this maneuver with the other side.
Next, we separate another corner that intersects the nose of the airplane and the upper side.
We bend.
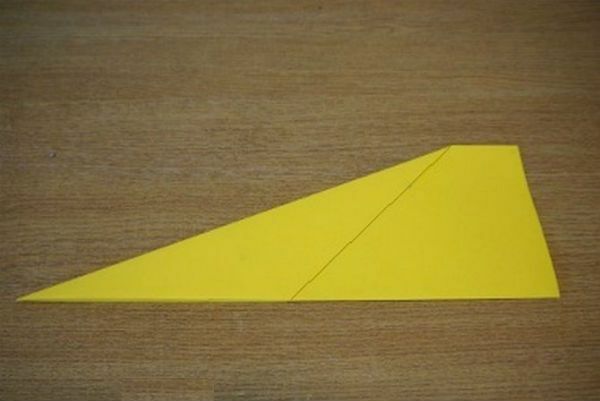
Do the same thing, turning the product over.
We measure height with a ruler. Visually, a 1.5 centimeter should remain at the nozzle of the aircraft, and at the tail it should be measured to the same height.
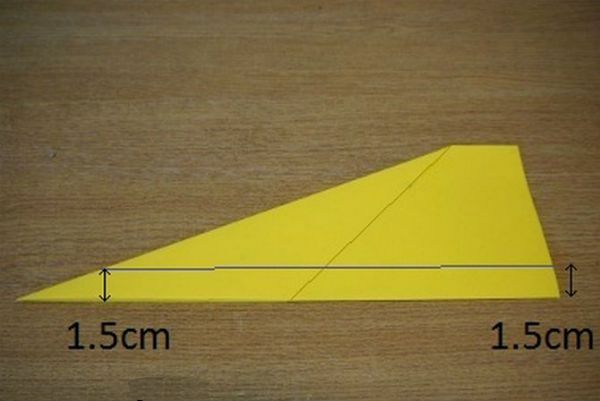
We bend the wing of the aircraft along this line.
The second wing is done in the same way, after flipping the product.
Now, at the previously measured height of 1.5 centimeters, bend the bent wing upward.
Analogically, we act with the second wing, turning the plane over.
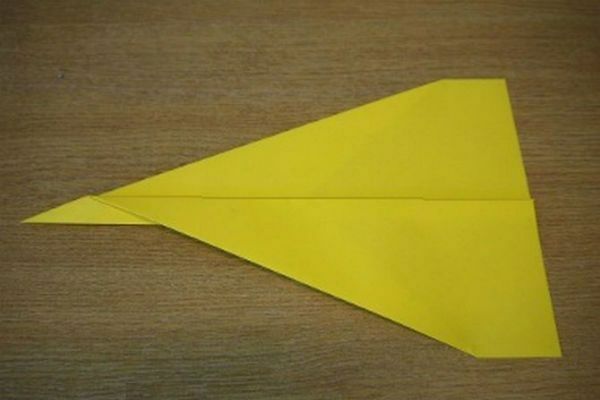
We again divide the spout in half.
We bend along this line.
Turn the product over and repeat the process with the other side.
Straighten the aircraft wings.
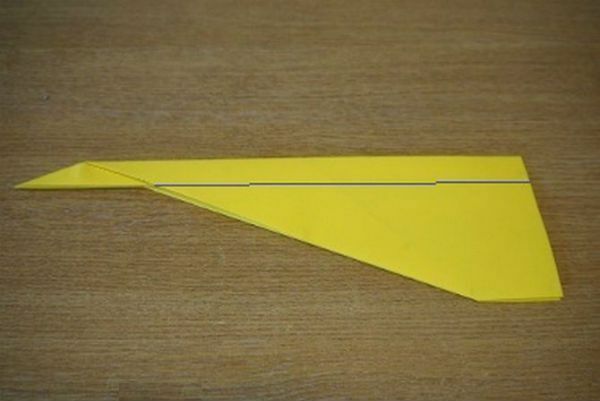
To fly the airplane, it is necessary to make a bend on each wing, leaving 2.7 centimeters of paper on each side.
This bend should look down during the flight.
Fast and dive
In order to create this model of the aircraft you will need a ruler, a pencil and a sheet of A4 paper.
Take a sheet of paper. We divide it along in half. We bend it and level it along this line.
We unfold the curved and turn the sheet.
From the center of the intersection of the two halves, two triangles should be noted. We bend these triangles upward.
Again we measure two triangles on each side of the central bend and the bent corners. Again, these triangles bend upward.
Measure from the nozzle of the aircraft 10.5 centimeters. The resulting triangle is bent to itself.
From the last bend line we measure another 2.5 centimeters down. And the lower corner of the triangle is turned upwards along this line.
Again, make the main center line of inflection. And bend the product.
Measure on the bottom of the aircraft from the nose and tail up 2.9 centimeters and along this line, bend down the wings.
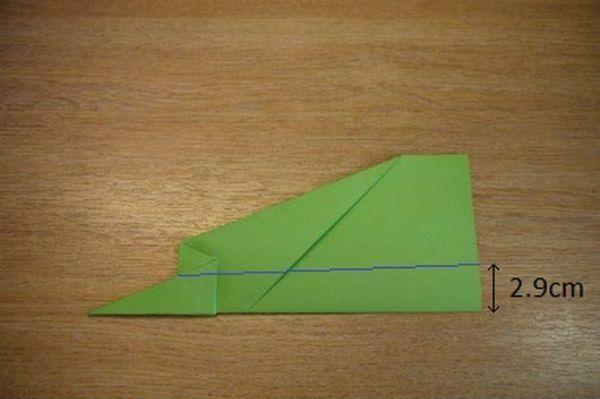
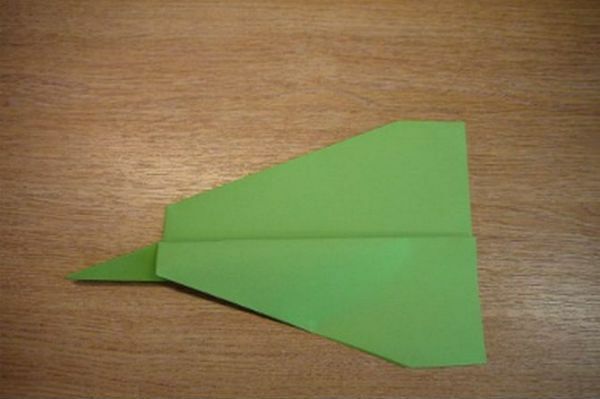
The plane is almost ready, you only need to make a 1.9 centimeter bend along the edge of each wing.
These bends in flight should be directed downwards.
In the technique of kirigami
To create an airplane you need to take:
- sheet from a notebook in a box, twice;
- ruler;
- scissors;
- pencil;
- Scotch tape.
Draw the main workpiece with a ruler and pencil on the sheet, as shown in the picture.
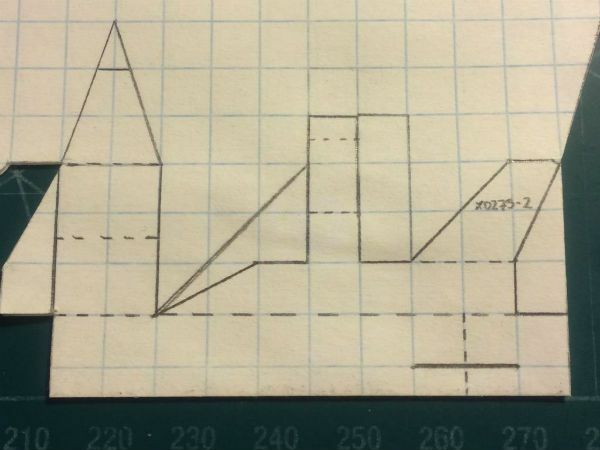
Cut the workpiece along all the lines.
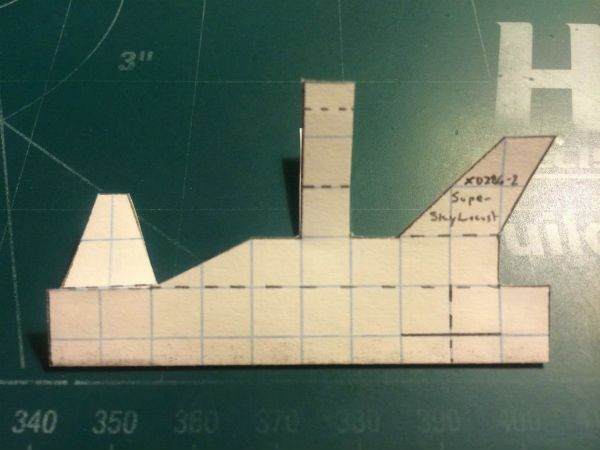
On wide lines we cut with scissors. And along all lines of the dotted line we add an airplane.
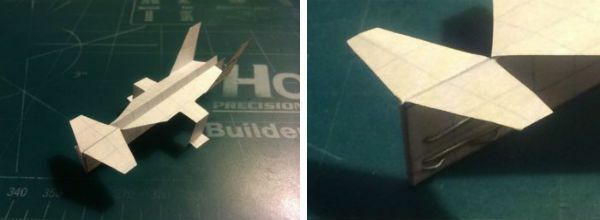
The airplane can be glued together in an adhesive tape or stapled with a stapler.