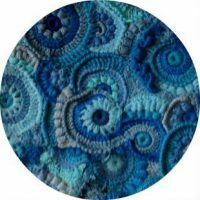
Freestyle is an unusual and fascinating skill that applies not only to knitting. But it was in knitting that it gained the greatest popularity. Literally this name is translated as "free form" or "free technique".Any composition of freeforms consists of elements that are created separately, after which they are assembled together. Finished items can be gathered in a scarf, decorate them with a hat, clothes and so on.
- Element flowers from knitted tapes
- Element simple leaves
- Element small heart
- Element flower with dense petals
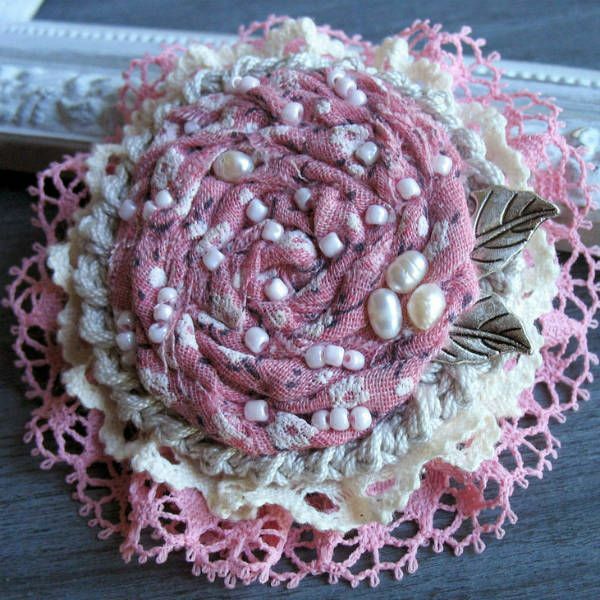
Element flowers from knitted ribbons
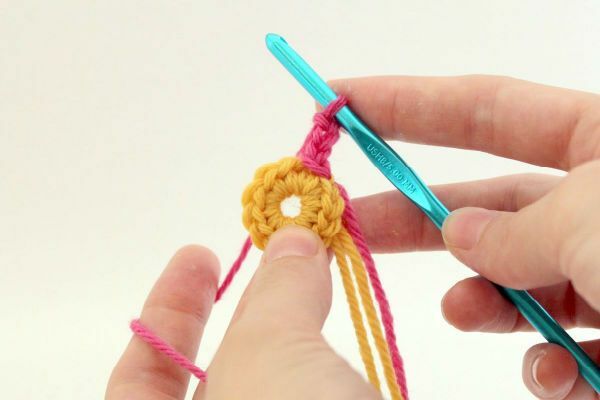
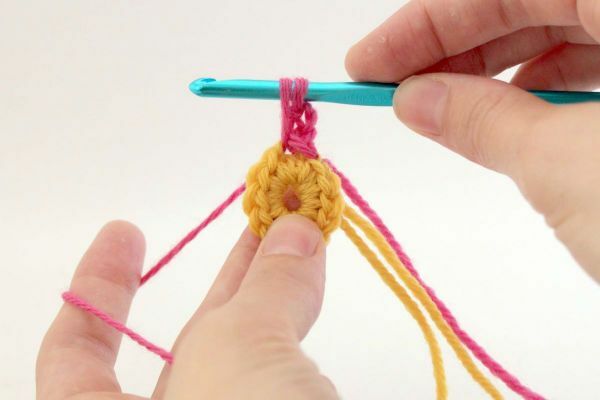
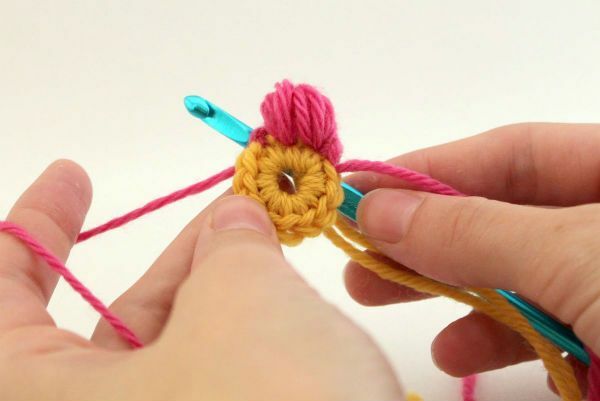
This technique is similar to the technique for creating colors from ribbons. The difference is that initially you need to connect the tape. It does not matter in what style and with what pattern you will knit it. Also, you must decide on the choice of thread color, and how many colors to use in one flower. So, you can make monochrome flowers or even threads of different colors, if your idea requires it. For example, three-stage flowers look very beautiful. They consist of three separately connected ribbons, say pink( 1), white( 2), and pink( 3).In this case, tape 1 is the core, it is the shortest. Tape 2 - the second circle of petals, it is about one and a half to two times longer than the first. Tape 3 - the longest - three to four times longer than the first.
To assemble the ribbons in a flower, do the following: just fold them and sew them at the base. At the same time, you can draw a flower, make different sizes of petals, open one and close others.
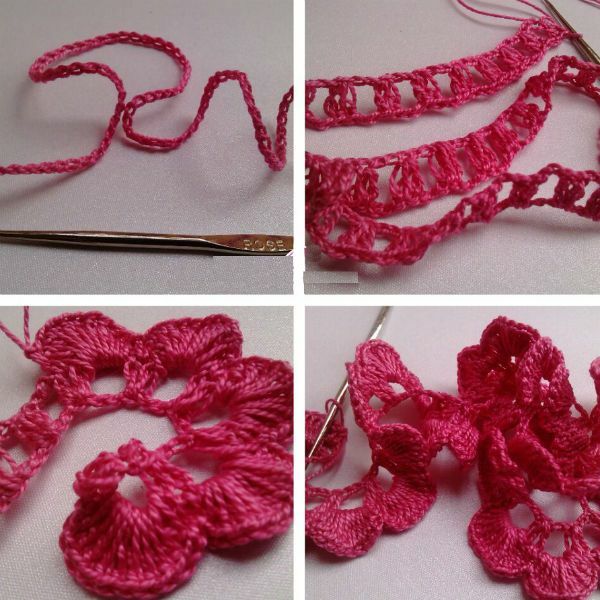
For a flower with a diameter of three centimeters, it is necessary to tie about 10-15 centimeters of tape.
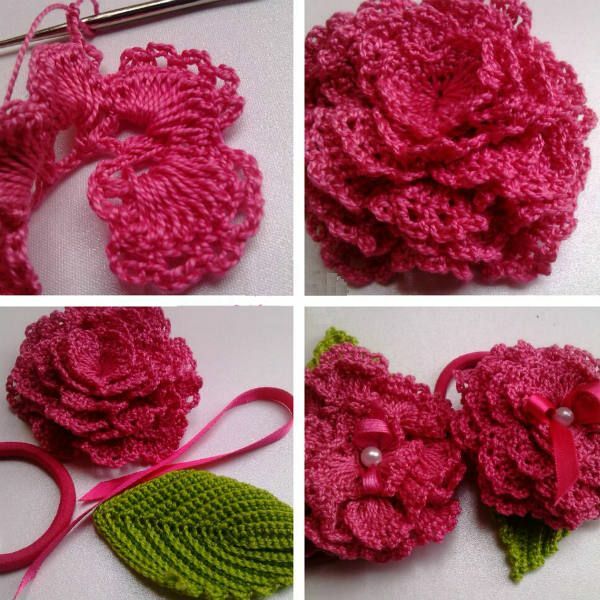
To enrich the appearance of flowers, you can use additional decorative material, for example, beads,beads, lace, satin, tulle ribbons. For the easiest addition of such a tape, just put it over the knitted and form a flower.
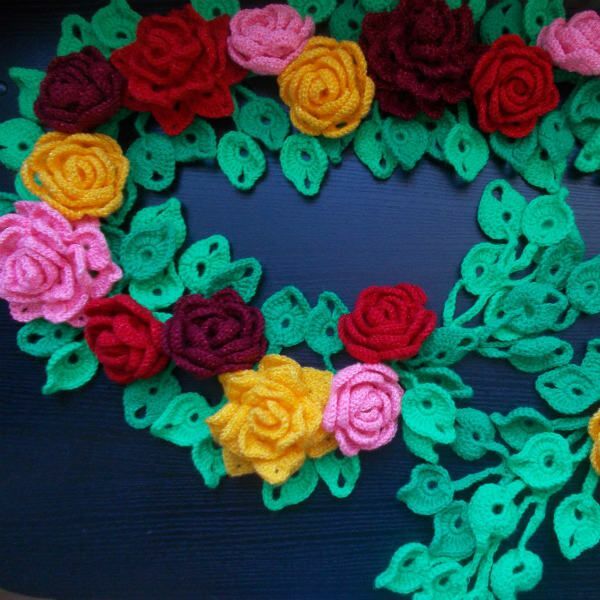
And here's what you can assemble from the finished flowers.
Fatine, guipure, lace will look beautiful only in tandem with a knitted ribbon of fine threads. This combination will add a flower of weightlessness, brittleness, make it more voluminous and at the same time not heavier visually.
Element simple leaves
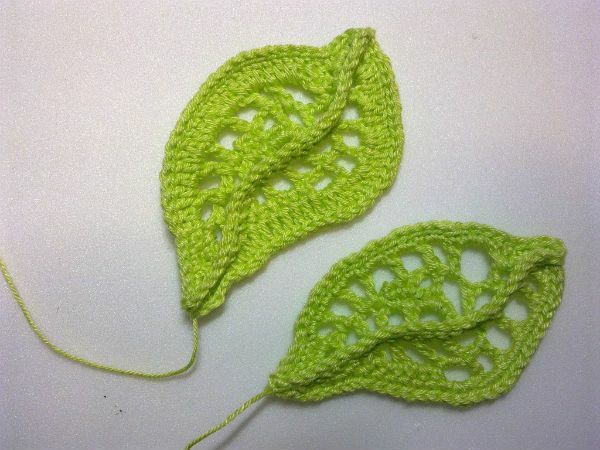
Materials needed:
- yarn for knitting the desired color;
- hook( choose the number for the selected yarn).
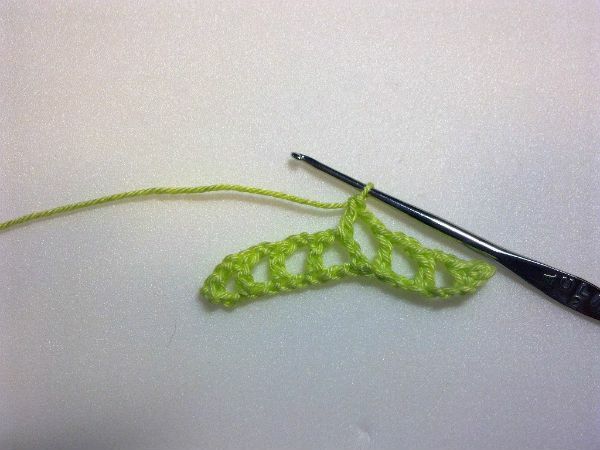
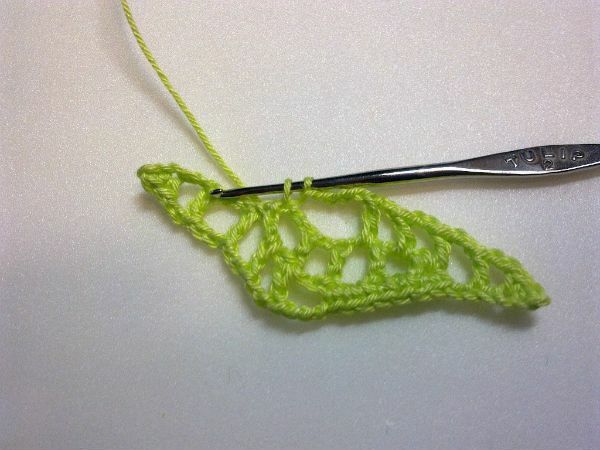
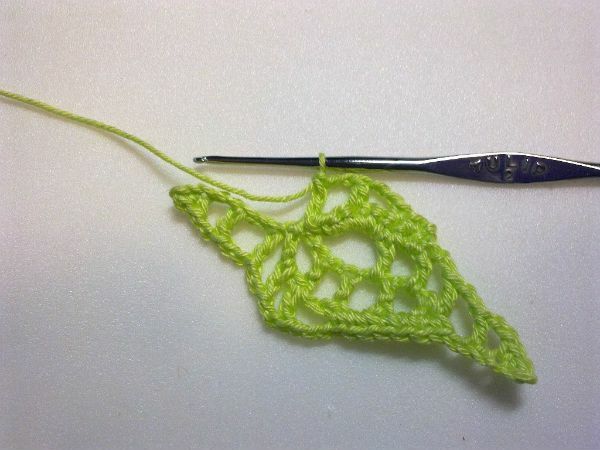
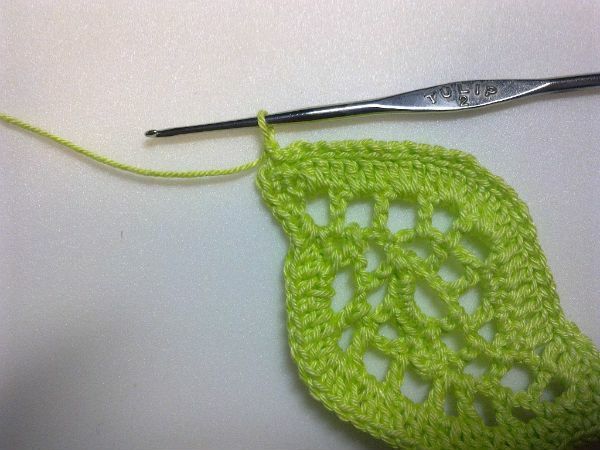
The leaf actually knits very simply, but its scheme seems very complicated. We will disassemble this scheme step by step and perform knitting step by step.
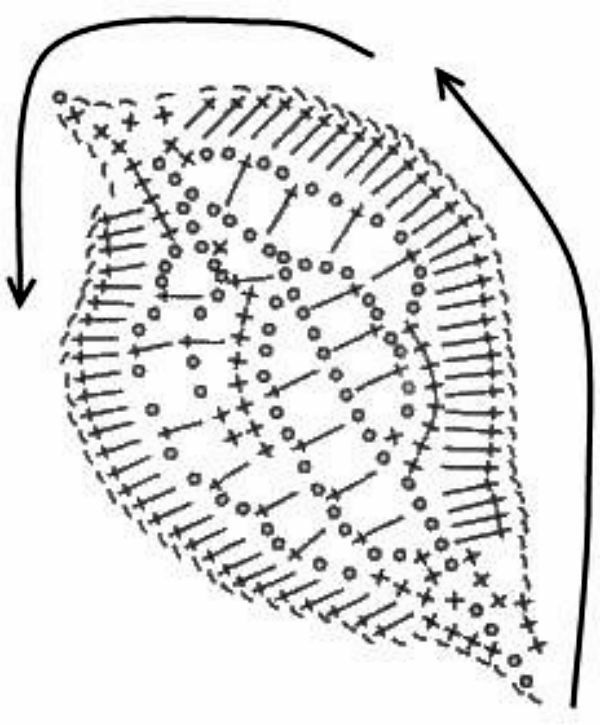
We collect 10 air loops, the second row is tyed as indicated by the arrow, and make the connecting column in the very first air loop.
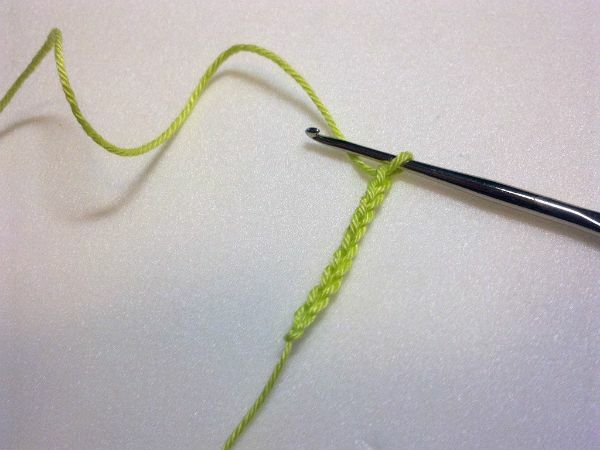
We send 8 more air loops and turn all knitting. We knit the third row.
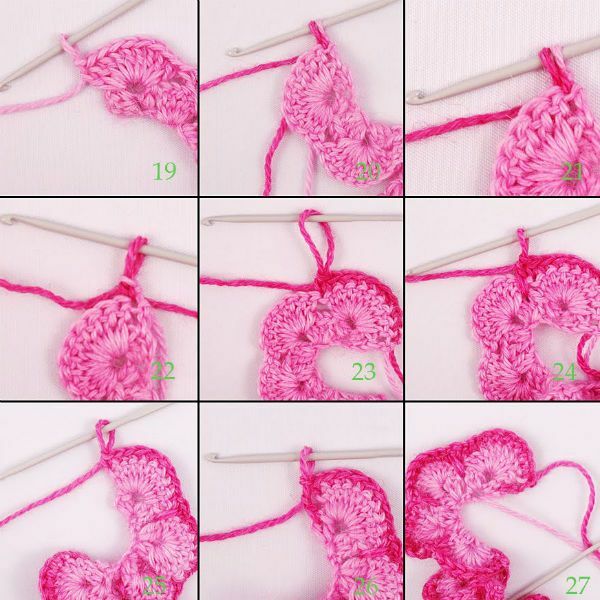
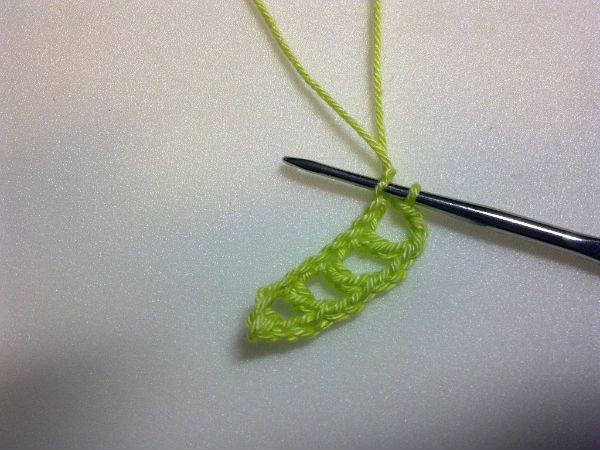
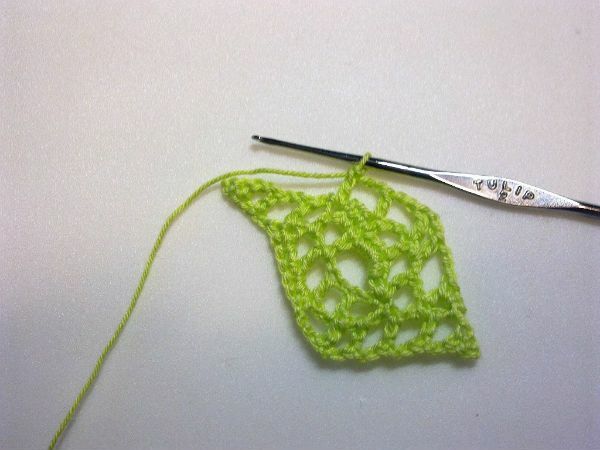
We finish making arches.
We make two more arches and we knit to the edge.
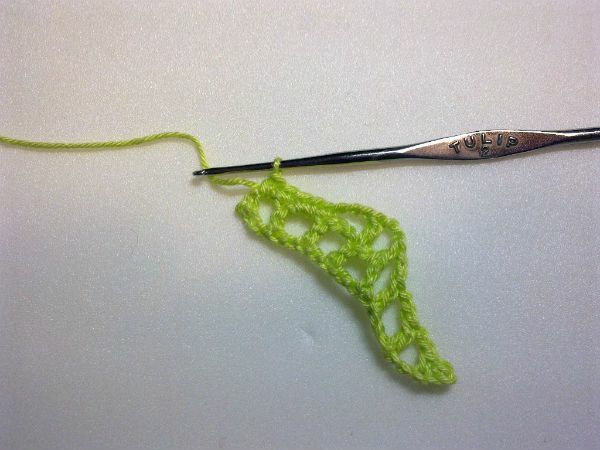
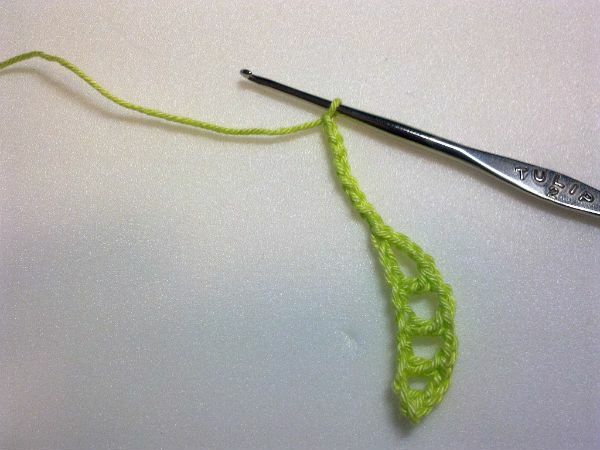
We rotate, we tie a short row from the columns without a cape guided by the scheme and again turn all the knitting.
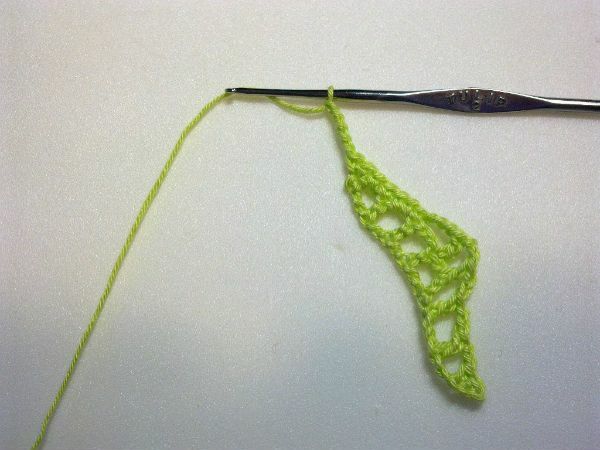
We begin to make arches.
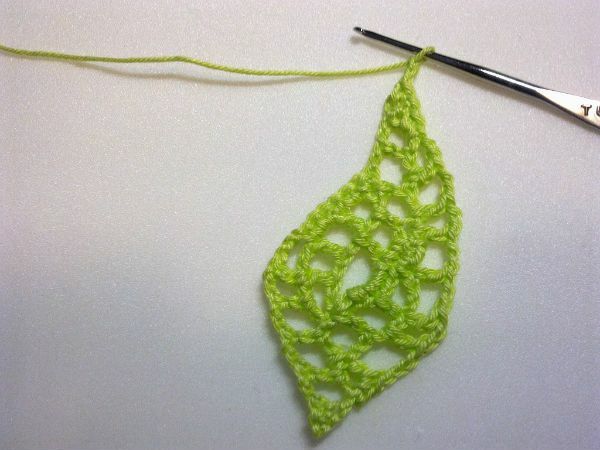
When we reach the end of the row of the crown of the future leaf, turn knitting again.
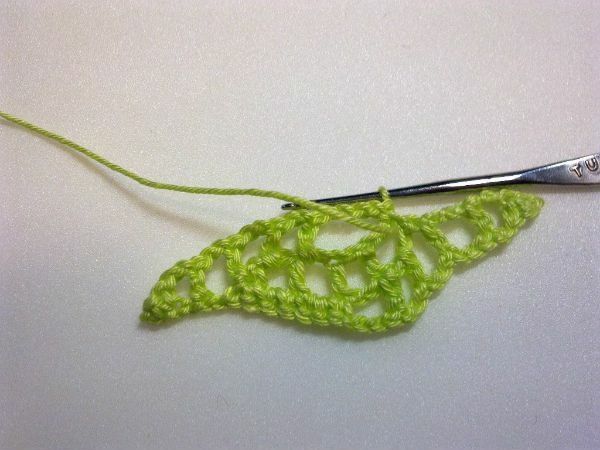
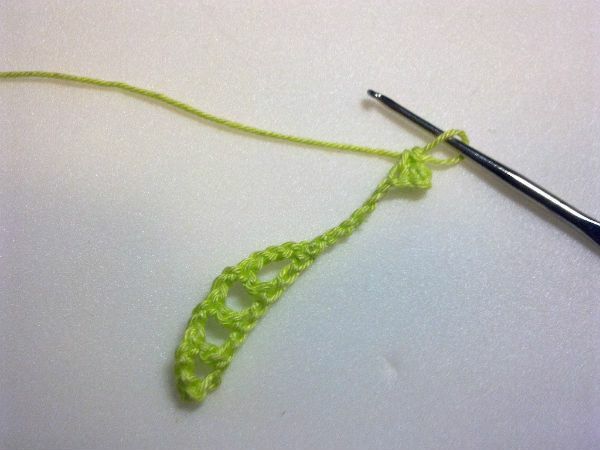
We knit to the edge with a column without a crochet and again turn.
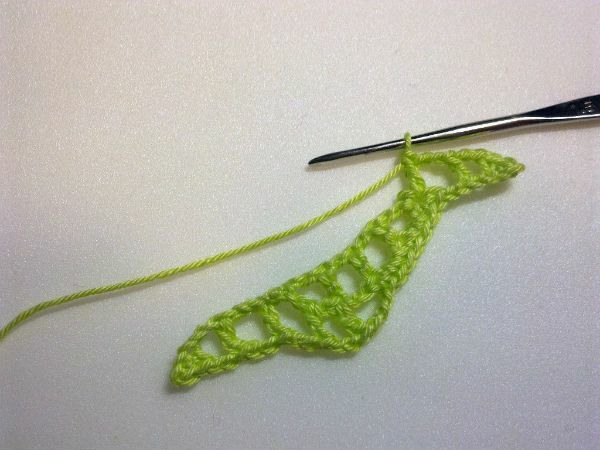
Again doing arches.
We reach the top of the head, turn over and again the arch.
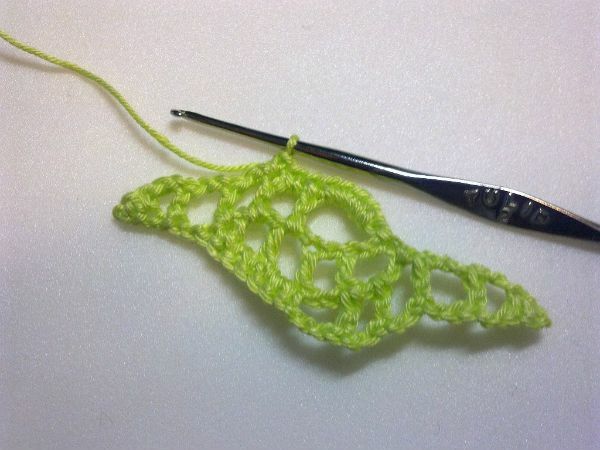
That's what should happen.
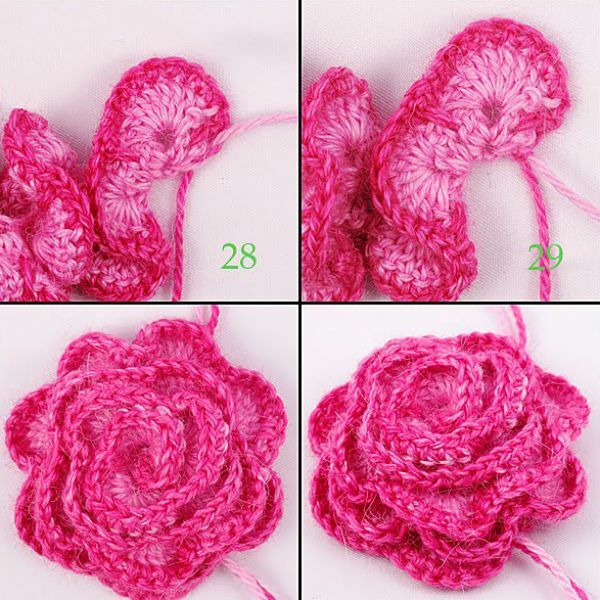
Leaf must be tied with columns without a crochet.
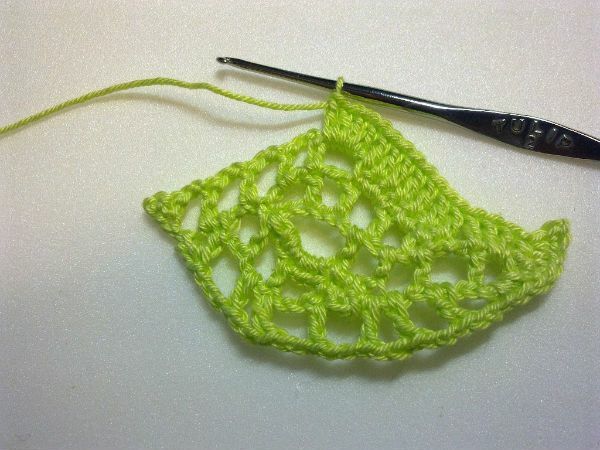
The last row of binding a leaf can be either a crocheted column or not. When tying the last row, do not turn the cloth.
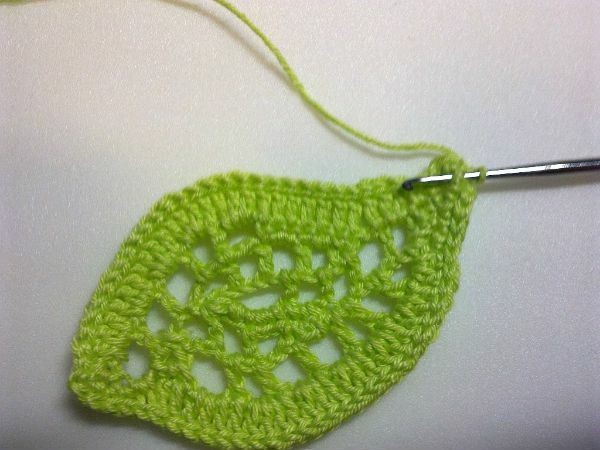
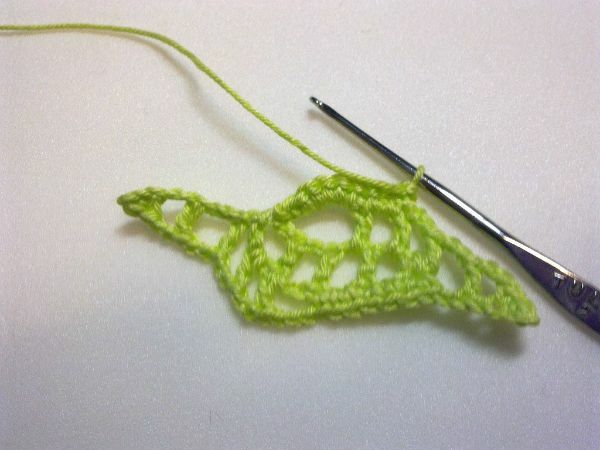
We finish the leaf with a round strap around the connecting posts. We select where the middle of the finished leaf will be and along it we tie a row of columns without a crochet. We fix this series with a connecting post. In this way, we created a leaf vein and betrayed it more natural.
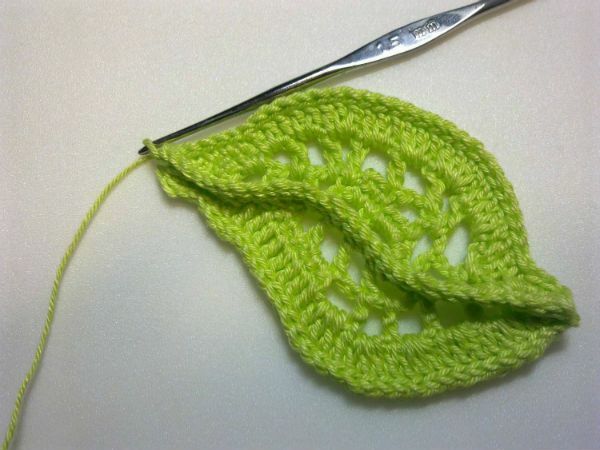
The option of strapping without crochet is similar to the previous one, but you do not need to make an additional row of connecting posts. We also make a vein of the finished sheet.
The pictures offer two options for ready-made leaves. They differ significantly in form, size and openwork.
to contents ^Element small heart

Materials needed:
- yarn for knitting the desired color;
- hook( choose the number for the selected yarn).
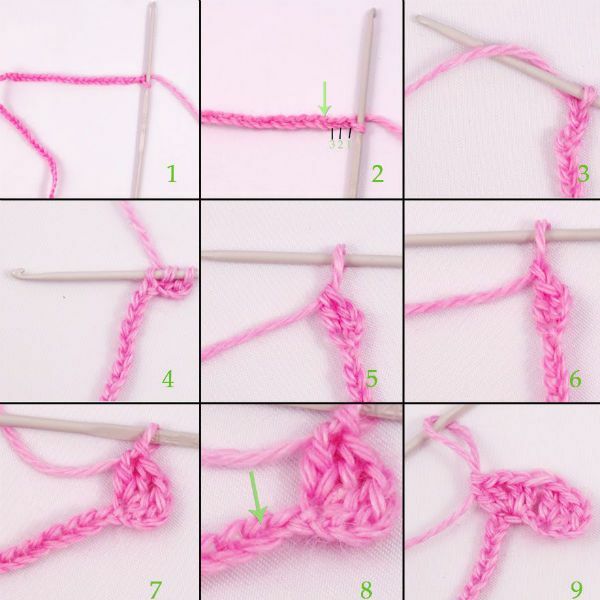
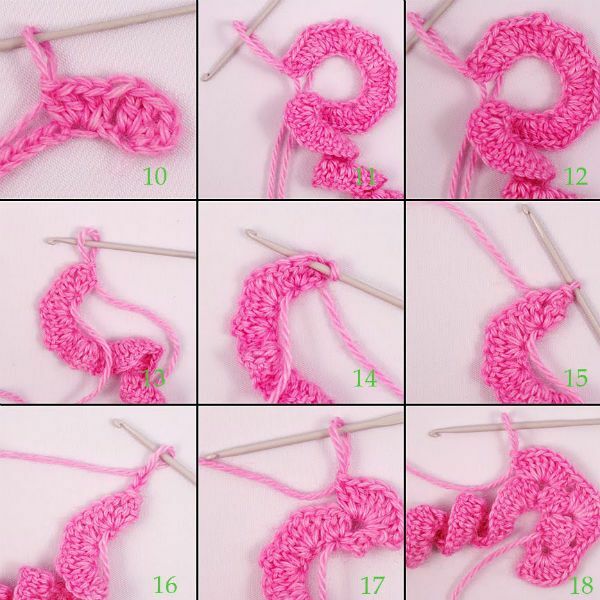
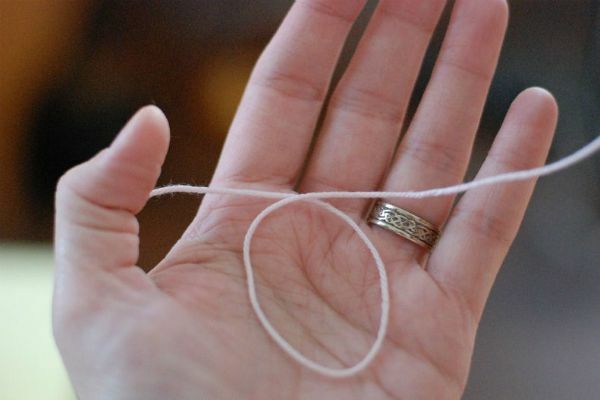
The first thing you need to do is fold the thread to create a magical amigurumi ring, as shown in the picture.
We begin by tying 4 air loops to the initial stage of knitting.
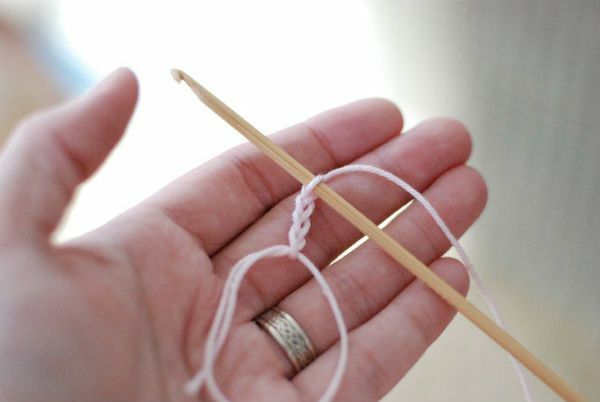
Then, on the ring, we sew the elements in this order: 2 posts with 3 nacs, 3 stakes with 2 napes, 1 air loop, 1 column with 3 nacs, 1 air loop, 3 stubs with 2 nacs, 2 stubs with 3 stitches from the last tiedcolumn, 3 air loops.
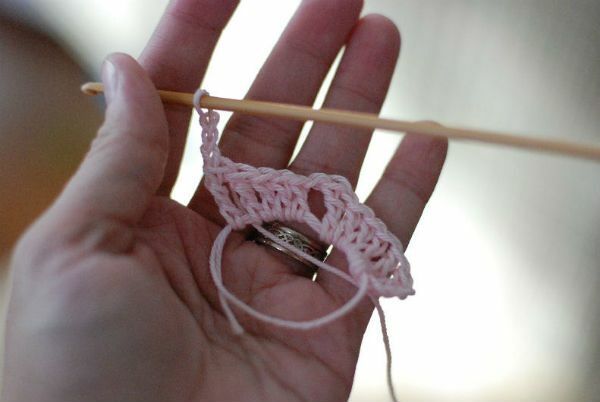
Tightly tighten the ring for a short edge of the thread.
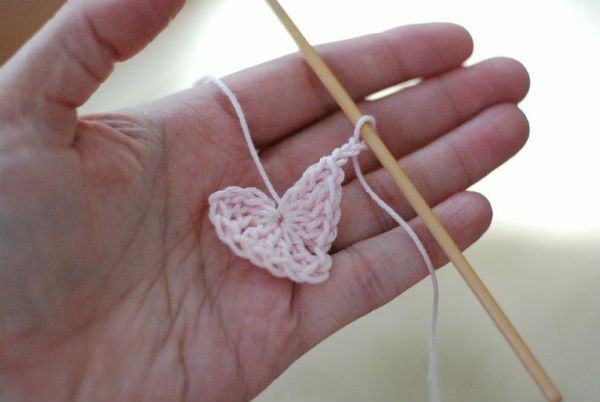
We connect the last loop with a connecting column with the center of the tightened circle. The thread is fixed, cut and hide the end.

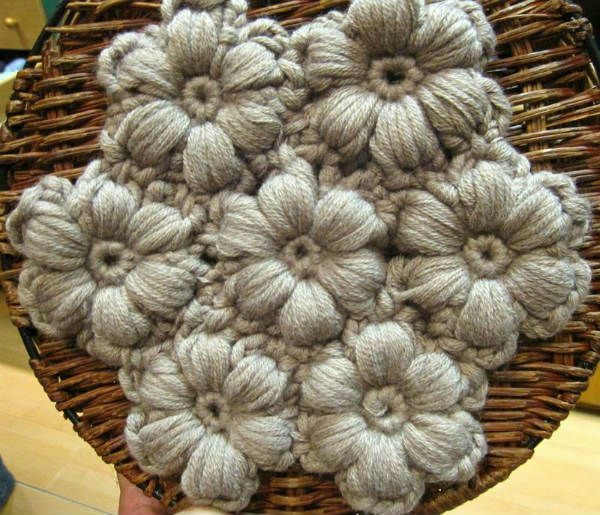
Element flower with dense petals
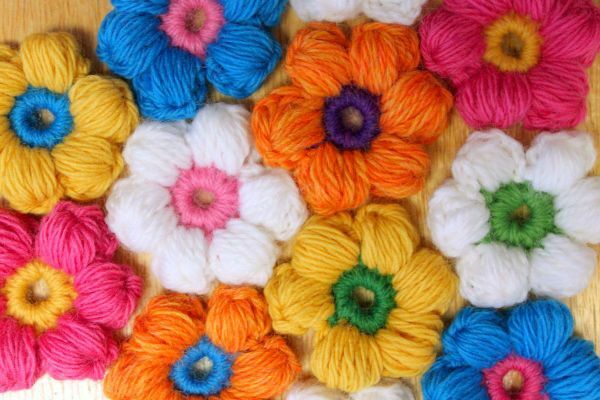
In this case, the petals are very dense and bulky, especially if you use thick yarn.
Dial 4 air hinges and connect to the ring. Circulate one row in a row without a crochet.
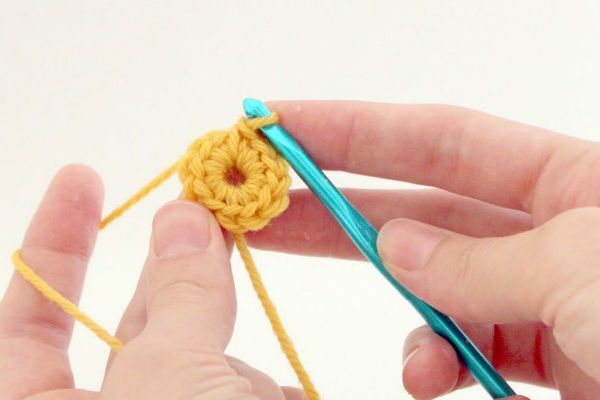
We add a different color for the petals to the connecting loop and we knit three air loops.
Now form the petal.
Create a crochet, enter the hook into the same loop, take the thread and pull out the loop, making it three hinges in height.
By this principle it is necessary to make all the loops in the petal.

To lock the petal, grab the crochet thread and pull it straight through all the large petal loops.
Other petals are also created.
And here's an example of how you can connect these elements.