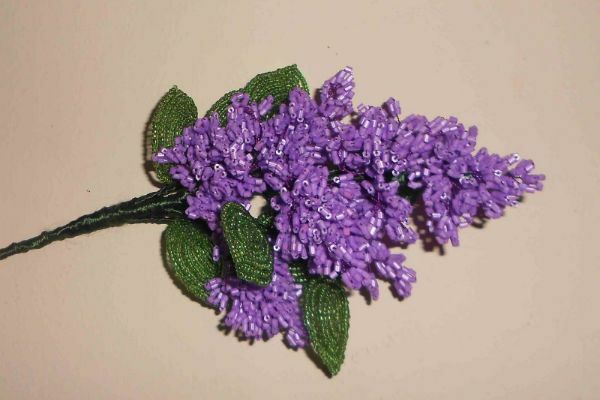
Spring is the time of beautiful updates in nature, when everything around is dumping the last bits of winter sleep, and is tuned to the warm rays of the sun. In particular, we love this time for its amazing palettes, when not only the buds in the trees are blossoming, the grass is green, the clear sky is happy with its blue, but the first flowers, flowers, gardens and, of course, lilacs also start to bloom.
- Required Materials
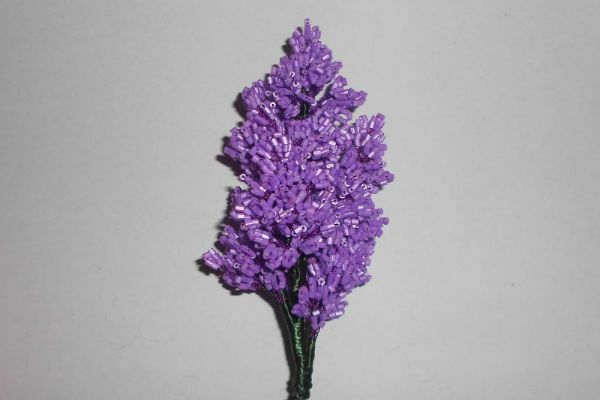
- Lilac Branch of Beads
Required Materials
The lilac beadwork is little different from the techniques for creating similar branches of other plants.
For our lesson you need a bead of any shade that falls into the acceptable palette of lilac flowers, for example, purple or light purple, you can also white, white and pink and so on. Beads for lilacs are best bought with a glossy finish and different sizes. Do not look bad and beads with matte coating. But transparent beads for this kind of crafts are not the best choice. For the study of leaves still need green beads, preferably two shades, where the first shade( darker) should not be more than 30% of the total number of beads. Green beads should be mixed and used in a chaotic manner. As a result, the leaves will have interesting color blotches. By the way, such advice extends to beads for flowers, they can also add darker shades.
You will also need a thin wire of two shades, ordinary and green. Adhesive tape is brown. If you want to attach a twig of lilac not to a vase, but, say, to a pot, it will require plaster or polymer clay to fix it. Also, for such an option, artificial moss, pebbles, can be used to decorate the area around the stem of the twig.
to contents ^Lilac branch from beads
Getting started, like all the steps in it are quite simple. First of all, the elements of each inflorescence of lilacs are formed. Then the leaves are made, after which it all comes together.
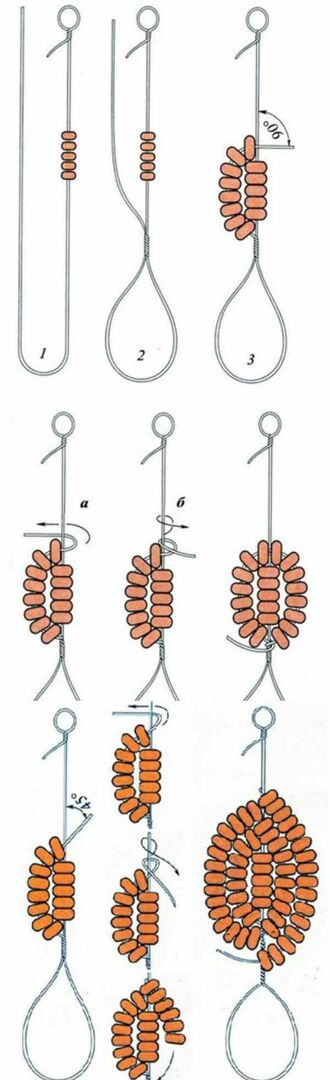
Dial 5-6 beads and twist the wire, forming a loop from it.
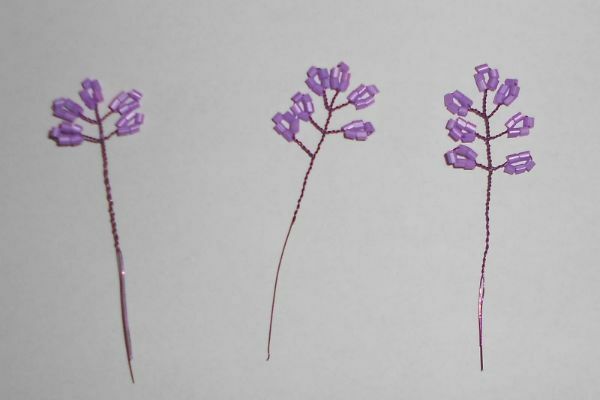
Scrolling should be about a centimeter. After this, start making the same loops in one direction from the first loop.
Only then add a different number of beads. Let their number vary from 5 to 7. Then the inflorescence eventually turns out to be more realistic.
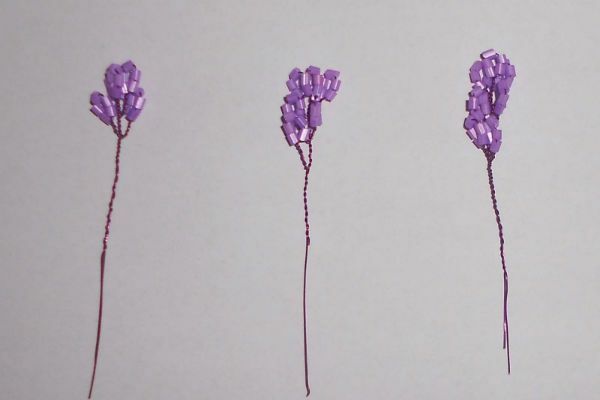
You can also use the method given in this lesson when the value of the loops goes in descending order to the center( the tip of the inflorescence) and again begins to increase in direction from it. Both the first and the second option are equally good.
In the case of petals, everything is done in the same way as with the inflorescence, only the loops themselves are tightly twisted and do not need to be guided; on the contrary, they must "look" from the center wire.
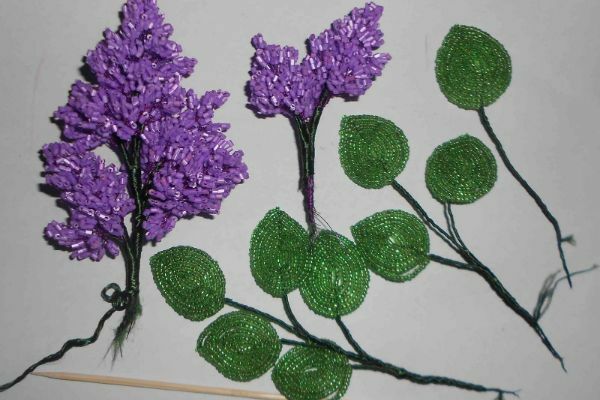
The composition of the lilac is collected at the expense of the tips of each twig, so they should not be cut. After working out all the elements, leave the wire length at least 30-40 centimeters. Better to have a stock.
For one branch it is necessary to make about 15 blanks of inflorescences.
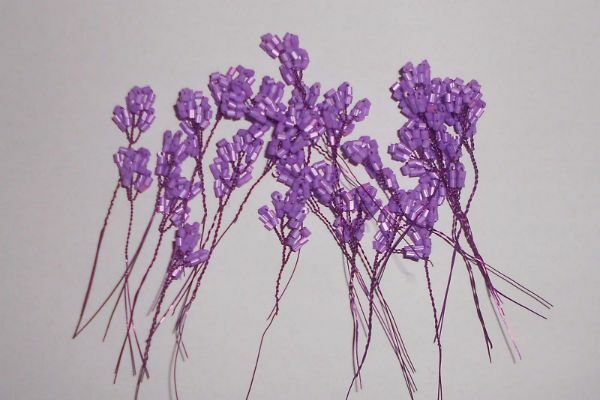
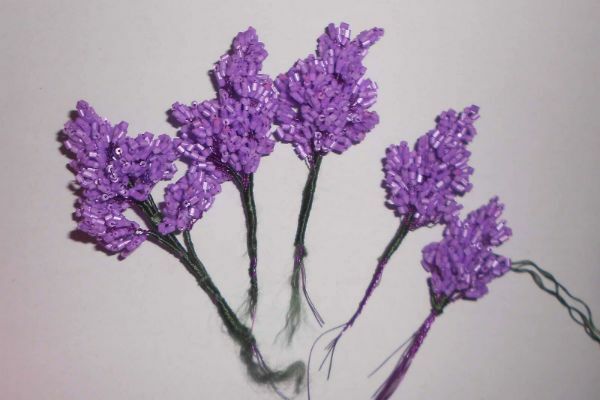
Be sure to cover the lilac stalk with a glued brown tape, or wrap it with a green wire that can be changed to a thin green wire or green strings of a floss. Winding the blanks, start to collect them together, forming a branch.
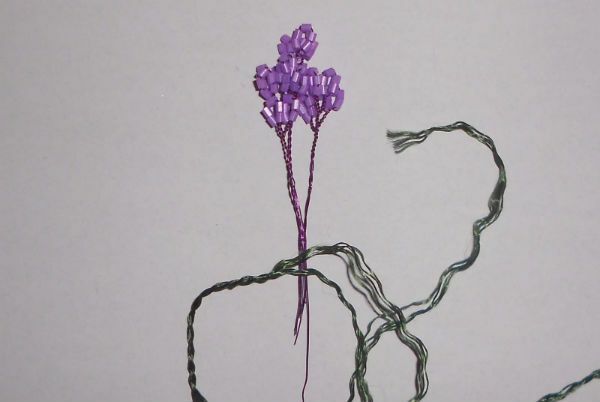
The finished inflorescence of the lilac should look something like this:
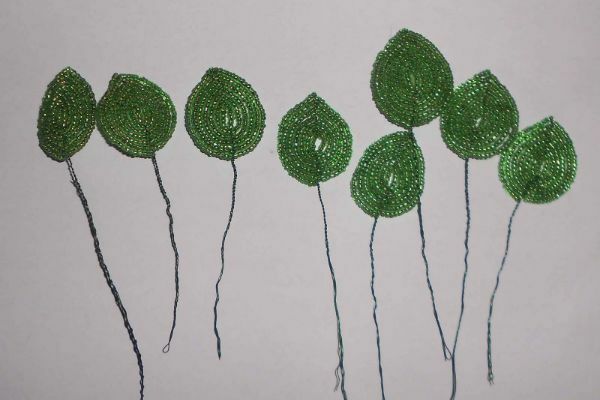
Now you need to make the bead leaves. For this, the technique of circular weaving is used.
Create 7-9 petals and start collecting the lilac branch. The stems of the leaves before this also need to be wrapped around the mulina.