
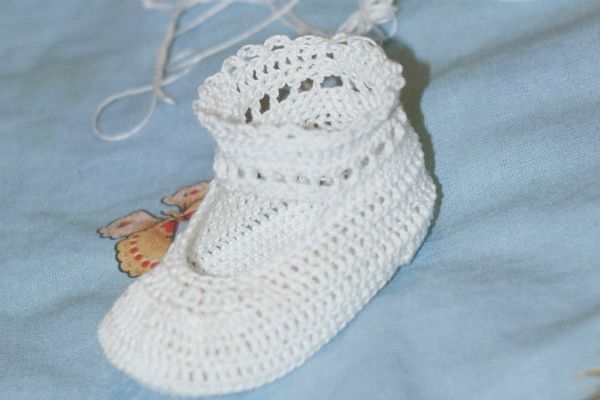
Boots are the first footwear for a newborn. Therefore, they should be as convenient, light, soft to the touch, necessarily warm, to protect from the cold. And, of course, beautiful, neat and memorable, because every mom wants to dress up her baby.
- Booties made of
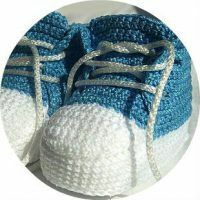
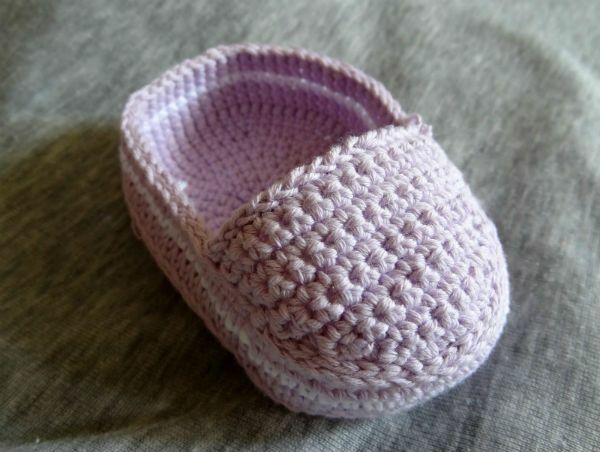
- fabrics Booties with crochet
- Booties with needles
Booties can be made from different materials - sewn from fabric or knitted from crochet or knitting needles. It does not matter how these warm socks are made, the main thing is that the materials are pleasant to the touch and hypoallergenic.
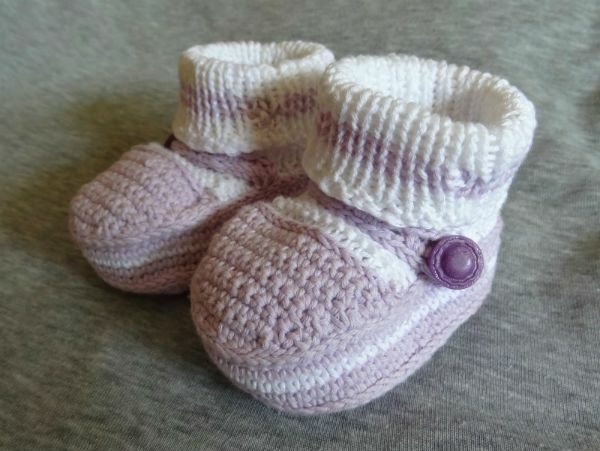
Booties made of
It should be noted that all stitches must be external so as not to damage the baby's delicate skin.
For these kines you will need:
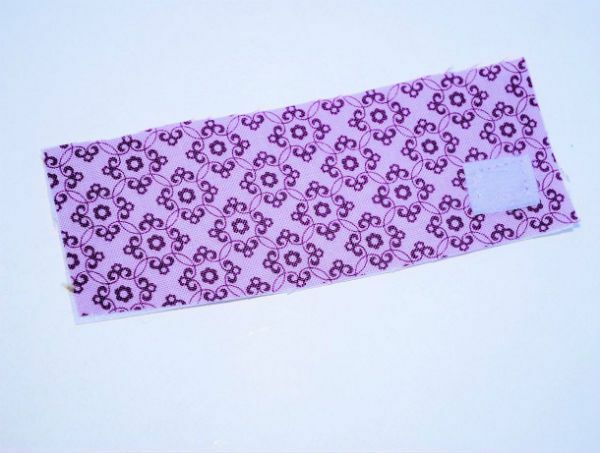
- two kinds of bright fabric with a pattern;
- small pieces of Velcro;
- a section of adhesive non-woven fabric;
- template.
The first step is to glue the material to the wrong side of the main fabric( make sure that the glue has passed all around the perimeter).
After that, you need to process the strips, which will later become clasps. Put the necessary piece of adhesive tape to the selected side of the strip, near the edge. Stitch the Velcro.
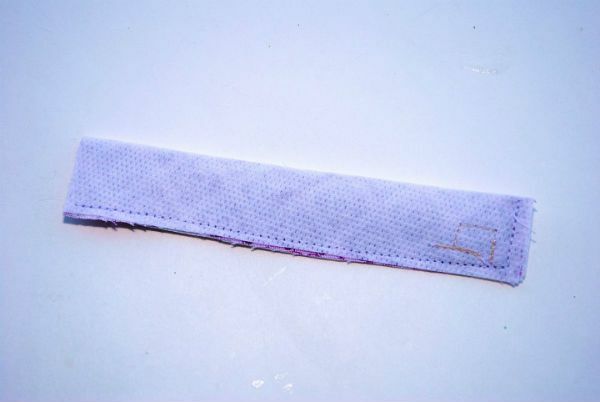
After this, fold the strip so that both edges are symmetrical. Stretch first those sides that are shorter, starting from the side where the tape is located. After processing the short sides, proceed to the long ones.
Remove the strip on the front side( this is quite difficult to do, because the strip is very thin, but do not despair, you will necessarily get it).
Spread out an inverted strip, remove the bumps to make it flat. Do the same manipulation with this strip.
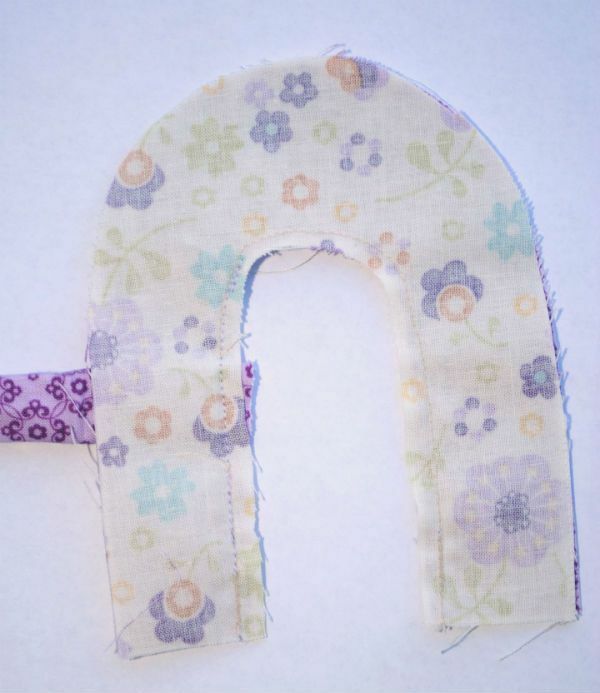
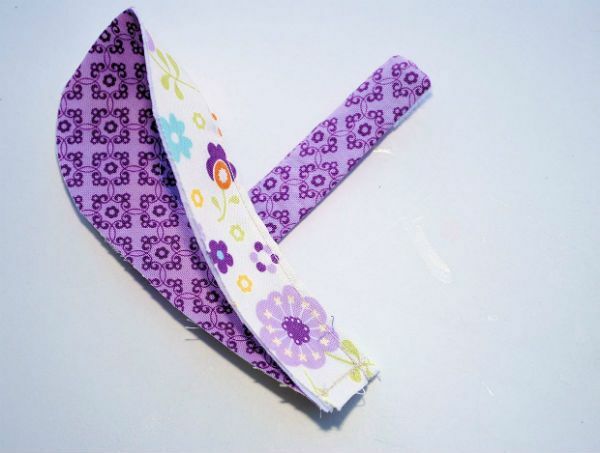
Choose two identical parts in the shape of 'U', take the details from each fabric and fold them face-to-face. Insert your strip into the matching parts, as shown. Stitch the inside of the mated parts.
After this, stitch the outer side of the sewn parts in the shape of 'U'.
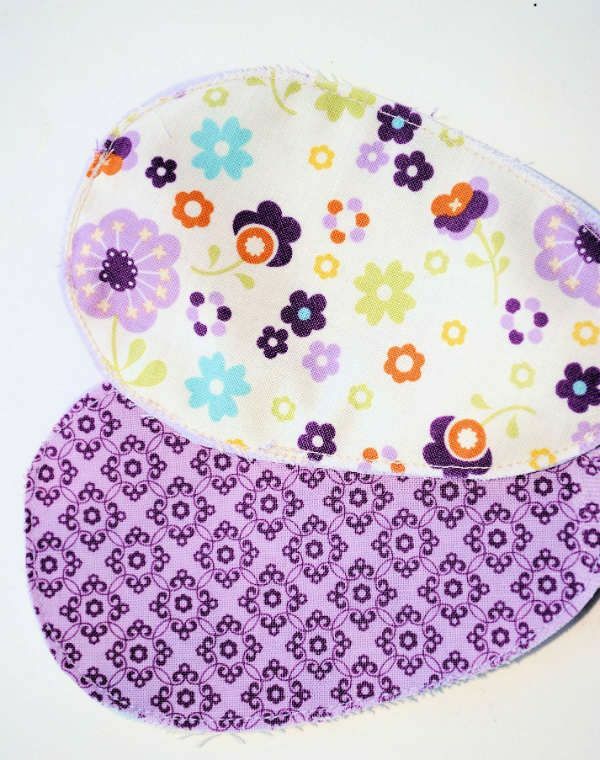
The second step is to fold the finished part with the sides to each other and stitch the bottom part.
After making the stitching, connect the details of the prepared sole from all sides so that the main fabric is on top, and the non-base fabric, respectively, at the bottom.
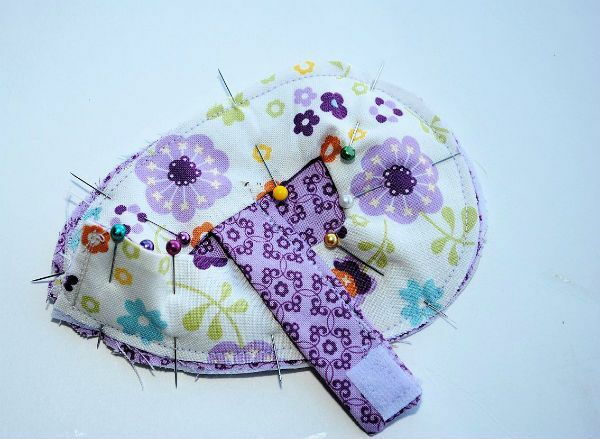
Now take the part in the shape of the letter 'U' and pin it to the sole with pins( facing each other).

It is necessary to flash the booties around the circumference, making it neat, since the pins are sharp enough.
After this, turn the received parts to the front side. Sew the sticky material to the opposite side so that the clasp can function.
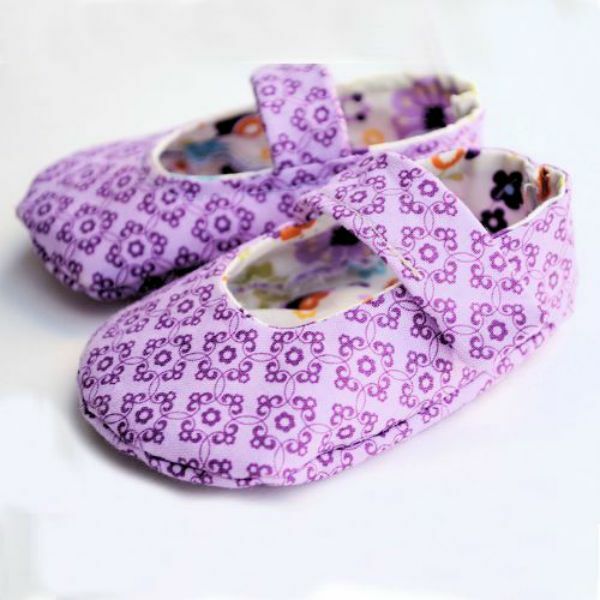
On this work on these booties can be considered complete. To create them, you will spend a maximum of several hours( this time for beginners), professionals will cope with this much faster.
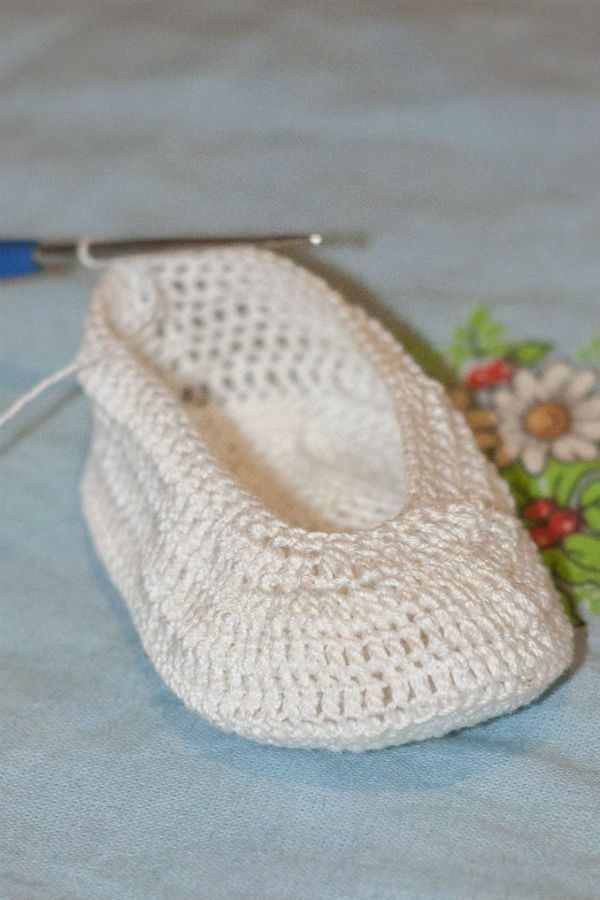
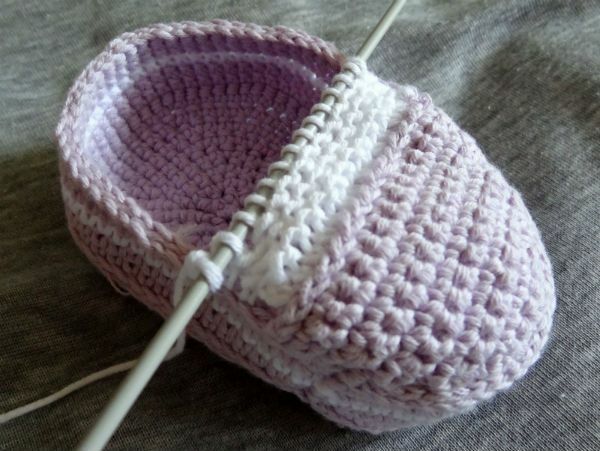
Crochet hooks
For the beginning we advise you to choose high-quality yarn. Now there are special collections of threads for children's things, in which you can stop the choice on any desired yarn. Starting from the thickness of the thread, choose the number of the hook. It is better and more convenient to work with №2,5 or №3.
Naturally you need to determine the size, for which you need to measure the baby's leg and subtract the width from the resulting number. The total length in centimeters will be equal to the length of the chain for air loops. Therefore, it is difficult to advise how much you need to dial air loops, this will depend on the calculations. But, on average, to work out products for infants, you can start working with 18 loops.
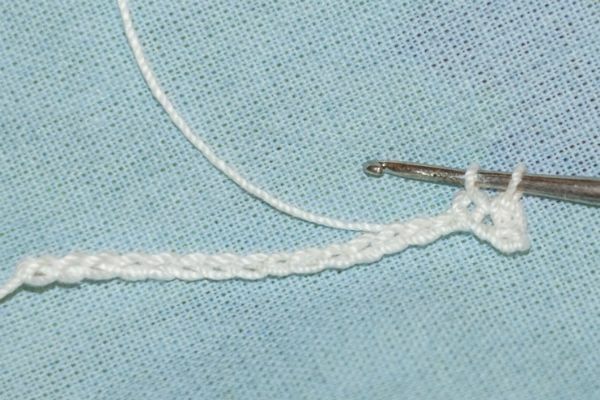
After this work begins with the outsole of the product. Knit according to the outline of the sole, pay attention to the symbols.

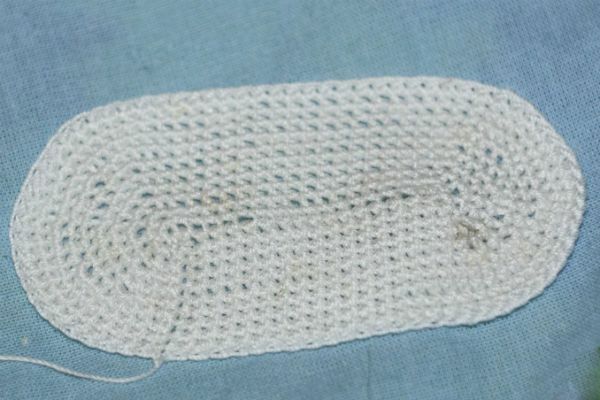
When you have finished the work on the insole, go to work on the sides.
Make two rows of a regular column with a crochet, but to make the sides go up, the first row must be tied with the back yarn of the loop.
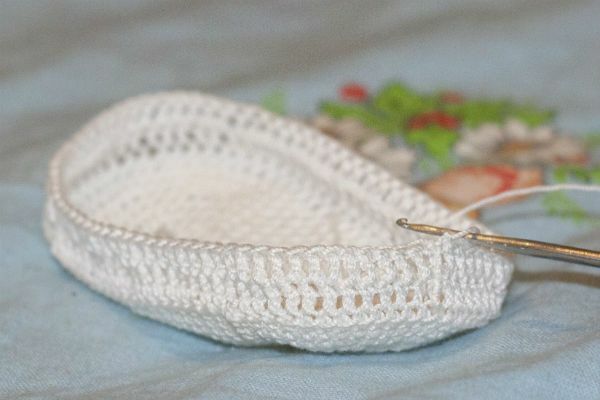
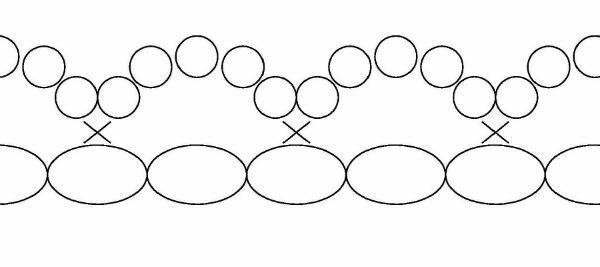
From the third row it is necessary to start forming the rounding of the booties using the scheme. Use also the usual pattern with a crochet.
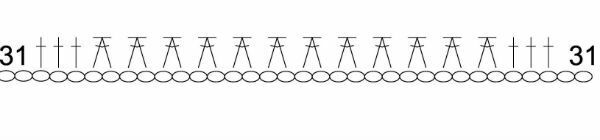
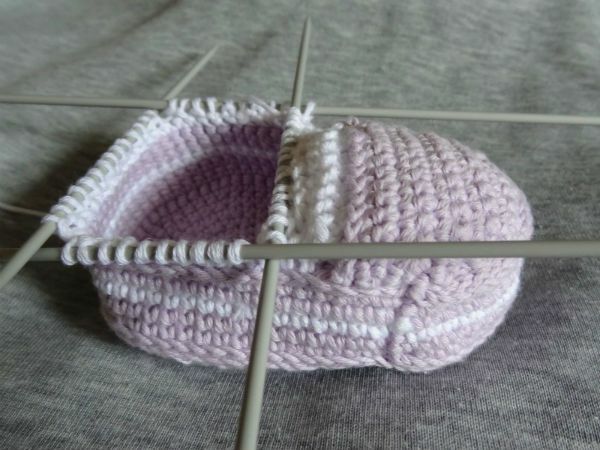
Gradually gradually reduce the hinges on both sides, but the fifth row is knit already without decreasing.
There are usually five rows to form a socks, six rows can be tied to a larger foot.
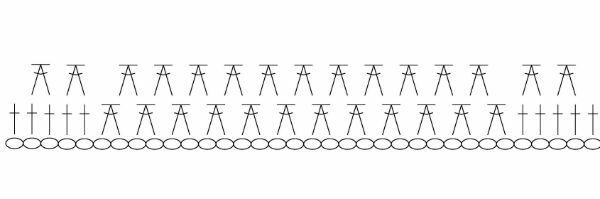
After forming the socks, go to the top. Stockings start with 18 stitches in a column without a crochet, then we need to make 15 air loops for the strap, which we transfer to the other side and fasten with the rim, continuing to knit with a crochet without a crochet.
Next row again make a column without a crochet. After that we start to work on the frill of the stocking, checking the work with the diagram. The assembly will be openwork.

Now we need to raise the stocking. Alternate the next three rows: first knit a column without a crochet, then a row of a column with a crochet, then a column without a crochet.
After that, it remains to make a fringing row.
The second, hanging frill must be tied from below, catching on the second row under the bezel.
For you to be comfortable knitting, just turn the booties. Tie around a column without a crochet. Make two rows, and the third finish according to the pattern.
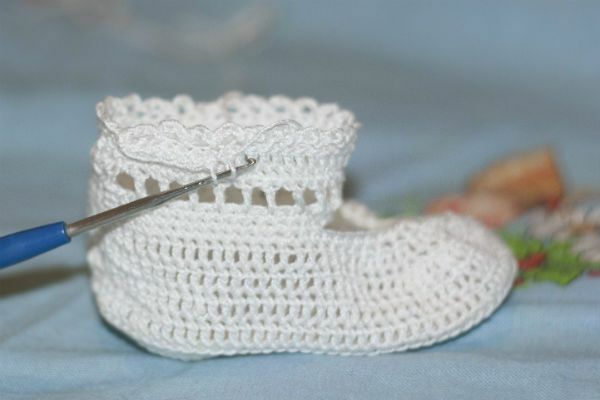
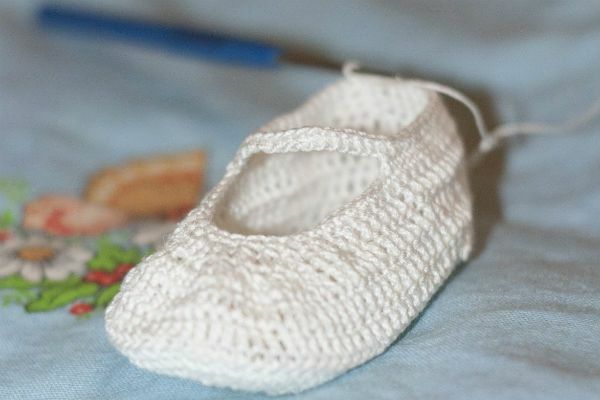
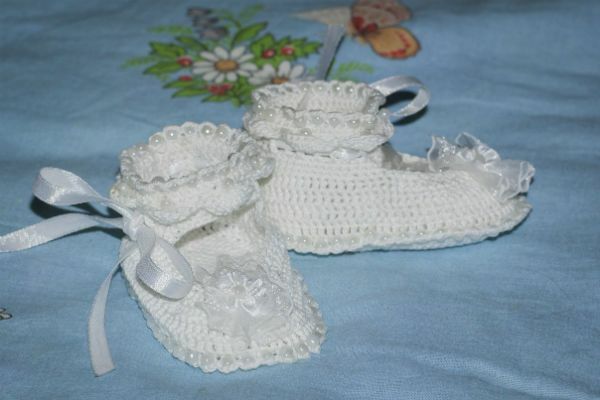
The final work on booties consists of ribbon decoration.
Booties with knitting needles
Use medium-thickness knitting needles and bright yarn. You can also choose a yarn of any color you like.
In order to avoid problems with the layout of the product, pay attention to the following abbreviations:
- chrome.- Edge loop;
- persons.- the front loop;
- - reverse loop;
- "+" - add a loop.
Work on booties starts with the sole. It can be knitted with knitting needles, but it is more convenient to make a crochet and after that switch to knitting needles.
Now we work in the technique of garter stitching. If you have two-color booties, use the non-basic color to set the loops along the edge of the toe. It is necessary to dial 14 loops. Six lines in this place.
Do not forget to connect the last loop in the rows with the base of the bootie.
When six rows of toe are ready, dial 34 loops on the remaining spokes, evenly distributing them.
Work out the pattern "rubber band" with alternating one of the wrong, one facial. In order to form a horizontal strip on the toe, tie it with a pattern of "rubber band".
You should have 25 rows in total. The last row should be closed. After that, you can work the strap. It is best to make a crochet. Choose a suitable place for the base of the strap and dial from this place 18 air loops. Spray the strap so that its width is no more than a centimeter.
Choose a place for the button. In this case, the strap acts as a non-functional decor, so that the button can be sewn over the strap without making a hole for it.
The second booties must also be made, but symmetrically the first one.
To give them charm, you can also decorate them with ribbons, beads, flowers, strings.