Weaving is known from very old times, even when our ancestors made bast shoes. Over time, people began to weave different types and purposes of containers and household items( boxes, baskets, cradles and stuff).Now weaving can create unique and unusual elements of decor, and household items simply diversified their arsenal and style.
- Christmas wreath
- Weaving braid
- Basket weaving
Christmas wreath

Materials needed:
- grapevine( any grape plant, both wild and cultivated), will require about 10 0.5 cm vine rods indiameter and about 2 meters in length( the number of rods of the vine depends on the desired thickness of the future wreath);
- glue gun;
- natural materials for decoration( bumps, sprigs of Christmas trees, acorns, berries);
- decorative materials( burlap, balls, bows, beads, money, boxes).
Weaving is best done from a freshly cut vine. If the vine is dried, you can moisten it and it will again acquire the necessary moisture and elasticity.
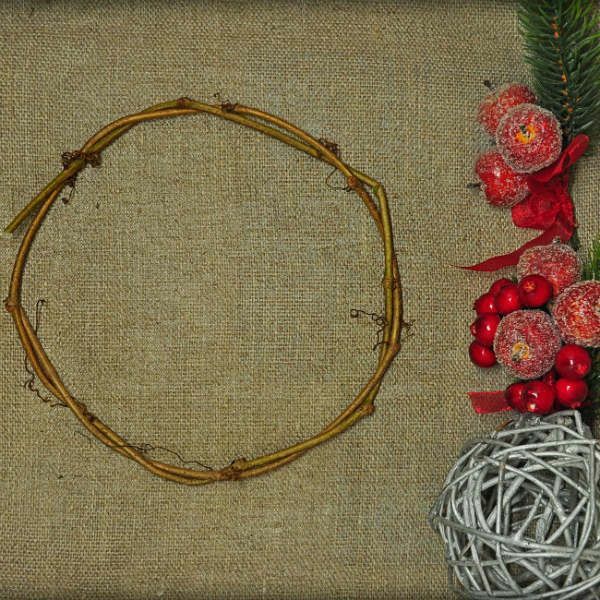
The order of weaving a Christmas wreath:
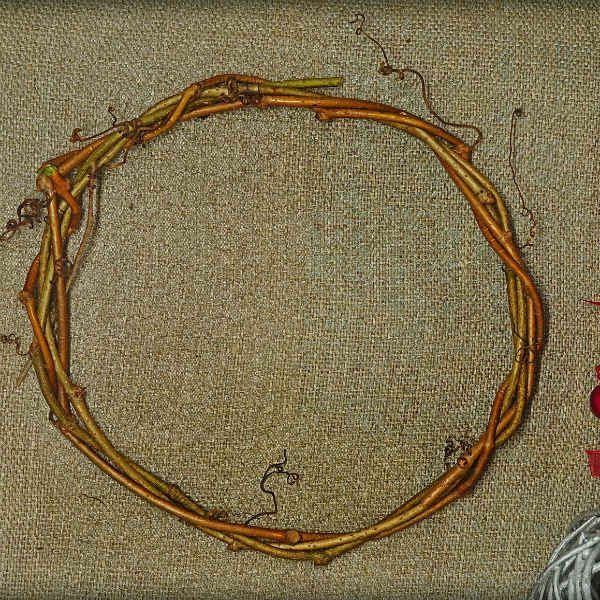
We take one wand of a grapevine and turn it into a ring, as shown in the picture.
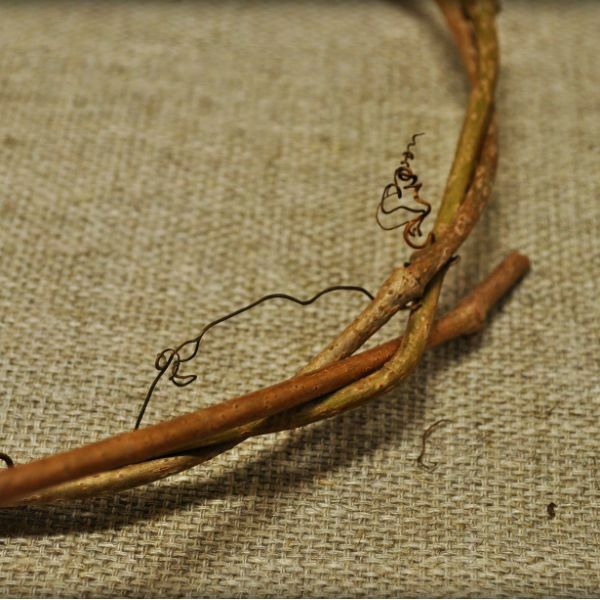
The second stick should be braided around the previously obtained ring.
At the beginning and at the end of the action the edges of the working vine need to be fixed between the bars of the first row of weaving.
In the process of the plexus, the vine has the property of breaking in such a case, in the place of scrapping it is necessary to cut the twig, and put the end between the previously woven rows.
Then wrap our ring with the vine to the desired thickness of the wreath.
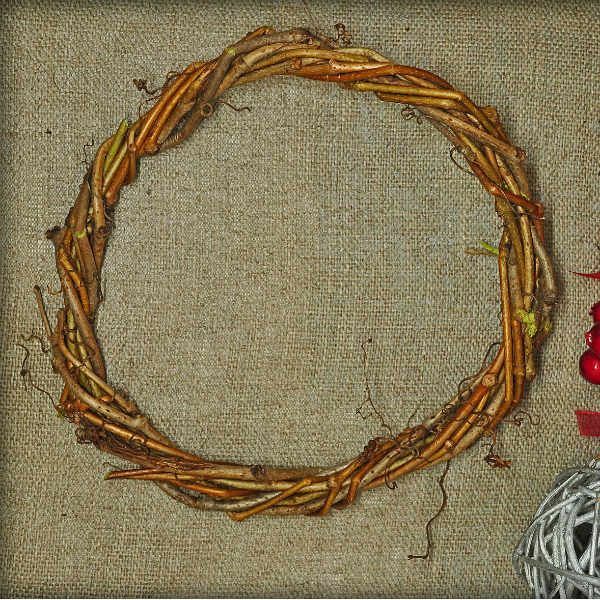
For the accuracy of the finished product, you need to make sure that all the rods fall in one direction during the weaving process.
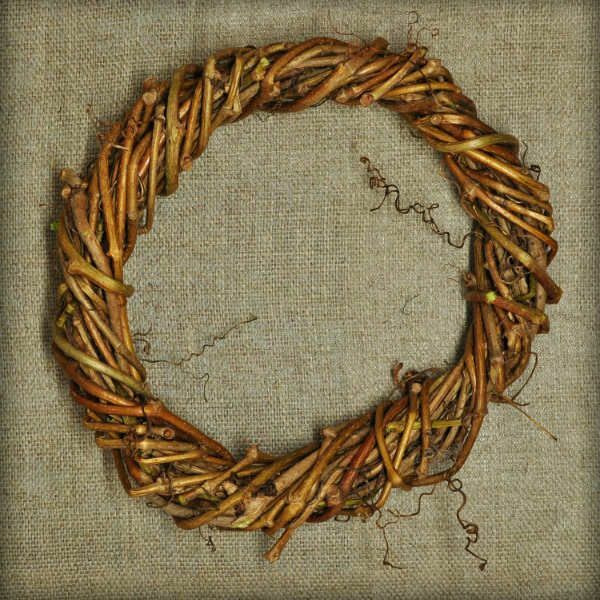
A ready-made ring from a vine can be left without decor, like a charm, and you can decorate.
With the help of a glue gun, you need to glue all previously prepared decor elements to the ring from the vine.
You can fill the wreath with twigs and cones, using your own imagination.
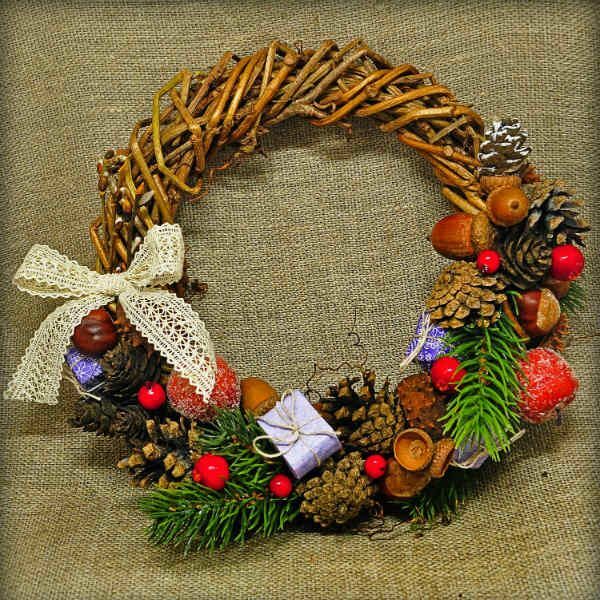
You can add various bows and even artificial snow to the wreath.
Decoration of braid
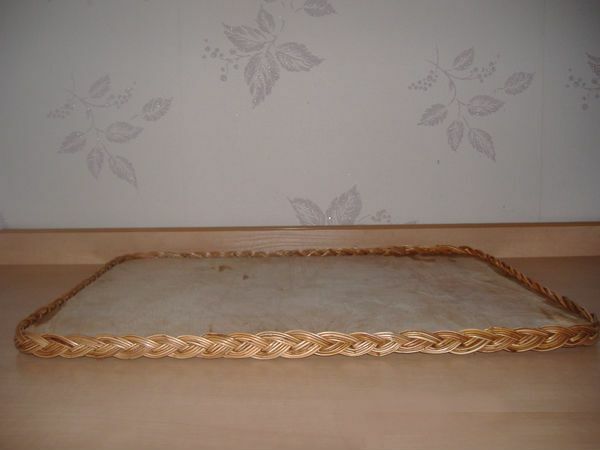
This example will be made on the contour of a plywood board with rounded corners.
Required Materials:
- plywood board with rounded corners;
- nail;
- hammer;
- pencil;
- drill and drill, depending on the thickness of the rod vines;
- cutters or pruners;
- the vine.
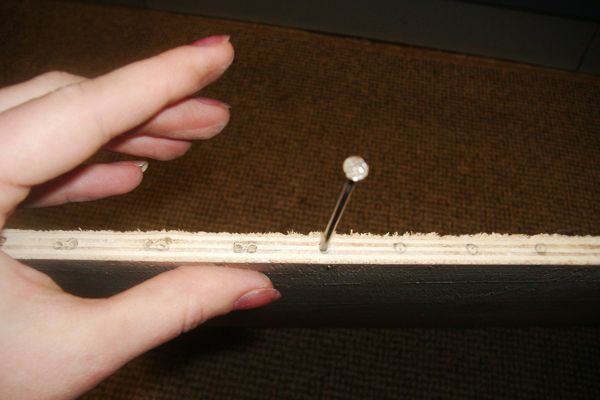
First you need to take a plywood board and on the sides you need to mark out with pencil the future holes for inserting rods of the vine, between the marks you need to leave about 3 centimeters.

With a nail and a hammer make small indentations on the marks. Drill drill holes about 2 centimeters.
The rods are best used wetted, so they are more flexible, so insert the rods into the holes as needed during the weaving process.
Insert in the holes on the rods about 30 centimeters long.
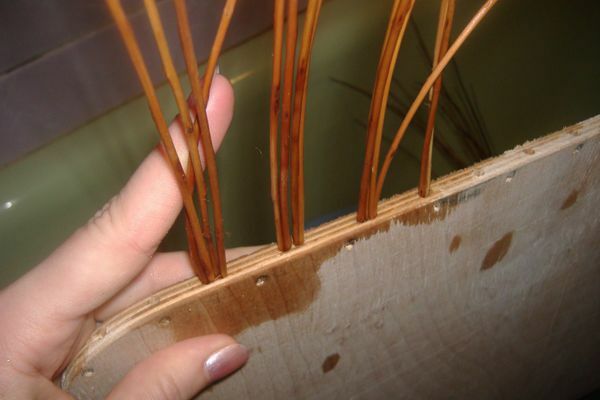
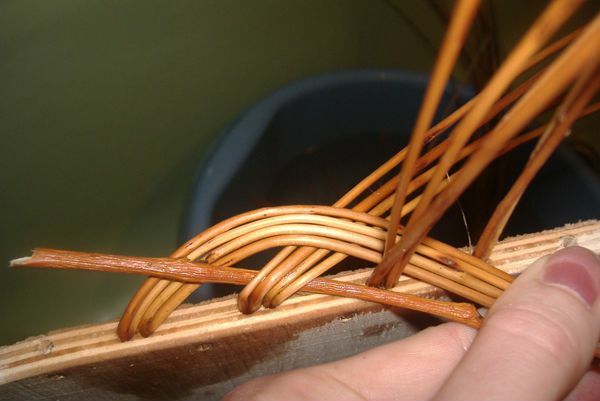
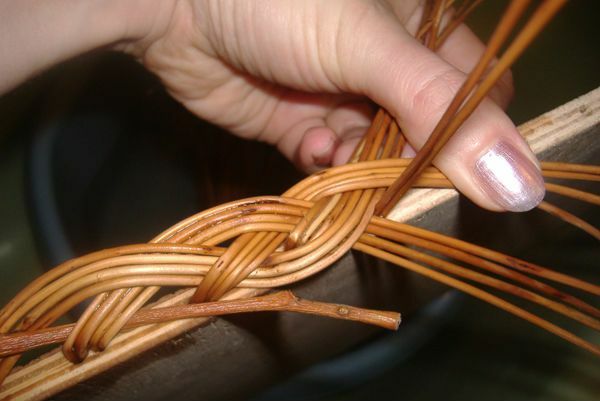
You need to start the braid from left to right from the point where the three pairs of holes are drilled one behind the other. From three places we will have four twigs of vines.
We will call these constructions from rods "strands" for convenience.
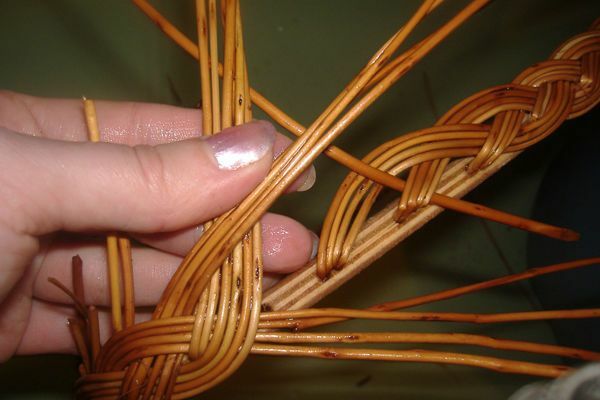
Take a single stick and bend the middle strand through it, using the tips from the picture.
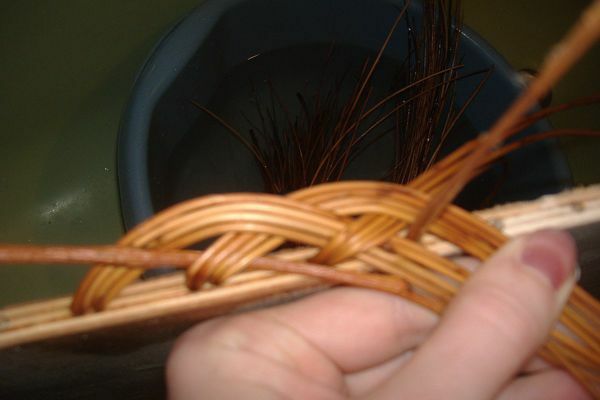
Take the first strand of rods and get them for the third, over the second.
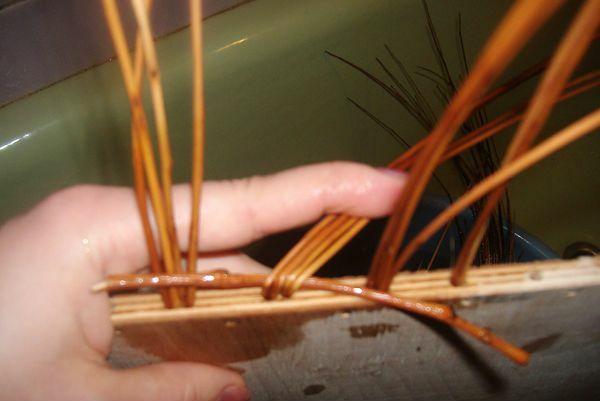
The third lock is folded over the first strand
Next, the strands will already consist of two rods of twigs.
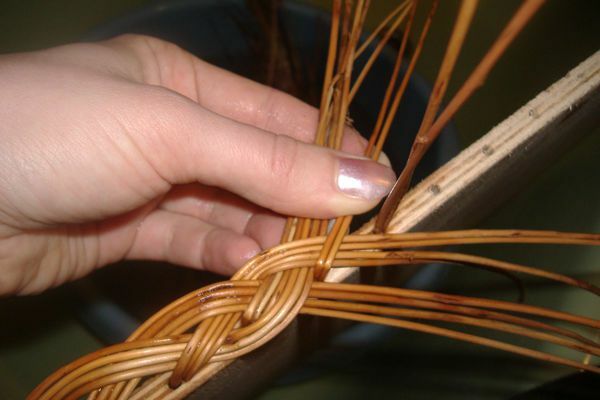
We take the second strand of four rods and we put a strand of two rods over the third strand, which still consists of four.
We fold the twin strand of rods.
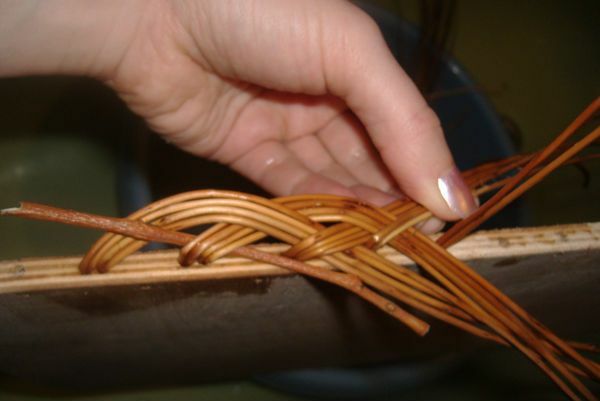
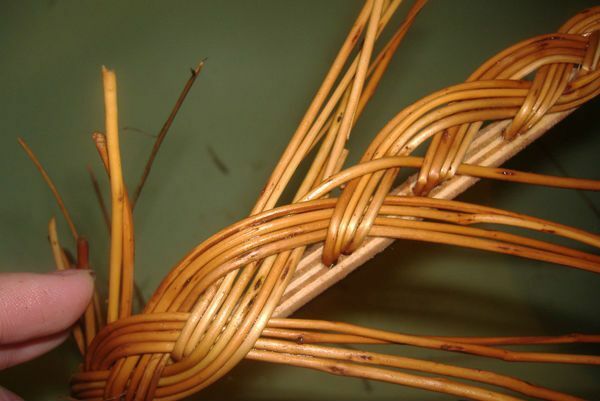
To the already twisted pair of strands we attach four rods from the first. We formed six rods in one plane. Further, the upper waves of the spit will consist of four rods, and the lower waves of six.
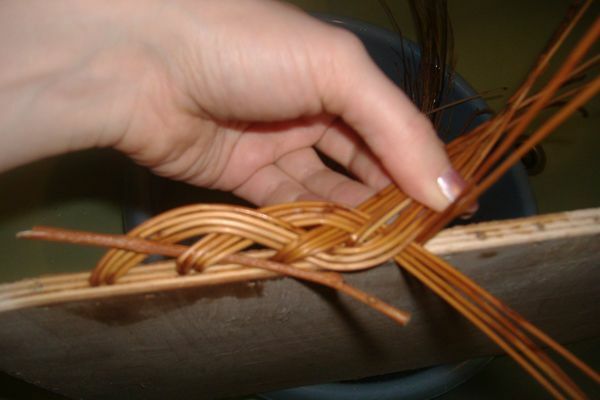
Start a third strand of four rods for the next pair of strands.
Bend the twin strand of rods.
To the already curled pair of strands, attach the four rods from the second strand.
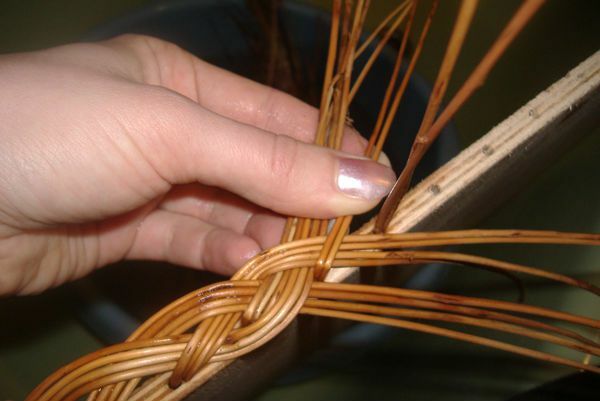
In the fourth strand we have already formed six rods. We take from them only four and we set up four twigs for the next pair of strands.
Next, in the process of weaving, when there are six rods in strands, you will only need to take four. All the rods, which will remain for two, will simply need to be cut off.
We fold the pair of strands from the rods by attaching four rods to it. So a wave of six rods is formed.
Repeat the step in which you need to take four twigs out of six.
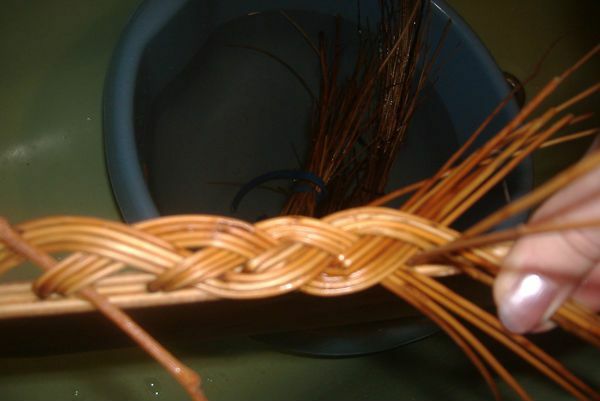
Continue to weave in a circle until the end and the beginning of the weaving do not converge.
Take four twigs from six in the top wave and wind them behind the first strand.
The last time you need to get the next four of the six rods, for the lock from which the plaiting of the pigtail began( a lock that was first bent through the auxiliary stick).
Add the bottom wave with the rods that are left and add in order to each woven section of four twigs, two more. And two unused rods at the end of the entire weaving cut.
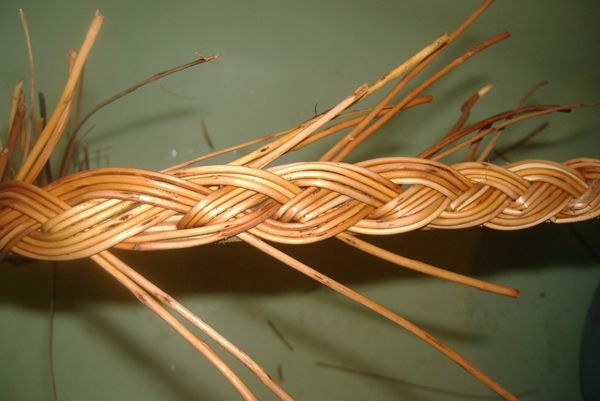
Also in the end you need to cut off all the sticking rods only neatly, so as not to spoil the hosts.
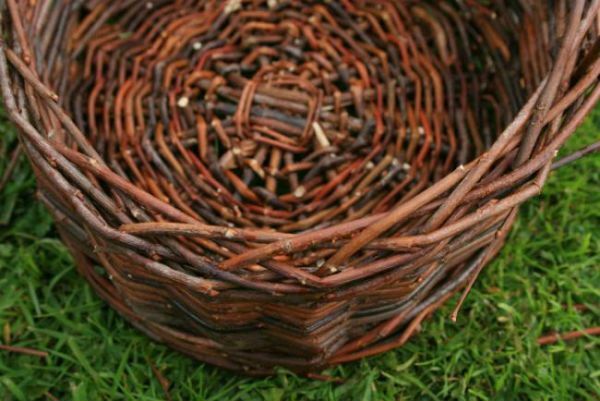
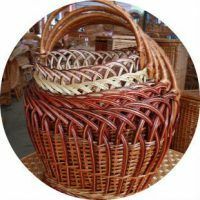
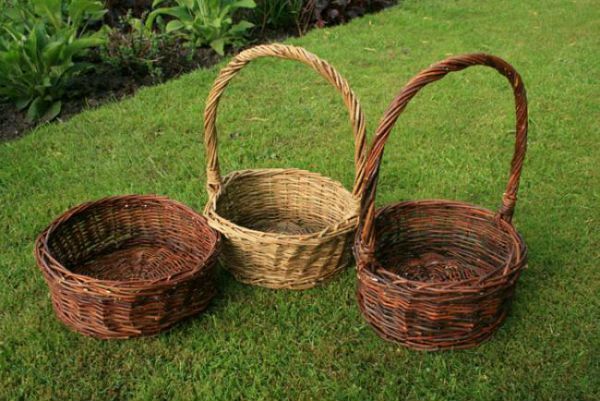
to the table of contents ^Basket weaving
For weaving you will need a willow vine, but not the whole vine is equally good for this case, some species can break when working with it. To check if the vine is suitable for work, bend it 90 degrees, if it does not break, then it fits. The vine must be dried before starting work with it.
However, before the process, the dry vine needs to be moistened to make it easier to work with it. The period of maceration of the vine depends on its length, the longer the vine, the longer it should be soaked.
In addition to the vines you will need:
- knife;
- scissors;
- pruner;
- long nail or sharp stick.
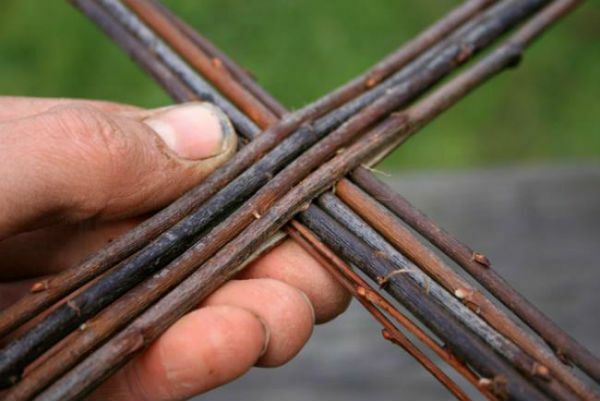
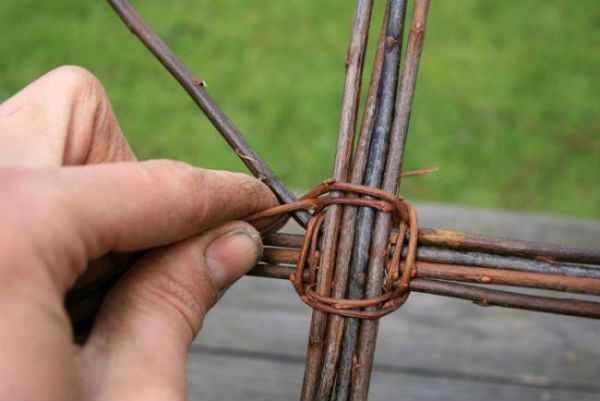
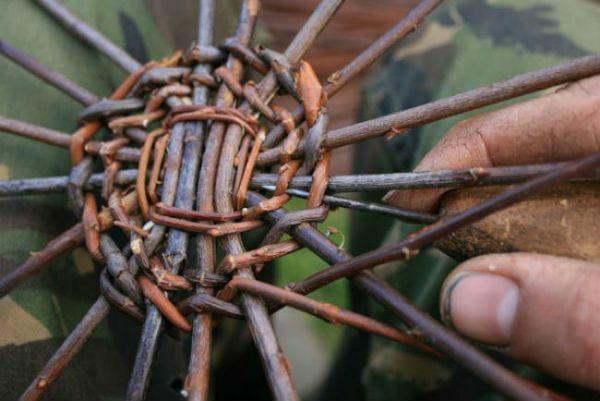
The initial step is to create a base for the recycle bin. Make eight segments of a fairly thick vine. For a basket of this size, as in the master class, enough lengths of about 30 centimeters.
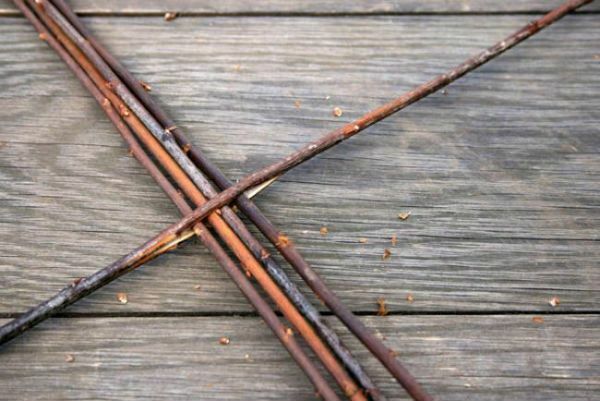
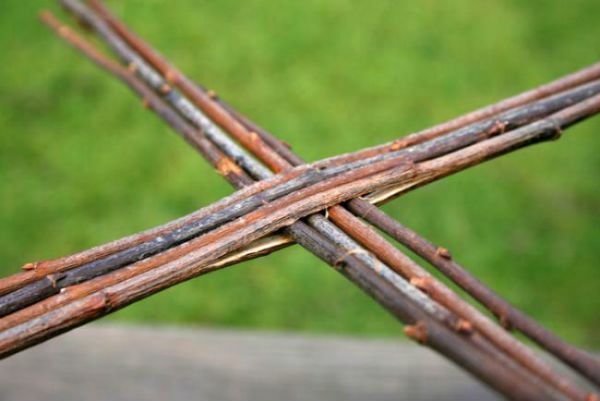
Take four pieces and in the center of each of them make a cut about 5 centimeters long.
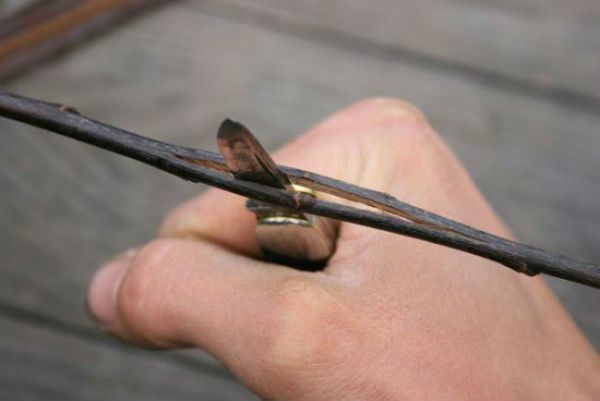
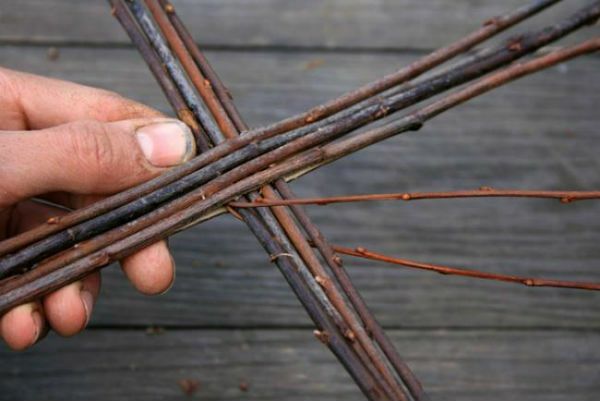
Insert the uncut pieces into the cuts in the middle to form a cross.
Now examine the segments of the rods and select the thinnest ones, and also the longest ones. Of these, it's best to start weaving. Take two pieces and insert the thin ends into the cuts, as shown in the figure.
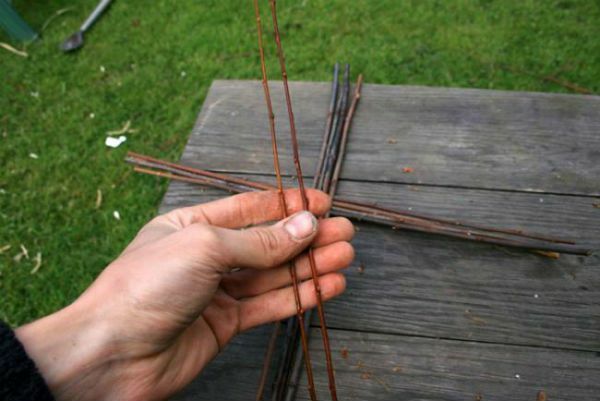
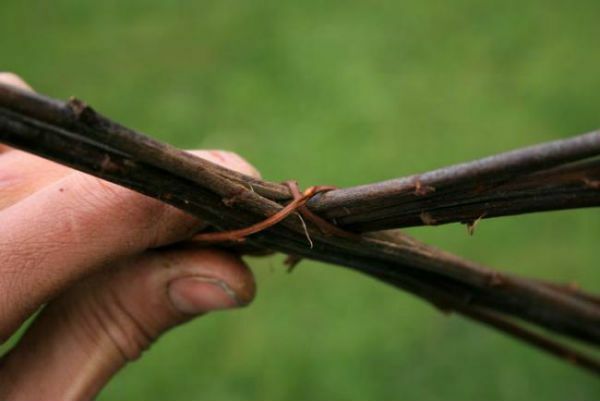
To start making a basket, we'll use the "Twisting" weave. In fact, this is a fairly simple technique, but it may not succumb to you the first time, if you've never encountered it before. It consists in the following: it is necessary to hold two twigs, and then twist them one above the other so that they change places. Every twisting is always done in one direction. To better understand the technique, look at the pictures.
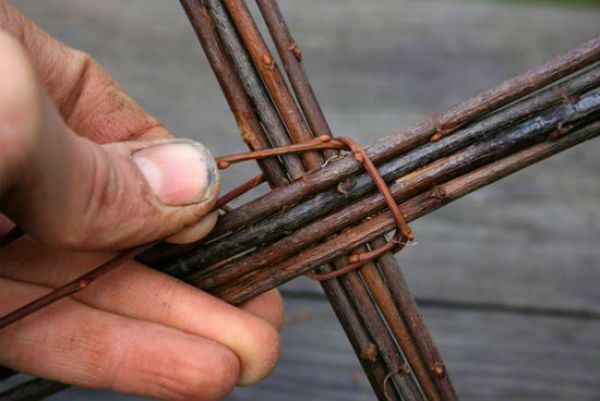
Wind each time four segments, make two rows. This will help to fix the base of the basket. Try as much as possible to pull the twigs and position them as close as possible to each other.
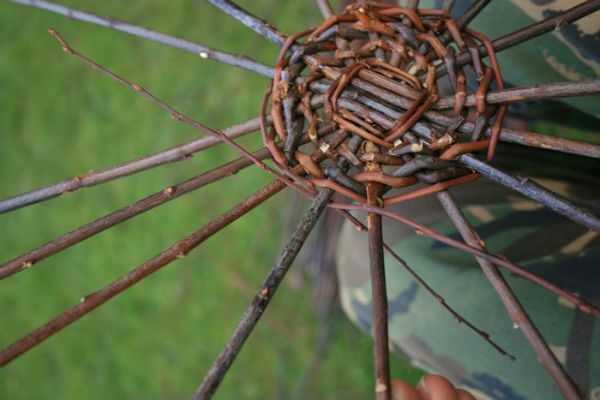
After you finish the two rows, using the same twisting technique, you need to wrap each piece separately with the rods.
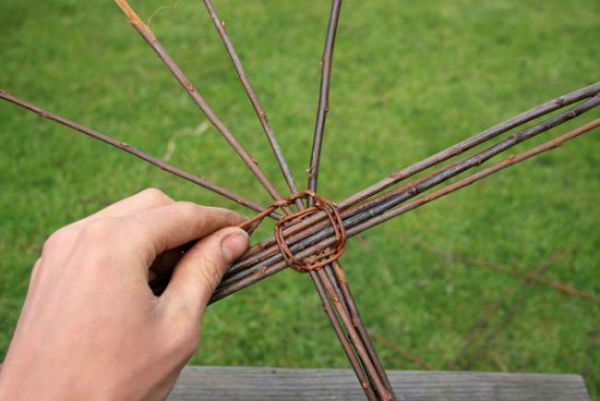
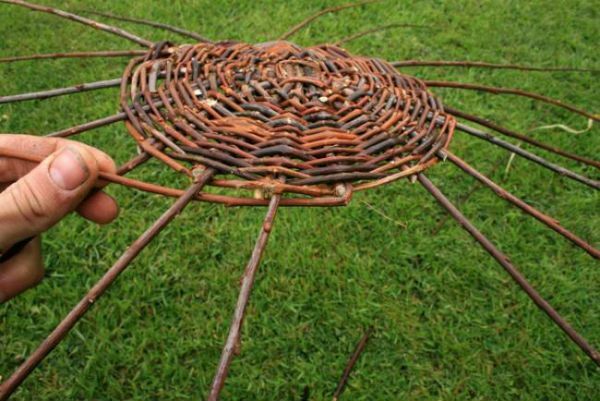
Separate segments from each other by tilting them. Make the distance between the segments as uniform as possible. After you finish this series, your twigs should be distributed like spokes of a bicycle wheel. Make a few more rows.
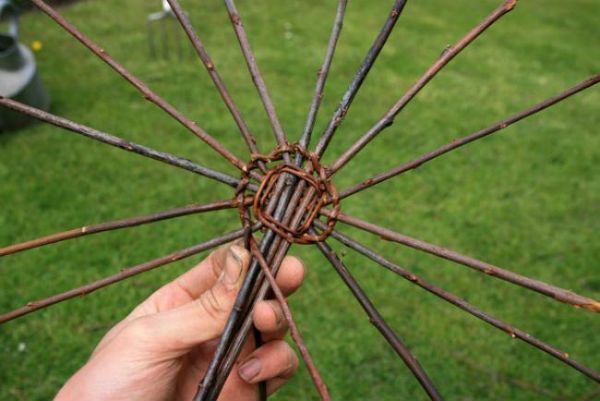
Soon your pieces for weaving will become too short, and to continue the work, you will need to lengthen them. It is better not to add two vines at the same time, as this can make the weaving weak. To understand how to do this, see the figure.
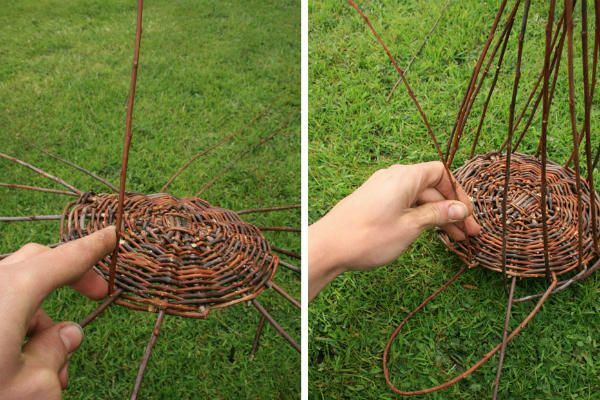
The end of the new segment must be inserted between the last two rows and then bent. After that, cut off the old vine and continue to weave the basket. When adding new twigs, connect the thick end with the thick, and the thin with the thin.
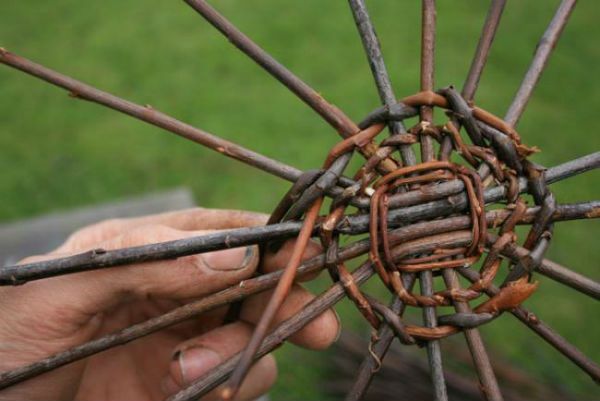
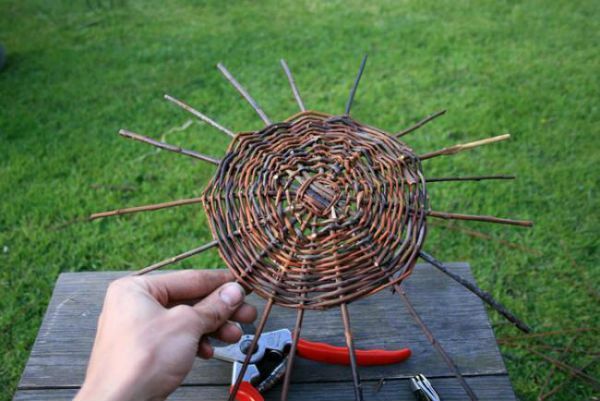
After making the base for the basket, insert another vine to the 16 that you have in the base( just sharpen the end of the vine and insert it into the last two rows).You will have to make some effort, if necessary, you can extend the distance between the braided rows so that the segment is easier to insert.
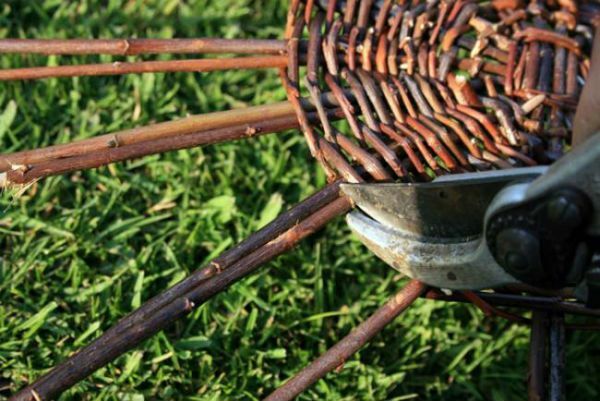
Cut off those twigs that you wove earlier, and continue to weave only one inserted( above the twig under the twig and so on).Add new twigs by simply attaching the new one to the old one. Continue weaving until the base reaches the diameter you need. In this case, the base is 20 centimeters.
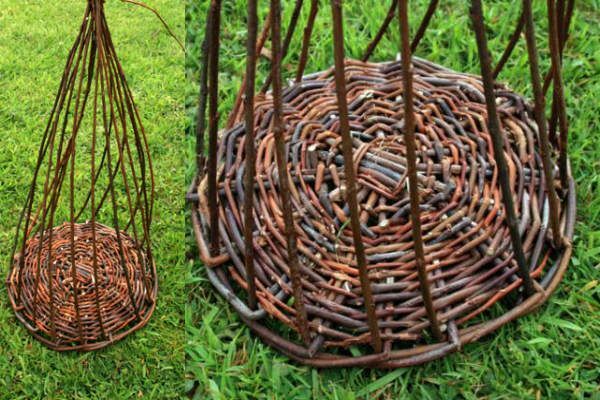
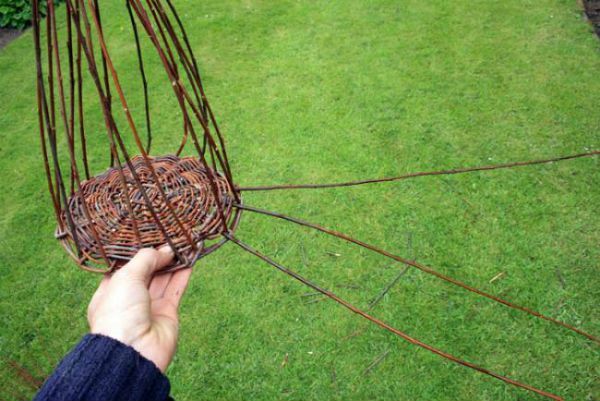
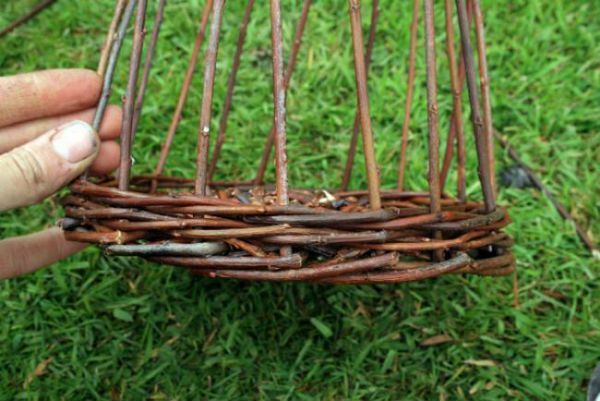
Now take the pieces of vines of medium thickness. You need to create a side basket. Thicken the tip of each of them sharpen. Insert these segments next to each of the spokes. Cut the ends of the old spokes at the base level.
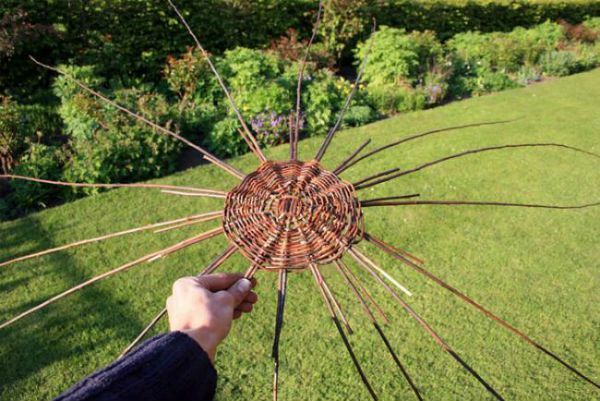
One of the new twigs, bend it to the left under two adjacent ones, and then bend upwards, as shown in the picture. Repeat in the same way with the remaining twigs. After that, take all the twigs in a bundle and tie them.
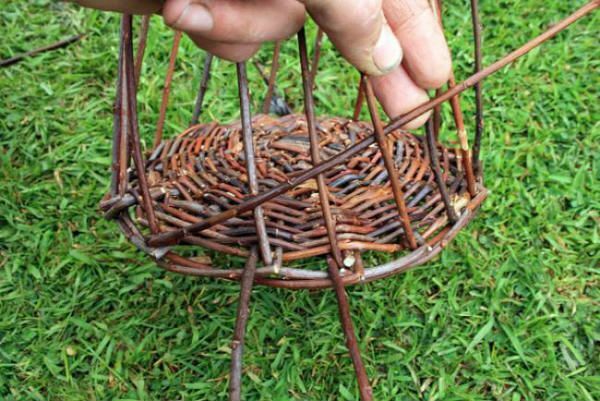
Now insert three twigs to the left of the three twigs at the bottom of the sides. Take the extreme left, bend it to the right for the two adjacent ones and before the third, then turn it out. Continue in the same way and make two rows, then untie the twigs.
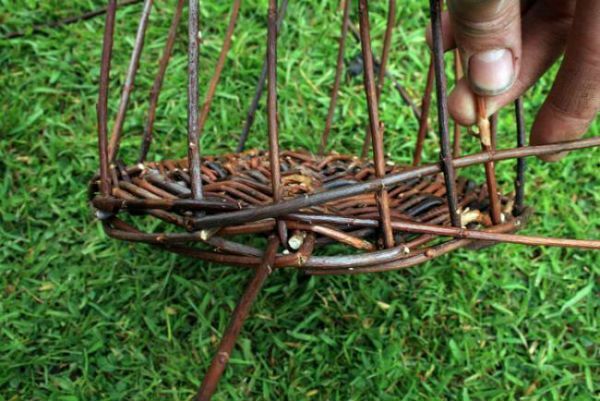
Count the number of twigs, take the same number. Insert to the right of each knitting needle in the base along the twig, tilting it to the left and winding behind the next knitting needle and before the third, and then pull the stick out again.
When you insert the required quantity, you can start the weaving. Weave until the pieces are short.
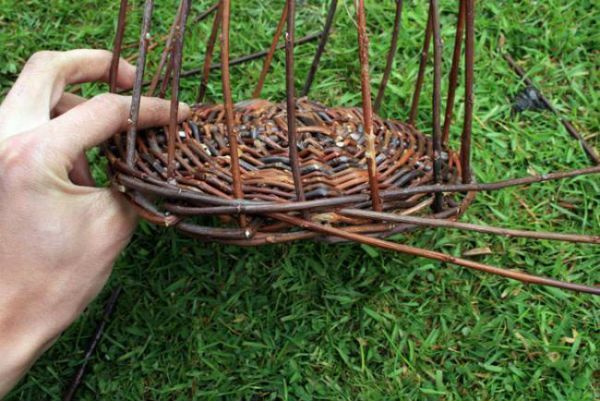
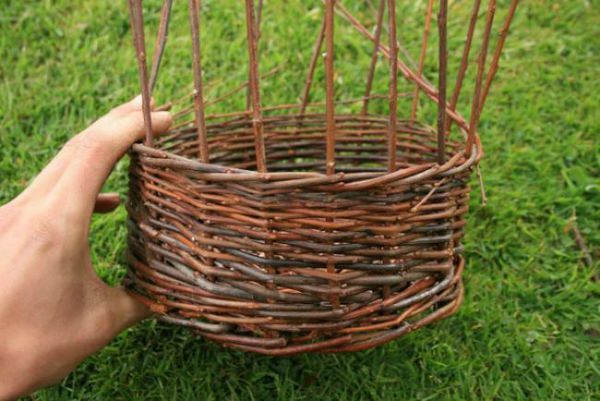
It remains to make the bezel. To create it, take one of the twigs and bend it to the right.
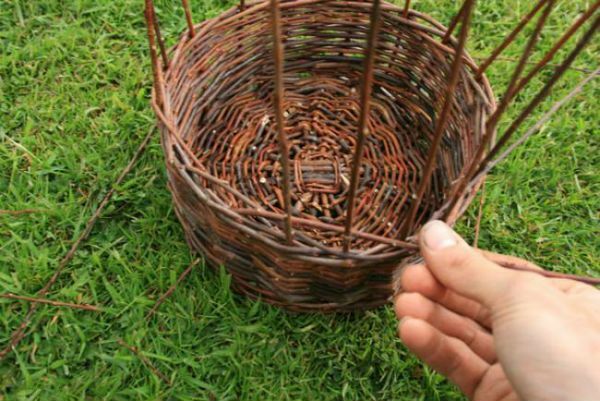
Start it behind two adjacent twigs, before the third and fourth, then for the fifth and output outside.
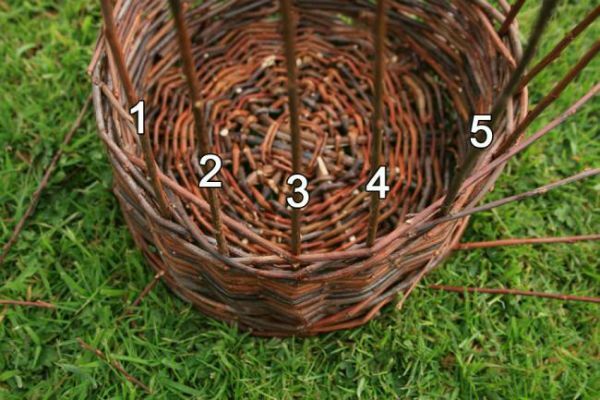
Repeat in the same way with each of the twigs. At the end cut off the excess length of the segments.