

Today the weaving of crafts from newspaper tubes becomes more and more popular. And the thing is that this is an exciting and creative activity, after which you can get an original product created by yourself. Beginner masters from newspaper tubes can easily and quickly make unusual and diverse elements of decor.
- Basket
- Hat
- Fungus
Basket
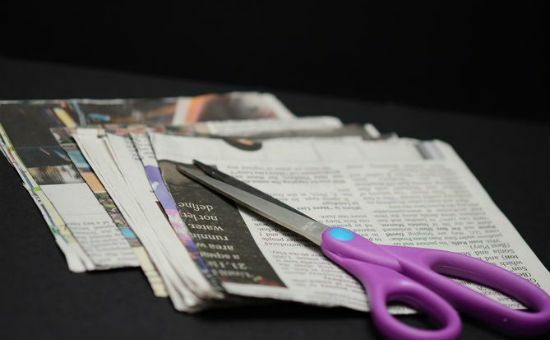
To create a beautiful basket of newspaper tubes we will need:
- newspaper or magazine sheets;
- cardboard;
- spoke or wooden skewer;
- glue PVA;
- scissors;
- ruler;
- brush;
- pencil.
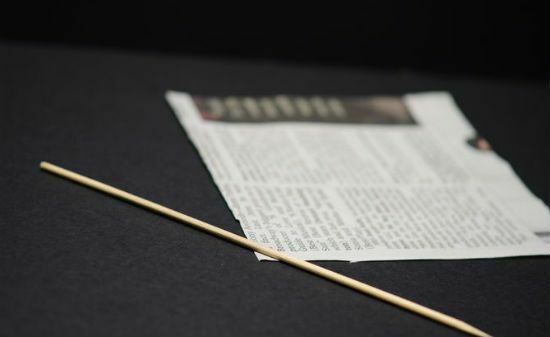
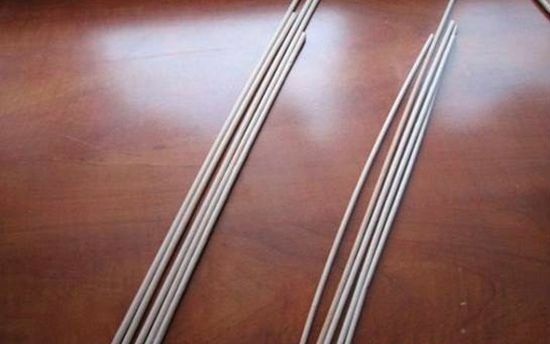
Cut newspaper sheets into squares measuring 10 by 10 centimeters( for longer tubes we cut larger newspapers).
Next, we take one sheet and apply an angle to the edge at an angle, after which we start tightly wrapping paper on it, then remove the needle. To ensure that the finished tube is not untwisted, glue the edge of the newspaper before tightening with glue.
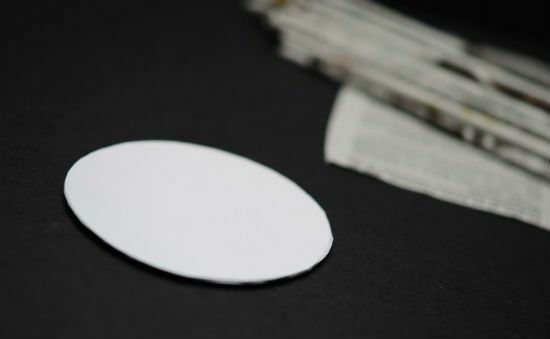
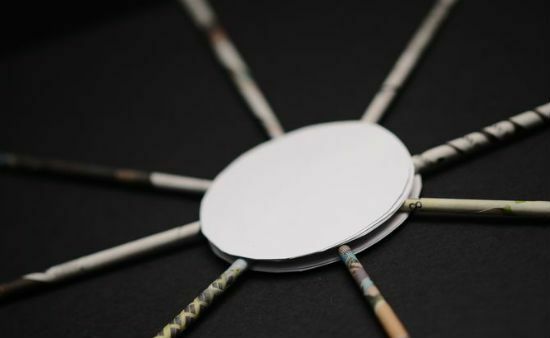
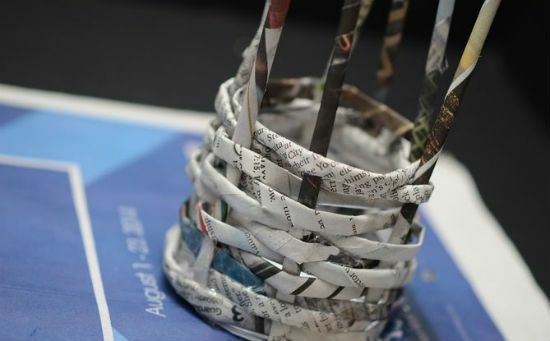
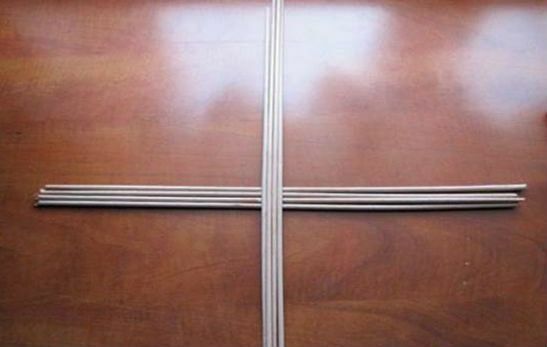
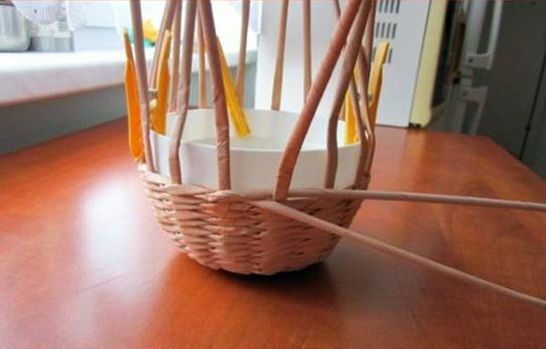
After all the tubes are folded, take the cardboard and cut out of it two circles for the base of the basket. Notice that the size of your future craft depends on the diameter of the circle.
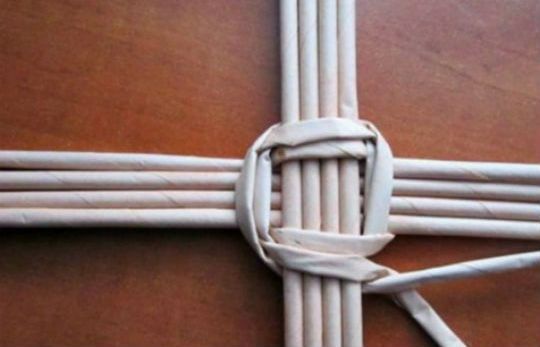
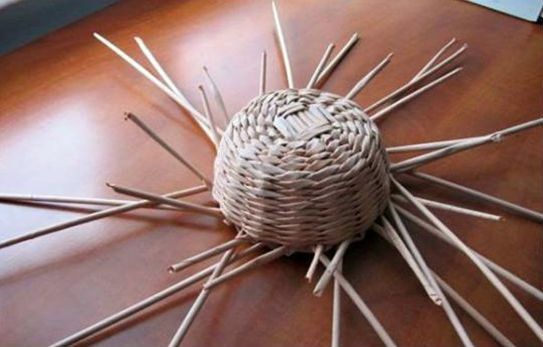
Next, eight sticks are glued to the cardboard circle in the form of a sun.
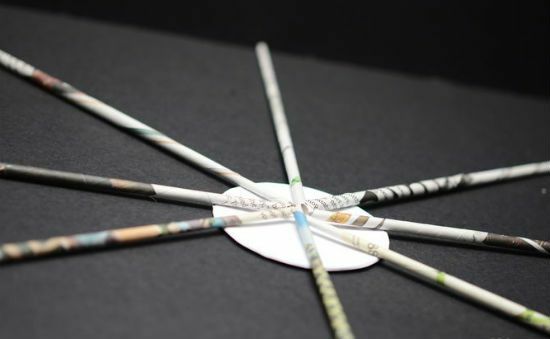
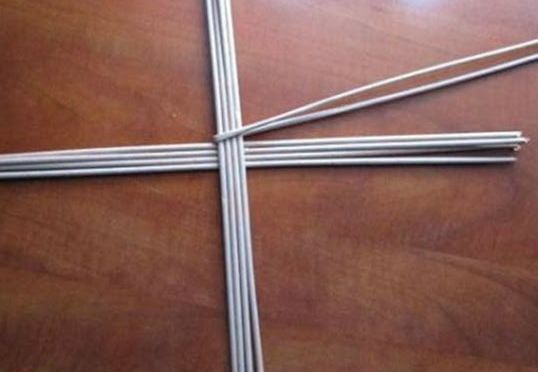
The second circle of cardboard should be glued with glue and cover a circle with tubes. Firmly press them against each other, for the best result put the "sun" under the press for 10-20 minutes.
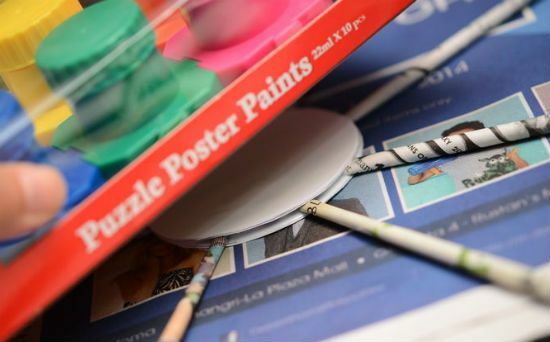
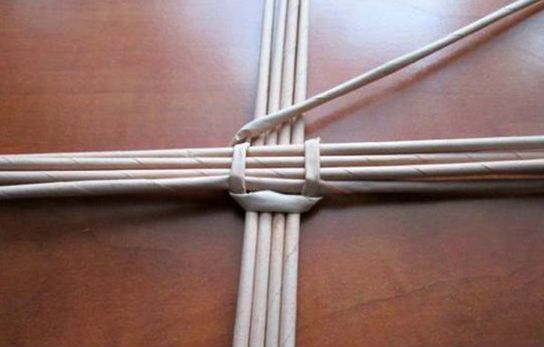
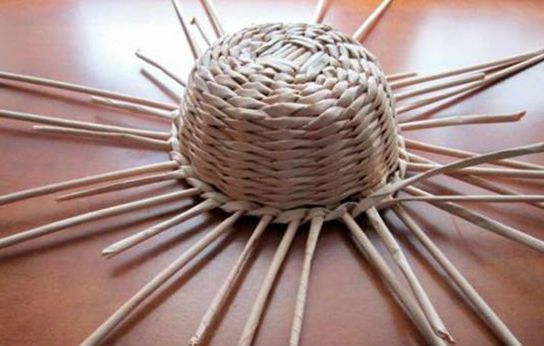
At this stage, our workpiece can be painted to make the basket look more effective.
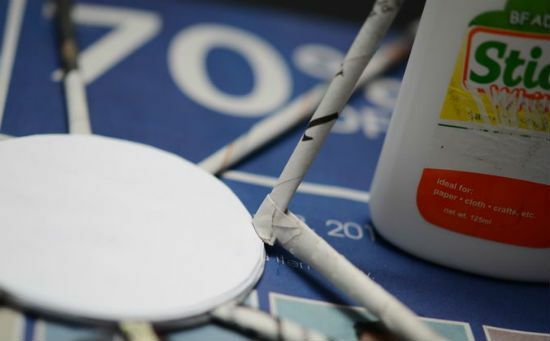
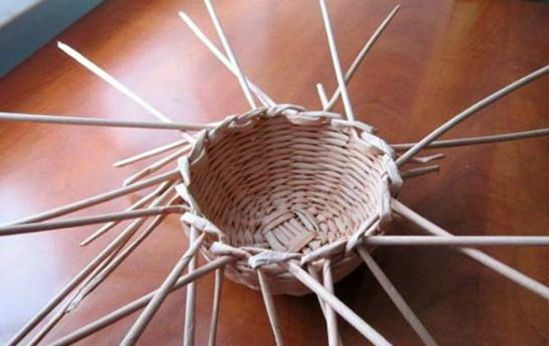
Next comes the most important stage - weaving. To do this, lift one tube from the workpiece vertically and glue the tube horizontally to it, as shown in the picture.
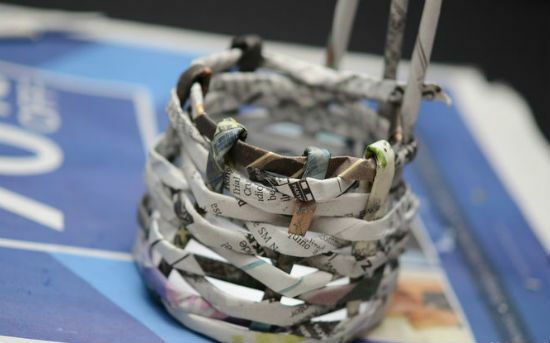
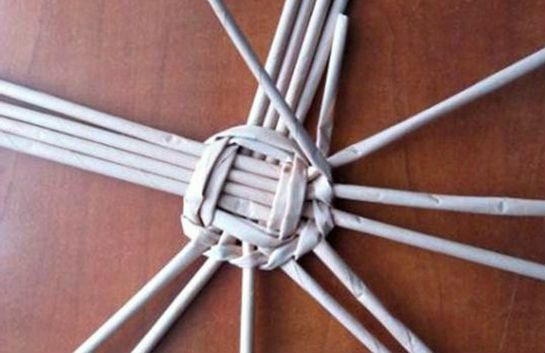
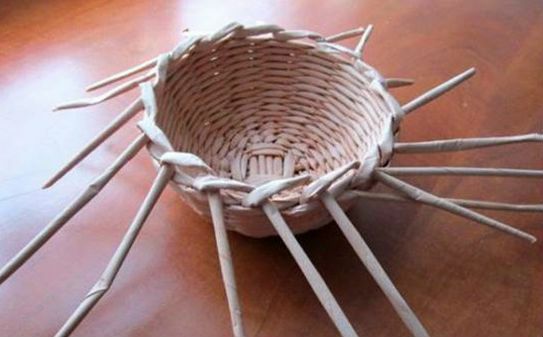
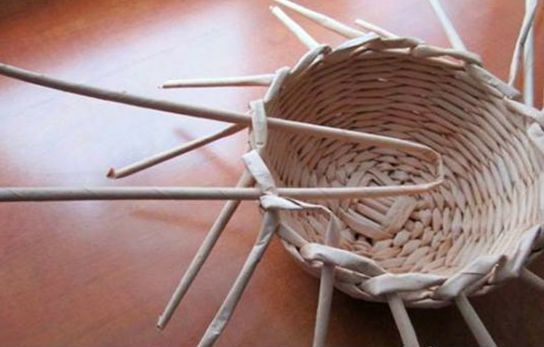
We'll wind this pipe for the nearby frame vine so that it goes around it from the outside. We move on in a circle, wrapping the next tube from the inside. When the vine, which we are braiding, ends, we add a new one. This is done simply - in a tube that ends, we insert another, as if screwing it, and continue to weave.
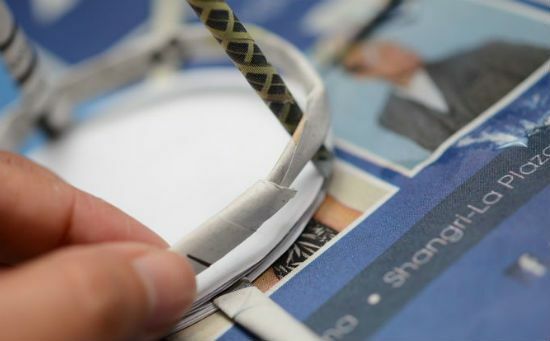
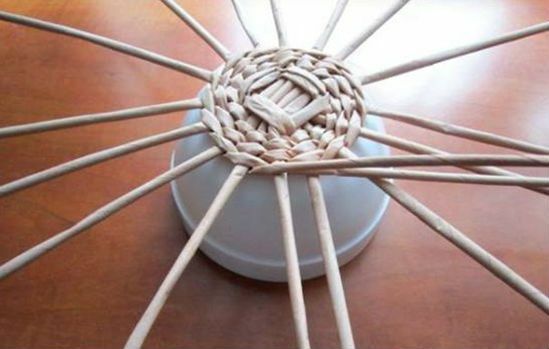
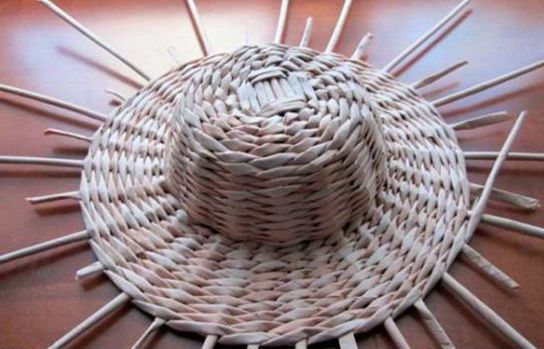
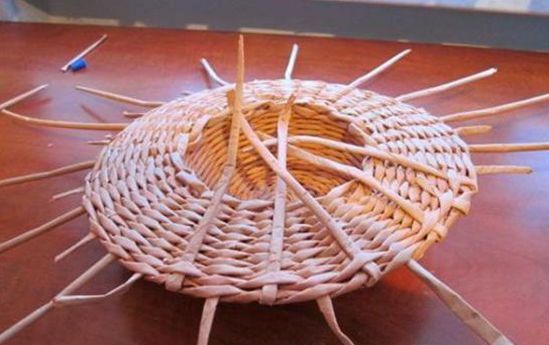
So embracing the frame tubes outside, and then inside, we weave all the rows. Toss the basket until the required height is obtained.
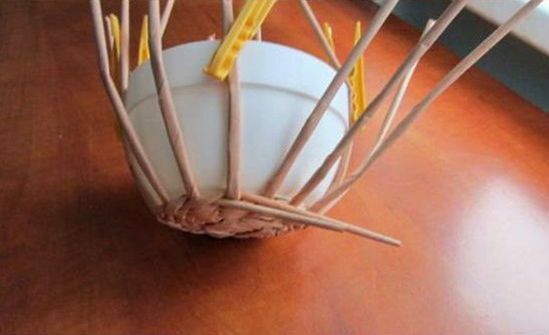
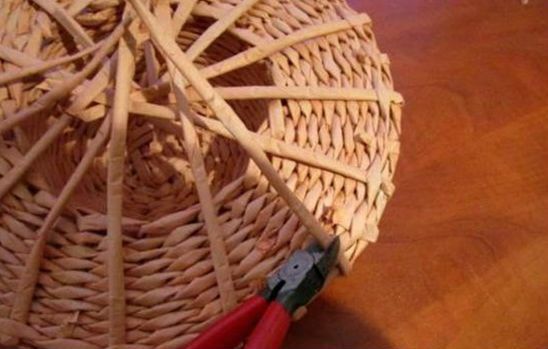
After the last row has been made, cut the vine tube diagonally, apply a glue on the edge and glue it inside the basket to the limit. Then we take the skeleton tube, cut it too, cover it with glue and fill it with artifacts.
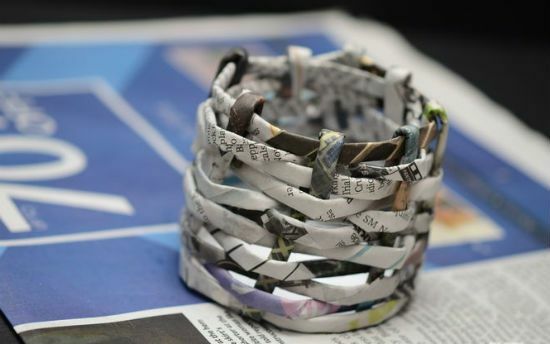
So do with all the pipes. That's what you should end up with.
Now our basket can be attached a pen. To do this, take two tubes and weave them into a tourniquet. In order that they do not disentangle, the tubes can be glued together, and also glued together the ends. Then we take the handle and we put its edges also inside the basket, the edges are seized with glue.
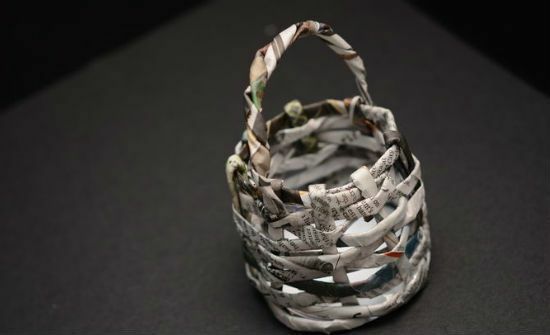
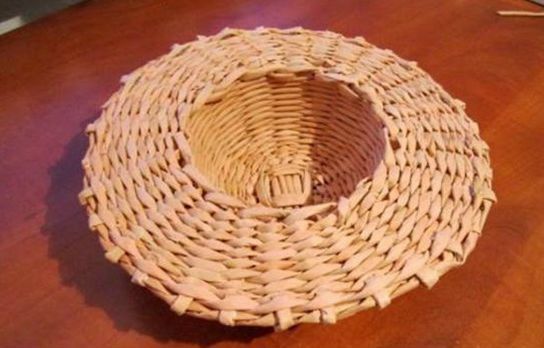
That's it, the basket of newspaper tubes is ready. It can be painted, decorated with decorative flowers, beads, decoupage, etc. This craft can serve as a stand for office supplies. A larger basket can become an original decor or a place where your child will store toys.
Hat
To create a light hat from newspaper tubes we need the following materials:
- newspaper;
- scissors;
- adhesive;
- bowl.
How to make tubes from newspapers you already know, so immediately proceed to the wickerwork. Take 10 long tubes( if you got short, then insert one more tube into each tube).
The eight tubes are folded criss-cross as shown in the picture.
We take the remaining two tubes, connect them together and set them up for a horizontally lying stack.
And we begin to weave at once with two tubes of the "rope" technique. We set up one tube under the base of the hat, the other from above and cross each other. So do with all the ends of our cross-ground.
We weave the second circle with the same technique.
On the third circle with a "rope" we braid each vine-base, dividing them among themselves.
To make our hat come out even and neat, take a bowl, apply the hand-crafted item to its convex bottom and use it as a braiding shape.
For more convenient weaving, fasten all the vines with clothespins over the edges of the bowl. So they will not be confused and prevent you from flying them.
This way we continue to weave until it seems that the hat is already deep enough.
Next, remove the bowl and start to weave the fields of the hat.

Vine, which we wove, cut and plant its edges inside the craft.
Now take a new tube and pass it in the loop near the base of the base, as shown in the picture.
So repeat with each rod-bottom, inserting into the loops next to it new tubules.
This is how the hat looks at this stage.
Further, to weave the fields, we take another vine and start each tube again with a "rope" technique.
Plait until the width of the fields is sufficient.
After that, all the remaining vines-grounds are brought into the interior of the crafts and fill in the cells.
The remaining unnecessary ends are cut with scissors or wire cutters.
This is how our hat looks from the inside, when all the vines were refueled and the leftovers were removed.
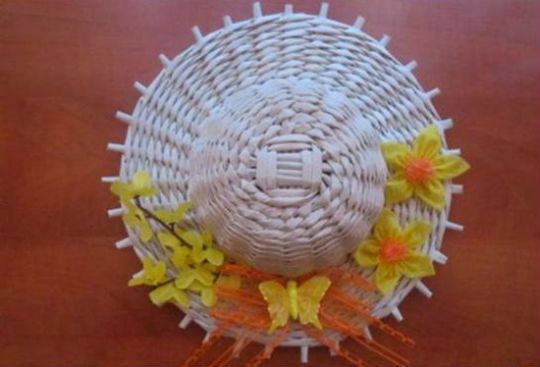
At this stage, the handicraft can be considered complete. If you want to somehow decorate the hat, you can paint it with acrylic paints, decorate with artificial flowers, ribbons, rhinestones and stones. And such a nice hat, woven from your own hands with newspaper tubes, you can get. It can be worn most, used as a decoration of garden stuffed animals or hung on the wall as an element of the decor of the room.
Fungus
Forcreating fungus from newspaper tubes we need to prepare:
- newspaper;
- scissors;
- adhesive;
- bowl.
Let's consider in detail the process of making crafts.
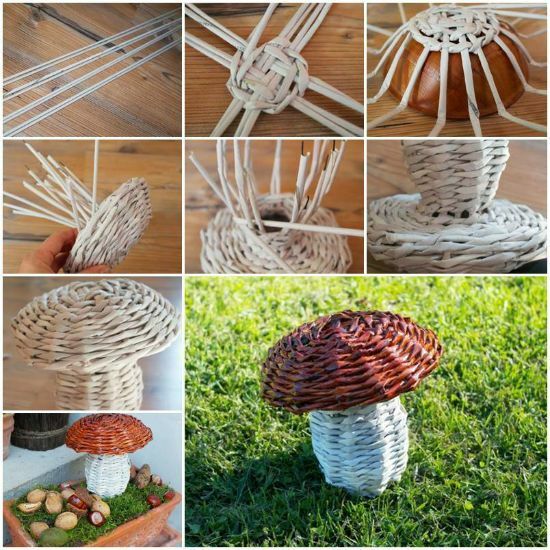
- For the base we take eight tubes and in order for our fungus to be more durable and well held shape, we put a thin wire into the tubes. We weave from them a base consisting of a square, as shown in the picture.
- Next we will braid this square. To do this, first take the first pair and, twisting it between each other, cover each tube, plait clockwise.
- To make the base for the fungus neat and convex, you need to place it on a small bowl. Continue to further weave the vines, but now stick to the shape of the bowl.
- After the fungus cap is ready, we remove the bowl. Now we need to bend the tubes so that the leg turns out.
- Now we braid the inside of the fungus and go to the foot, as shown in the pictures.
- At this stage, do not forget to slightly extend the leg, so that it does not just turn out straight.
- This kind of leg in the end you should get.
- Finish weaving hand-made. The wire, which we have already invested in the tubes at the initial stage, will not allow it to unravel, so the edges of the tubes can simply be wrapped inside the fungus.
- Now we only need to decorate our fungus. To do this, we paint his leg with white paint, and open the hat brown, then cover the entire fungus with a colorless varnish, so that the paint lasts longer, and he had a more spectacular appearance. Such fungi can be placed whole glades in the garden, on the flowerbed, or you can make such a small composition in a box or pot.
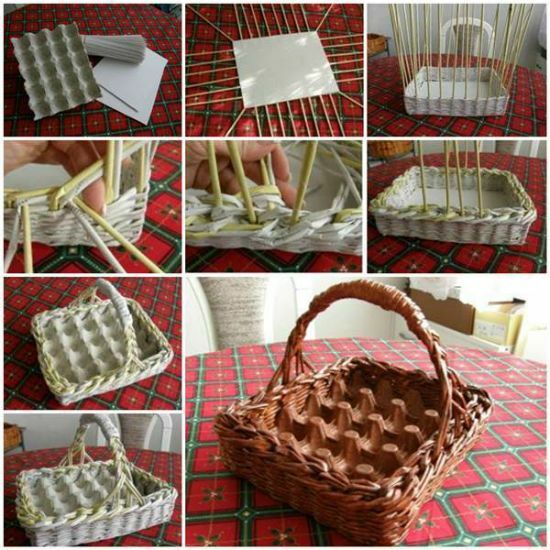
At last we'll share with you some photos of ideas of crafts, which can be weaved from simple newspaper tubes. Here, for example, you can make an original basket for eggs.
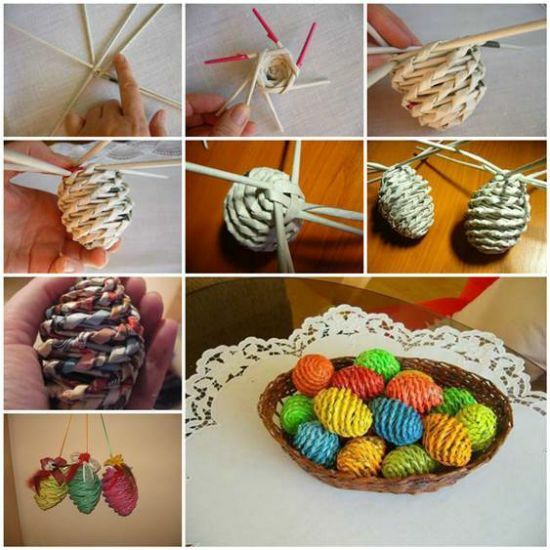
Continuing the theme of eggs, we will share with you another photo, on which you see wicker eggs. This article looks bright, original and unusual.
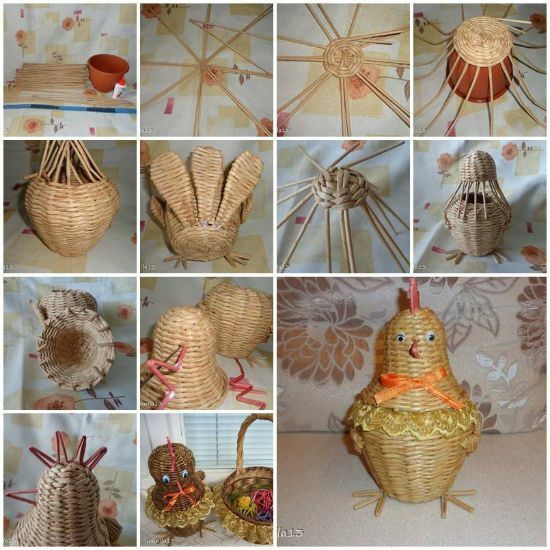
You can also weave here such a box-chicken, which will become an unusual and interesting decoration of your room.
As you can see, there are lots of options, so stock up on newspaper tubes and start creating masterpieces from such simple materials.