

Modular origami implies the folding of bright crafts from modular paper fragments by inserting them into each other. Modular origami also makes it possible to obtain both planar and three dimensional dimensional figures. Creating them is very simple for beginners, and the result is great.
- Features of the
- Technique Origami from the triangular modules
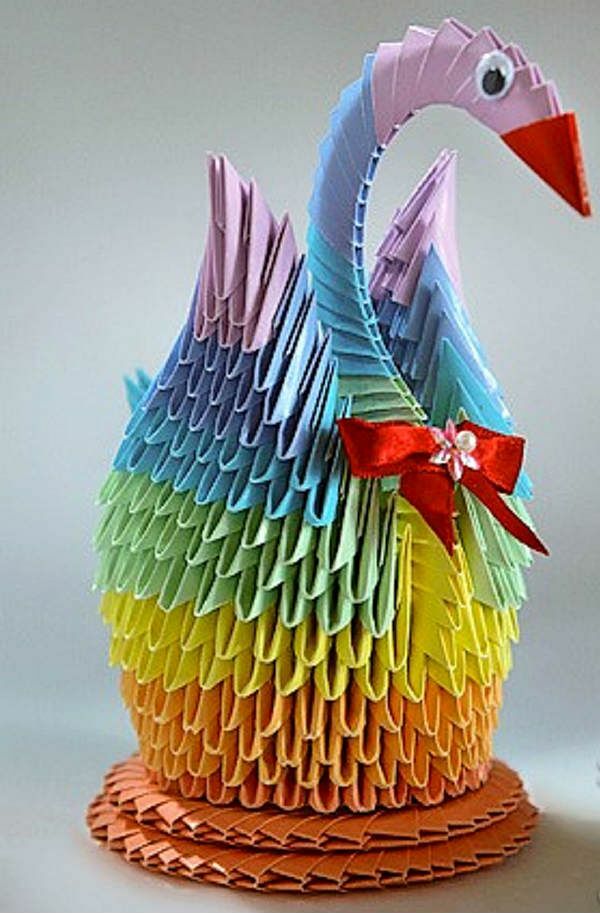
- Collecting the multi-colored swan
Features of the
technique Modular origami is a kind of ancient Chinese origami art. Folded figures and objects in the modular origami technique consist of identical and in most cases equal in size in one product paper modules.
Paper modules are folded from a sheet of paper according to the standard origami rules of the desired shape and size.
Use in the creation of modules is preferable to thick paper( not cardboard), it better keeps the shape at bends and does not lose strength with time. If you use colored paper, it is advisable to use double-sided paper.
Origami from triangular modules
The most common occurrence of origami figurines from triangular modules. It is not difficult to fold a triangular module. You need to prepare( cut) the same rectangles of paper, which will form the basis for the module. For convenience and smoothness of all angles, it is best to use A4 paper. You yourself can determine the necessary dimensions of the module to create a particular design and spread the sheet into rectangles along or across.
To create a module, you need:
- Bend the prepared paper rectangle in half.
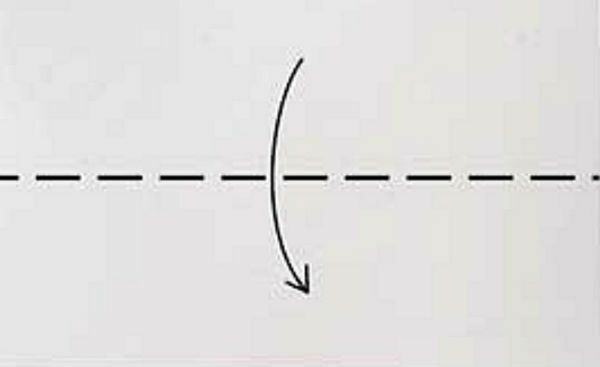
- iron the bending line and turn it back, thereby charting the center line.

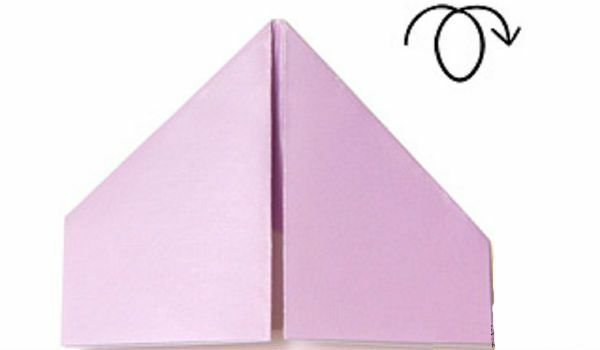
- The upper corners need to be folded inside and along the central bend.

- Turn over the resulting workpiece on the opposite side.
- Bend the bottom of the resulting part.
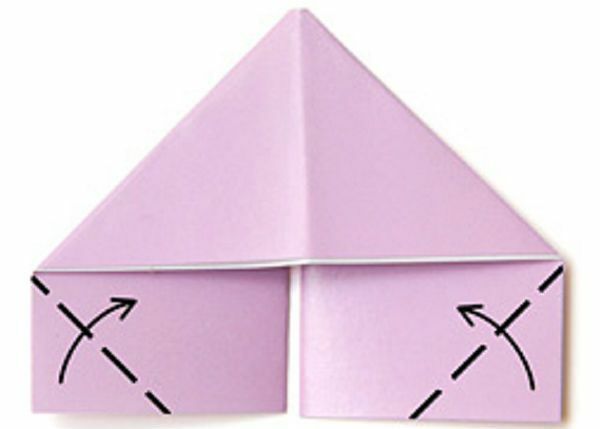
- Bend corners that protrude, per piece to form a triangle, and between the lines there should be a gap for subsequent bending.
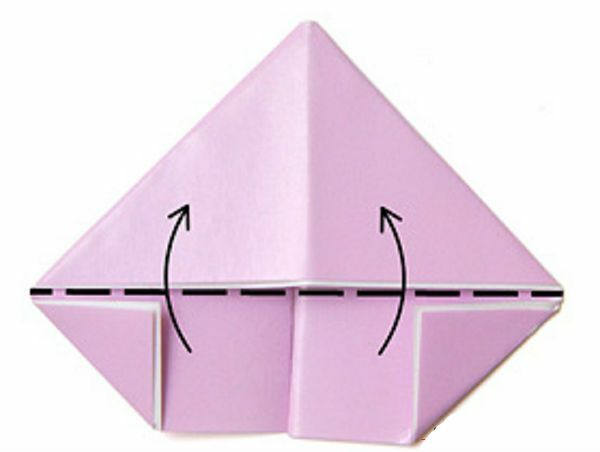
- Lower the bend back.
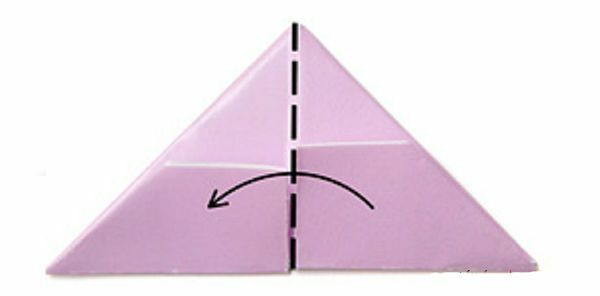
- Bend the bottom again, so that the corners that protrude are inside.
- Add the resulting triangle as a little book.
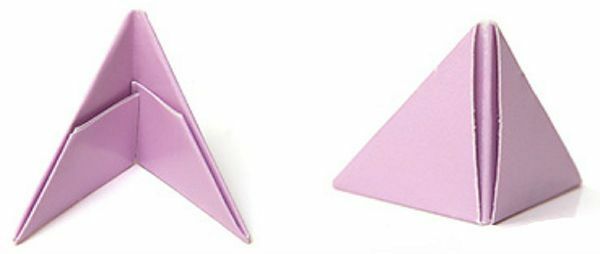
The result is a triangle with two pockets - this is the necessary module.
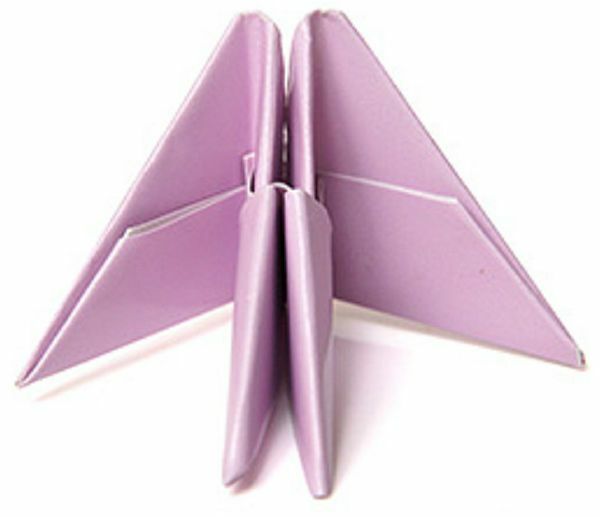
For the pockets, by inserting into each other, the modules are very easily interconnected.
Collecting a multi-colored swan
You will need a lot of triangular modules of different colors:
- red - 1( for the beak);
- pink-orange - 136 pieces;
- of orange - 90 pieces;
- yellow - 60 pieces;
- green - 78 pieces;
- blue - 39 pieces;
- blue - 36 pieces;
- purple - 19 pieces.
Create a swan and can be monophonic or choose the desired color. In this case, you still need to make a minimum of color accents: prepare one module for the beak, and for the swan itself 458 modules of the main chosen color. You can also black out the wings.
Let's move on to the process of assembling a bird.
You need to take three prepared pink-orange modules and put them as shown in the picture.
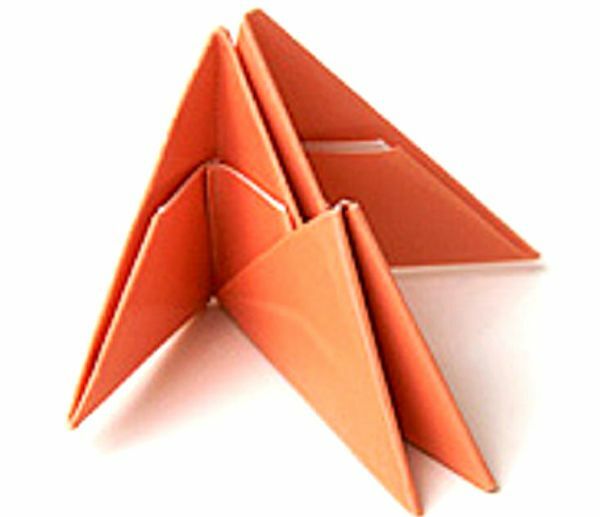
Pair them together with pockets( insert the first two modules with the corners into the pockets of the third one).
We take two more pink modules and connect them to the already connected structure.
In this way, the first ring of two rows is assembled - on the short side are the modules of the inner row, and on the long side - the outer ring.
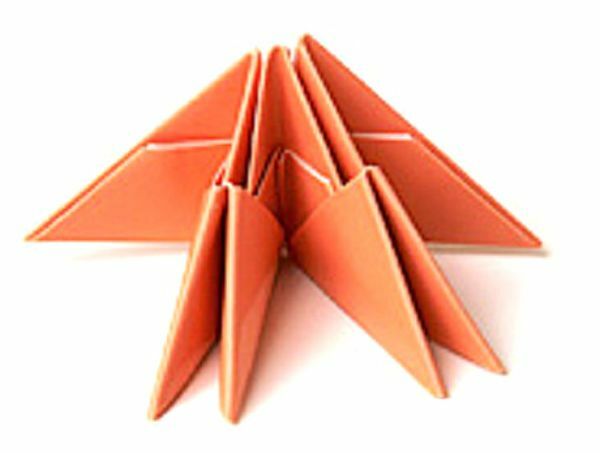
Each row must have 30 modules, each series in a chain must be closed by the last module. Rings must be collected carefully, incidentally holding, so as not to disintegrate.
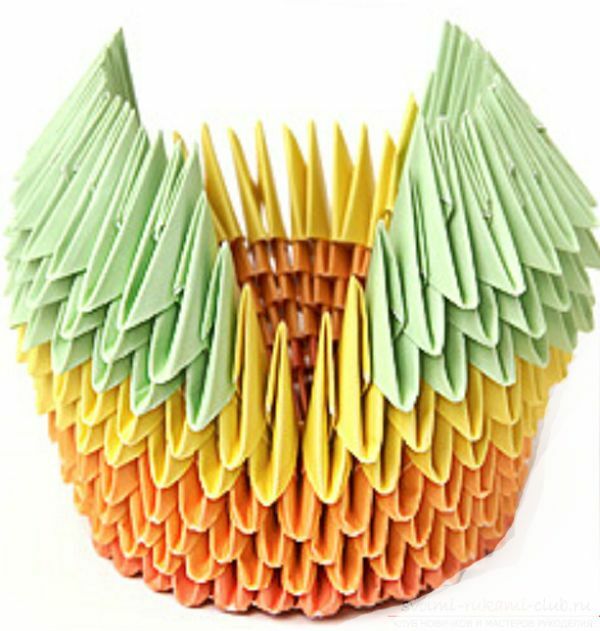
The third row of 30 orange modules must be assembled in staggered order, as shown in the picture.
Similarly, we collect the fourth and fifth rows.
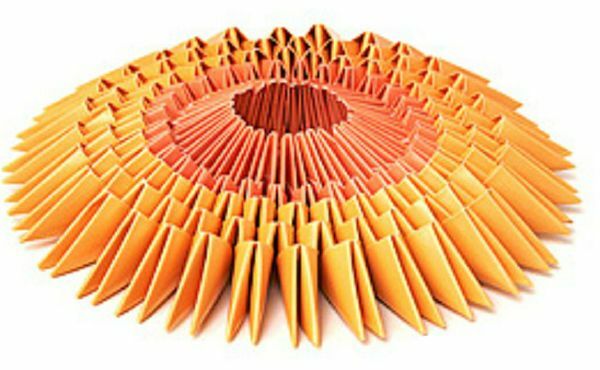
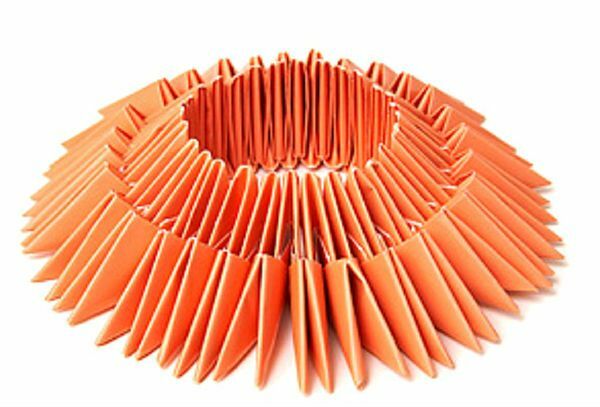
It is necessary to raise the entire resulting structure and gradually gently take it by the edges and, as it were, "turn it out".The resulting form should look like an "arena".
On the reverse side of the "arena" should look like it is shown in the picture.
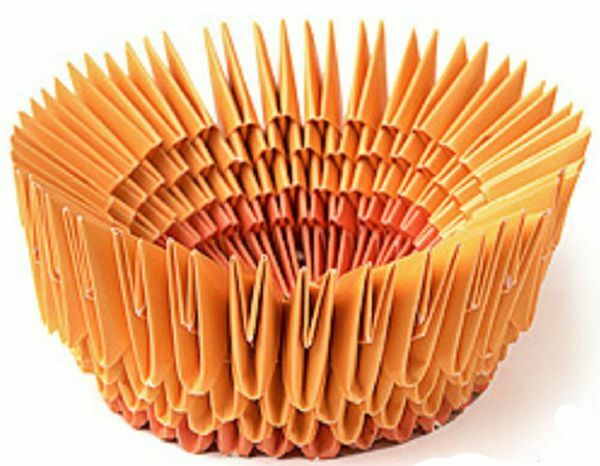
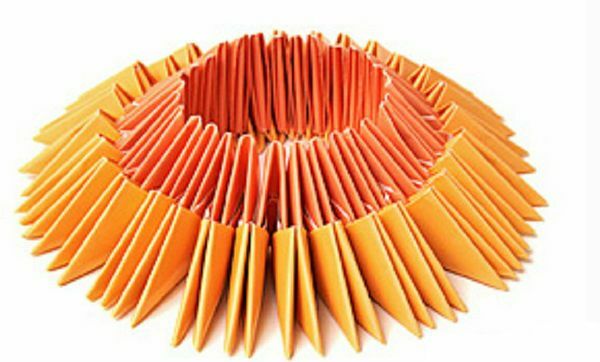
Next, we collect the sixth row of a structure of 30 yellow modules. Modules need to be worn on top of the order of the previous row.
The wings begin to form from the seventh row. We choose where the neck and the head of the bird will be placed, and symmetrically from it we begin to fold the wings along a row of 12 yellow modules. These 24 modules form gaps on both sides of the structure.
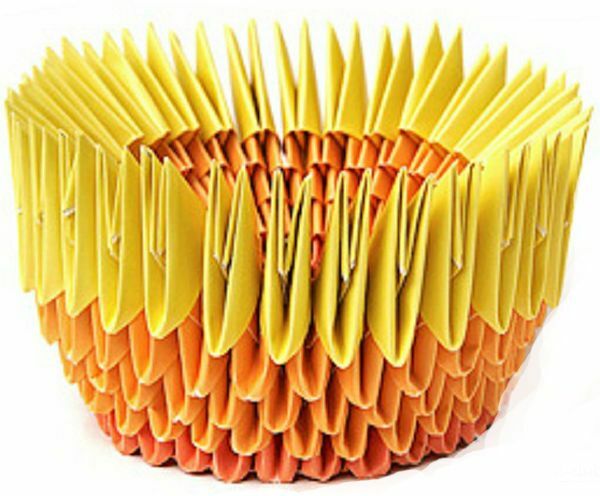
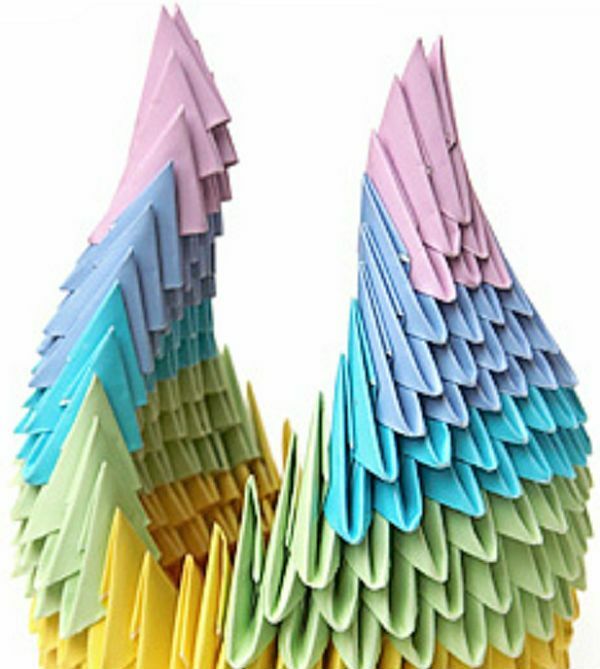
In the process of creating wings, we make three rows of green modules in each row reducing their number by two. In the 8th row - 22 modules, in the 9th row - 20 modules, in the 10th row - 18 modules.
The following rows are added from the blue modules.11 row - 16 modules and 12 row - 14 modules.
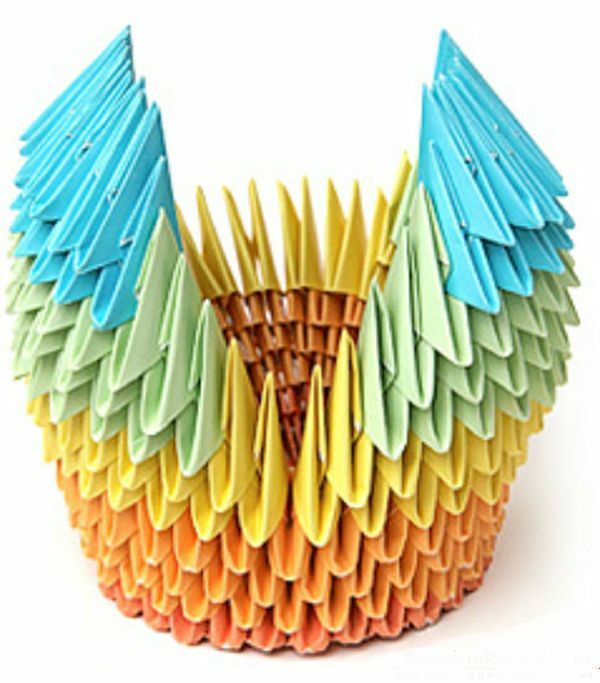
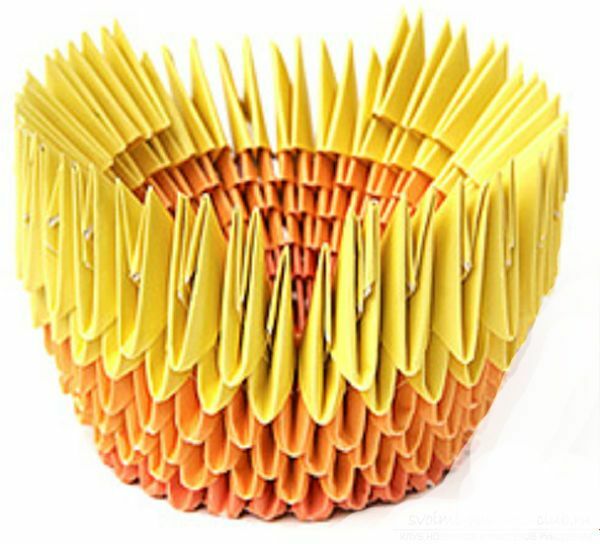
Then using the blue modules, we lay out three rows.13 row - 12 modules, 14 row - 10 modules, 15 row - 8 modules.

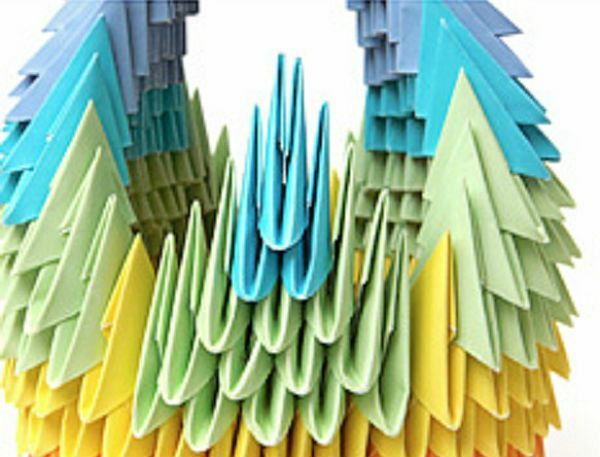
Finish the wings of the swan in purple modules in three rows.16 row - 6 modules, 17 row - 4 modules, 18 row - 2 modules. Wings should be given slightly turned and convex on the outside of the shape.
To collect the tail, you need 12 green and 3 blue modules. The tail consists of 5 rows and is created in the same way as the assembly of the wings, but in each row it is necessary to reduce the number of modules by only 1 element.
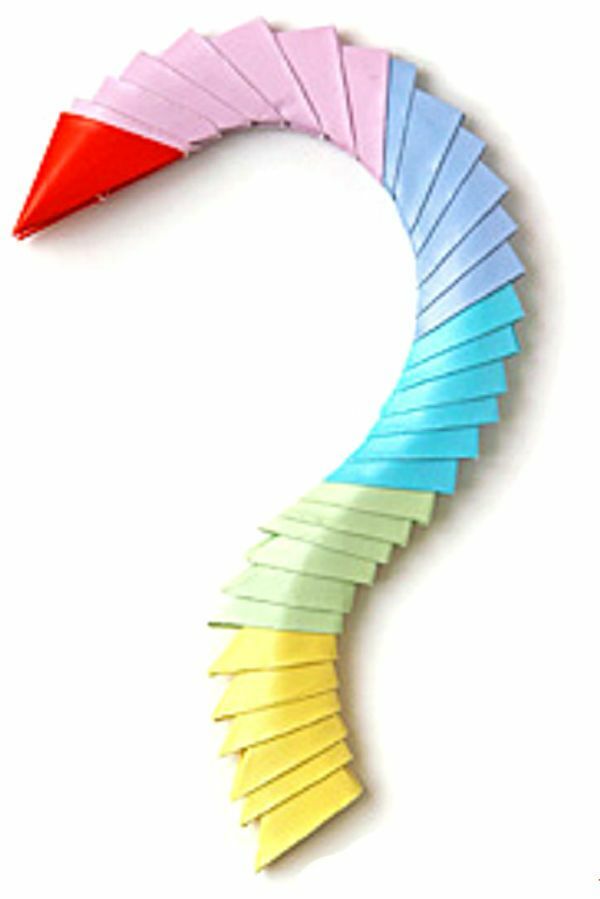
To assemble the neck, you need to assemble the modules by inserting both corners of the same module into the two pockets of the next one.
Insert the red module( beak) and 7 pink, giving the necessary bend of the neck.
Next, along the neck of the swan, you need to attach 6 modules of different colors, making the same as in the color scheme of the wings.
We fasten the neck around the whole structure, between the wings. Eyes swans can either be marked with a pencil or felt-tip pen, or glued cut out of paper or already finished, bought in a specialized store. You can also decorate a swan bow, a butterfly on your own preferences.
You can fix the workpiece on the pedestal with glue, or leave it without fastening.