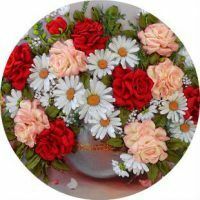
Embroidery with ribbons implies the creation of voluminous paintings, full of riot of colors and variety. Such embroidery does not require special skills, it is only necessary to know the minimum basics in sewing. For work you need to have a minimum of materials, free time and the desire to create masterpieces. The article gives examples of creating a variety of colors that you can compose into a composition.
- Clematis
- Chamomile
- Chandeliers
- Roses
- Lilac
Clematis
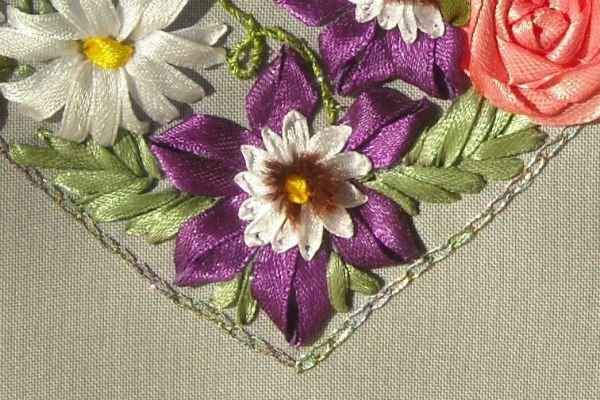
Required materials for embroidering clematis with ribbons:
- fabric, embroidery base;
- satin ribbons of different colors( purple, white, yellow, green);
- embroidery frame;
- needle for embroidery with ribbons with a long big eye;
- scissors;
- threads of a floss( brown, purple).
On the main fabric we make the marking of future petals with a purple thread so that the resulting flowerneat and symmetrical. To do this, you need to make 6 stitches about 6 millimeters each, as shown in the example.
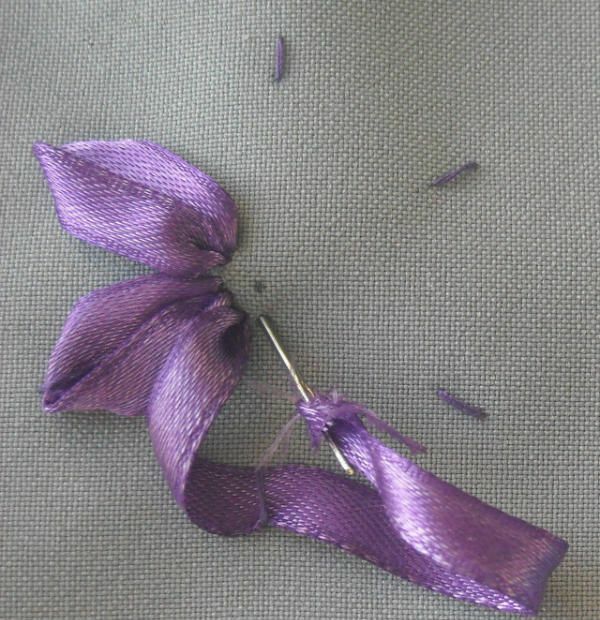
Embroider purple petals using stitch "loop".It is necessary to stretch the top of the petal through the stitch of the thread, so the tape is fixed.
On each finished petal, you need to make 2 small short stitches with a white ribbon( tape should be taken a little thinner than the main one).
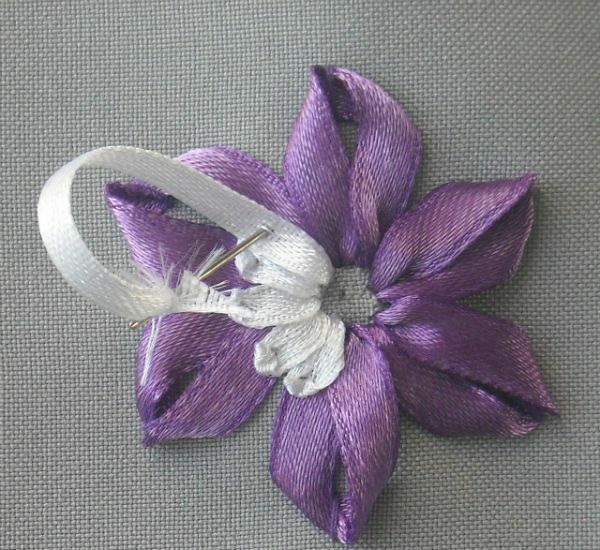
In the center of the flower make a yellow ribbon a knot so, as described in the previous descriptions. This is the middle of the clematis.
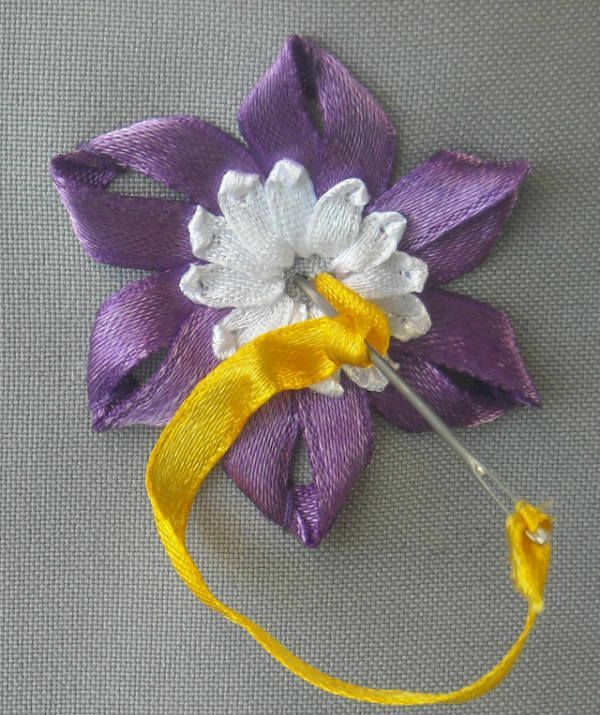
A brown thread floss folded several times around the center, you need to sew a few stitches, leaving the loops released. It will be stamens.
Brown loops need to be cut, thread spread and, if necessary, trim with scissors.
to table of contents ^Chamomile
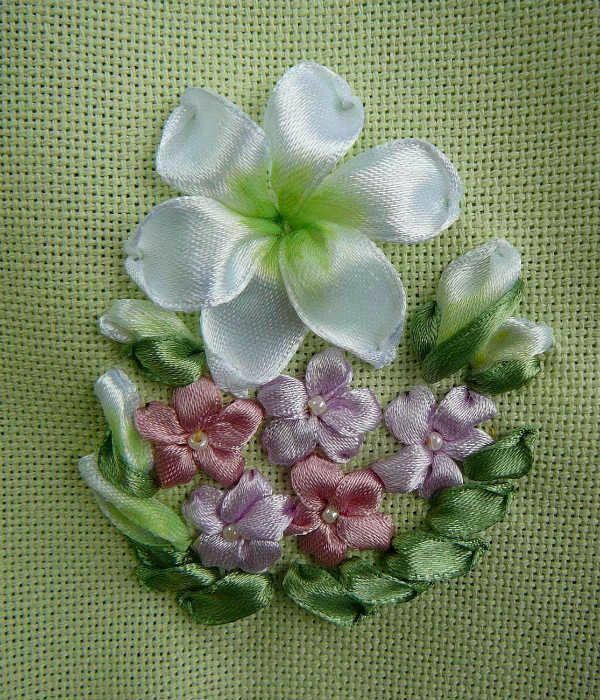
Required materials for embroidering chamomiles with ribbons:
- fabric, embroidery base;
- satin ribbons of the required color;
- embroidery frame;
- needle for embroidery with ribbons with a long big eye;
- scissors;
- decor elements( beads, rhinestones).
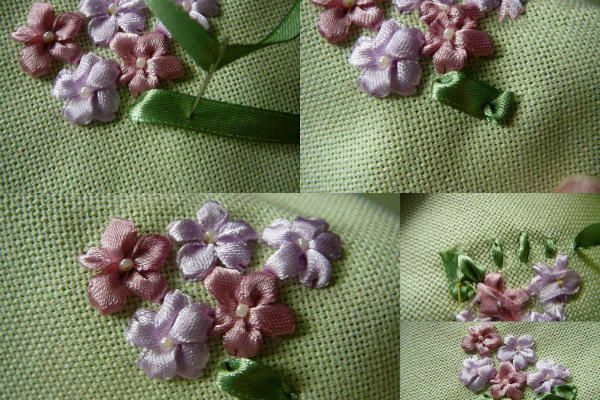
First, we draw on the fabric exemplary silhouettes of future chamomiles. In the example, the example provides options for small and large pyatilistnikov and six-leafed. You can choose the sizes of the future embroidered ribbons. So you can create a ribbon embroidered picture.
To create a flower we introduce a needle with a ribbon in the middle of the future chamomile. We fix the tape starting from the wrong side, taking it out to the front. Each time removing the tape on the front surface, we form a petal and fix it with a stitch. The thread is fixed firmly so that the flower is sewn securely.
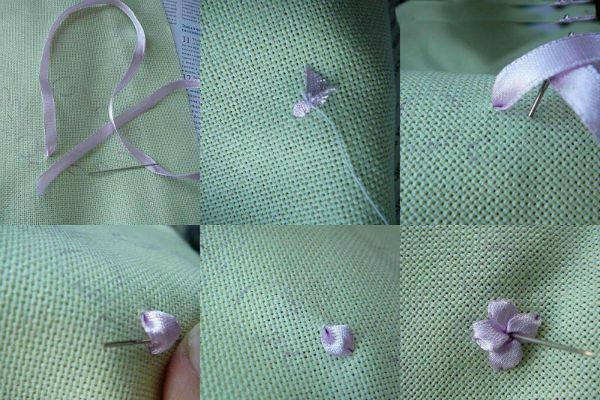
A ready-made flower can be decorated with a bead, strasses or a simple knot from a ribbon of a different color.
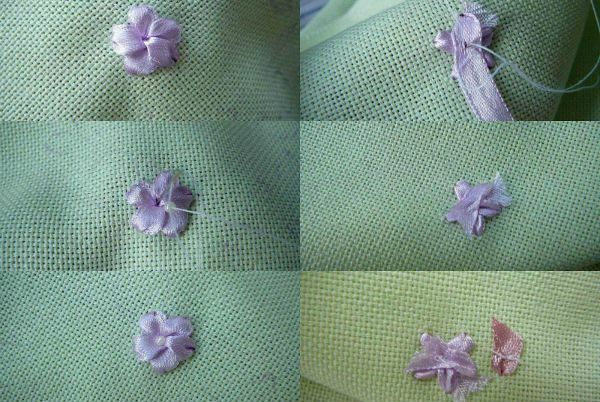
To form the leaves with flowers, it is worthwhile to take a needle with a green ribbon and perform ribbon stitches. We take out the ribbon on the front side, with a needle, we plan a future puncture and, in order to form the necessary texture of the leaves, we pull the tape inwards and stretch it from the wrong side.
Such small chamomiles can be many or few, depending on your desire and the expected result of brightness and saturation of the picture.
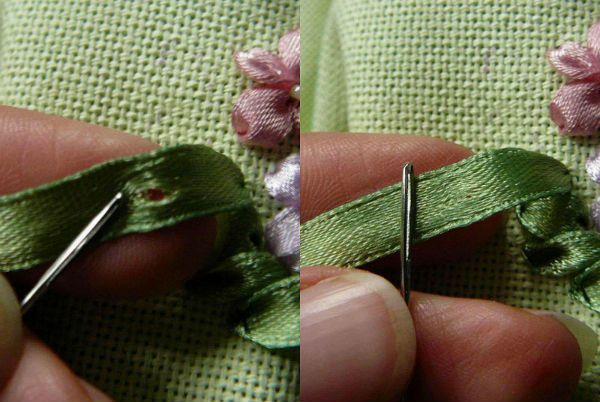
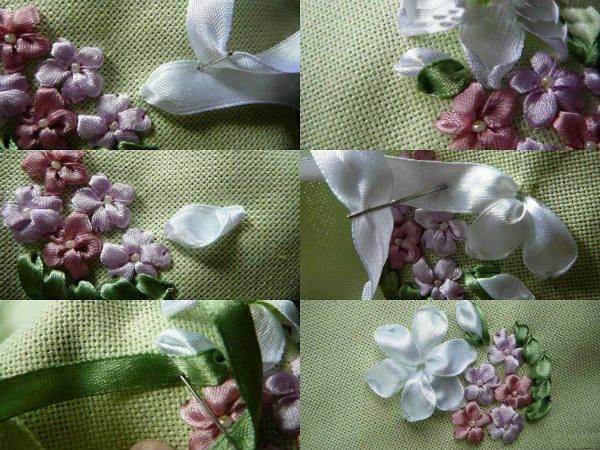
To make a big daisy it is worth taking a tape of a larger width, somewhere 12 millimeters.
Sewing the most chamomile occurs by puncturing the needle in the center of the flower, and the stitches need to fasten the petals. To create undisclosed buds, you need to use the seam "left ribbon stitch".
Butterflies
Materials needed for embroidery of buttercups with ribbons:
- fabric, the basis of embroidery;
- satin ribbons of the required color;
- embroidery frame;
- needle for embroidery with ribbons with a long big eye;
- scissors;
- thread floss.
It's best to take thin ribbons from 2 to 4 millimeters wide for embroidery of buttercups.
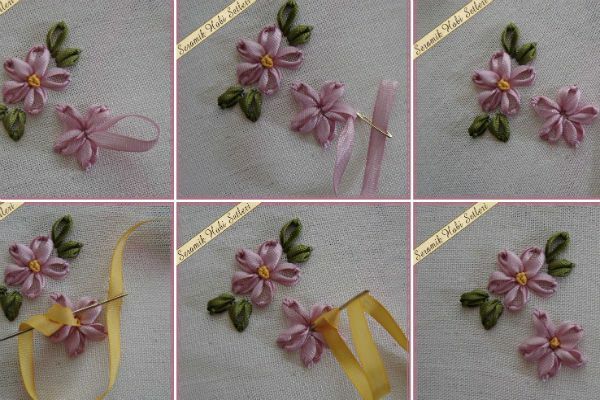
Insert the ribbon into the needle and fix it on the fabric base from the wrong side, removing the needle with the tape on the front side of the fabric in the center of the future flower. Return the needle with the tape on the wrong side leaving a loop that forms the first petal.
From the center, retreat the distance to the length of the petal, and at the same point withdraw the needle from the wrong side, pass the needle through the loop of the petal through the same hole again on the wrong side of the main fabric and tighten the tape.
In the same way, perform all the necessary petals.
Using a needle with a yellow ribbon or a yellow mulina, you need to perform the middle of the buttercup. Put the needle on the front side in the center of the flower, wrap the thread 2 times around the needle and return the thread again through the center to the underside. We tighten the tape and thereby form a bundle, the middle of the buttercup.
The leaves are made with green ribbon in the same way as the petals.
to the table of contents ^Roses
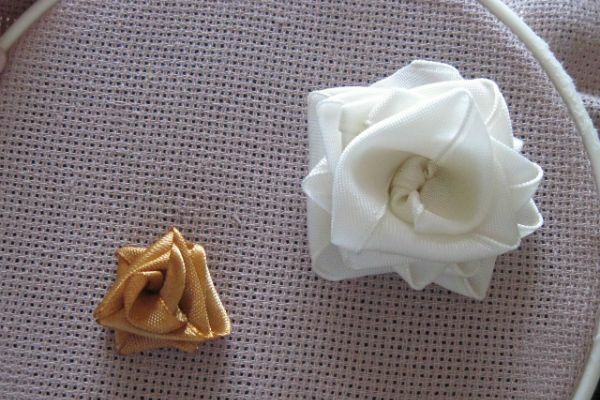
First you need to prepare the materials:
- tapes( to make a small rose, use not too wide tape);
- needle with a fairly wide eyelet;
- fabric on which you will embroider.
Creating this element underlies many terry colors.
Take the prepared needle and a small piece of tape. Stretch the entire segment through the eye of the needle, otherwise it will be wrapped during work.
Now you need to pierce the opposite end of the segment with a needle( do this as shown in the picture).To do this, move the needle along the length of the line to a distance sufficient to allow you to reach the end of the cut with a needle.
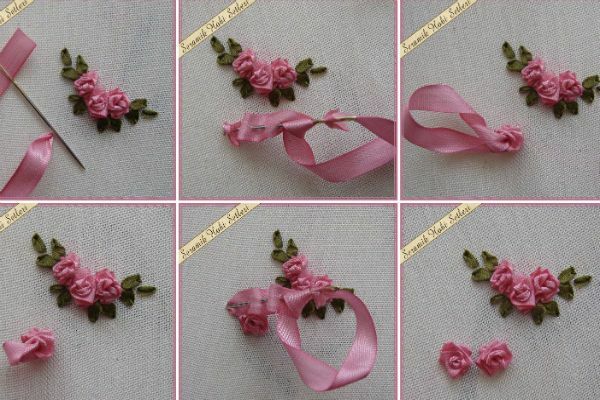
As a result, you will get a small loop that needs to be tightened carefully so that you have as much of the embroidery as possible. Thus, your needle will be securely fixed and will not move along the length.
Pull the needle with a piece through the fabric. The end of the segment can be fixed with a few stitches or knotted.
Now on the very cut, having retreated about 8-10 centimeters from the fabric, you need to tie a knot. It should not be too tight, as this is part of the flower.
Now it is necessary to make usual stitches on a piece between a knot and a fabric, as though "stringing" a tape on a needle. Their length can be different, then the rose will have a more natural look. It is best to make short stitches next to the nodule and long stitches are closer to the fabric.
When you are done making stitches, simply pull the needle through the hole into which you pulled it( or next to it).
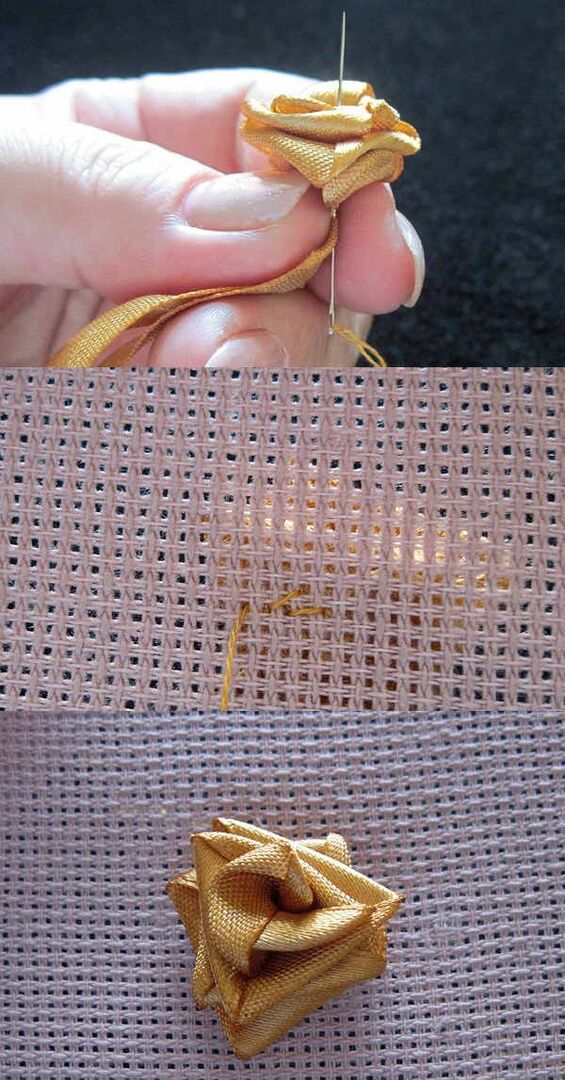
Now gently begin to pull the needle. The knot made by you will form the center of the flower, and petals will form from the stitches.
Petals are baited around the center.
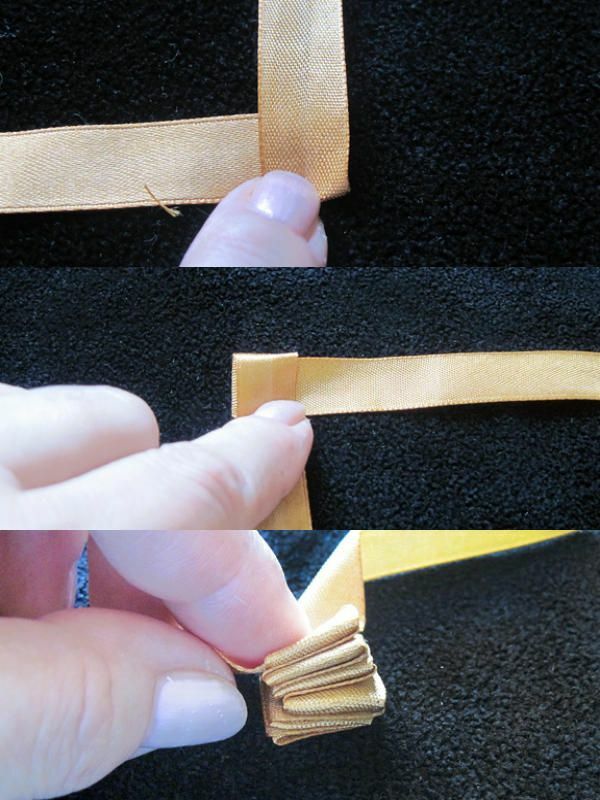
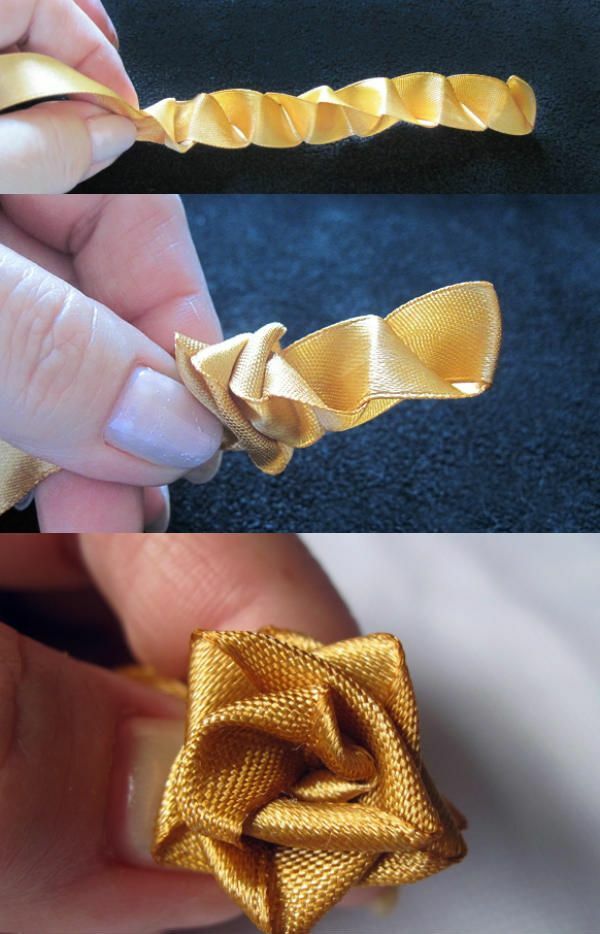
And here's how you can make a rose in a similar way:
Lilac
Necessary materials for embroidering lilac with ribbons:
- fabric, embroidery base;
- satin ribbons of the required color;
- embroidery frame;
- needle for embroidery with ribbons with a long big eye;
- scissors;
- thread floss.
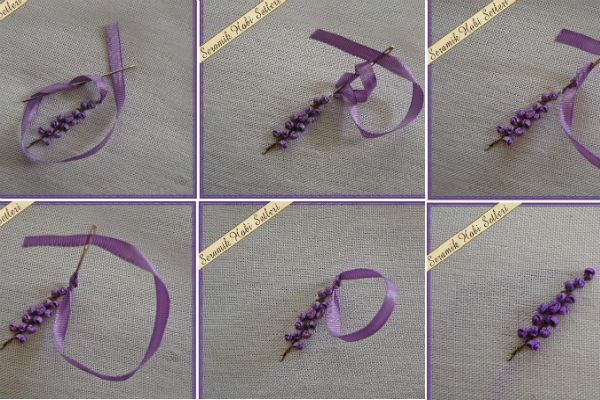
We take the main fabric and thread the mulina with a simple suture smooth the basis of the future branch of lilac.
In the needle we insert a string of purple( lilac) color and fix it by removing it from the wrong side of the fabric at the base of the embroidered stem.
Turning the needle with the tape as shown in the example, return the thread through the hole, as well, injecting the needle onto the front side. In this way, we get small knots, which are the colors of the lilac. Such nodules need to be made along the entire length of the embroidered main branch.
The leaves of the lilac are large enough, for their embroidery it is worth taking a green ribbon thicker.
