
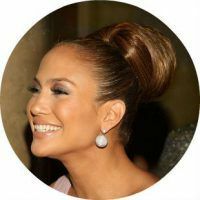
The most feminine and elegant image corresponds to the hairdo "Babette", which was popular in the 60s of the last century. Today, it is again relevant and it has several options for execution."Babette" is the best choice for going to the theater or for an official reception, it is perfectly combined with cocktail dresses and restrained decorations.
- Classic
- Classic
- With roller
- With bow of hair
- Ponytailed
- With loose hair
- With tail
- Wedding
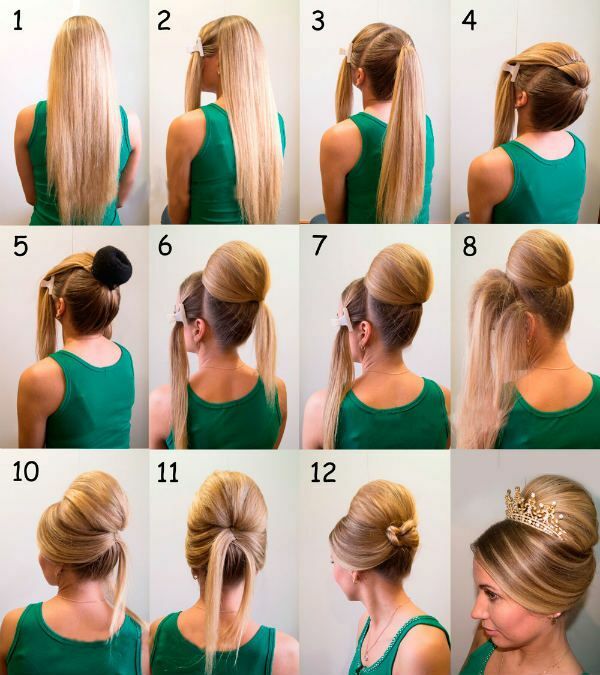
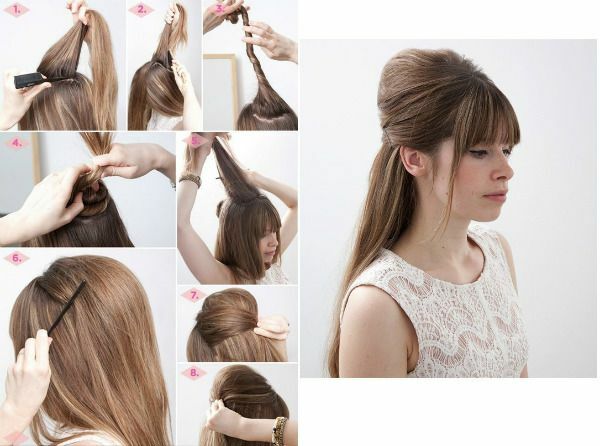
Classical
"Babette" is a volumetric piling for long hair that is attached to the form of a roller. It fits well with the bangs. As decorations for her, you can use ribbons, hoops, barrettes, decorative hairpins.
To perform the classical "Babette" follows:
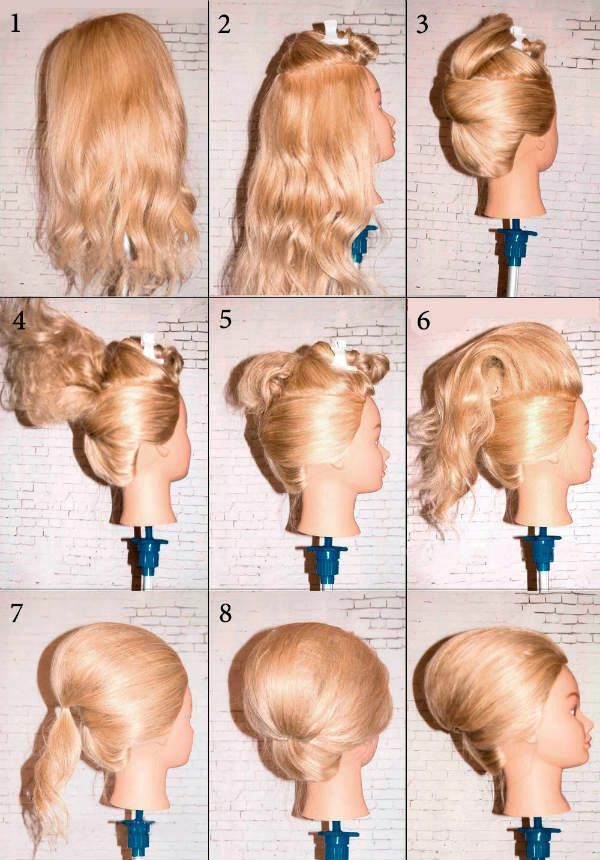
- Wash and dry hair.
- By horizontal parting, divide the head of hair into two equal zones.
- The top of the hair while clamping.
- Bottom gather together and fold into a regular seashell.
- The projecting tips should be combed and formed from them.
- At the roots of the upper half of the hair perform a haircut.
- Lay them back and spread evenly so that they fully cover the roller.
- The ends are bandaged with an elastic band and hidden under the styling.
- "Babette" should take the form of an even semicircle, for this it should be well spread out, smooth with a soft comb and fixed with lacquer.
Naches is an important stage in the creation of this hairstyle. It is carried out by a narrow comb with natural bristles. Start more conveniently with the lower strands and move up.
Casual
For long-haired girls, the maximum number of variants of "Babetta" is available, but if desired, this hairstyle can be performed on ringlets up to the shoulders. Moreover, the owner of short hair will always come to the rescue of hairpieces and false strands.
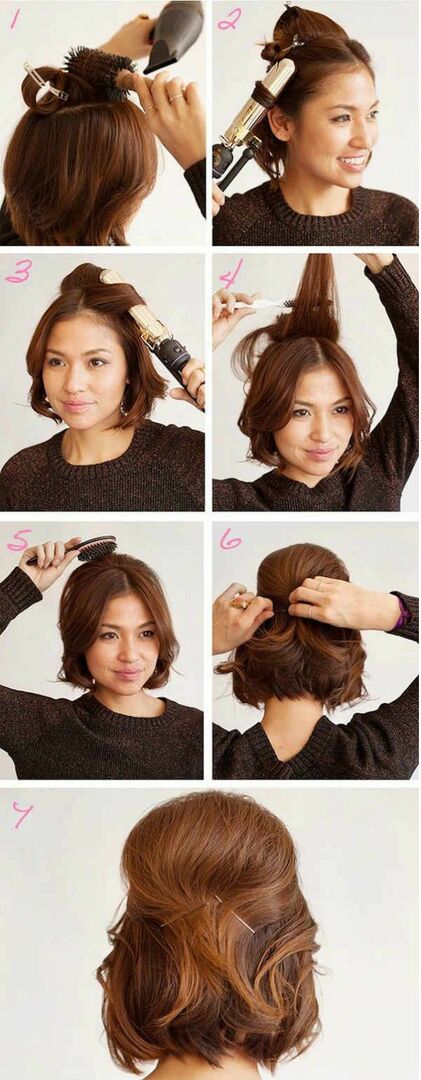
- Wash and dry the head, giving volume to the roots, using a hair dryer and a round comb.
- The ends of the strands and curls in the face of a screw on the curling iron.
- Select a zone of hair on the top of the head and comb it well.
- On the top of the head, separate the hair row and cover it with hair.
- Stretch the spread and smooth with a soft comb.
- Strands gather on the back of the head and fixed with invisible.
You can diversify this hairstyle by forming bows, bundles and bundles of hair on the back of your head.
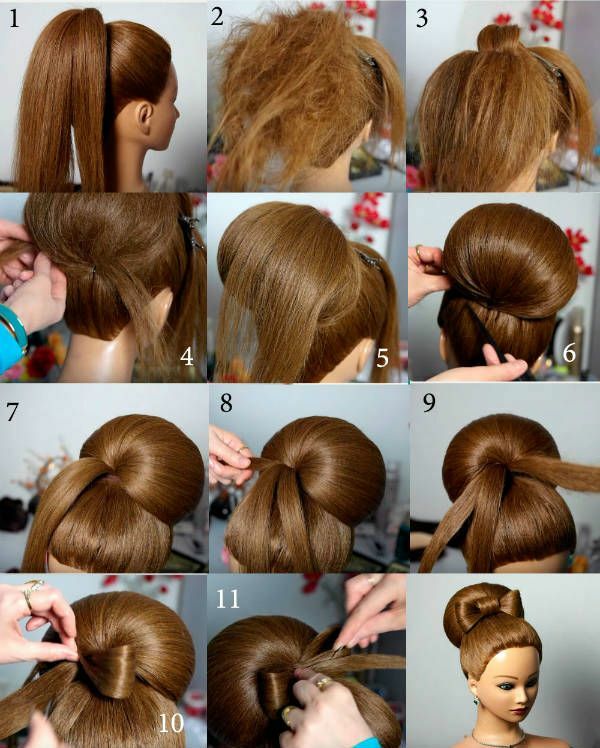
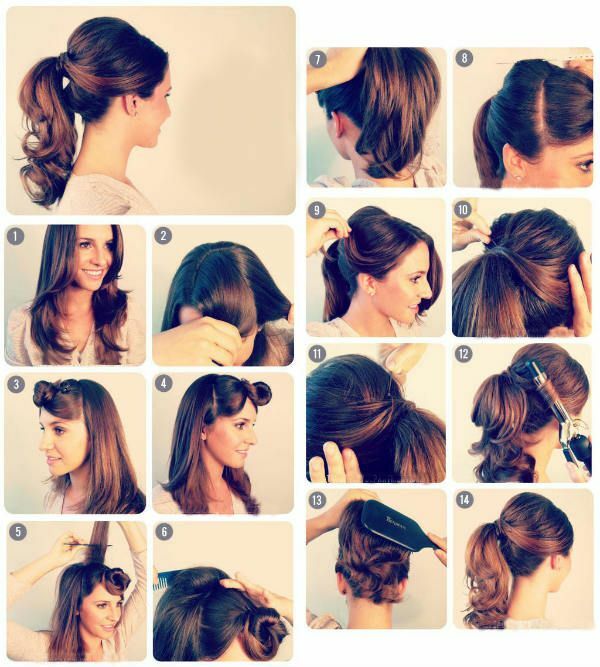
With roller
Ideal for evening or wedding hairstyles. And it can be performed both on the vertex, and on the back of the head. And each version has its own charm.
- Clean and dry hair divided horizontally through one ear to the other.
- Lower zone to assemble into a tight tail on the crown.
- Throw it open, as shown in the photo and lock it with invisible ones.
- Fix a foam roller to the base of the tail.
- Curls return back, completely covering them with a roller.
- To fix the hair under the roller, tie a thin rubber band.
- Fit the ends for laying.
- The top zone of hair is combed at the roots.
- Place the strands around the head on both sides and secure with the invisibility on the back of the head.
- The ends of the hair are rolled into bundles and fixed in a whimsical pattern.
- On the basis of "Babetta" put on a diadem.
With bow of hair
- Make a high tail on the crown.
- Divide it into three parts. Lower the left on the spot, resting on the face.
- The lower largest part of the hair is well combed and formed from it a roller.
- Fix it in place with studs.
- The middle part of hair is covering.
- Stacking is ideal to straighten, smooth a soft comb and fix on the nape of the hairpins.
- Tips to hide inside the "Babetta".
- The remaining smallest part is divided into three strands and put in a bow as shown in the photo.
- Hairstyle to varnish.
If desired, instead of a bow, you can form a rose and other elegant decoration.
to the table of contents ^Pigtails
Effectively look hairstyles, in which for the separation of the hairpiece from the front of the hair are not ribbons or hoops, but natural braids.
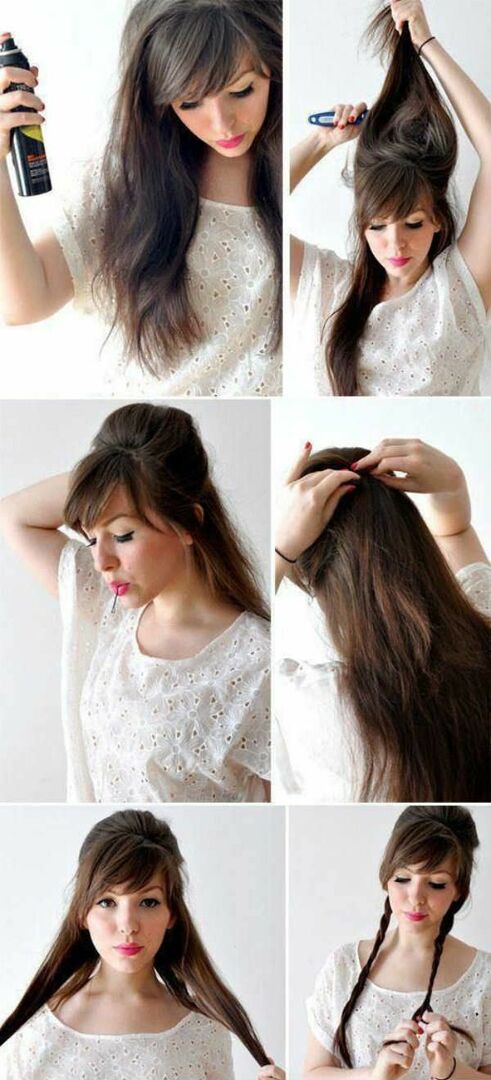
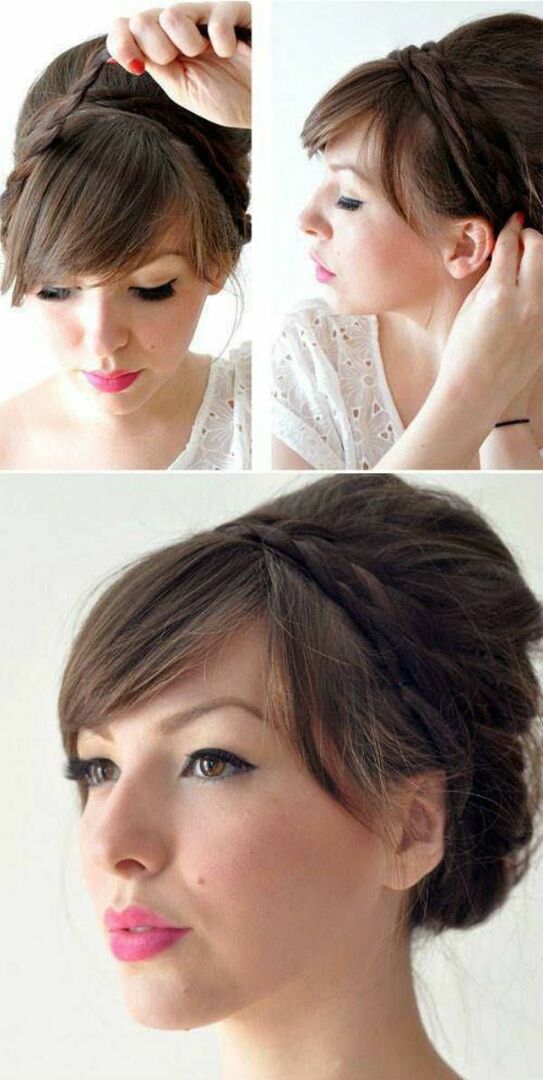
- Apply a styling agent to clean hair.
- Divide the shag in two halves.
- Top high quality and scratch with invisibility on the back of the head.
- Lower curls split in half and fold into strands or weave into braids.
- Each woven element is wrapped around the "Babetta" and fastened with studs.
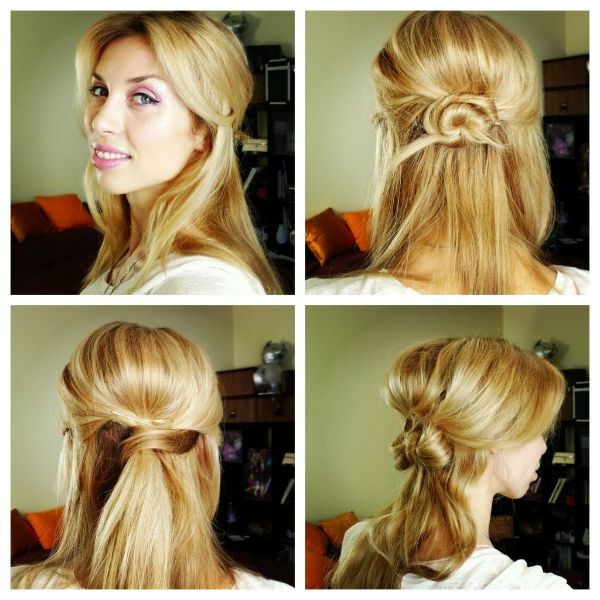
With loose hair
Babette, combined with loose hair or individual falling strings, gives the image a playfulness, with such a hairdo you can go to a party and other informal events.
- On the thread to highlight the hair zone.
- To scratch them.
- Collapse the bundle and form a bun. Secure it with studs.
- Curls on the vertex are combed at the roots and laid over the bast.
- It is good to comb them, gather them together on the back of the head and fix them with invisible ones.
- Loose hair leave flat or wind on a curling iron.
With the tail of the
- , divide the Chevelure into a horizontal parting into two zones.
- The hair of the face is still secured with a clamp.
- At the back of the head to perform a basic haircut. Lay it back and smooth the comb.
- Collect the lower curls in the tail.
- Strands from the face to take back and wrap around the tail. Secure the ends with invisibility.
- Tail the entire length of the screw on a curling iron and comb. It should turn out to be very voluminous.
Wedding
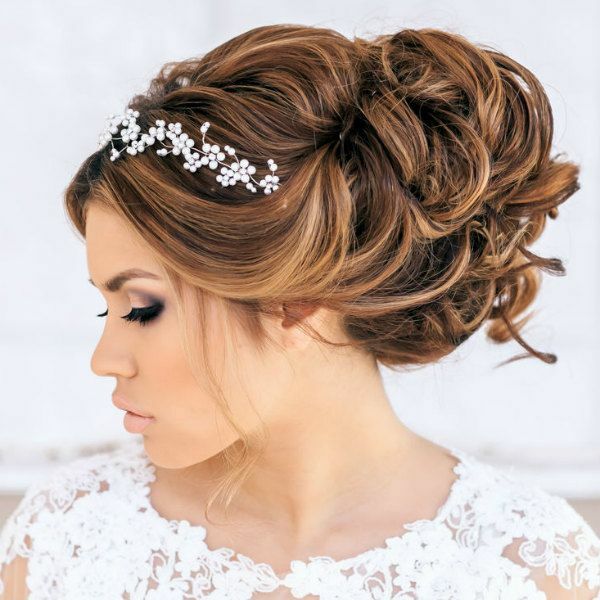
Similar styling is performed on the basis of the classical "Babetta".
- Wash rinses, dry and wind on a curling iron.
- Divide the hair into two halves.
- Bottom gather in the shell and fix with studs.
- The upper divide into strands.
- Each strand is twisted by hand, laid on the shell and fixed with pins in several places.
- All locks should be placed naturally and so that under them there is no noticeable base.
It is convenient to fasten the veil to this style. Very gently and romanticly looks wedding "Babette", decorated with fresh flowers.