
In this article we will talk about the gradient manicure. You will learn about its types, as well as get acquainted with the step-by-step instruction for recreating such a manicure at home.
Contents
- Gradient manicure at home step by step
- How to make a gradient on nails varnish?
- How to make a gradient on the nail gel with lacquer?
- Gradient gel with lacquer brush
- Gradient gel nail polish sponge
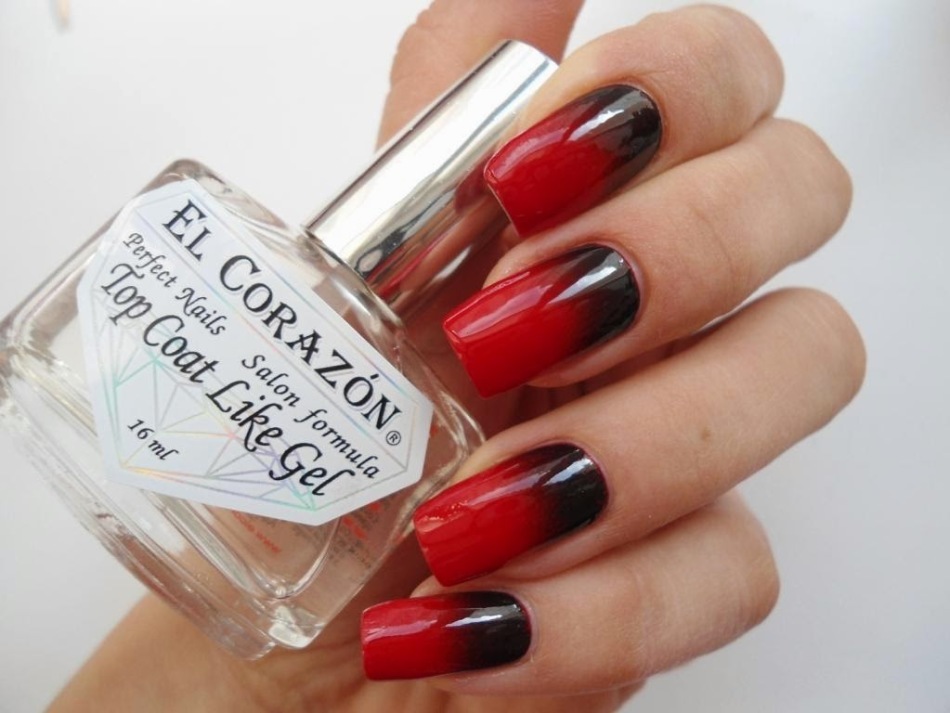
- Gradient manicure shellac
- Nail design gradient gel varnish
- Varnish gradient
- Video: Gradient manicure ombre
- Video: Festive manicure gradient
Did you know that at home you can do not only manicure, consisting of one tone, but also to recreate beautiful smooth transitions of hues? The so-called gradient manicure or ombre appeared relatively recently, but it gained frenzied popularity. A special charm is given to him by the fact that even children can learn the technique of ombre, as it turned out. And the result is simply amazing - see for yourself.
Gradient manicure at home step by step
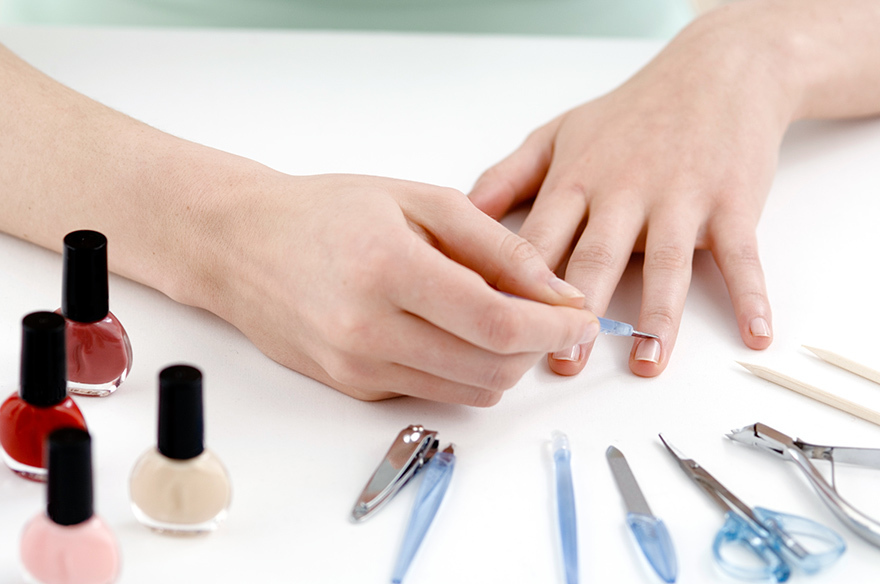
- First of all, you should stock up in advance with all the necessary materials and tools. You will need everything, than it is possible to clean or remove a cuticle - tweezers, an orange stick, scissors. Also prepare a base for manicure, varnishes, finish coat, sponge or cosmetic sponge, nail polish remover, pencil-proofreader or cotton buds, piece of polyethylene, foil or cardboard, a little water in the
 container Properly matched material is already half the success of the
 IMPORTANT:Be sure to get a varnish of any light pastel shade or saturated white - against the background of this coverage gradient manicure will turn out to be clear and bright.
- Now you can start the procedure for preparing nails. Carefully give them shape, adjust the length to your liking. The gradient design on long nails looks more effective, however it is possible to transform even short ones, the more visually this type of staining extends the nails. In any case, they should be given a neat form. Make sure that there are no burrs, cut the cuticle
 treatment
 - It's time to degrease your nails and use the base coat. Do not neglect this stage - this will allow to last longer for the varnish and, most importantly, the nails will be protected from the appearance of a yellowish shade
 Base coat
 - Now put on the entire length of the nail plate the plain varnish we mentioned above - some pastel or whitecolors. Be based on the fact that this shade should be included in the conceived palette. Do not rush - give such a coating as it should dry
 Plain Coating
 - At this stage, you can already use a sponge or sponge. Lower it into the water and squeeze it to such a state that moisture can hardly be felt, otherwise the sponge will only absorb the varnish into itself
 sponge
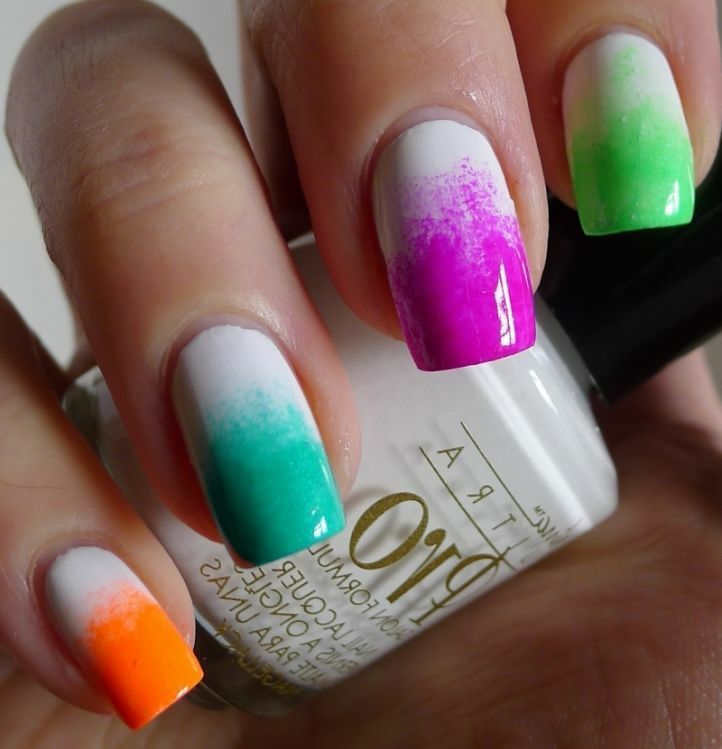
 - Now make each line with a varnish on the sponge. In this case, the lines must be adjacent to each other, having a neat common boundary. However, there may be more lines, for example, three. It all depends on how many tones you plan to get as a result of
IMPORTANT: Do all the actions as quickly as possible, because the lacquer dries out quickly enough by itself, in addition, part of it will be absorbed into the sponge. Therefore, you can apply several layers on each line
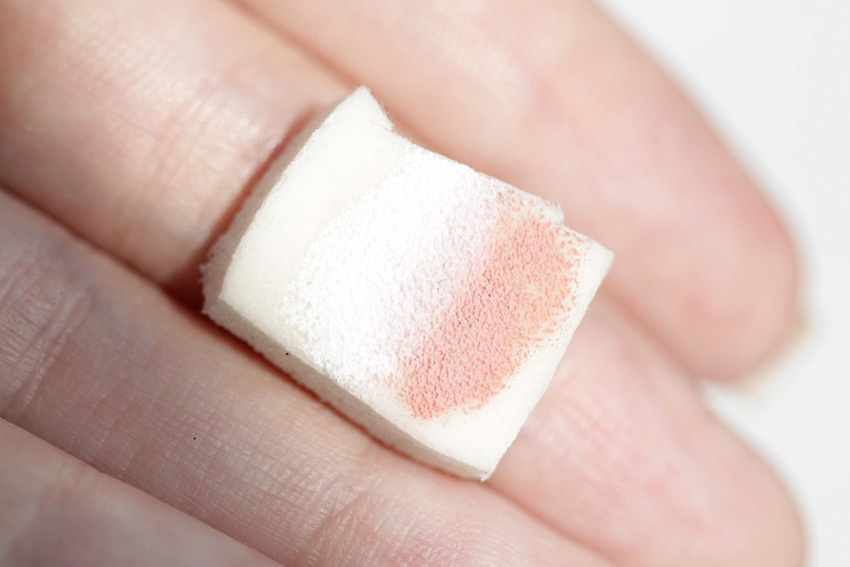 drawing lines on the sponge
 - It's time to print the nails in turn. And for this you can choose different ways: either attach the sponge to the base of the nail, stretching it to the tip, or make a slip on the entire surface. Keep in mind that frequent blotches will give the brightness of the manicure
- . Normally, after processing one nail, you need to apply the lacquer once more to the sponge. However, if you do everything quickly, you can print a few nails without re-painting the sponge. It is recommended before applying the lacquer on the nails, still printing it on a piece of cardboard in order to make sure that everything suits the
IMPORTANT: If you want to visually make the nails longer, make the transition from light to dark shades, while the darkest should be located on the tip.
 So the nails look after dipping them with a sponge or sponge
 - . As you have noticed, there are prints from such napping movements around the nail. Do without them still will not work, so do not worry, but rather carefully dispose of them. To do this, you will also need a special corrective cosmetic pencil or cotton swab, previously moistened in the liquid to remove the varnish coating
- However, you can avoid undesirable dirt - for this, before the start of the manicure, simply glue the skin around the nail with scotch tape or treat it with some fat cream. All this will make it possible to create a protective film, which will have the whole "blow".However, there is a possibility of gluing or covering the area on the nail itself, so do everything neatly
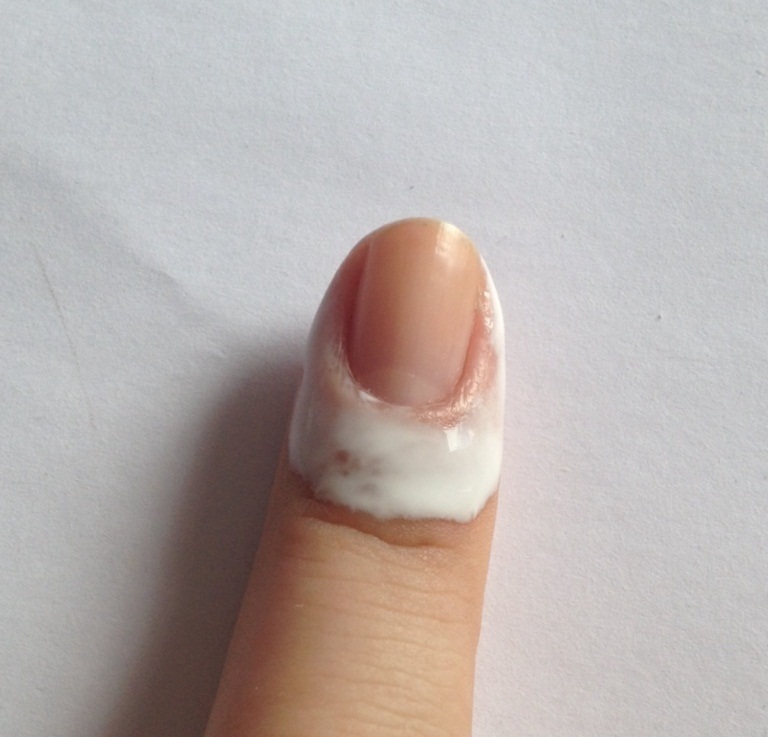 That's how you need to treat the skin around the nail with
 - cream. The final step is applying the finishing varnish. This action will result in the manicure glittering, evenness, and also the smoothing of the shades will be smoothed - they will become smoother and softer.
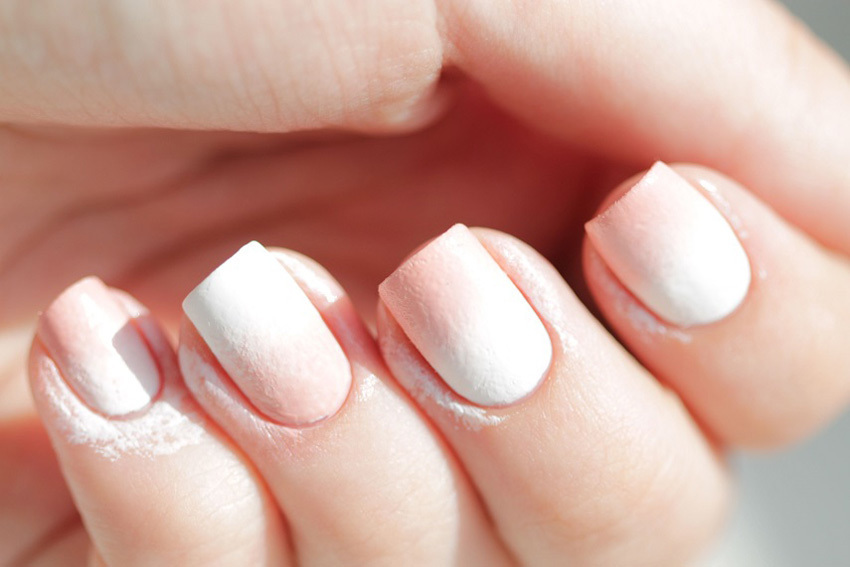
 This is how the manicure looks at the final stage of
 . How to make a gradient on nails with varnish?
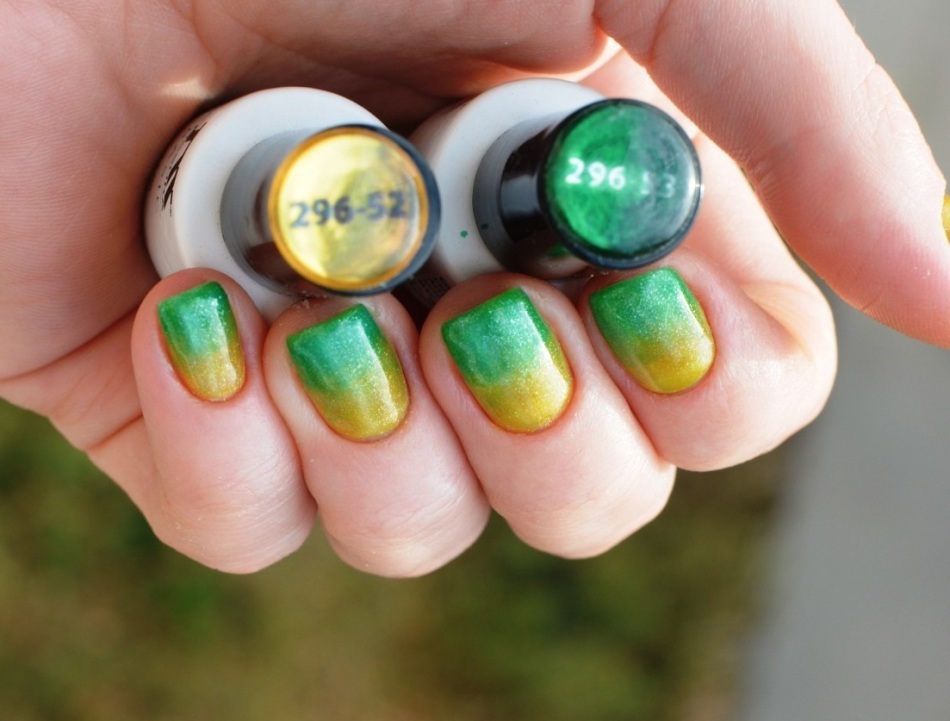
Correctly choose the shades - this is not such a simple task, as it may seem initially. They can be as one color scale, and contrast. But if you still want a close palette and experience difficulties in selection, there is an opportunity to purchase a special set of varnishes, containing up to 7 shades. Whatever it was, the varnish of pastel coloring or rich white should be - they perfectly fit as a basis.
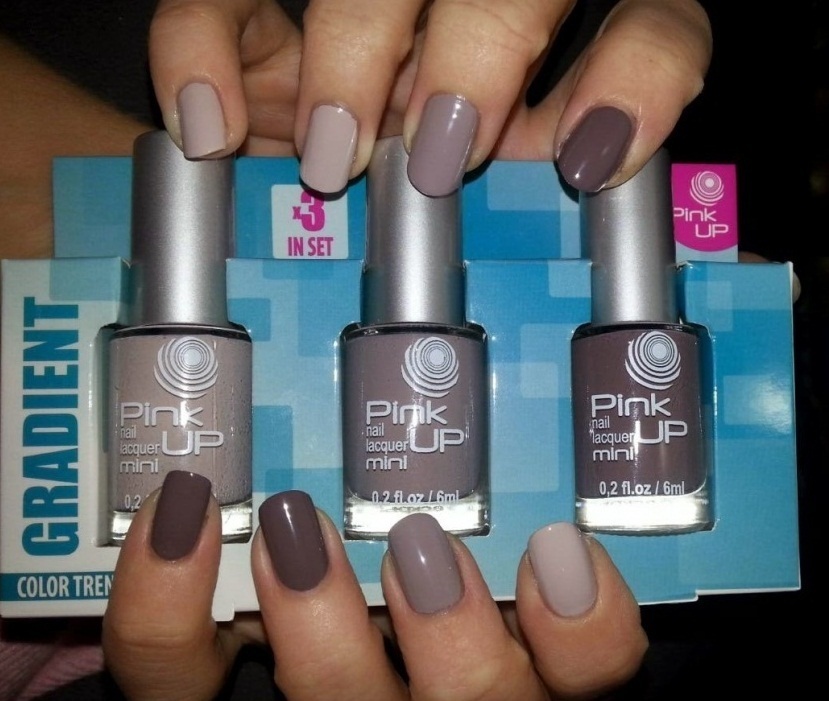 Ready-made varnish set for gradient
 IMPORTANT: Make sure that the varnishes have the same texture.
- Lacquers do not necessarily need to be applied to a sponge. Alternatively, you can smear them on the lid, a plastic film. In this case, the smears should adhere to each other, and the joints can be smeared with a toothpick or some kind of sponge. After that, you can transfer everything to the nail plate
- There is one secret to applying the lacquer: so if the coloring involves the transition of colors from the light at the base to the dark at the tip, you need to make this dark base color. If on the contrary - from dark to light - then the entire plate is initially applied light. By the way, in this case it is possible to apply a non-transparent shade on the sponge and just print it on the tip of the nail.
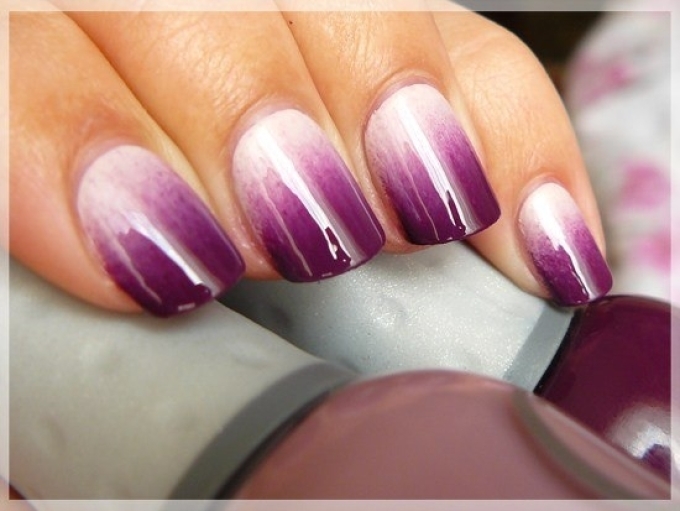 . Transition from light to dark
 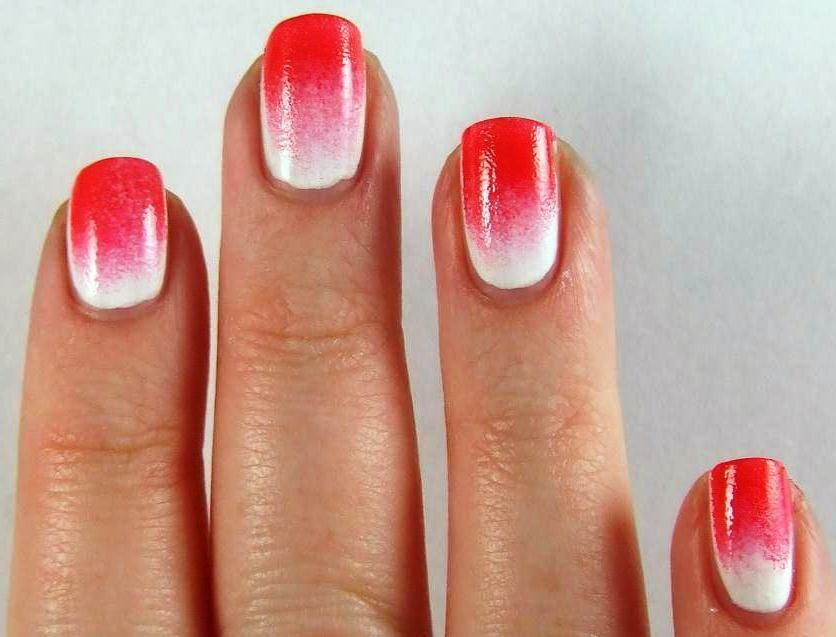 . Another version of the transition from light to dark.
 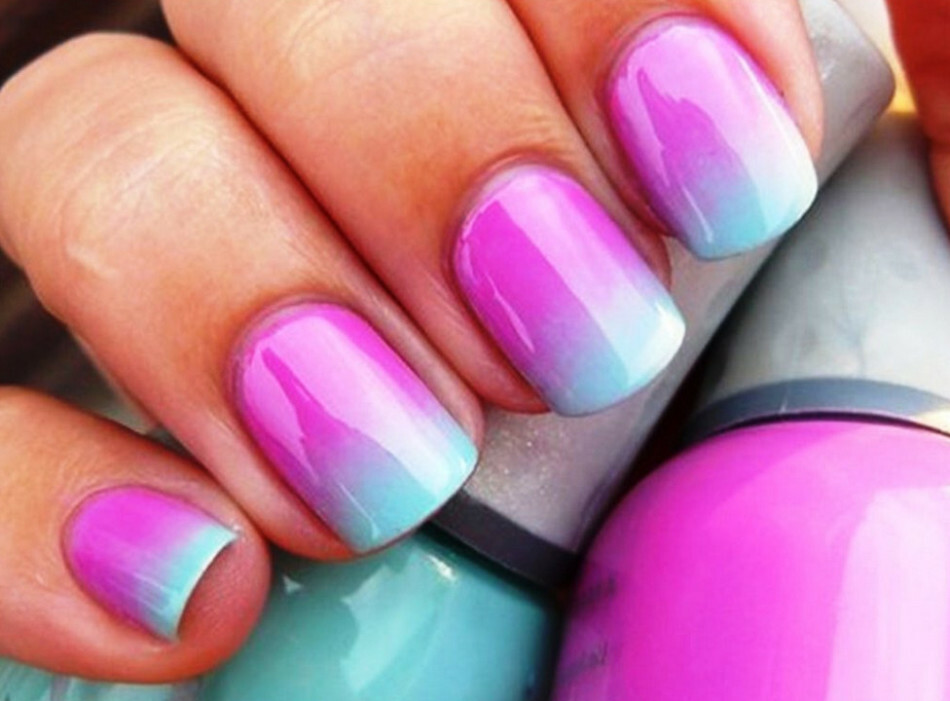 . Transition from dark to light
 - . Evenly distribute the varnish on the plate can be achieved thanks to the finish coating. By the way, thanks to him the borders of the shades become more blurred, and the surface of the nail
- is evenly leveled. Especially the latter is actual in case the varnish was applied with the help of a sponge and the pores from it are visible on the surface. Color bars can be placed both horizontally and vertically - it all depends on the idea.
- There is a little trick: if you want the shades to turn out as much as possible, try to mix different colors of varnish on any surface. Especially good for this fit white and black - they allow you to successfully recreate the dark and light shades
 Horizontal stripes
 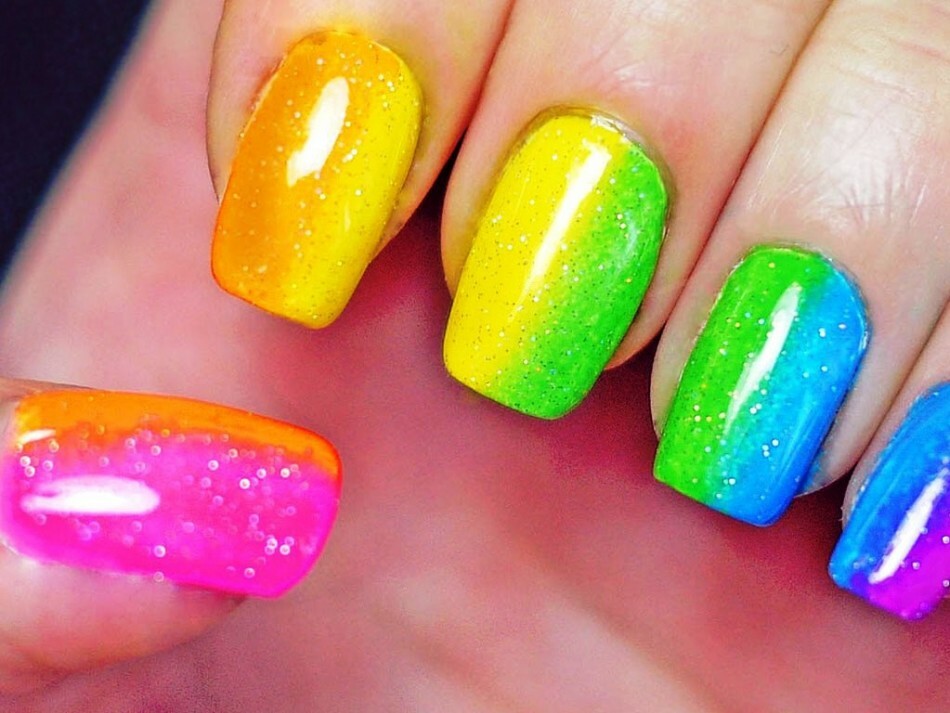 vertical strips
 IMPORTANT: In order to create the closest in the palette shades, you should work by adding each time you mix the same number of drops of varnish. For example, try to increase the number of drops over and over again - you will achieve a smooth color change. If you like this method, apply a second layer immediately after the first one dries, and then start again to experiment with mixing.
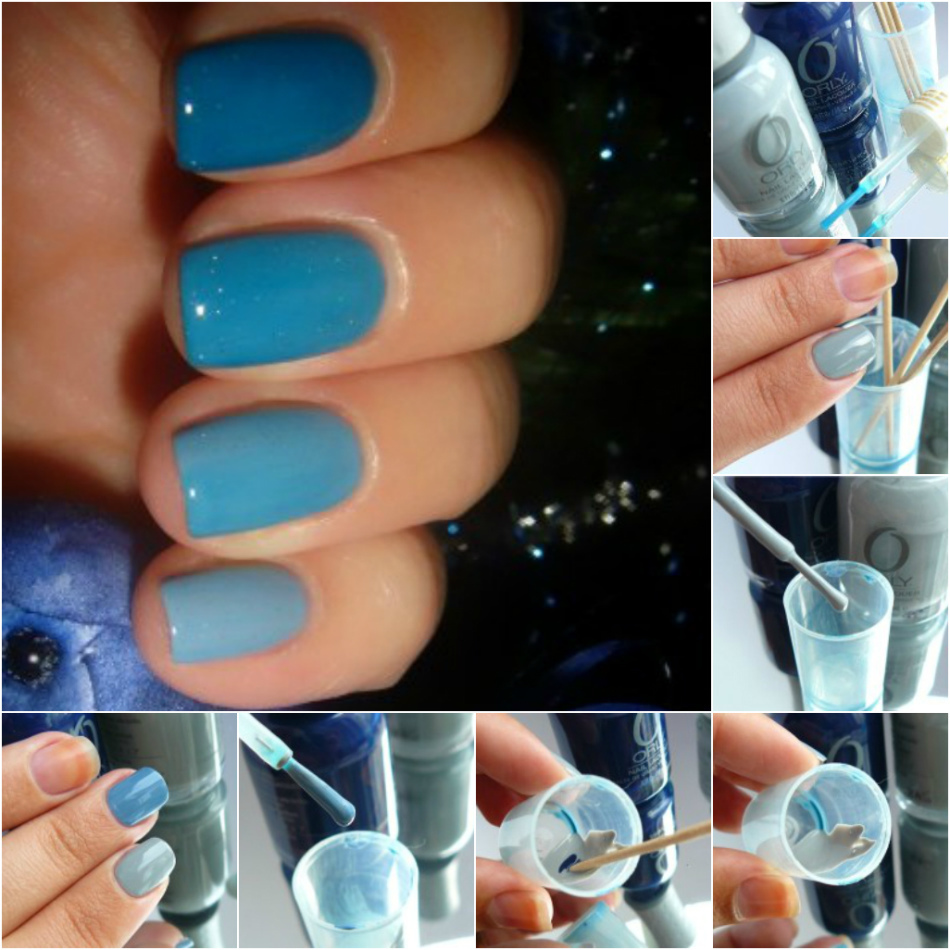 Self-mixing colors to achieve the desired shade
 How to make a gradient on the nails gel with lacquer?
The sequence of the nail coating with gel-varnish is almost the same as in the case of conventional varnish, but it is necessary to stock up for drying with an ultraviolet lamp whose power is 36 watts. In addition, in order to remove the sticky layer, you need wipes that do not contain nap. Once the necessary tools are purchased, you can start the manicure:
- First, carefully work the surface of the nail. You can do this with a special nail file whose abrasiveness is 80-100 grit
- Now it is necessary to degrease the nails with the
- bond. After that it is necessary to use the ultraviolet lamp to dry
- . The nails are covered with a gel base and dried again with the lamp
- . Using the degreasing agent, it is necessary to remove the sticky layer
- To improve the adhesion, it is recommended to nail the nail
- . On one half of the nail plate it is necessary to apply one color
- Now on the second half we apply another color
- Gently paint the border with the first color so that it turns out smooth. It is recommended to do this with a small brush
- Again use the lamp
- Remove the adhesive layer with a degreaser. It should be done with neat slip movements using a cotton swab
- The final stage is the application of the top cover
 . Here is a manicure obtained with the gel-varnish
 IMPORTANT: Drying with an ultraviolet lamp should not exceed two minutes.
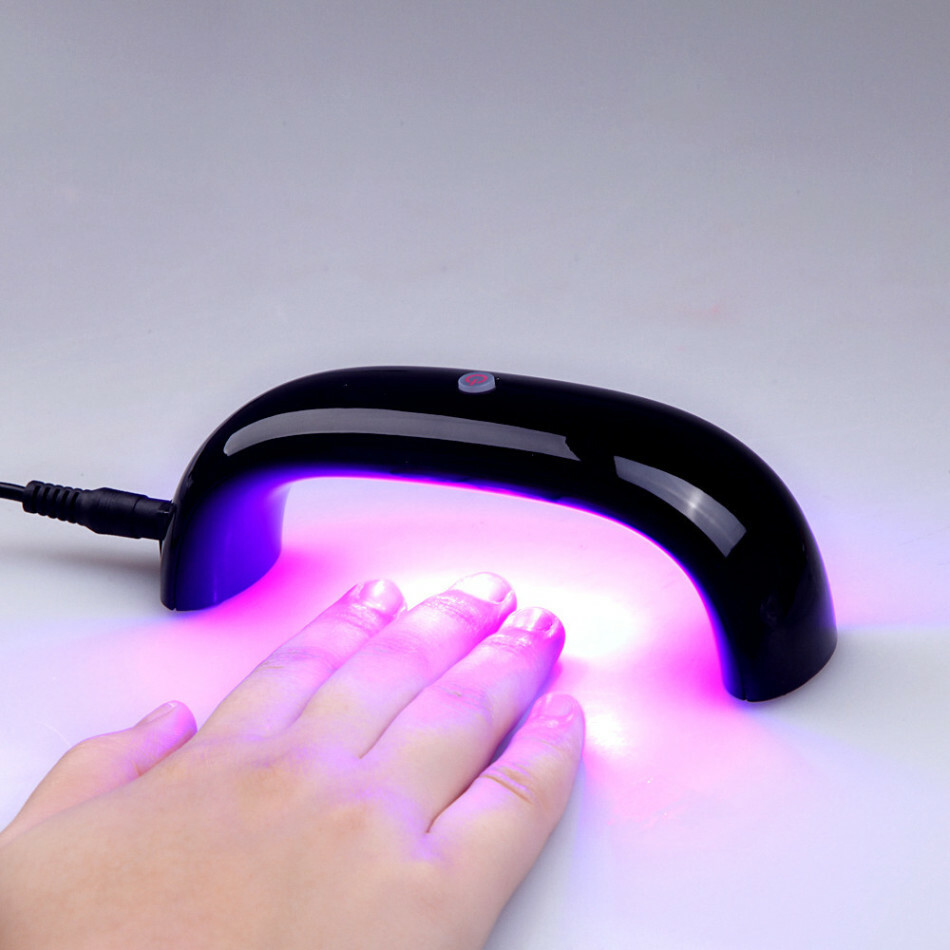 Drying of nails with ultraviolet lamp
 The undoubted advantages of gel-lacquer are that it dries very fast and lasts about three weeks. At the same time, it is not broken off in small pieces, as in the case of ordinary varnish, it does not even lose its shine. Allergic reactions can also not be feared. However, for weakened nails, it is not recommended, removing it requires a lot of maceration.
 Brightness and gloss of gel-varnish
 Gradient gel with paint brush
Brush is desirable to choose a flat with a semicircular or straight tip made of synthetic materials. The brush that you will apply the base will do. So, the principle of working with a brush like this is:
- Paint half of the nail plate in one tone, then the other half with the other. Layers try to do as thin as possible - they will be easier to grow
- . Now take a flat brush and moisten it in a clinker so that it is hardly wet. While it has not dried out, draw several times from the cuticle and the tip. In this case, the brush should be as much as possible horizontally to the surface of the nail - this will achieve smoothness when smoothing the lines. After this procedure, you can dry the nail
- It's time for the second layer for each shade. And again, with a slightly damp brush, soften the lines of
IMPORTANT: Between the steps of the nail treatment with a brush, wipe it with a tissue. Use a napkin, too, in a clinker.
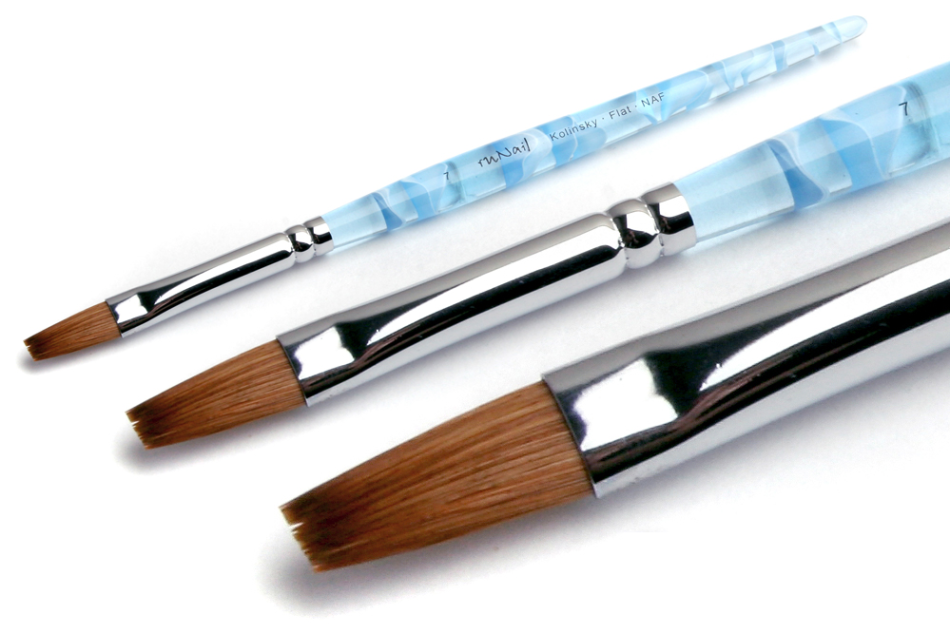 Flat brushes
 If for you the work with a flat brush seems complicated, but the very technique of drawing a brush attracts, you can try to start with a fan. Transitions, however, are not so smooth, but this method is easy enough:
- First of all, apply a base layer of the lightest shade. Dry it with the lamp
- . Once the shading turns out to be not very smooth, it is advisable to create a third transition shade yourself. You can make it on a piece of foil, and put it on the middle of the nail plate between the two basic shades of the
- . Wet the brush in the clinker, then mark it until you get the expected effect.
- Dry the nail.
- . Repeat the procedure by creating a second coat of
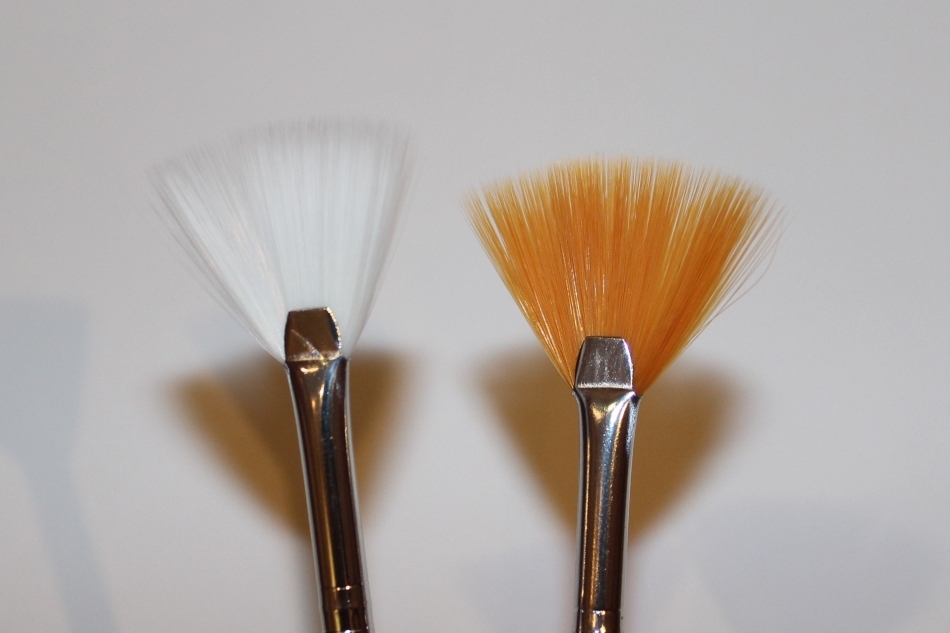 . Fan brushes
 Gradient gelvarnish with sponge
- Sponge is the most effective tool for creating a gradient manicure, because the transitions are so smooth that the brush does not work even with all the diligence. Above we described the technique of applying a color layer on the nails of
- . It should be added that the prints should be done carefully. As for their number on one nail, it all depends on what color intensity you are comfortable with - the brighter and more saturated you want to get a manicure, the more it is worth making the prints of
- . The fixing compound should be applied immediately after staining the nail plate - so you can avoid carrying the porousstructure of the sponge on the nail. The disadvantage of this method is that every nail will have to be applied once again to the sponge, since a certain part of it will quickly absorb. However, the result is worth it
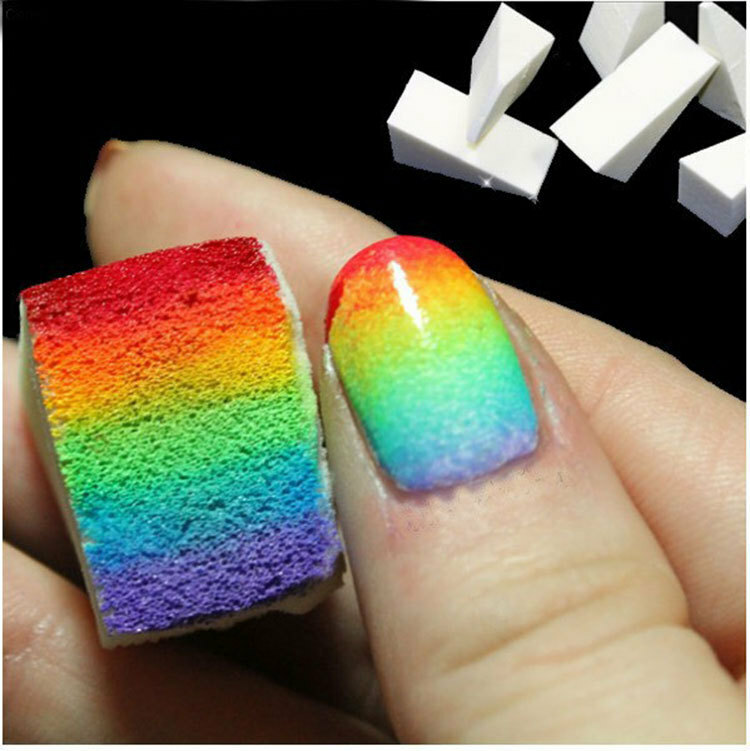 Sponge
 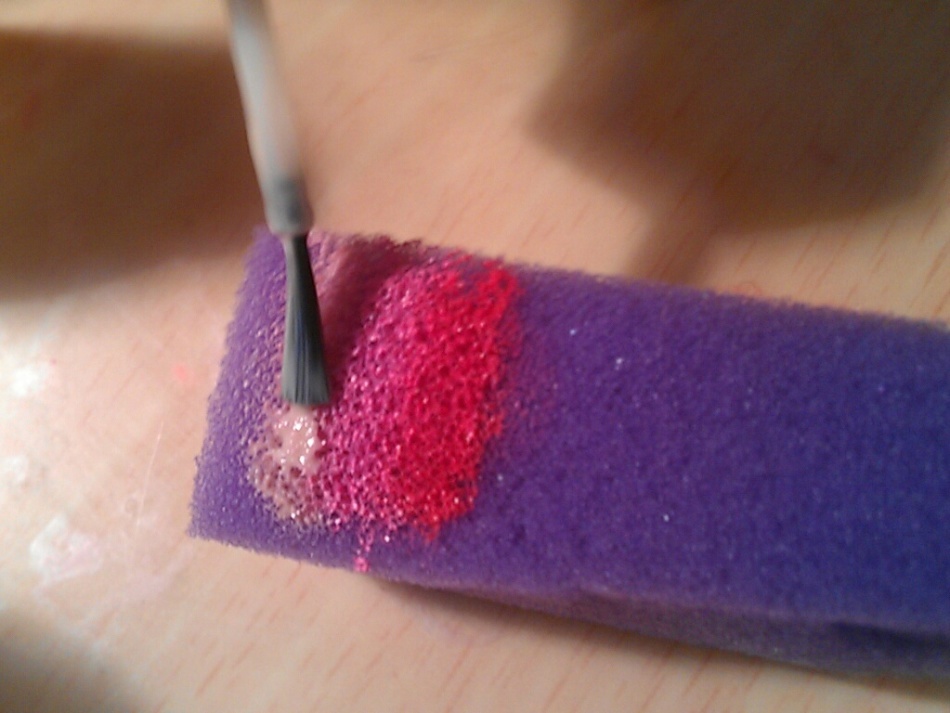 Sponge
 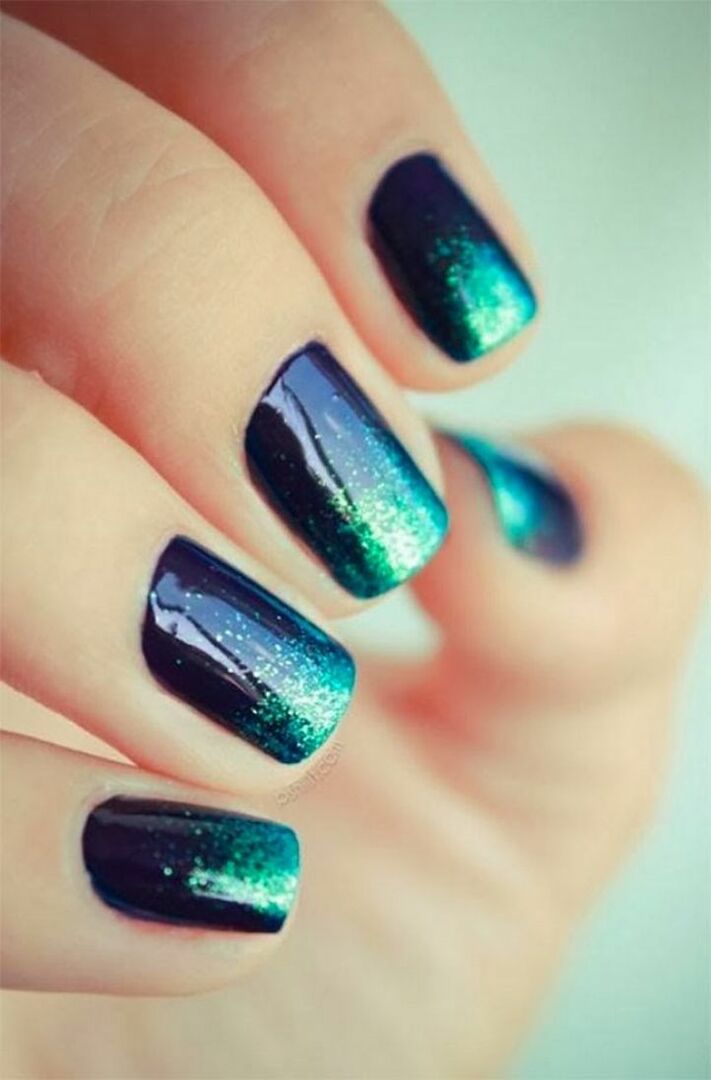 Smooth transition of contrasting colors
 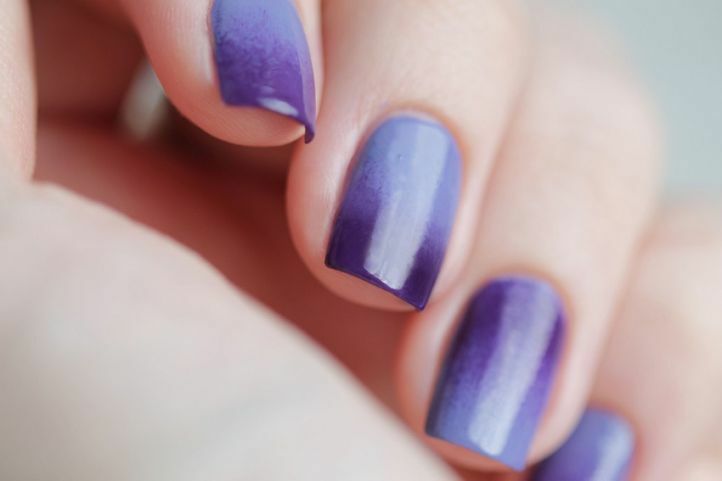 Smoothness of the transition of similar shades
 Gradient manicure with shellac
A mixture of gel and lacquer - shellac - is gaining popularity. If you are a fan of such coverage, then you can try to make a gradient manicure with it. For this, as in the case of gel-varnish, lint-free napkins and ultraviolet lamp will be needed. The sequence is as follows:
- Degrease the nail plate and dry it
- You can apply shellac with a sponge - as we wrote above, this is the most optimal way of obtaining smooth transitions. Only in this case, first apply one shade near the cuticle or on the tip of the nail
- Apply drying with the lamp
- . Now you can apply a second shade on the free part of the nail. At the same time lightly touch the already painted part for the first time, thus going abroad
- Again, use the lamp
- Now you can use the fixer that will level the coating and add shine
- Dry your nails again and remove the sticky layer with degreaser
 Shellak
 IMPORTANT: Be sure to treat the nail with a bass- in this case shellac will be fastened well.
Manicure shellac favorably differs from the usual in that it is much brighter, more accurate and lasts longer. However, in the latter case it is not very convenient if the manicure is boring and you want to try something new - it is much more difficult to remove such a coating.
 Accuracy with shellac
 Nail design gradient gel
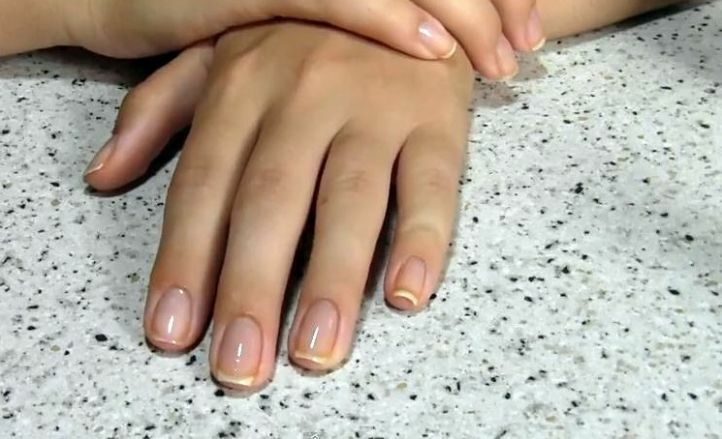
- As for design, it all depends on your imagination. Improvisation here is only welcome. Even the stripes can have different directions - not only horizontally, but also diagonally, vertically.
- Colors can be either a single palette or contrast ones - it is important only to create a smooth transition. Also, you can create transitions not within the same nail, and each nail to paint a slightly darker or lighter shade than the previous
- Lovers rhinestones, stickers, patterns, too, will be where to clear up - all these elements will perfectly fit into the design. Instead of a glossy fixer, you can try to use matte - suddenly it will be that you will like it
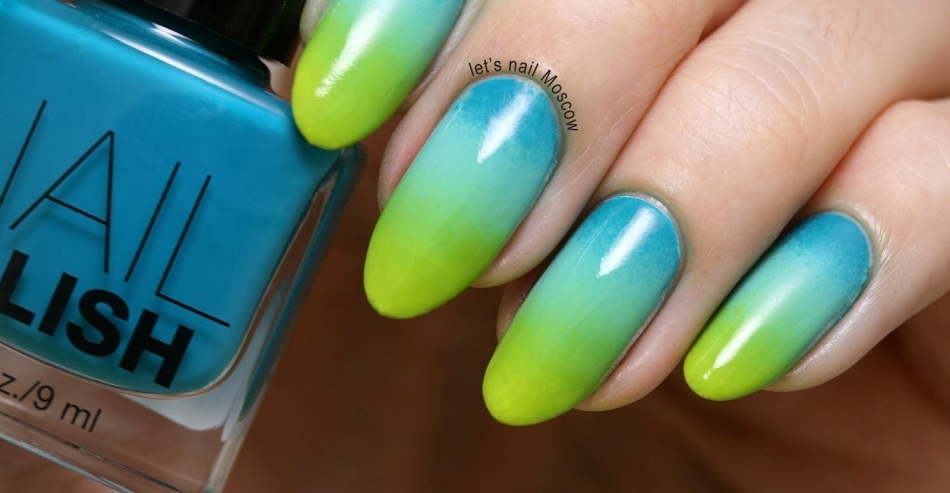
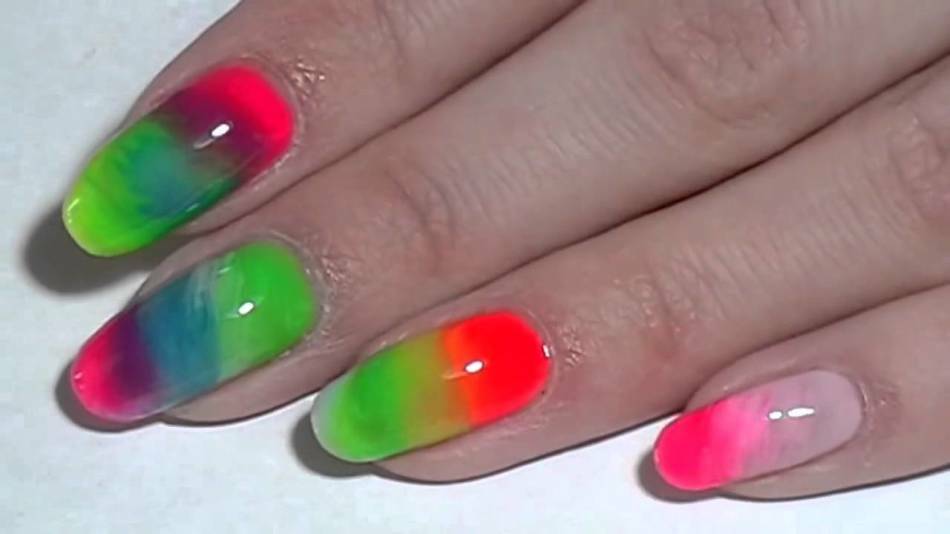
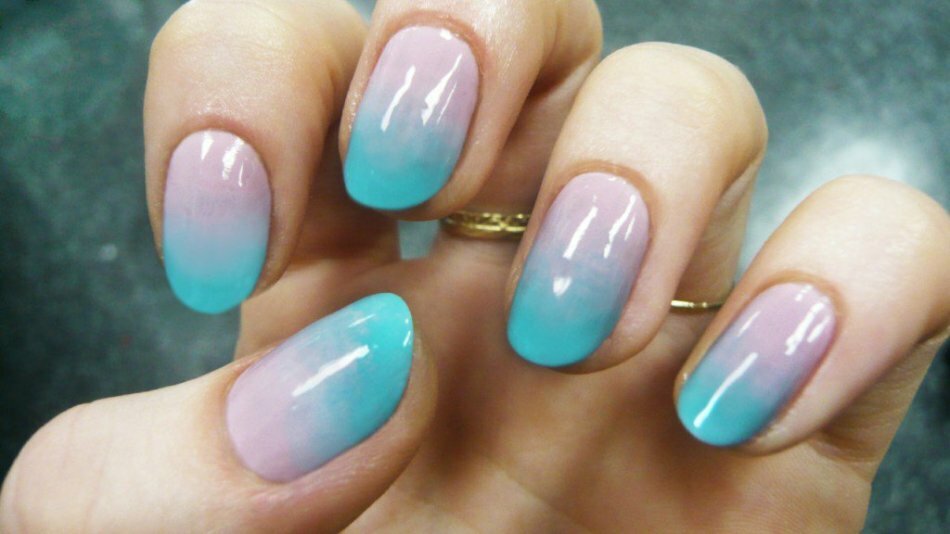
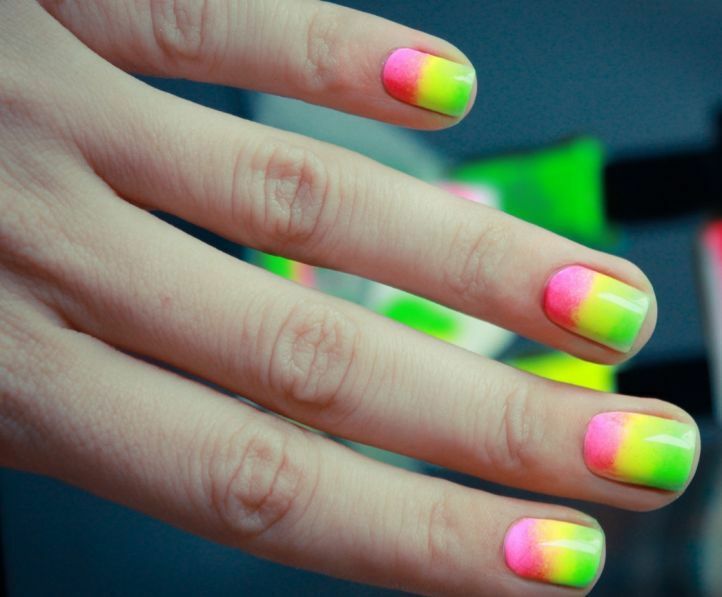 Summer brightness
 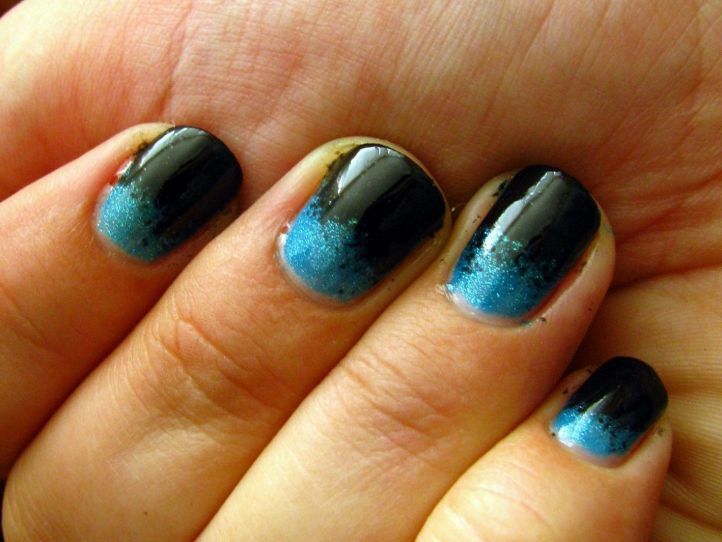 Delightful contrast
 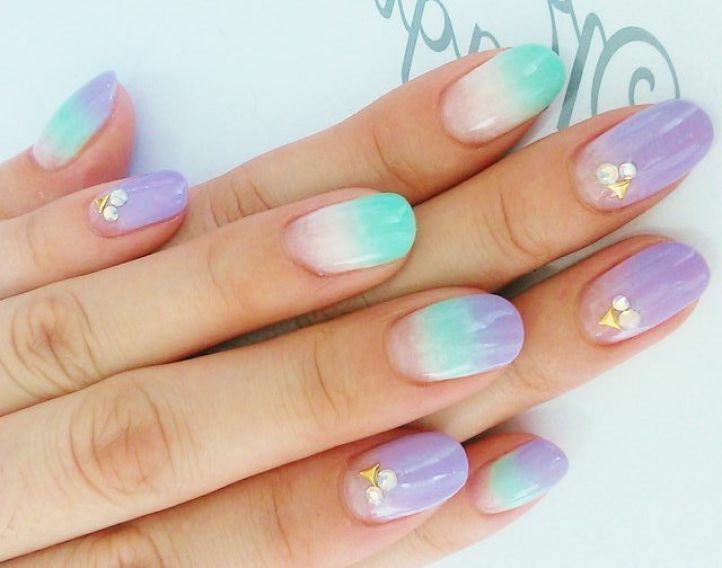 Gentle gradient with crystals
 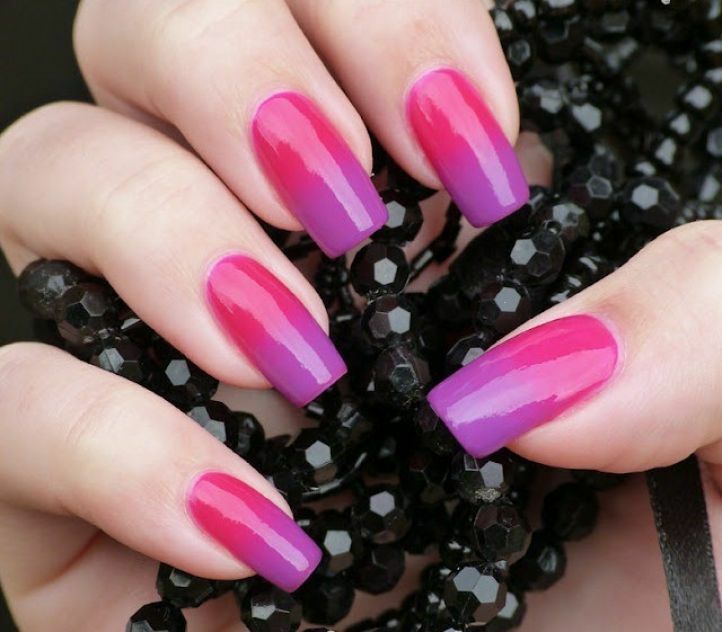 Pink gradient
 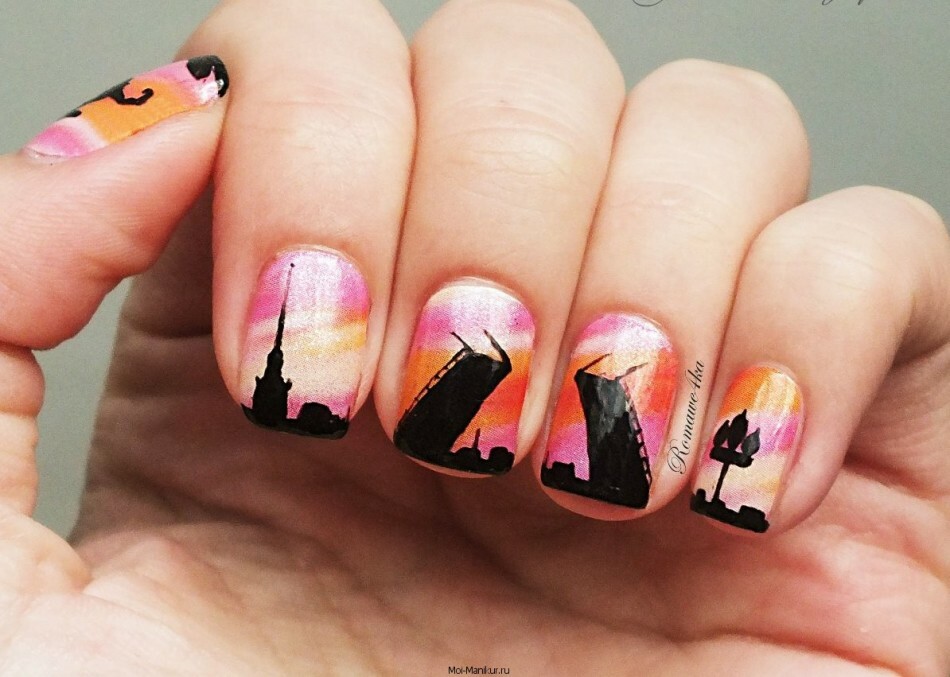 Romance of the city at night
 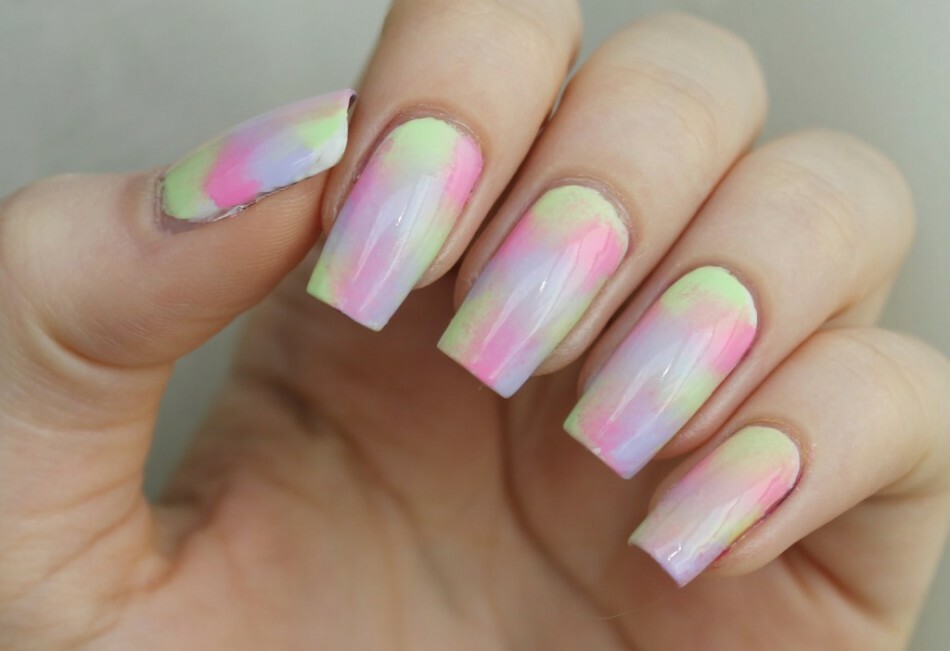 Gentle transitions
 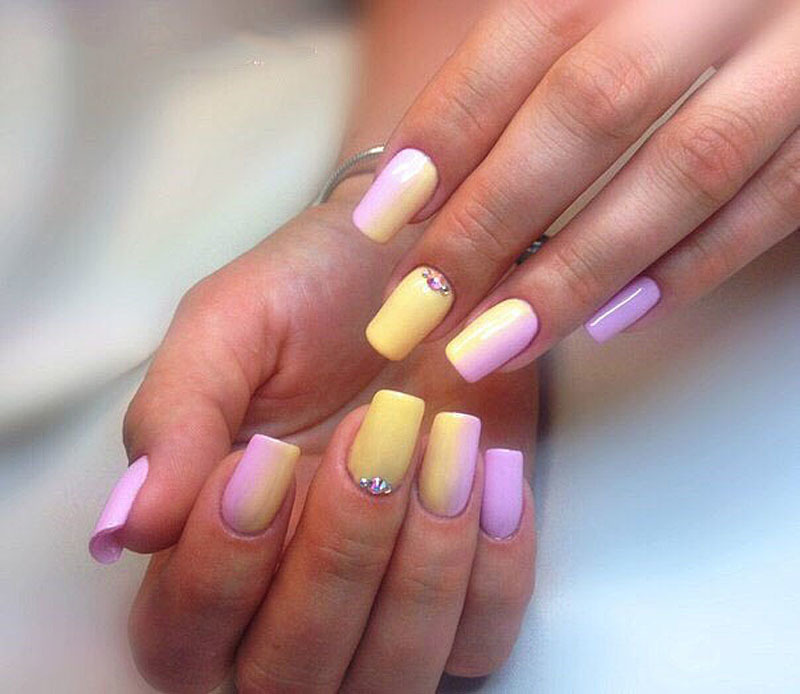 Delicate vertical gradient with crystals
 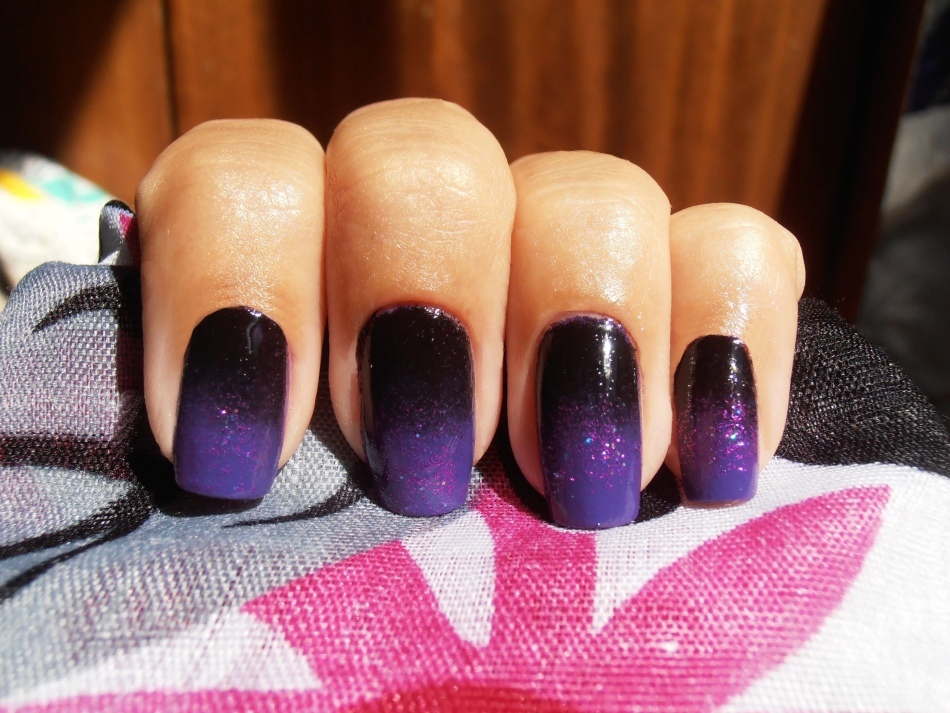 Mysterious dark gradient
 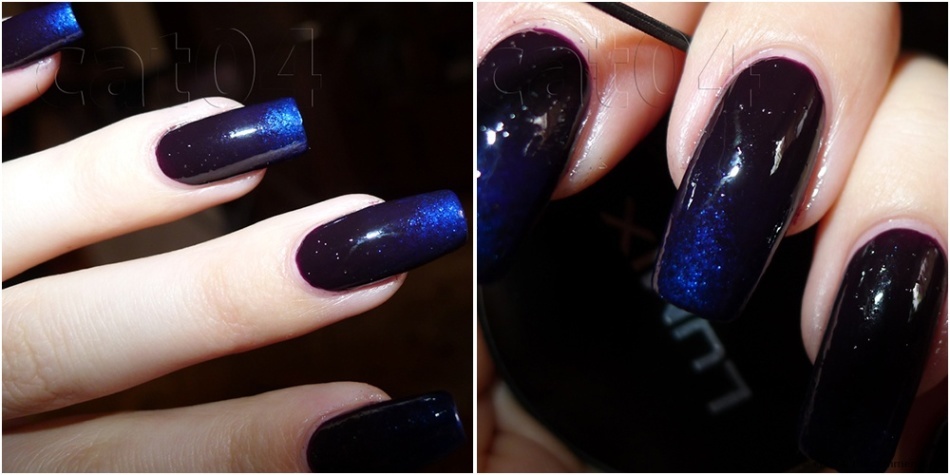 Delightful black and blue
 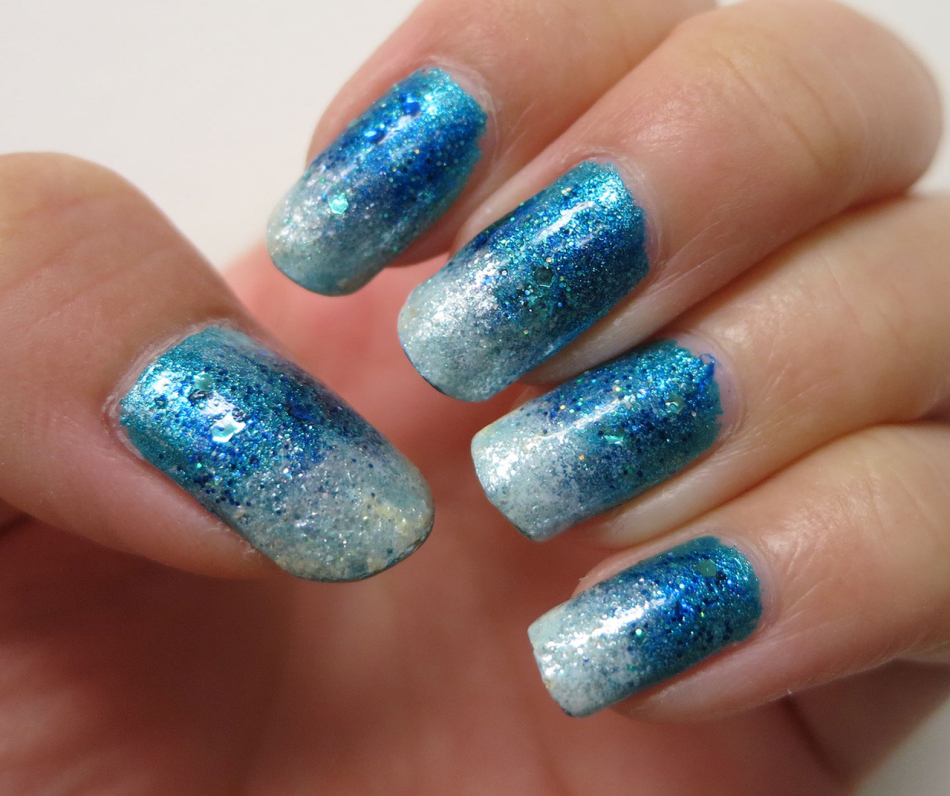 Winter version
 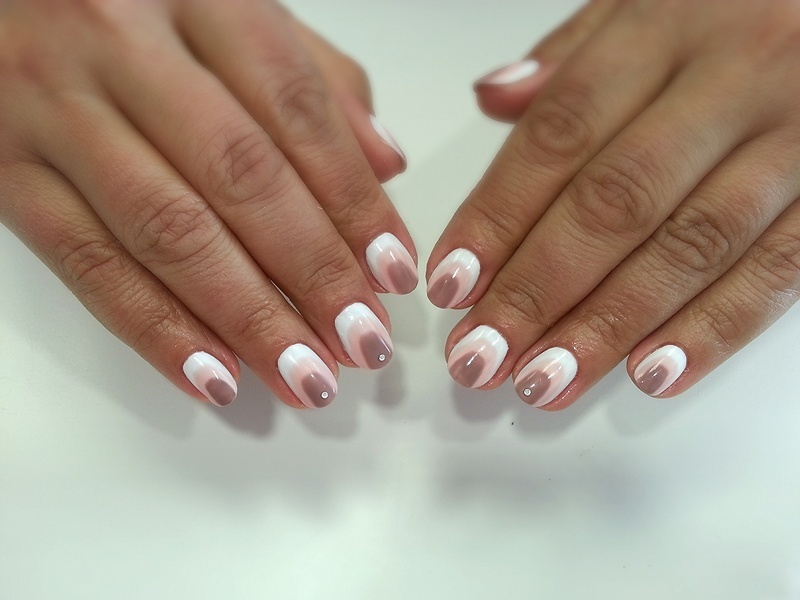 Gradient arc
 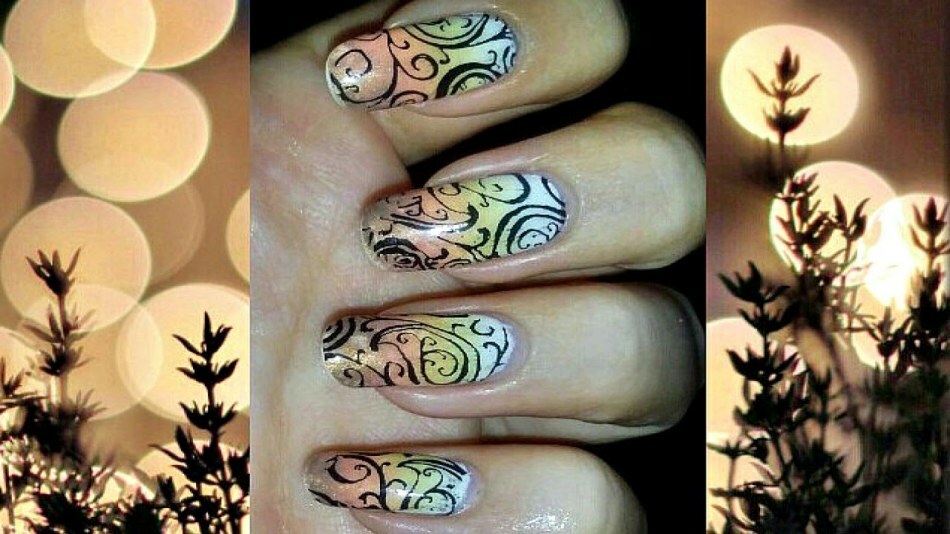 Spotted summer
 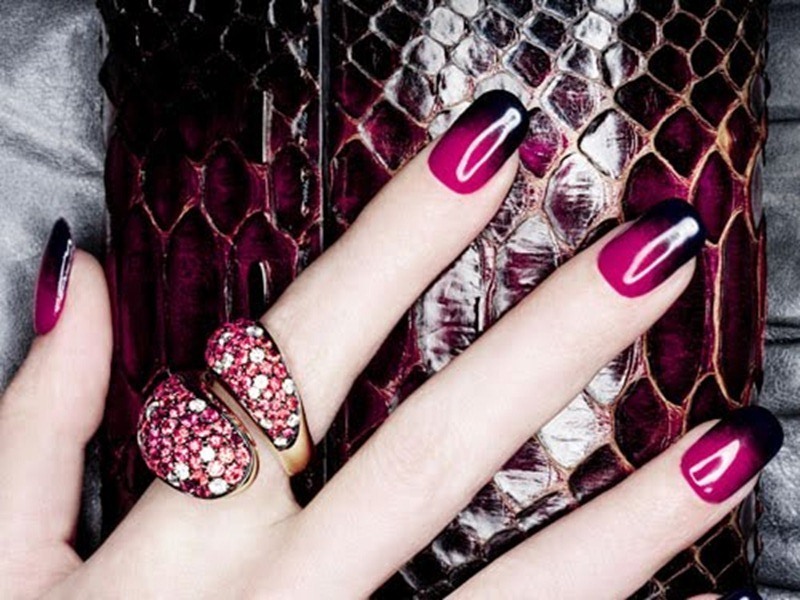 Under color of clutch
 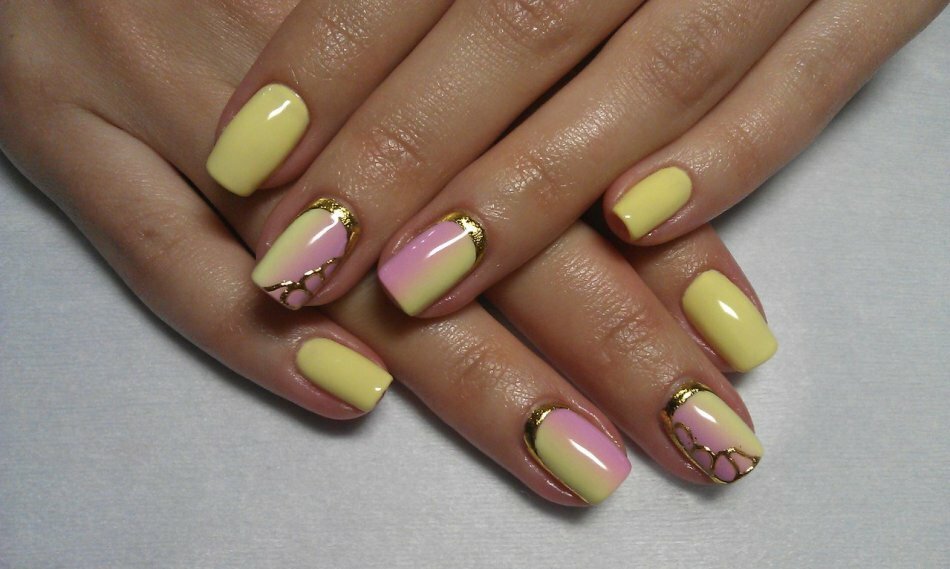 Gentle gradient with patterns
 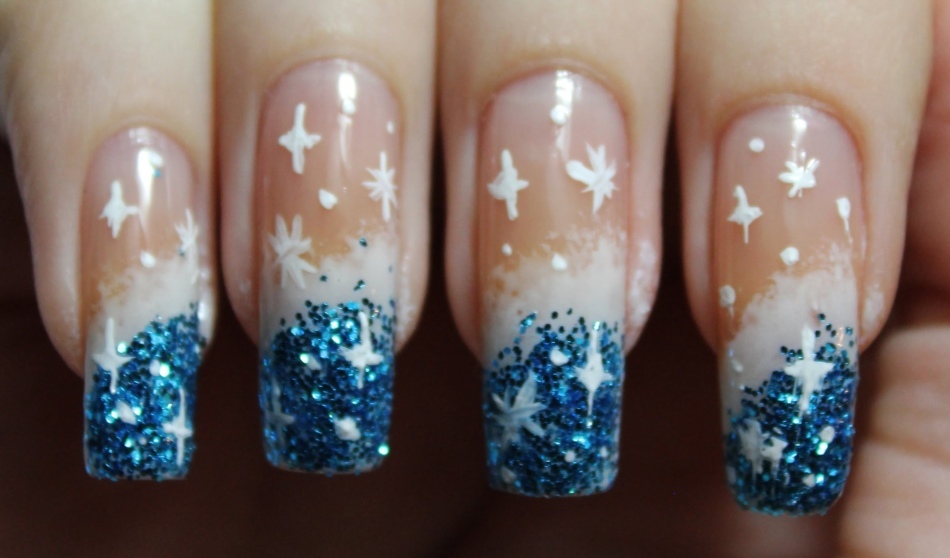 Morein version for winter
 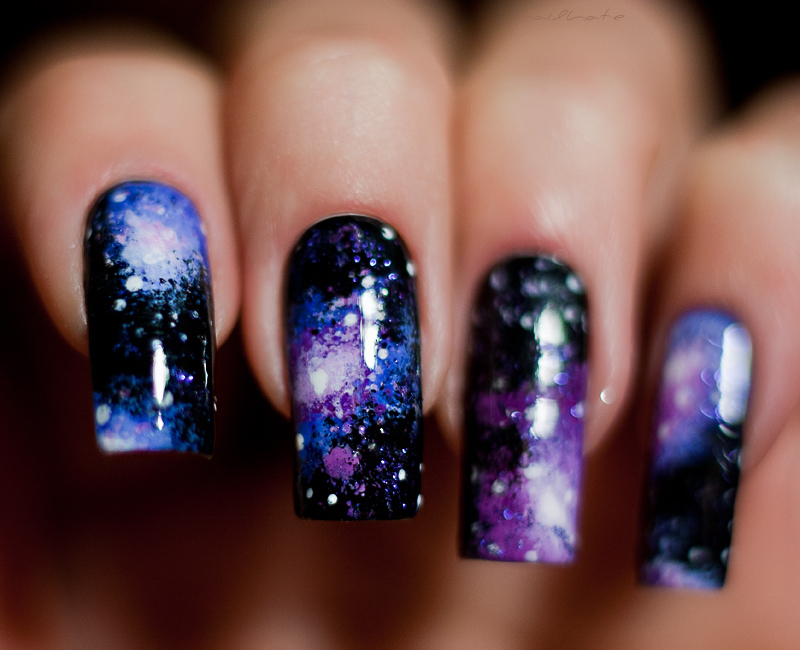 Cosmos
 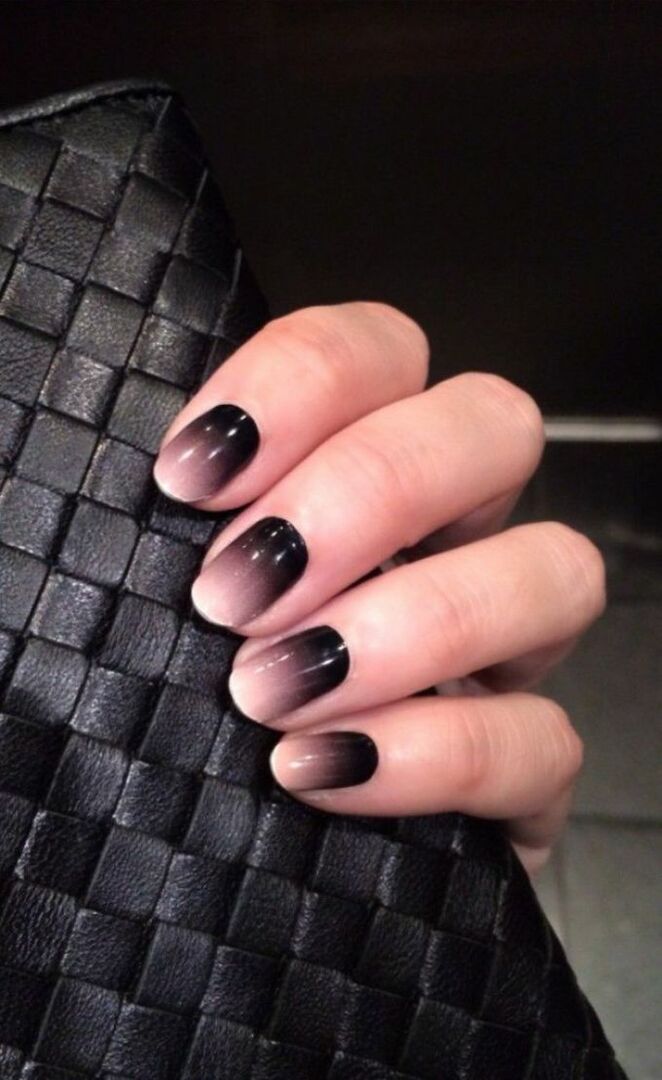 Aged and elegant
 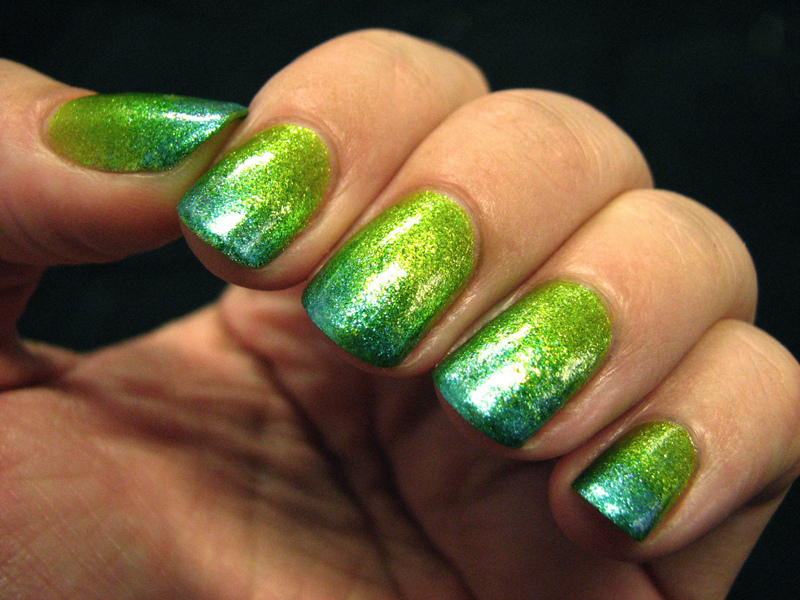 Herbal luminance
 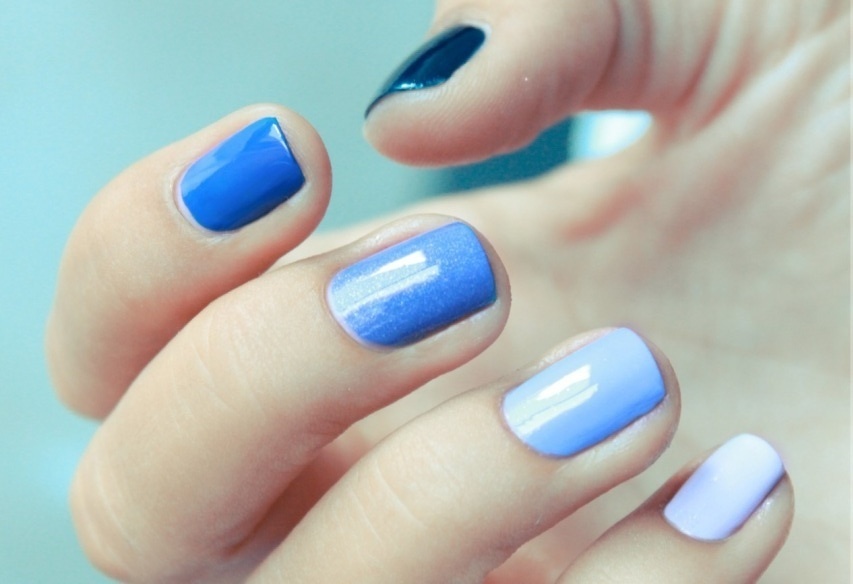 Smooth nail transition
 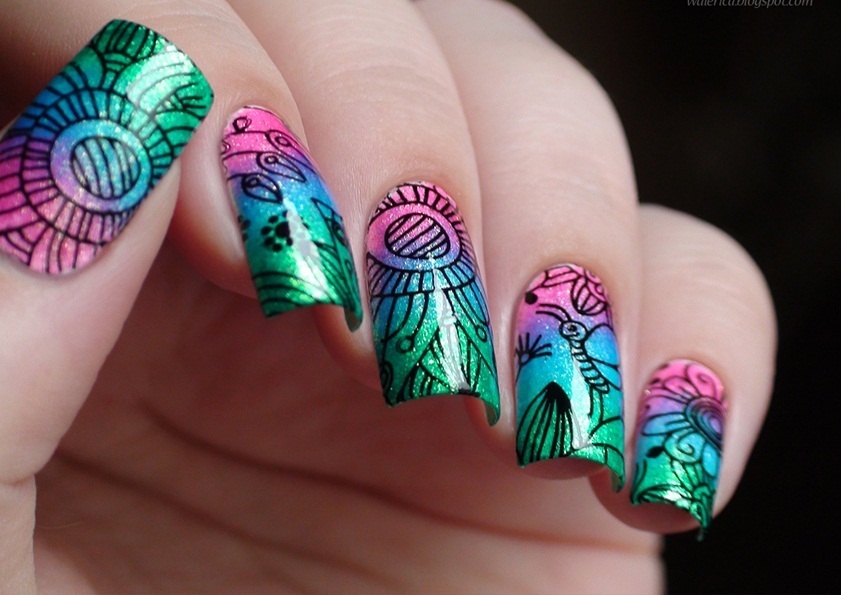 Variegated patterns
 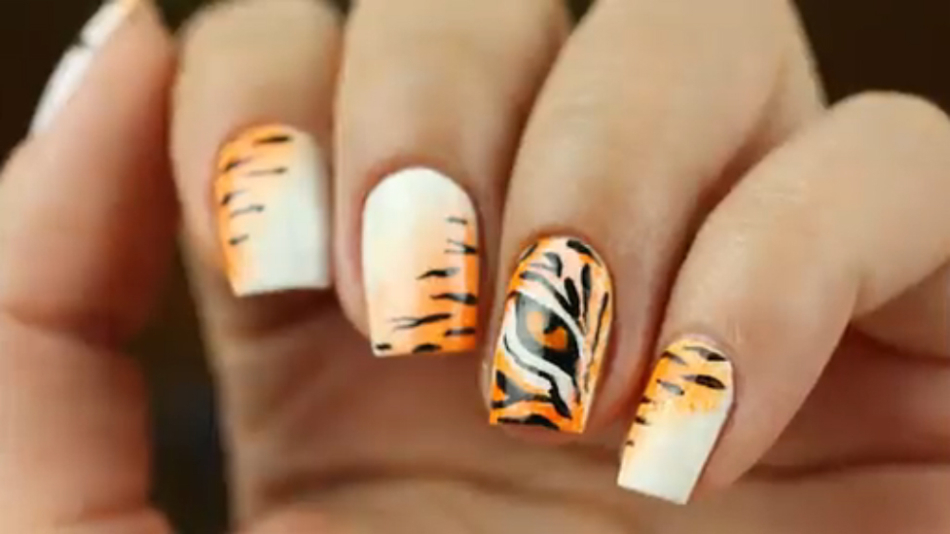 Predatory
  Newspaper ombre
  Diagonal gradient
 Varnish gradient
So, what kind of varnish should be in order to be able not to be afraid to damage their nails? After all, a gradient manicure will certainly carry you so much that you want to constantly experiment. First of all, it should contain a high percentage of cellulose, since it is a natural product. Far behind the example, you do not need to go: cellulose is found in many plants, and 90% of cotton consists of it.
It helps to strengthen the nails, and you do not have to worry about their strength. And for nutrition and moisturizing, it is necessary to keep camphor oil. Concrete is saturated with marine minerals, which whitens the nails and promotes their moistening. Brightness, gloss and polishing effect provide silk amino acids. And, of course, you can not do without vitamins, especially without vitamin E, which helps strengthen, maintains a healthy state and beauty.
IMPORTANT: What should not be in the lacquer is toluene formaldehyde, which destructively affects the nail plate. In other words, it is a carcinogenic substance with which it is better not to get involved.
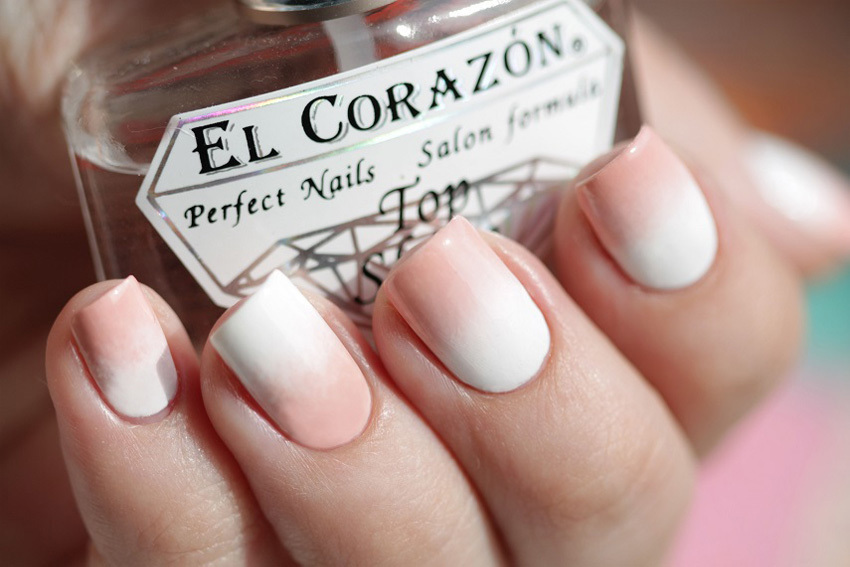
 Correctly matched lacquer - the guarantee of a good manicure
 There is a little trick to keep the lacquer longer - it should be shaken, rolled between the fingers - then due to the appearance of air bubbles inside, its service life will be longer. Keep the bottles in a warm place, but in no case in the light.
To make the manicure ideal, be sure to use, along with the varnish itself, the basis for manicure and a means for quick drying.
 Use the base and the drying agent
 As you can see, you can master a gradient manicure under the power of any fashionista. The effect is no worse than salon. A little skill, accuracy and patience - and here is your unique manicure ready! Rejoice yourself and others, but do not forget at the same time about purchasing a quality product.