
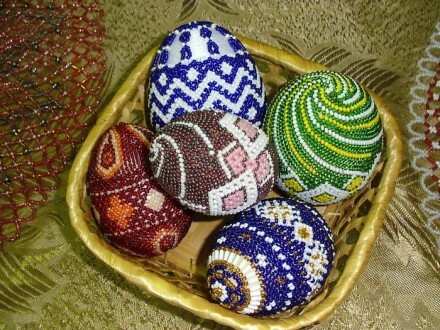
Tradition to paint, paint for Easter hard-boiled chicken eggs rooted in depthcenturies. Celebrating the day when Jesus Christ was resurrected, Christians decorate the festive table and give each other the decorated eggs, perceiving them as a symbol of a new life, goodness, grace, prosperity, prosperity. A perfect gift to the main Orthodox holiday can be Easter eggs made of beads made by themselves.
Pasting eggs with beads
Those who have never had beadwork will have to be patient and learn from the basics. Or choose a simpler version of decorating Easter eggs with beads - a method of pasting.
- To work, you need real eggs, food color, salt and vinegar, PVA glue, toothpicks, thin fishing line( nylon thread), beads, beads. Eggs before decoration should be welded, as usual, hard-boiled.
 glue PVA
  food coloring
  fine line
 beads and beads
  table vinegar
  table salt
- To paint well laid on the shell, before cooking, eggs are immersed in vinegar, diluted with warm water. Then rinse in cold water and cook for 10 minutes.
- Still hot eggs are immersed in the diluted dye according to the instructions, turn to paint on all sides, spread on a napkin to dry. To make beautiful Easter eggs from beads, the dye should preferably not be chosen so bright that small beads are not lost on the general background. It is best to choose a neutral or contrasting color paint, so the iridescent pattern will be clearly visible, the decor will be spectacular.
- When the eggs completely cool and dry, you can go to the
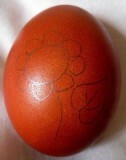 decorating them with beads. To do this, the contours of the future pattern or pattern are applied to the shell surface with a simple pencil. Subjects can choose any - from traditional crosses and letters "ХВ" to stylized folk ornaments, flowers, animalistics.
 - Slight lines on the surface of the shell cause a little PVA.Then, using a toothpick, glue colored or monophonic beads. The work is painstaking, but the result is worth the effort and time.
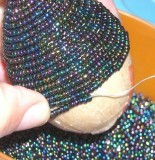
- The second version of decorating Easter eggs with their own hands - gluing ready beads of beads. The baubles can consist of either one thread or be a complex bead chain.
Bead thread in one row just screwed on the egg, pre-glued. You can start the pasting both from the butt and from the middle of the egg. The main thing is to firmly fix and glue the end of the thread.
 pasting an egg with a plain bead thread
 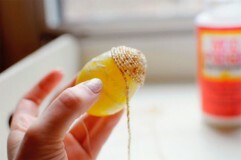 gluing an egg with a bead thread with alternating different colors in it
  alternating colors in a bead thread
 If the bouquet is wide, its diameter should be exactly the same as the diameter of the egg in the widest part. A strip with a ready-made pattern is put on and glued firmly to the shell in the middle of the egg. Further, from the "girdle" to the tapering ends, glue the egg with single beads or glue long single-row beads threads.
- A more complex way of decorating Easter eggs is by braiding with beads.
Technique of braiding eggs with a beaded net or cloth can be different. The choice of the pattern and themes of needlework is limited only by the imagination and skill of the master. But in any case, such symbolic souvenirs look great, festive and very elegant.
Simple pattern of braiding eggs for beginners - video tutorial
Material and accessories
Before you start the needlework, you need to purchase materials for making bubbly Easter eggs. They are the same regardless of the chosen technique of beading. In the work on the crafts you will need:
- Billets in the form of eggs.
- Beads and beads of different color and size.
- Adhesive.
- Needles for attachment and collection of beads in a pattern.
- Fine nylon thread or fishing line.
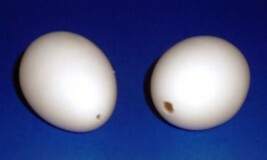
To make an Easter egg from beads, you can use a whole shell from a real egg:
- To do this, the contents of the raw egg are blown through the tiny holes made at the ends.
- The shell is "strengthened" by gluing it with pieces of soft paper( newspapers, napkins) in the papier-mache technique.
The workpiece can be completely made from papier-mâché, giving it the shape of an egg. For convenience, its base is made flat so that the "egg" is stable. For beauty and aesthetics, the layers of dried paper are leveled with fine-grained sandpaper and covered with acrylic paint.
 preparation of eggshell
  materials for pasting eggshells or shop eggs
 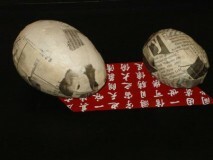 eggshells, strengthened by
 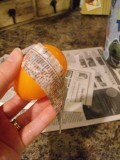 newspaper creation of eggs from the newspaper in papier-mache technology
 - Beads for decorating Easter eggs can be purchased any. Better quality is considered to be that of Czech glass, but if there is not one, the Chinese will do the same.
- The color palette, as well as the size of the beads, is determined based on the selected pattern scheme, pattern.
- For the background, usually use white, cream, blue beads, any pastel shades. For the pattern - a bright multi-colored, in multiple versions.
- Buying beads, you need to remember that it is sold not by piece, but by weight. Therefore, the easiest way to determine the desired number of beads on a special table, with a selected pattern of the future pattern( drawing).
- Beads and needles for beading can be found in the same shops. Threads should be chosen very thin, but strong, with a cross section suitable for the size of holes in beads. Needle for work needs a special - very thin, flexible, with a miniature eye.
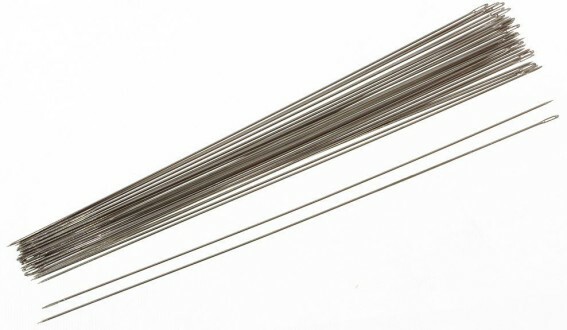 needles for beads
 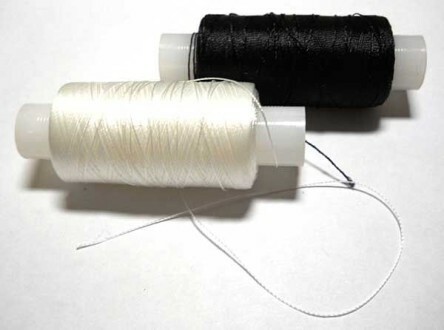 threads for beads
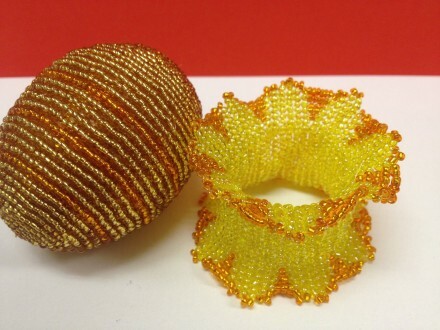
Technique of weaving a diamond-shaped net from beads
A simple way of weaving, which you can master in a short time. Baste the Easter egg with a mesh "in a rhombus" even a novice needlewoman is capable of.
Step-by-step instruction:
- The work starts with the fact that the beads are seeded in such quantity that the diameter of the closed row corresponds to the diameter of the egg in its widest part. The number of beads must be a multiple of 6, i.e. 24, 30, 36, 42, etc., depending on the size of the workpiece and beads. Close the chain by passing the needle with a fishing line in the first bead.
- Next, dial 5 beads, count the 6th in the finished chain and put a needle in it. It turns out a diamond. By the same principle, the rest of the rhombs are braided, finishing the row on the first bead.
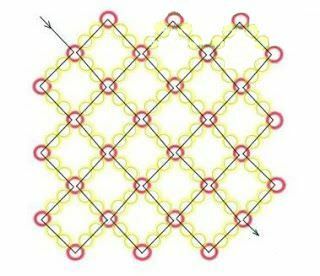
- The second row of a grid of rhombuses begin to weave, passing a needle on a rhombus with an exit through the middle, third, bead. The thread is planted with 5 beads, the needle is introduced into the third bead of the neighboring rhombus. Following the step-by-step instructions, create a second and several subsequent rows of a grid of rhombuses that will braid the middle part of the egg.
- The finished belt is put on the workpiece and starts to braid the tapering parts. The set and fastening of beads are performed in the same order as the weaving of the 2nd row, but the needle is not planted with 5 but 3 beads. As the diameter of the workpiece decreases, only one bead is taken.
There is another way of weaving mesh weaving. A set of beads continue to do 3 pieces, but the needle is passed through a diamond, passing the neighboring one. Flying the butt of the egg, the scheme can not adhere to, and connect the beads in any order.
The same principle is used to make a braid in the rhombus of the second part of the egg. Weave the last bead into the pattern, make a fixing knot, cut the thread and hide it.
 diamond-shaped girdle around the egg
 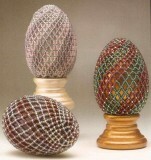 diamond-shaped mesh around the egg
 Double-sided weaving technique
A method ideally suited for those who only master beadwork. This technique - two-sided weaving or hand-weaving - even experienced masters are most often chosen to decorate the Easter egg with beads.
Step-by-step instruction:
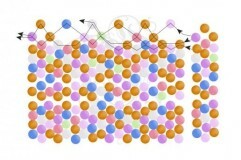
The easiest way to learn on beads is of two contrasting colors. One weave even rows, the other odd. The first 2 rows weave as follows:
- Thread the thread in 2 beads.
- Return and insert the needle into the 1st bead.
- Again, thread on the thread 2 beads.
- Hold the needle with a line in the 3rd bead.
- In this scheme weave two rows. In the first bead
are connected to each other, in the second they are attached to beads of the first row.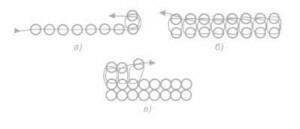 two-sided weaving scheme
 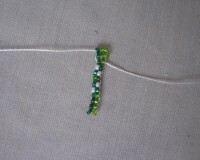 beginning of double-sided weaving
- Next, pair the penultimate with the first and last with the second beads. The thread is passed through 3-4 beads of the odd( first) row, removing it through a bead in an even row. Repeat the same thing, pulling the thread to the right in the 3rd or 4th beads of the odd number.
- Starting to weave the 3rd row of the canvas, string one bead and thread the same bead from which it was bred. Start the needle in the last bead and tie it. Again string on a thread one bead and weave the cloth around the egg in a similar pattern.
Important:
- In order not to be mistaken with the dimensions and to weave a beautiful bead of beads closely fitting to the surface of the workpiece, it is recommended to weave the first 2 rows of the belt, put it on the egg, and then weave the next rows. The ends of the belt should be joined, tightly tightened, tying the ends of the thread.
- When the belt is fully ready and firmly fixed on the workpiece, it is possible to start braiding the tapering parts. You need to do this carefully, reducing the number of beads in each subsequent row. To the canvas lay down exactly, the number of beads should be reduced evenly, passing the thread through an equal number of beads of the previous row.
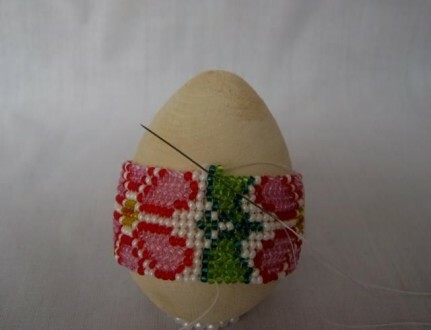 belt in two-sided weaving technique
 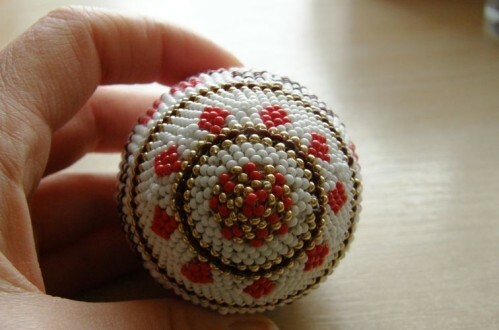 top design
- If in some place there is a skewed pattern or the rows are too loose, it is better to immediately disband the braid and dial it again. The last bead crowning the butt of the egg is fixed, passing the thread through it and several neighboring ones. The thread is tied in a bundle, cut off, the tip is wound under the braid.
Manual weaving technique is suitable not only for decorating Easter eggs. Using a similar scheme, you can create a beautiful decor for any other crafts and souvenirs. For example, make decorative Easter beads, which can be used to decorate the interior or present as a gift to friends, relatives, colleagues.
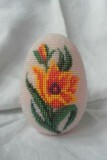 floral ornament in the technique of hand weaving
 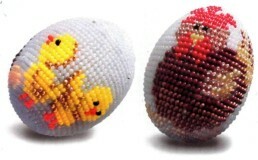 animal ornament in the technique of hand weaving
 Mosaic weaving by beads
A very simple method of mosaic weaving is perfect for beginners. The canvas is padded without a scheme, it is not necessary to calculate how many eggs the bead will leave for the whole braid. It is enough to prepare beads of selected shades, thin line and needle.
If this is the first experience of making beadwork, do not choose the complex multicolor patterns. It is enough to limit oneself to a few pastel shades.
Mosaic beadwork for decoration of the Easter egg is performed in the following order: 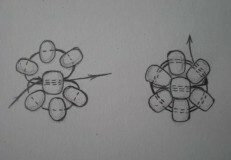
- Make a flower with one bead in the center and with 6 petals around.
- Beads of the second row interweave between the "petals".To make it easier to understand where the second and first rows of weaving are, it is recommended to use beads of a different color.
- The number of beads in the 3rd row is increased, expanding the area of the canvas. Therefore, between the beads of the second row weave not one, but two beads. In order for the chains to be even, the thread must be passed into the same bead from which it was bred, and then thread in the first bead of the 3rd row.
- To create the 4th row of a mosaic braid on a needle, plant one bead, interlacing them with beads of the previous chain.
- The fifth chain goes to the extension, so you need to recruit at least 3 beads at a time.
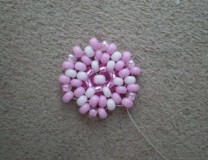
- Sixth row weave, stringing on a string of 2 beads. To knit was uniform, the needle is passed through 3 beads of the 5th row.
- After finishing the 6th chain of the bead mosaic, you can start braiding the eggs. To do this, the finished patch is fixed exactly in the center of one of the ends of the workpiece. Fastening can be made with a pin or glue.
- The seventh row goes for expansion. To ensure uniformity of the binding, the needle is passed through 2 beads of the 6th row, stringed on a fishing line one bead, the needle is threaded through every third bead of the 5th row.
- Picking up the 8th chain, you need to focus on the distance to the previous row and the size of the beads used to weave the pattern. Proceeding from this, dial 2 and 3 beads in turn. Thread through each second bead of the previous row.
- Chains number 9 and 10 are typed in the same order, but for 9
 rows per thread string on one bead, and for 10th - immediately on 2.
 - After finishing the 10th chain of the mosaic, you can thread any beadwork in the beaded braid orpattern. At this stage, fantasy is unlimited - you can safely choose any scheme and create a pattern for decorating the Easter egg on it.
- After passing the middle of the egg, the braid should be gradually narrowed. Set and weave of beads produce in a similar order, but in the direction of decrease. To draw( pattern) was symmetrical from all sides, you should navigate the axes that pass through the 6 petals of the flower.
- Complete the mosaic braiding of the Easter egg just like it started - creating a flower with one bead in the center. The thread is fixed, having brought it into several beads of the upper chains.
 bead stand
 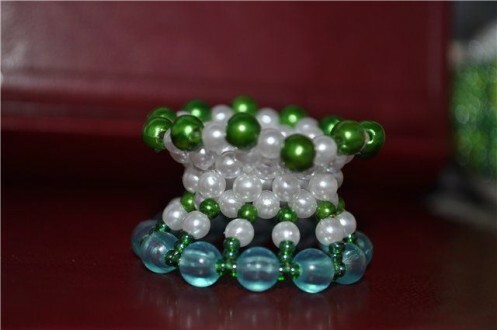 bead stand
 Easter egg made of beads can be considered complete. But you can additionally make a stand for a souvenir. This part can be made from the same beads or other decorative materials - beads, colored satin ribbons, foil, colorful corrugated paper, etc.
The easiest way for an Easter egg, braided with beads, can be made from a strip of cardboard and lace. To do this, a strip of cardboard of the required width is glued into a cylinder and a lace "skirt" is glued on top. In addition, the edge of the lace can be decorated with beads, beads, rhinestones, satin flowers, feathers.
Related videos:
 27:08
27:08 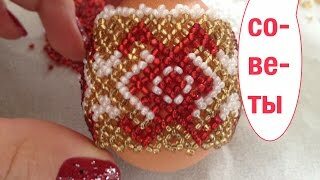 9:10
9:10 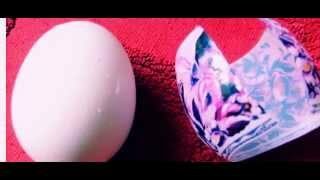 3:58
3:58