
Making a newly-married couple presents is a long tradition. But alas, it is not always possible to guess what the newly-wedded spouses really need, and there is a risk of presenting something useless. Therefore, it is preferable to give money, with which the happy couple will dispose according to their needs. Today we will tell you how to make a chest for money for a wedding with your own hands.
There is one problem in a cash gift: transfer of notes without a package is considered a bad omen and bad form. To help just come and a wedding chest, fulfilling the role of a kind of family bank, in which guests can easily drop envelopes with bills, without violating the rules of decency.
Design of the wedding chest
Wedding boxes for money are very popular recently. Usually they look original, attract the attention of guests. Throughout the ceremony, they omit the money intended to serve the basic general family budget.
The design of the money box should be bright, memorable, creative, consistent with the uniform style of the event.
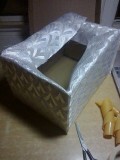
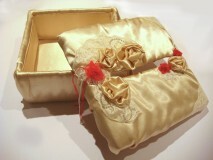
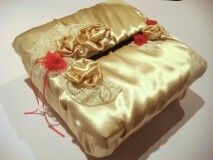
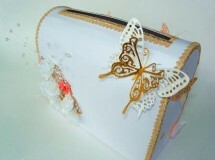
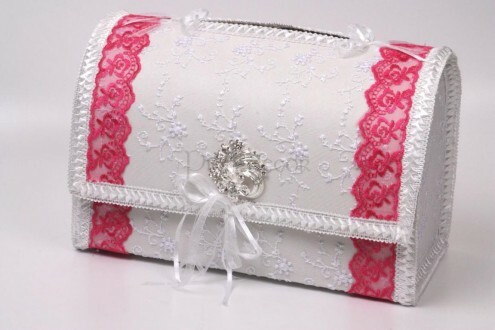 Casket for money wedding
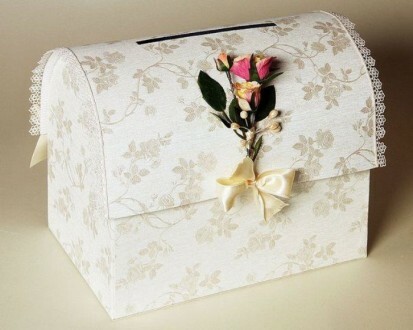
The most popular forms of these boxes:
- Chest.
- Heart.
- Casket.
- Cake, etc.
Most often they are made from cardboard, take as a basis a ready-made box or cut out and glued according to the template. To ensure the safety of the contents on the chest for money, they hang a beautiful lock that fits the style of the accessory itself. The banknotes and envelopes in this case are lowered through a thin slot made in advance. 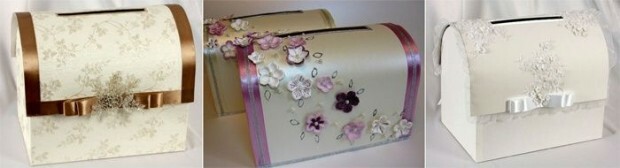
The color solution should also be considered. If the wedding is framed in some concrete tones, then they must be repeated on the casket. The same goes for style. Universal decor - in white, using silk and traditional wedding symbols - engagement rings, flowers, figures of the bride and groom, hearts, etc.
Especially creative newlyweds can make from a large box a whole bank or cash machine with their own hands, mailbox, house. This is already a matter of taste.
Tips for making a monetary chest
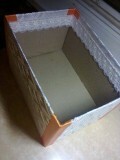
We decided to make a chest for money with our own hands? There is nothing easier, especially if you have old boxes for dishes, small household appliances, shoes, sweets:
- Boxes with a separate lid can be simply glued appropriately, by making a narrow opening for envelopes in the lid.
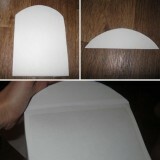
- For a box with a one-piece lid, the side faces can be cut in the shape of a semicircle or a triangle, and the lid can be slightly stretched to make it easier to give a similar bend. In this case, you need to ensure that when it is closed there are no creases, cracks, dents, etc.
 Using ready templates, you can cut out a solid cardboard base for a box of almost any shape, then glue it, make a slot for money and proceedtightness and decoration.
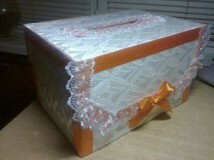
Elegant casket for money
Rectangular boxes, even spectacularly decorated, look much less elegant than caskets resembling caskets. Such a "family bank" for a wedding to do by one's own hands is not as difficult as it might seem at first. To do this, you will need:
- Box with a hinged lid or a sheet of thick cardboard.
- Paper.
- Glue, scissors, painting tape.
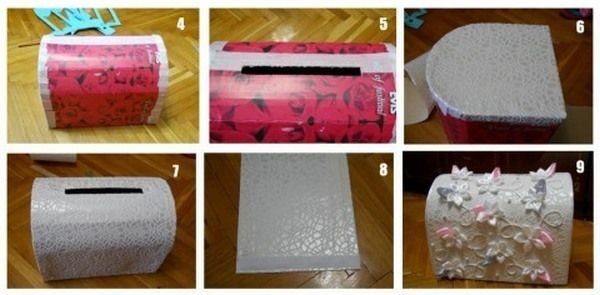
If there is no finished box, use the template to cut the workpiece from the cardboard, then glue and proceed to the further work: 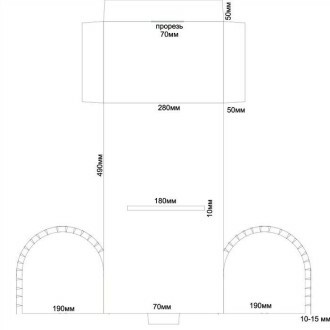
- Pencil out the semicircular contour on the side edges and cut off the excess.
- Cut the front face flush with the bottom of the round part.
- Cover the lid with a ruler every centimeter, so that it has a semi-circular shape. In length, it should be such that it slightly overlaps the top of the front face. If the length is not enough, then it can be "increased" with the help of cardboard and glue.
- On the sides of the lid paste pasteboard elements cut from cardboard using semiprecious ones on one side and straight on the other with the help of paint tape.
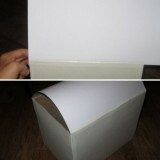
- Glue all edges of the chest with paint tape.
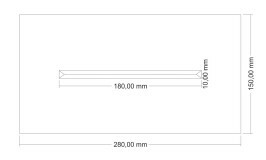
- In the lid, make a hole for money about 5-7 mm wide, not more than 15 cm in length.
If a chest made by yourself will be used after the wedding, for example, for storing family photos or memorabilia, it should be done on the lock. To do this, in the part of the lid that overlaps, also cut the hole, and at the same place on the front edge, attach a metal or cardboard loop with a slot under the lock. If the chest is disposable, then the cover can be simply glued, in this case the inside of the box does not need to be made out.

Doing a hood
No matter how beautiful the base, in its original form, it is not suitable for a wedding, so you need to cover the box. You can do it with various materials:
- Textiles - silk, velvet, satin, brocade or any other. For a wedding in a Boho style, natural fabrics with hand sewing are suitable. Supporters of eco-design can use flax or cotton with rough texture, even burlap. The basis can be pasted with a plain or textured fabric, and with the help of light or translucent materials make elegant draperies. Inside, too, is to make the upholstery with contrast material.
- Skin is white or pastel shades.
- Color cardboard or kraft paper - on such a monophonic base the effective decor will look very good.
- Design paper - gold or silver, with the effect of "old time", textured, etc. Beautiful wallpaper with a neutral ornament, sparkles, pastel colors.
- You can simply paint the future chest for money with white paint on a water basis.
Volumetric upholstery
It will be great to look like a chest for money, the upholstery of which is made with the effect of volume. With your own hands, you can do this as follows:
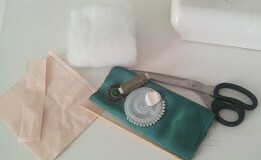
- Cut the sides of the box to cut pieces of sintepon( in 1-2 layers) and glue them to the base.
- For the same dimensions, cut out the cladding parts from a suitable thick fabric, leaving 2-3 cm allowances.
- Place the fabric on top of the sintepon, fixing with tail pins.
- Use the smooth buttons to attach the fabric to the base, placing them in a "diamond".The point of each button on the back side is bent.
- Garnish or sew a box from inside with a cloth.
- All edges of the outer upholstery are tucked inside and glued.
- Excess fabric at the joints neatly trimmed, then glue all the gaps with a thick decorative cord in tone or contrast.
- Button hats can be hidden afterwards, pasted on them with rhinestones, flat beads, small flowers or bows.
Buttons can be used instead of buttons, in this case they simply need to be sewn to the basis through all layers of fabric, placing them crosswise, as for a quilted ornament.
Decor
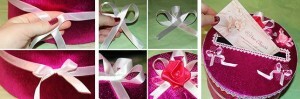
After the base is ready, you can do any decor by yourself with the help of:
- Lace, satin ribbons, decorative cord.
- Beads, rhinestone, sequins and other small accessories.
- Finished beads in different sizes( for pearls, glass, etc.).
- Artificial flowers, including textile.
- Bows.
- Decoupage.
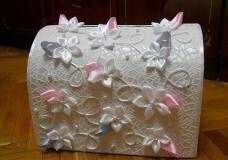
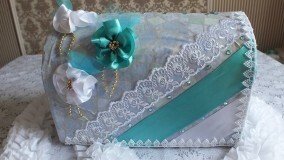
 Options for decorating the chest for money
 The simpler the base, the more spectacular the decor should be. For example, if the chest is trimmed with a plain cloth or colored cardboard, then it should be decorated on the edges with spectacular lace, ribbons, and do three-dimensional floral appliqués.
All decorative elements decorating wedding chests made by own hands, it is best to plant on a colorless silicone or superglue, some parts can be sewn or fastened with a stapler, buttons.
When decorating a money box for a wedding with your own hands, remember that the design should be as close to the overall style of the event, the outfits of the bride and groom, the bouquet of the latter.
Variant 1
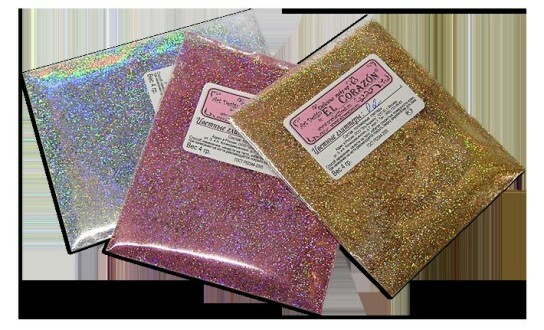 Beautifully laid crystals of rhinestones of different sizes, as well as sequins. The latter can be used to apply openwork patterns:
- Use a transparent glue to draw a suitable ornament.
- Sprinkle a lot of glue on the area with glitter.
- Wait until drying, shake off excess sparkles.
Variant 2
Original applications look from beads: using pearls you can lay out one big or several smaller hearts, the edges of the slots for money, thematic inscription.
Option 3
Cloth hangers can be supplemented with lace frills or assemblies of the same textiles, hang threads of finished beads, and fix a small floral composition from one side.
Wedding chest in vintage style
If the base was painted with white paint, then decoupage techniques can be used for decor: 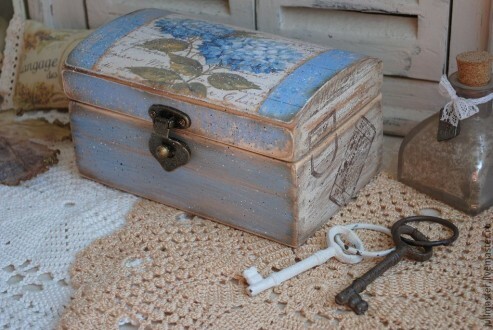
- Print wedding themes, carefully cut them along the contour.
- Lubricate the PVA glue with the glue on the chest where the pictures should be placed, place the image there and gently smooth it with a brush.
Thus it is possible to paste the entire box or individual parts of it. In the latter case, additional decor will be appropriate. For example, you can make a spectacular decoupage in the style of vintage:
- Print out a joint photo of future spouses or two separate photos with each of them. It is best to stylize the photograph in the old days.
- Cut out the photo in the form of an oval.
- Stick on the front face or side.
- Around the photo, make a frame of white pearls or clear crystals.
- Bottom or top fix a neat bow.
- On empty sections of the box you can paste clippings from old newspapers, music or books with romantic verses, quotes.
- As an additional decor, you can use lace, satin pastel shades, ready beads, feathers.
- With glitterers( contour paints) of silver or gold color, depending on the style of decoration, make a thematic inscription: the names or initials of the newlyweds, the date of the wedding or something symbolic.
By the way, you can make a clasp near the chest for a wedding, and from the outside you can designate it with a beautiful bow, brooch, flower, etc.
Making a slot for money
Even the most beautiful chest for a wedding done by yourself will look unfinished if the slot formoney not to issue.  It's very simple: just lay out the beads, rhinestones, beads on the contour, putting them on the glue. You can wrap the edges of a satin ribbon or lace. If the contours do not look aesthetically pleasing, you can make a edging from a decorative cord or sequins, small flowers.
Chest for money for a wedding made by own hands is a spectacular and unusual festive accessory that will attract the attention of all guests and become a coin box for the family budget. And after the holiday, he will take a worthy place on the shelf, storing in himself valuable memories of the happiest day in the life of the couple.
Wedding Chest by Yourself - video
Related Videos:
 1:49
1:49 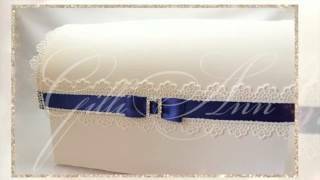 0:54
0:54 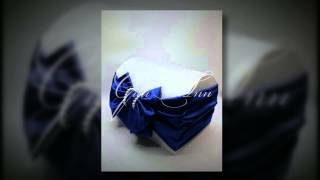 0:50
0:50