

Twine - not just a gymnastic exercise, but a great way to tidy up the shape of the legs, improve the genitourinary system and even prepare for pregnancy. There are several types of twine: longitudinal, transverse, sagging, vertical, on the hands. Although the last three are possible only after mastering the first two varieties of this posture.
- Preparation
- basic rules and
- precautions longitudinal splits
- Exercise 1
- Exercise 2
- Exercise 3
- Exercise 4
- Exercise 5
- Exercise 6
- Transverse twine
- Exercise 1
- Exercise 2
- Exercise 3
- Exercise 4
- Exercise 5
- Exercise 6
- Activity 7
- Activity 8
- Exercise 9
- Contraindications
Preparation of
Before performing stretching exercises, it is necessary to warm up well mshtsy legs and back, for it can jog, jump rope, perform squats, kick their feet, do yoga, and so on. If the warm-up lasts at least 40 minutes, then it will be much quicker to get into the twine.
Another good recipe to warm up and relax your muscles - a hot shower or a sauna. After these procedures, getting into the twine becomes much easier.
Basic rules and precautions
Beginning with stretching, it should first of all be remembered:
- should not be rushed, twine landing is a long process, depending on age and natural flexibility, it can take from several days to several months,so you should be patient;
- exercises should be performed smoothly, without jerking;
- it is important to apply equal efforts on both feet;
- should be engaged in stretching regularly, at least 4 times a week;
- training duration, without taking into account the warm-up, should be at least 30 minutes;
- in case of sudden pain or discomfort at the time of stretching, you need to stop and stop the exercise, because your goal is twine, not injury;
- muscles and ligaments should periodically rest after training and have time to recover.
For beginners in the Internet there are quite a lot of video tutorials.
to contents ^Longitudinal twine
It is considered the simplest version of this exercise. When it is performed, the same muscles are used as in walking, so even with independent, but regular training at home, you can sit in such a twine in a short time. It is enough to perform the following set of exercises for stretching.
to table of contents ^Exercise 1
Become straight, feet shoulder-width apart, shoulders spread and relaxed. Take a deep breath and exhale.
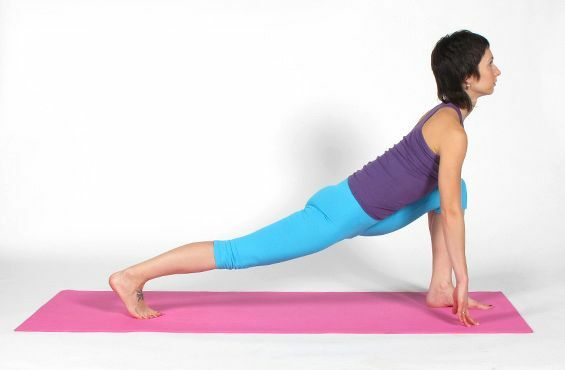
Turn to the side and execute one leg lunge forward. Bend the knee in the knee, which is in front, while it is important that the shin is perpendicular to the floor, and the foot is pressed tightly to the floor, as in the photo. The leg, which is located behind, is completely straightened and focuses on the fingers.
Place the palms on the floor on either side of the front foot. The top reaches out, the look forward. Straining the muscles of the perineum and pushing the palms off the floor, perform springing movements. In a minute, change the position of the legs.
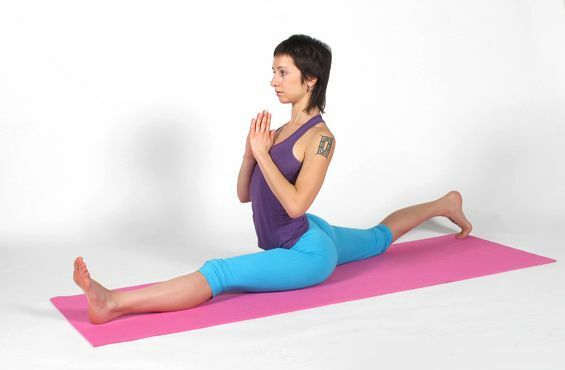
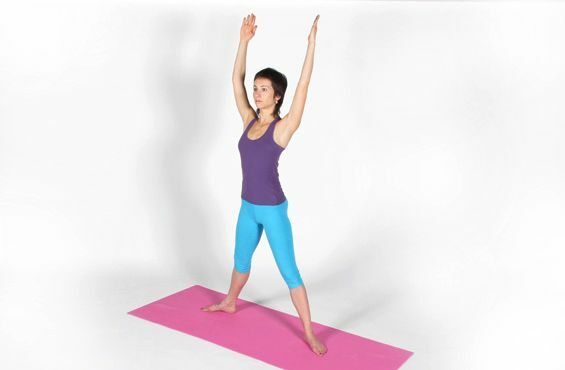
Exercise 2
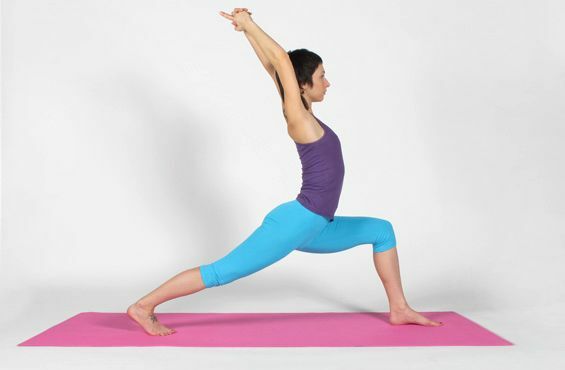
Staying in the previous position, you need to align the body, raise your arms up and connect, straighten your shoulders and slightly bend your back. It is important to reach up with the crown and hands. Look forward. In a minute, you need to change your foot.
This exercise brings great benefit to the spine, it stretches legs well, strengthens the muscles of the perineum.
to contents ^Exercise 3
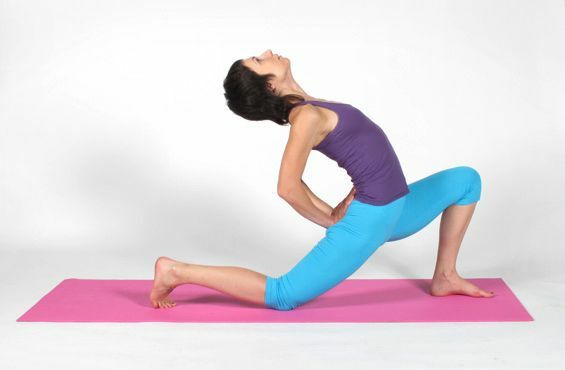
Leg, lagged back, lowered to the knee. The front leg is set strictly perpendicular to the floor. Palms rest against the waist and perform a deflection back as far as possible. The head can be kept straight or tilted back. In a minute, change the supporting leg.
to table of contents ^Activity 4
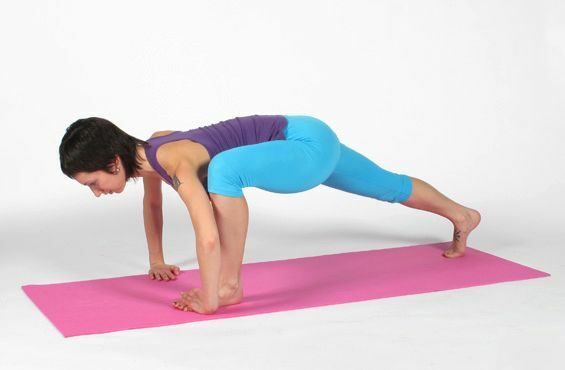
Return to position as in exercise 1. Place fingers on each other's feet and place them on the floor on both sides of the foot, elbows pointing to the sides. Looking at the floor, the chest is parallel to the floor and stretches down.
to contents ^Exercise 5
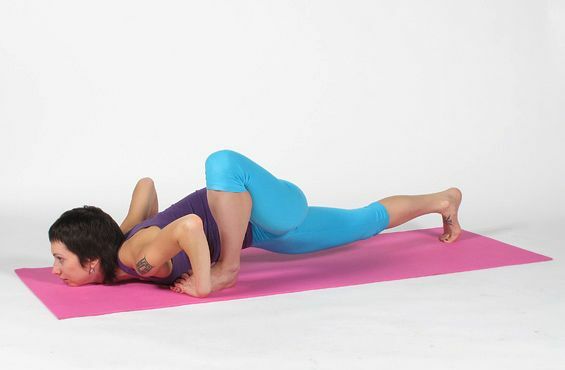
Continuing exercise 4, you need to smoothly move down and forward. Ideally, you need to touch the floor with your chest and chin.
After performing the change of the reference leg and return to the exercise 4.
to the table of contents ^Exercise 6
Accept the pose as in Exercise 1. It is necessary to try to bring as close to the floor the kneecap of the leg that stands behind. If possible, move forward and straighten the leg in front. You need to do this smoothly, without jerking. Over time, this longitudinal posture will produce a real longitudinal twine. Change the foot and repeat the action.
Transverse twine
This is a more complicated twine option, but its usefulness is invaluable. It is very effective for the development of the muscles and joints of the pelvis and for general sanitation of the genitourinary system and intestines. Longitudinal twine leads to the correct position of the lumbar region, improves blood circulation of the spine, improves the shape of the legs.
For children, it is much easier to do it, but following the tips given below, you can learn the longitudinal twine at any age.
to table of contents ^Exercise 1
Feet should be wider than shoulders, palm rest in the lower back and perform a deflection back as far as possible. Ideally, you should see your heels when bending. If this does not work the first time, do not despair, in time this will be possible.
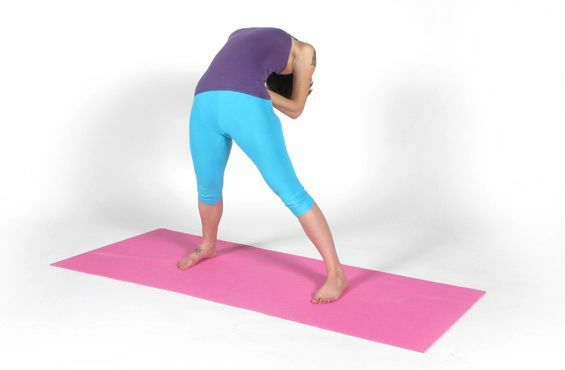
to table of contents ^Exercise 2
To be level, legs wider than shoulders. Hands raise up, lock in the lock and turn it out. Drag your arms and head up. On exhalation, tilt forward so that the back is parallel to the floor. Look forward. The tension in the muscles of the legs should be felt.
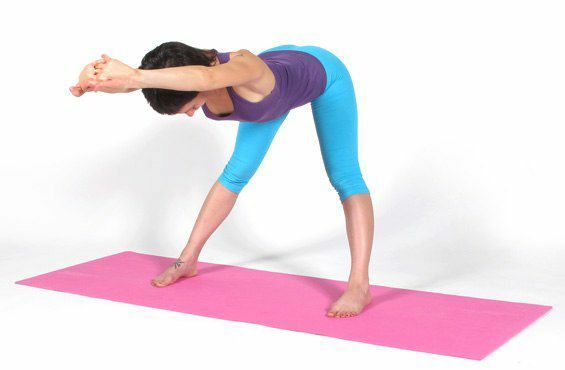
to contents ^Exercise 3
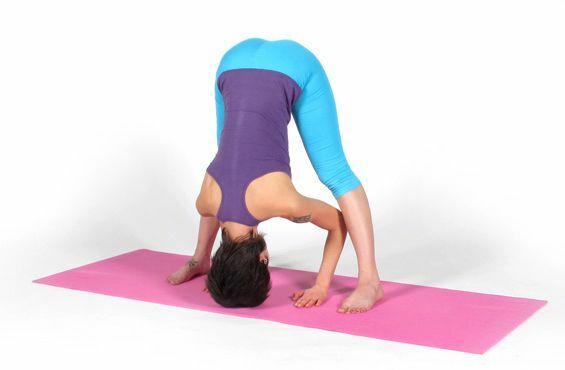
Continuing the previous exercise, you need to place your palms on the floor and perform a deep slope. Knees do not bend, the muscles of the legs keep in suspense. You can smoothly sway, gradually sinking lower and lower. The back, shoulders and neck should be relaxed, and directed down, and the coccyx - up. If possible, put your head on the floor.
to contents ^Exercise 4

When the muscles become accustomed to the time and the body allows a deeper inclination, the support will no longer be the palm of your hand, but your forearm.
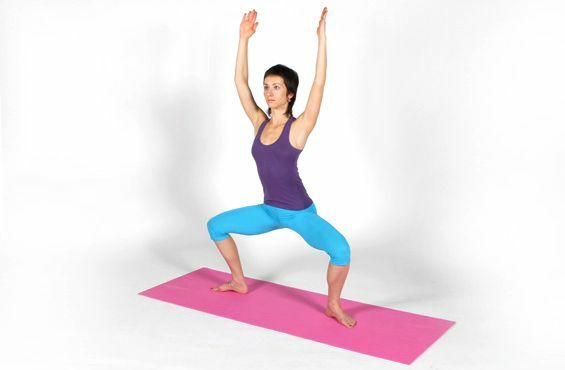
to table of contents ^Exercise 5
To get straight, the legs are wider than the shoulders, the stops are directed in different directions, the arms are up. Keeping the back flat, slowly perform a deep squat, while the hips should be maximally deployed, and the knees widely divorced. The look is directed forward.
For beginners, 6-8 sit-ups are enough, but in the future their number needs to be increased.
to contents ^Exercise 6
Hold in the deep squat that is described in the previous exercise, the maximum possible time, but not less than 30 seconds. Complete 3 approaches.
to table of contents ^Exercise 7
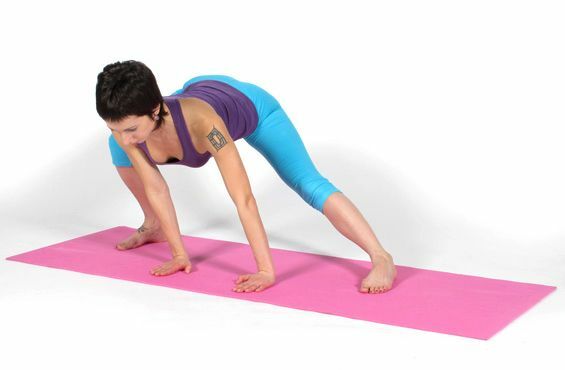
Feet as wide as possible, feet parallel to each other, palms resting on the floor. Alternately perform side attacks on each leg. One leg to bend in the knee, transferring the weight of the body to it, and the other - to pull out well.
For complication, you can take the palms of your ankles, and perform similar attacks, only now you can carry your weight only with your feet.
For beginners enough 8 repetitions.
to table of contents ^Exercise 8

Put your feet as wide as possible. Leaning on elbows, tilt the body forward parallel to the floor. With every breath, stretch the muscles of the legs, with an exhalation - relax.
To complicate the exercise and strengthen the muscles of the press, back and hands in the same pose, you can perform push-ups.
to table of contents ^Exercise 9
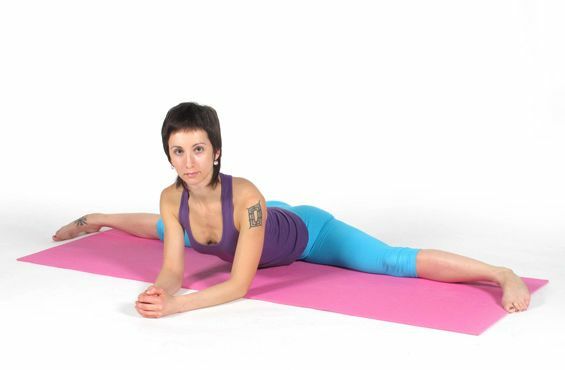
From the previous position, the stomach and crotch are gently lowered to the floor. When this is possible, you should straighten your back and turn your toes with your fingers.
to table of contents ^Contraindications
- Inflammatory processes in the body.
- Increased temperature.
- Diseases of the joints.
- Injury and muscle strain.