- 1 How to knit mittens with knitting needles( for beginners step by step)
- 1.1 Mitten without a seam - master class with detailed description( photo)
- 1.2 Step-by-step knitting instruction on two spokes
- 2 Mitten with knitting needles( patterns and description)
- 2.1 How to tie beautifulWomen's braids with braids
- 3 Knitting with mittens for children
- 3.1 Knitted children's mittens with owls
- 3.2 Ideas with bullfinches
- 4 Video lessons from the best masters
- 4.1 Original mice or white hedgehogs for small
- 4.2 How to knit mittens
- 4.3 Warm openwork for a girl( double of a mohair)
- 4.4 Interesting two-color minions for a boy of 7-8 years
- 5 Jacquard products( video lessons)
- 5.1 Original knitting with ornament( Norwegian patterns)
- 5.2 For girls with deer
- 5.3 Men's mittens with arans for small men
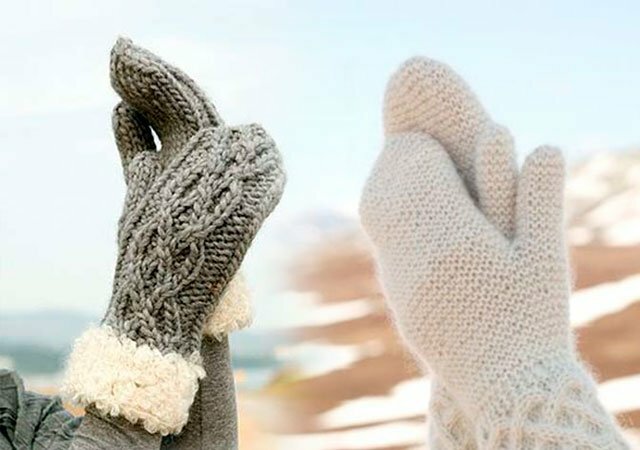
Mittens have always been the most practical and comfortable for a cold winter. Today in stores a huge selection of mittens for the whole family, but it's much nicer to wear things that were created with love with their own hands.
Having learned to knit, you can create whole sets: a hat, scarf, mittens. They will beautifully harmonize with each other if you perform them in the same style with the same pattern.
I propose to go directly to the discussion of the topic: "how to bind mittens with knitting needles - a step-by-step instruction".
How to knit mittens with knitting needles( for beginners step by step)
In order to learn how to knit beautiful stylish mittens, you need to learn how to knit the most simple, on the basis of which you can create the most original models for the whole family.
Mitten without a seam - master class with detailed description( photo)
The most interesting thing is that even a lazy person can cope with this model. They can be monophonic, but the author suggests adding a few red bands for a change.
For work we need a woolen thread( 70 g), 5 stocking knitting needles No. 3.
The author has the knitting density = 1.7 loops of 1 cm. Next, you need to measure the girth of the brush, but we will knit for the hand, whose brush circumference is equal to 20 , see
The product is knitted from top to bottom on five knitting needles,seamless. Calculation of the number of loops: 20 x 1.7 = 34 loops. We distribute 34 loops for 4 spokes. I propose to round off and type 36 loops, so we will get to 9.
To facilitate the explanation, we will give each serial number. Closing the circle, we knit the four loops of the first knitting needle together with the end of the yarn left on the 4th spoke from the set of loops so that the circle closes tightly around the edge.
Let's start with the of the right part .We assume that on the 1st and 2nd spokes - the loops of the lower part of the mittens, and on the 3rd and 4th - the upper. We start the work with a rubber band, which we knit 1 × 1( 1 face, 1 purl).The height of the rubber band or cuff is 7 cm.
Next, we turn to the knitting of the main part of the mitten: we knit along the circle with the front loops to the base of the thumb 5 - 7 cm, depending on the size.
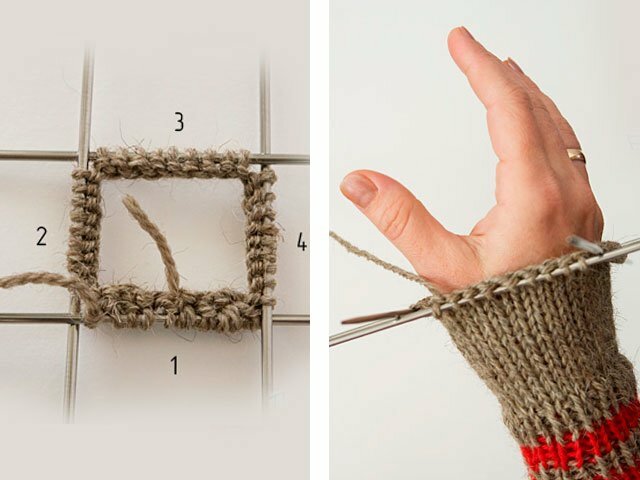
The thumb will be knit on the 1st spoke, for the left one - on the 2nd. To do this, we sew the first thread on the first spoke with a thread of the primary color. All other hinges, except for the last one, are knitted with a facial color thread. Then we return the loops, connected by a color thread, to the 1st needle and once again we sew by the main thread. We get a color line. This will be in the future a hole for the thumb. Next, just bind to the little finger( about 8 cm).
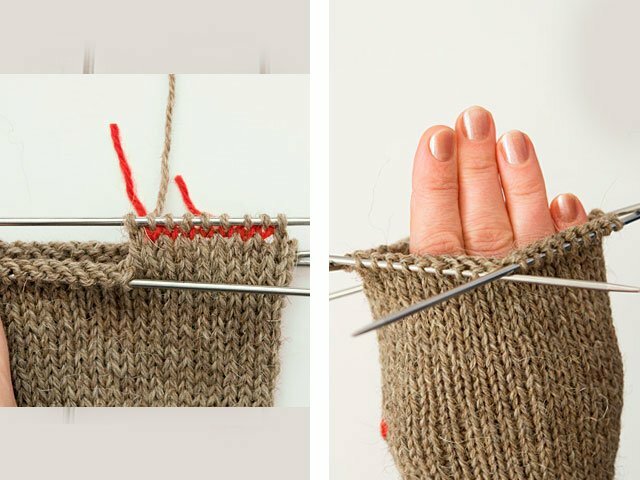
Then proceed to decrease the loops on the toe of the mittens .On the first and third spokes at the beginning, the first two loops are sewn together face-to-face in a second way( behind the back walls), first turning the 1st loop. On the second and fourth spokes we knit two loops together at the end of the needle front in the first way( behind the front walls).So we make the loops down through the circle, until there is half the number of loops on each spoke( in this case, when the number of loops on each spoke is odd, we reduce the smaller part - 4 loops) through the circle, then we loosen the loops in each circle( 5 loops).At the same time, on the 1st and 3rd spokes, in those rows where the loops do not diminish the first loops, we also invert and tie the first way. When there are 2 loops on each spoke, tighten the loops and fix them on the wrong side.
Now proceed to the pinch of the thumb .To do this, gently pull the colored thread from the thumb hole. Then we introduce two spokes into loosened loops, we get 7 loops on the bottom spine, on the top 6. Begin to knit a finger, distributing loops for 4 spokes: on the first 4 loops, on the second 3 and pull one loop from the side edge of the hole, on the 3rdand the 4th spoke will also have 4 loops( 3 + 1 from the side edge of the hole).To make it more convenient, the end of the working thread can be lowered into the hole( on the underside of the product).
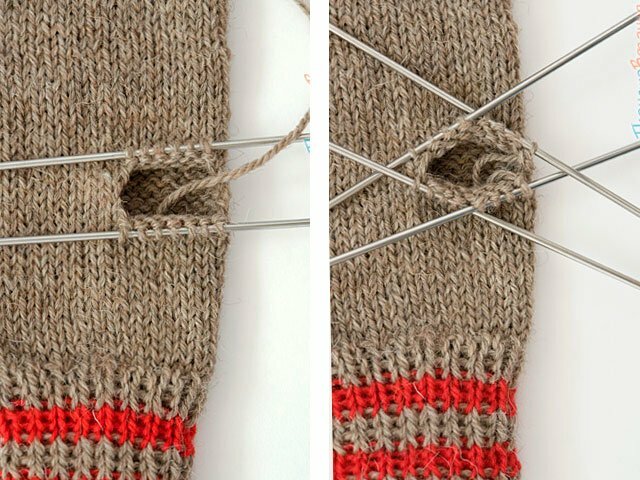
Continue to knit your finger in a circle to the middle of the nail, and then start to loosen the loops just like with knitting the mittens of the mittens: on the 1st and 3rd spokes at the beginning, at the 2nd and 4th spokes at the end, butdecrements are made in each row. When each needle remains on the 1st loop, pull the hinges and fix on the wrong side.
The left mitten is knitted similarly to the right, but in the mirror image: we cut out the hole for the finger on the 2nd spoke.
Step-by-step knitting instruction on two spokes
Such long gloves are knitted on two spokes. You can separately link the two parts to the subsequent joining of the halves, but we consider the option where you have to make just one inconspicuous seam( so it will be correct and visually beautiful).
Necessary: yarn, knitting needles, pin for knitting, centimeter tape, hook, needle.
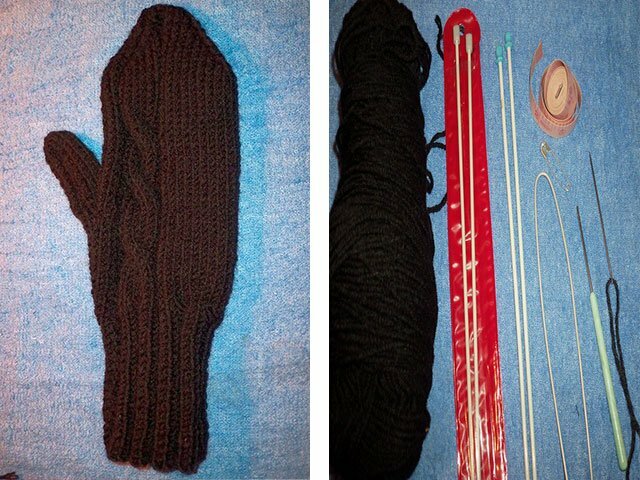
Let's start with the right part.
Measure the wrist circumference, the length of the palm and thumb. It is also necessary to measure the density of knitting by tying a little. We measure how many loops are 1 cm. I have a 20 cm girth, in 1 cm - 2 loops. You need 40p-4 = a set of 36n + 2 edges.
Start from the bottom with a rubber 2x2( 2 front, 2 purl).It turned out approximately 10 cm( 15 rows).
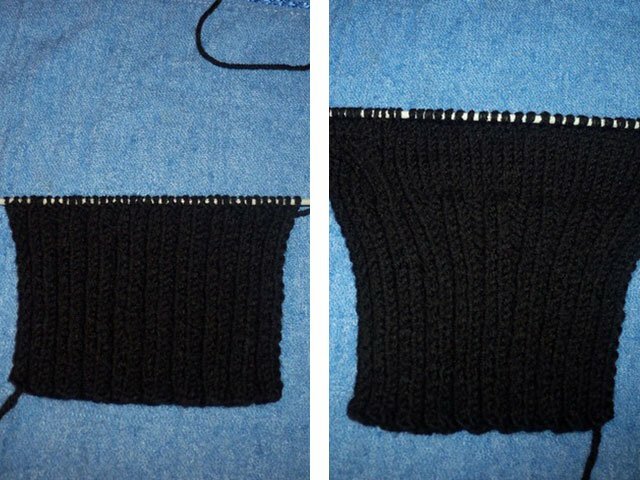
Next, go to the main canvas, where you can choose spokes of smaller diameter. In the second row, evenly add 4 loops. Next, we knit just 7 rows to the base of the thumb. You can try on and, if necessary, tie more \ less.
Finger in the mitten is not on the side, but as if not much closer to the palm, so for the right mitten we knit as follows.
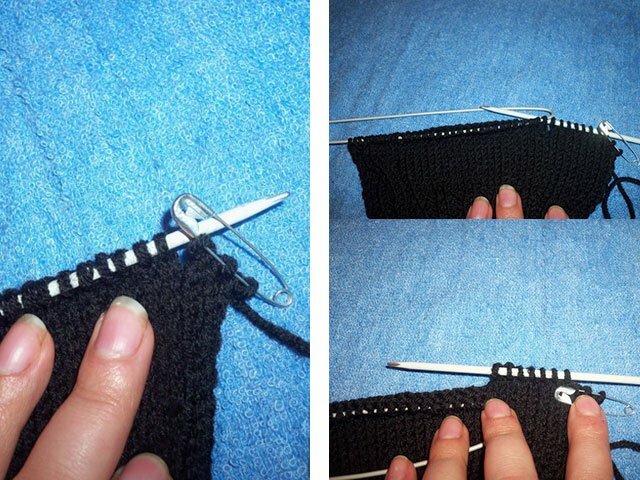
- A. - Edge, 2p.on the drawing we sew and take off on an ordinary, sewing pin.
- B. - For a finger 6-7 loops are taken. Depending on the completeness. We send 7 loops according to the drawing, and remove the remaining ones by a pin.
- V. - on the working spoke we have only 7 loops of the thumb.
We knit in height by the main drawing, without edges! The length of the finger is multiplied by 2. My finger is 6cm * 2 = 12cm high.21 rows have appeared. THE FIRST AND LAST DEPOSITS ON THE DRAWING! !!We return the buttonhole from the big pin.
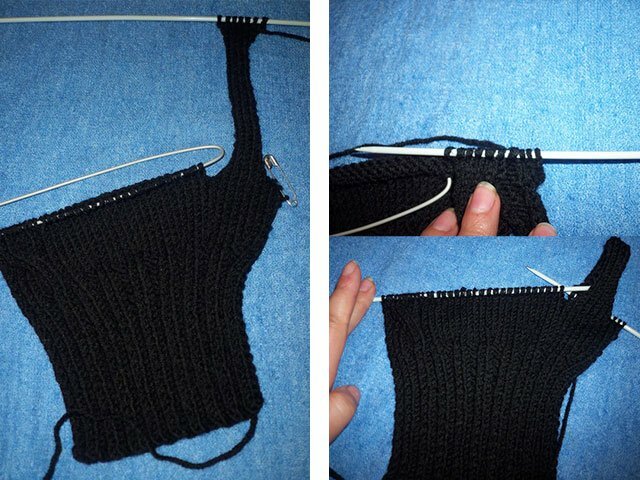
We send to the end of the series according to the figure. Next, we knit on the figure the required number of cm. To the place where the little finger ends. I have 16 facial rows. We try and check the size.
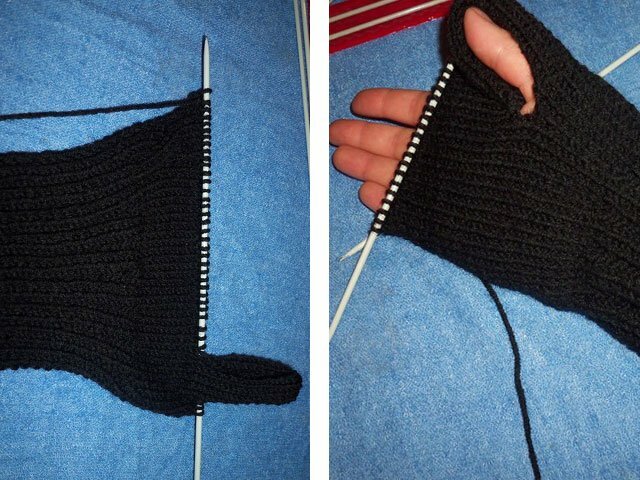
We divide all the loops by 2. We remove one part on the pin.
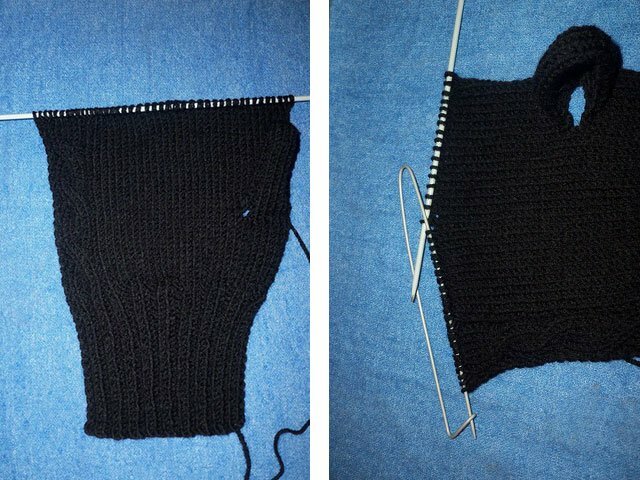
We begin to reduce.
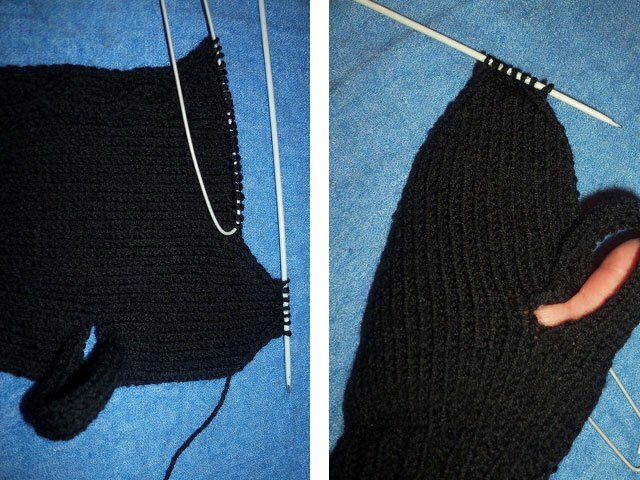
Edgebanding, 1p.on the drawing, 2p.together, further on the figure when 4p is left on the spoke.we tie 2 together, 1 according to the figure and the last, as the back edge.
Inside the series we knit according to the figure. I do not have a spoke with 20 loops. I knit so, edge, face, 2 together, 12 facial, 2 together, 1 facial, 1 viznanochna. Otog 20 loops. We cut this way in each face row until 6-8 loops are left on the spoke. I have 7.
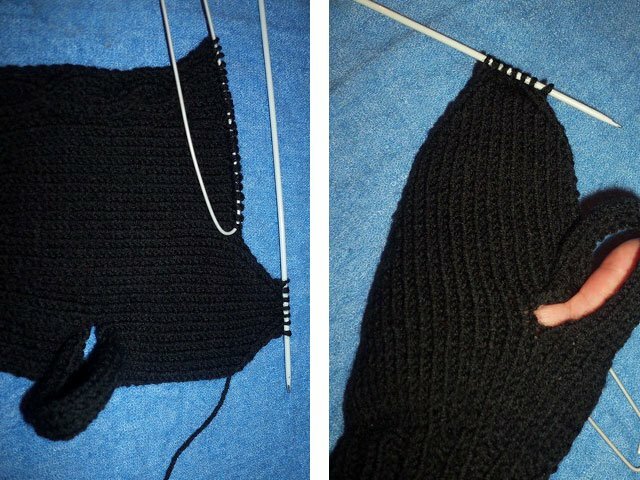
Close the hinges and do the same procedure with the second half. In order to properly finish, simply tie two loops together, shifting the knotted to the main knitting needle.
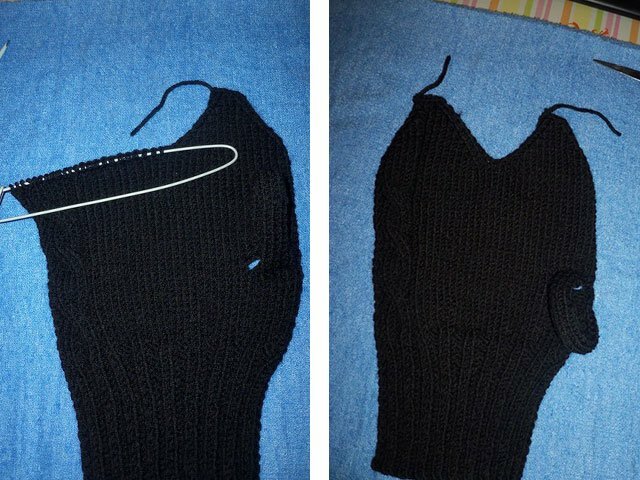
Next, do the final work. We sew a finger and the mitten itself.
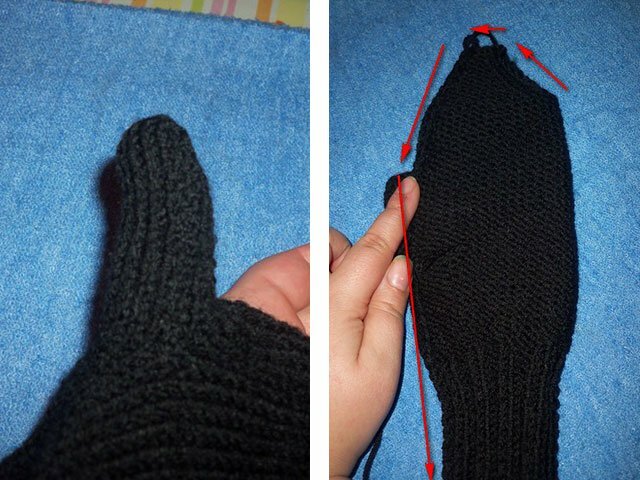
From these lessons you can conclude that it is not such a difficult knitting knitting. Knitting mittens requires basic knowledge and some free time.
Mittens with knitting needles( patterns and description)
Having learned to knit the most simple models, you can dilute them with beautiful patterns, giving vent to fantasy. In the article "Knitting Patterns and Knitting Patterns( description)," you will find them in large numbers.
And now I suggest switching to more complex mittens with knitting needles( the diagrams and description will help you understand this difficult matter).
How to tie beautiful gloves with braids for women
Mitten with braids spokes schemes and description for lovers of classics.
Piglet is the main decoration. We chose a simple braid, but if you are not afraid of difficulties, you can choose a more complex and original option.
Yarn - acrylic( can be made of angora), about 70 g;stocking knitting needles №3,5.
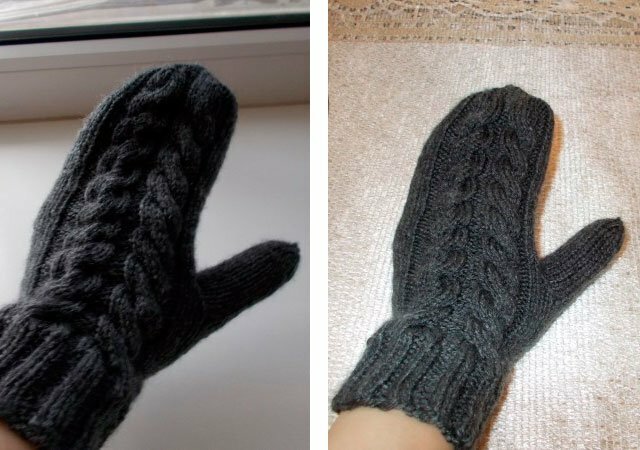
The pattern of the rubber band : 2 persons., 2 out.
Visor pattern of the "spit" : 8 cross the hinges to the left( leave 4 loops on the auxiliary spoke before work, 4 faces and loop the loops from the auxiliary knitting needle).
8 hinges cross to the right( leave 4 loops on the auxiliary spoke at work, 4 persons and loop the loops from the auxiliary knitting needle).
Dial 48 items and distribute them to the stocking knitting needles, you get 12 loops on each spoke. Knit an elastic band of 3.5 cm( if you do not have elastic bands, knit more than cm).
Then, let's start knitting the main pattern. For the convenience of knitting the "braid" pattern, I carry the loops from the 1st and 2nd spokes to one spoke. Those. The loops are distributed over 3 spokes( not 4 spokes), on the first needle 24 loops of the main pattern, and on the 2nd and 3rd spokes on the palm side of 12 loops.
So, the first row after the gum starts with a knitting needle on which 24 loops, we begin to knit the main pattern.
1-6 row: 1 persons., 2 persons, 8 persons., 2 persons., 8 persons., 2 persons., 1 persons., Loops on two spokes on the palm side of the knit faces.
7th row: 1 persons., 2 out., 8 hinges cross to the left, 2 out., 8 hinges cross to the right, 2 dep., 1 persons., Hinges on the two spokes on the palm side knit persons. Repeat rows 1-7 throughout the work.
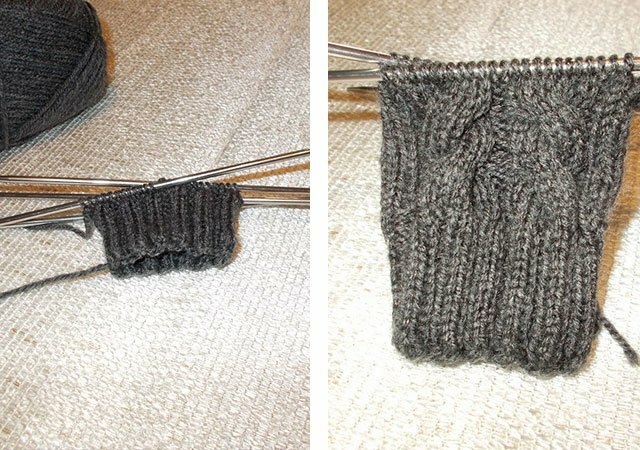
At a height of 10 cm from the beginning of knitting( you do not need to have 10 cm, hands and fingers are all different), form a hole for the thumb. Let's start with the left mittens. On the spoke on the side of the palm( 3rd spoke) we knit 4 faces., 6 sts we take out a pin, we dial 6 pcs on the spoke( so that, as before, 12), 2 persons. Knit for the thumb of the right mitten symmetrically, i.e.on the second spoke from the side of the palm: 2 persons., 6 sts. We take off on a pin, we collect 6 pcs., 4 faces.
The formation of the toe is done after the little finger is closed on the hand.
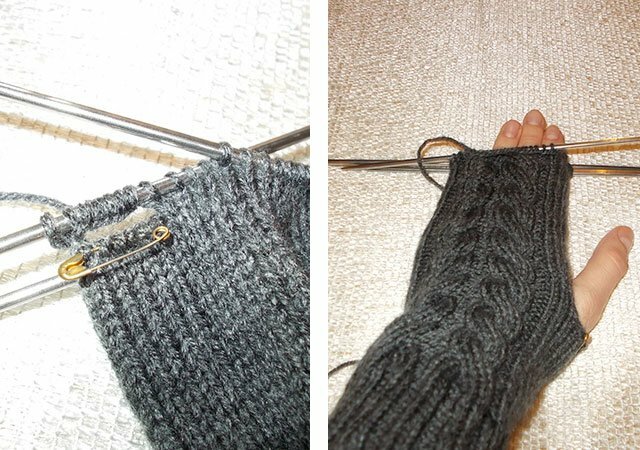
For a rounded toe, tie two middle hinges together on each spoke.
Loosen the loops in each row until there are only 1 pc left on the spokes( total 4).After that, tear the thread off the tangle and thread it into the needle. Pick up the needle with all 4 items, pull off and secure the underside of the mittens.
After the two mittens are tied, let's start knitting the thumb. To do this, we remove the 6 pt from the pin with a pin, dial 6 pips on a parallel row and dial 4 pips on the two lateral rows. A total of 20 p., Distribute them to 4 spokes( 5 pts per spoke).
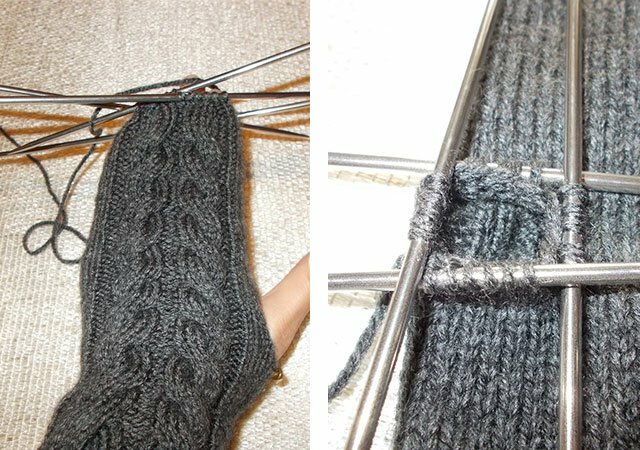
And we knit the circular rows of faces.up to the required length of the finger. We form the toe of the finger in the same way as the moussex toe formation.
Done!
Knitting with knitting needles for children
Kids love it very much when their mother creates, for example, beautiful chanterelles or bears that can be put on pens and go to play snowballs.
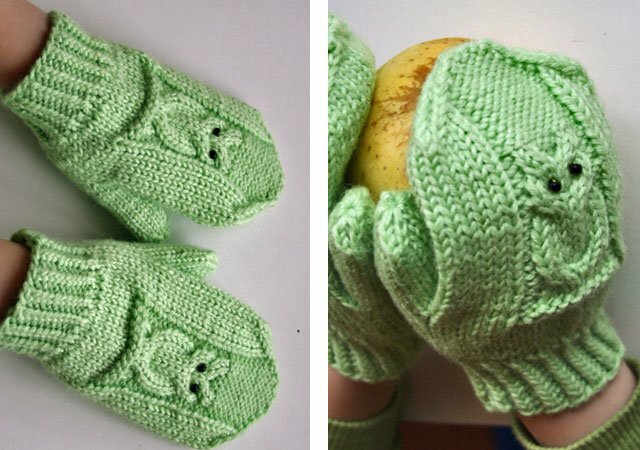
Knitted baby mittens with owls
For the child there is nothing more interesting than a mitten with a pattern. He wears such things with great pleasure, so I propose to please the child with wonderful owls.
Materials and tools:
1 coil;
stocking knitting needles No. 1.5;
additional spoke or special removal of loops;
needle for yarn;
four beads;
thread and needle for sewing beads.
Mittens are knitted in two strands.
So, type 32 loops, distribute them to 4 spokes( 8 each).
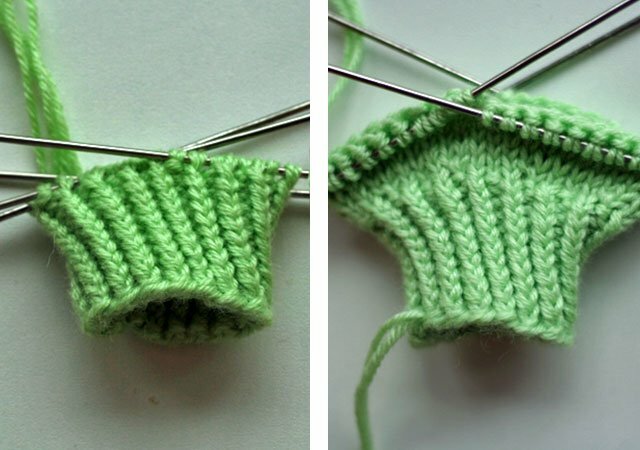
1 - 10 rows: an elastic band of 1 persons.х 1 изн.
11 series: persons.
12 series: persons;add from the broach to 2 persons.on each spoke
13-18 rows: faces.
19 series: we begin to tie the "owl" on the 12 loops of the third and fourth spokes. The first spoke is a person;second spoke - faces;third spoke - 4 persons., 6 debris;the fourth spoke - 6 rept., 4 persons.
20 series: the same as the 19th.
21 series: the first spokes are persons;second needle - 2 persons., remove 6 thumb-holes for a pin, 6 additional loops, 2 persons;third spoke - 4 persons., 2 out of a person, 4 persons;the fourth spoke - 4 persons., 2 dep., 4 persons.
22, 23 rows: the first spoke is a face.; second spoke - faces;third spoke - 4 persons., 2 out of a person, 4 persons;the fourth spoke - 4 persons., 2 dep., 4 persons.
24 series: the first spoke is a face.; second spoke - faces;third spoke - 4 faces., 2 out., 2 loops removed for extra. Spit for work, tie the next two loops of faces., then loops on extra.spokes - faces.; the fourth needle - two hinges to remove on dop.knitting needles before work, knit the following two faces., then loops on extra.spokes - faces., 2 out of a kind, 4 persons.
25 - 31 rows: first spoke - faces., Second spoke - faces., Third spoke - 4 persons., 2 persons., 4 persons;the fourth spoke - 4 persons., 2 dep., 4 persons.
32 series: the same as the 24th
33 - 35 series: the first spokes - faces.; second spoke - faces;third spoke - 4 persons., 2 out of a person, 4 persons;the fourth spoke - 4 persons., 2 dep., 4 persons.
36 series: the same as the 24th and 32nd.
37 series: the first spokes - faces.; second spoke - faces;third spoke - 4 persons., 2 dep., 2 persons., 2 dep.;the fourth spoke - 2 dep., 2 persons., 2 persons., 4 persons.
38 - 41 rows: the first spokes - faces;second spoke - faces;third spoke - 4 persons., 6 debris;the fourth spoke - 6 rept., 4 persons.
39 series: we start to reduce. The first spoke is to tie the first 2 loops together of the faces.behind the back wall;the second spoke is to tie the last 2 loops of the faces.behind the front wall;the third spoke is to tie the first two loops together of the faces.behind the back wall;the fourth spoke is to tie the last 2 loops of the faces.behind the front wall. The remaining loops knit along the pattern( faces and knitted)
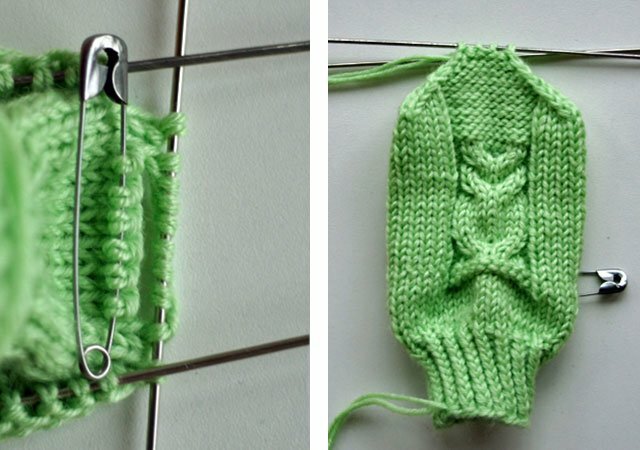
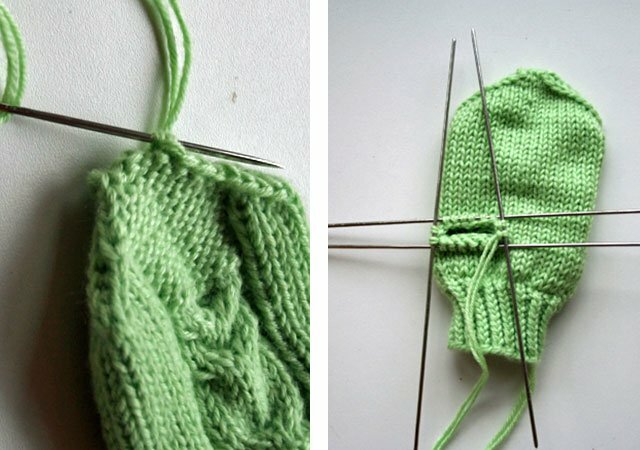
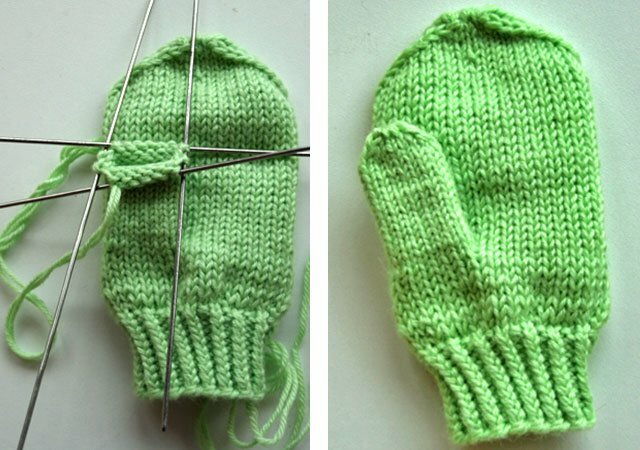
When there are only 8 loops left on the knitting needles, we pull them together with a needle. For the big finger, we transfer the 6 loops on the spoke to the pin, we take 2 + 6 + 2 loops from the edges for three spokes.
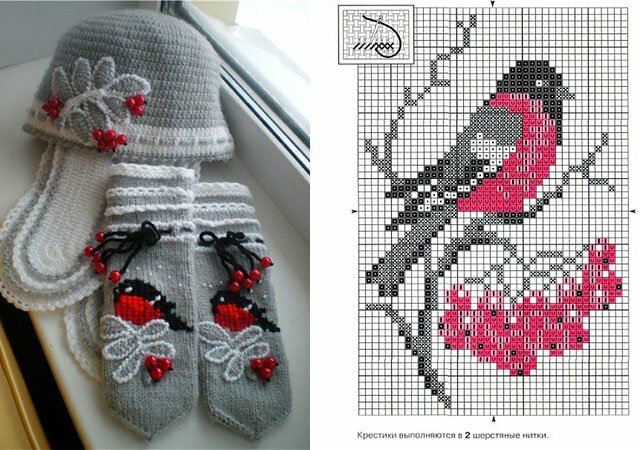
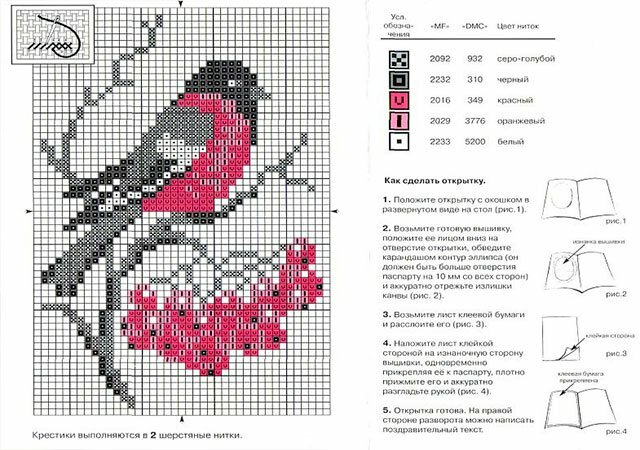
Ideas with bullfinches( embroidery)
With simple mittens on hand, you can decorate them with original embroidery, which will look gorgeous in a children's kit.
Video lessons from the best masters
YUTUB today has become a real treasure where you can find a huge number of training videos. For example, in Svetlana Bersanova's blogs, you can watch the video for free. And such a good author is not small. You will be able to find a mentor to your liking and receive the most valuable knowledge absolutely free of charge.
Original mice or white hedgehogs for toddlers
How to knit mittens
Warm openwork for girls( double of mohair)
Part 1
Part 2
Interesting two-color minions for boy 7-8 years
Jacquard products( video lessons)
Jacquard with a winter theme - a classic, which will always be relevant, so I propose to go to the most complex options that require maximum time and attention to detail.
Original knitting with ornament( Norwegian patterns)
For girls with deer
If you want to learn how to knit a complex but very original "deer" pattern, this lesson with a detailed description will help you.
Men's mittens with aranas for little men
If you learn all the lessons we've offered, you can fantasize and create products of any complexity: women's gloves without fingers, with convertible tops, with false patterns, thick yarn and embroidery. Good luck with your endeavors. Try, experiment and indulge your home with nice crochet.
