

- 1 Drawings on the nails for beginners step-by-step photo
- 1.1 Drawings on the nails by dot-step step-by-step photos - easy diagrams
- 1.2 Simple pictures of the dots on the nails at home photo step by step
- 2 Video for beginners how to draw dots on the nails
Dots - a tool for nail design, reminiscent of a pen with a ball on the end. Two of its varieties are popular: two-sided and with a replaceable tip.
Different ball diameter allows you to create ornaments of varying complexity from standard to real masterpieces. Drawings on the nails with the points of the photos you can see below, look stylish and original. Run them at home easily and quickly. After all, the whole process of learning for beginners is presented step by step with photos and video lessons.
Those who want to learn how to draw dots need to purchase several instruments with different diameters of the ball. The secret of obtaining a beautiful design by 80% is determined by the choice of the right drawing. It is better for beginners to make a choice in favor of simple patterns and only having gained experience to pass to more complex.
Drawings on the nails with a dot-like step-by-step photo - light schemes
With the help of an uncomplicated tool, professionals can create author drawings on shellac. For beginners, in order not to lose enthusiasm, it is better to start with simple forms. A step-by-step photo helps to avoid mistakes.
For creative experiments, varnishes of necessary colors are applied drop by drop onto a piece of paper. In this way, it is most convenient to type them with dots.
So what simple shapes can draw a beginner? Watch training videos and photo lessons:
Point
Dial a small amount of lacquer and put the tip of the ball on the nail plate.
For stains of the same size, before applying each of them, dip the instrument into the lacquer.
To draw elements of different sizes, you can put 3-4 pieces in a row, without additional dipping. But the easiest way to do this is to use dots with different diameter balls.

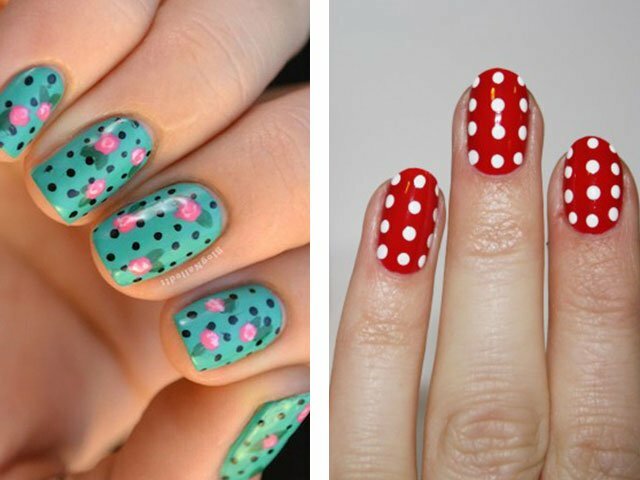
Flowers
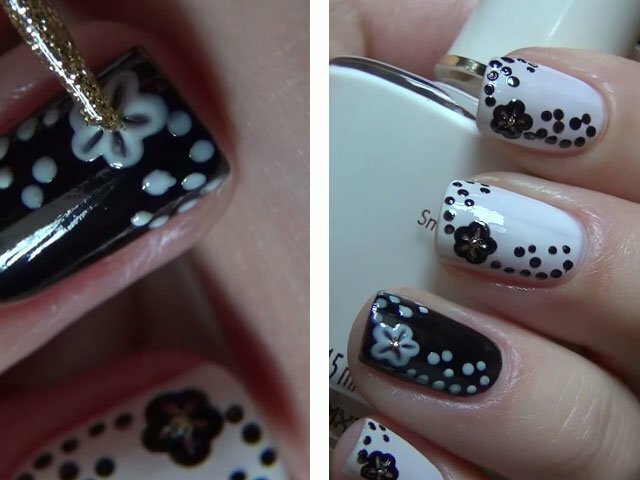
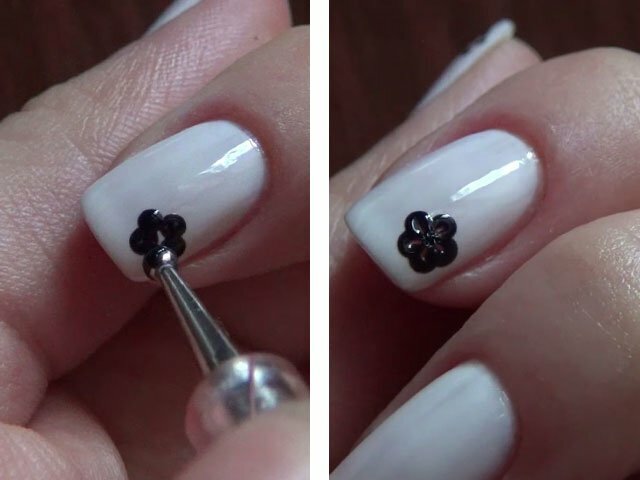
Put a rhinestone in the center of the putative flower.
Around the base of the flower to apply droplets - petals.
A flower similar to a Kalanchoe can be obtained by placing the points 2-3 mm apart.
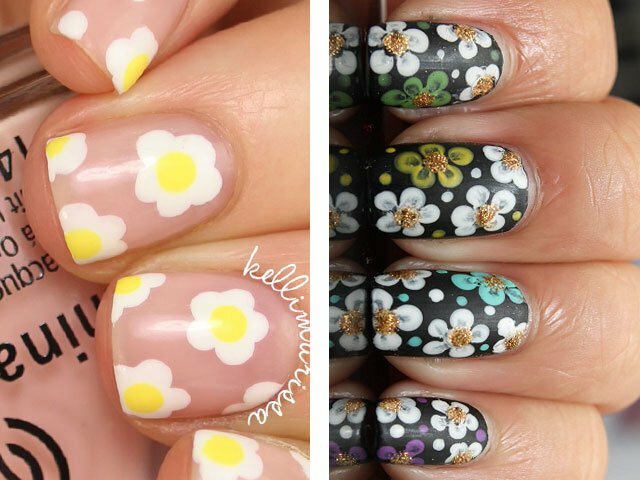
If stains are set frequently, they will merge in a line and thus the flower will look like a child's figure.
To obtain elongated petals like a lily or chamomile, immediately after applying the dots, stretch them with a toothpick in the desired direction, as shown in the photo.
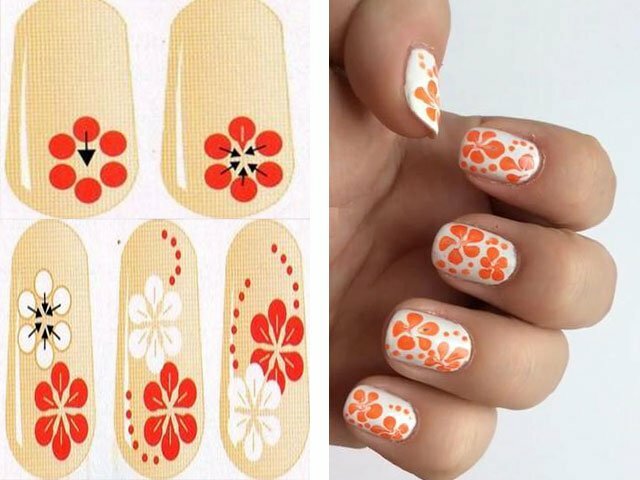
And it is possible as follows:
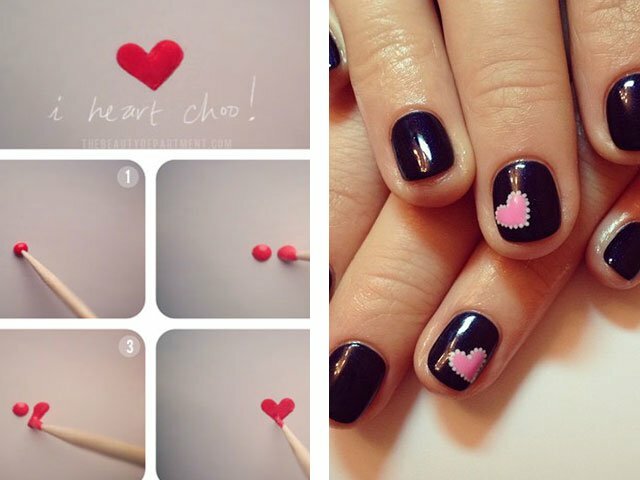
Heart
Draw two large drops close to each other on the nail.
With a fine brush from below, draw the connecting lines, giving them a heart shape, as shown in the photo.
Bow
Large size dots, place 2 drops.
Another shade and smaller dots in their center make two more.
Using a thin brush or needle, draw a connecting line between them.
The outline of the bow can be emphasized in a dark color.
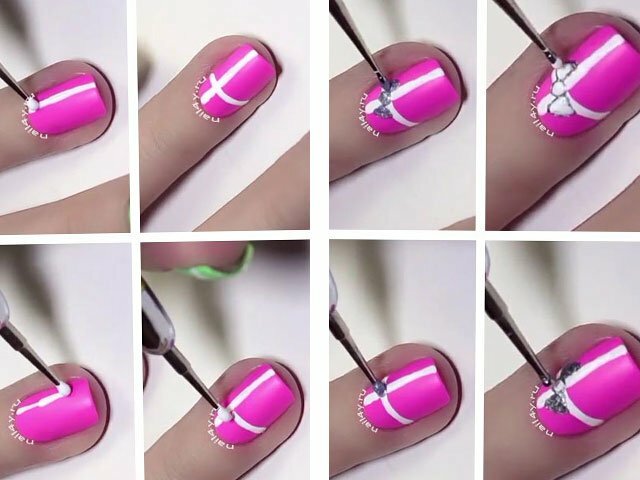
Photo for inspiration

Simple pictures of dots on your nails at home photo step by step
There are simple compositions that you can easily draw with dots and beginners. For example, geometric shapes, abstractions or animalistic prints. Make a drawing original help points of different diameters deposited randomly or in an orderly manner. Special skills for their execution will not be required, but the aesthetic taste does not hurt.
We offer a selection of simple master classes with photos, where the process of creating patterns is shown step by step:
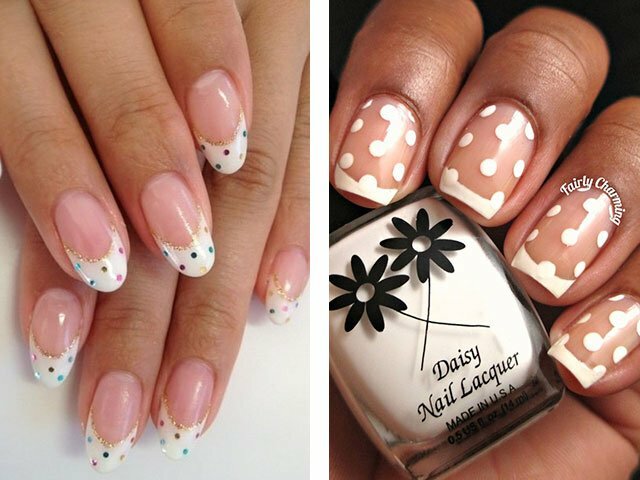
Manicure "French peas"
- Fingernails along the entire length covered with light pink gel varnish;
- Draw a white "smile" on the tip. The basis for the design should be in the form of a classic French manicure;
- In the same shade dotted symmetrical double row of drops. The drawing should be placed horizontally, directly under the white strip of the jacket;
- Layers of all stages to perform step by step, carefully dry and finish at the finish.
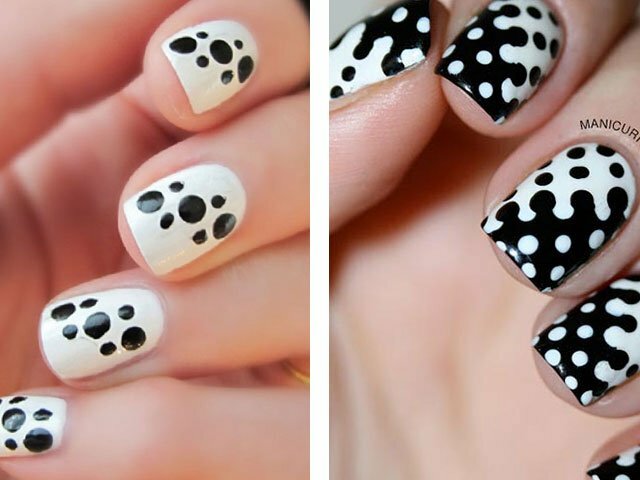
Manicure "Contrast scattering"
- For a basis it is necessary to take a varnish covering of black color. Apply and leave for a few minutes until completely dry;
- Meanwhile, dilute the white paint on the palette and dab the dots into it;
- From the middle to the tip of the nail plate, set the tool in a free-standing manner with points of different sizes;
- Secure the picture with the finish coat.
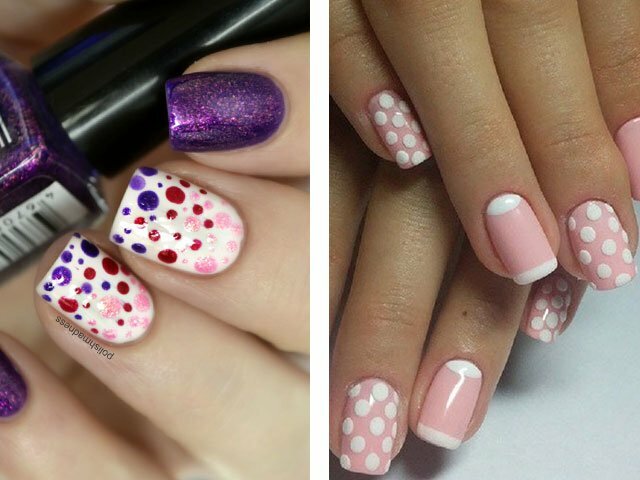
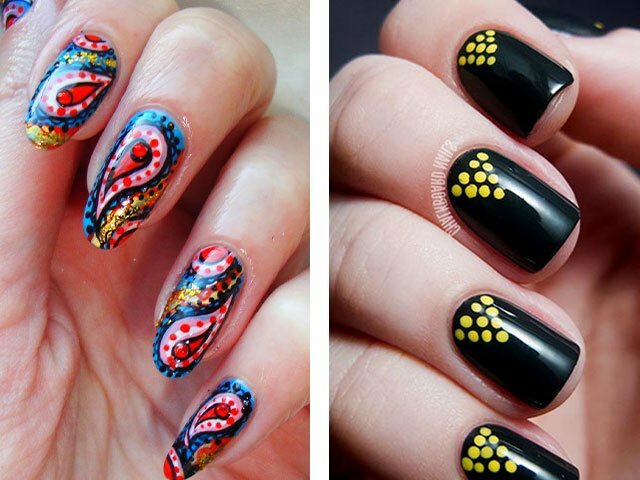
Manicure "Fireworks"
- Paint nails with black or dark purple varnish, dry well;
- For design, prepare lacquer coatings of yellow, pink and turquoise;
- Dot the dots in the yellow varnish, and in the center of the nail in the vertical direction, place several large diameter points;
- Type a pink lacquer and apply small patches in parallel to the large ones.
- Do the same with a turquoise hue on the other side;
- Seal all layers with a finishing coat.
On the next video you can see the instructions for creating the pattern step by step:
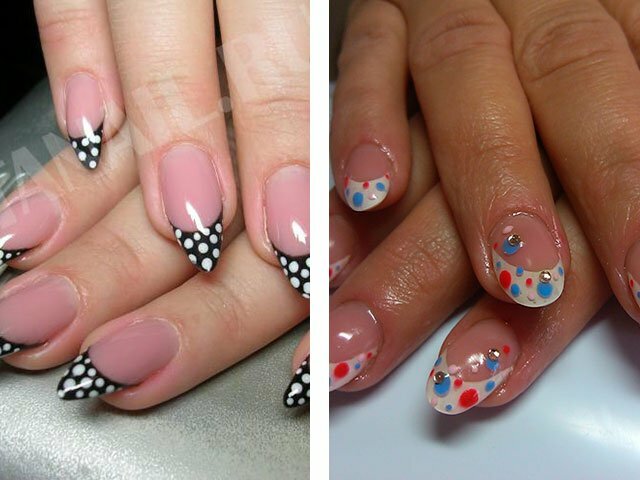
Manicure "Zebra"
- Fill the nail plate with a white lacquer coating;
- After dipping the instrument ball into a black shade, begin to draw the corners from the right tip of the nail. To make the drawing look natural, dilute the corners with wavy lines, as shown in the video;
- At the end, fix the print with a fixer.
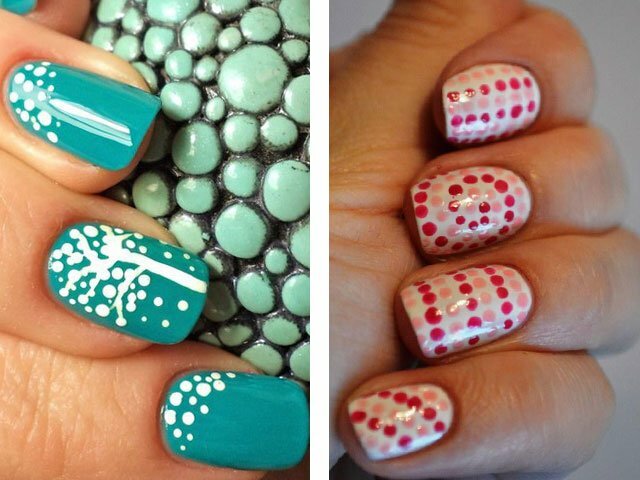
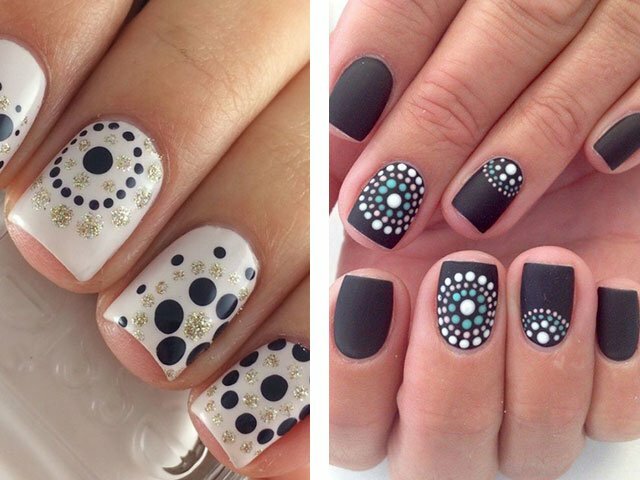
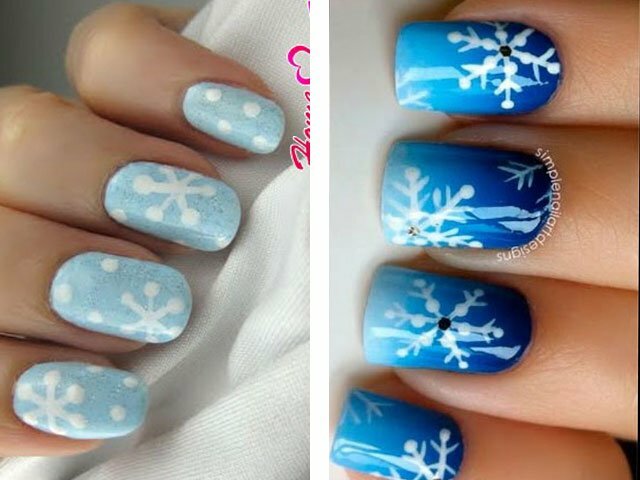
Manicure "Snowflake"
- Apply a blue varnish on the nails.
- Use the white dot to draw a base - 3 intersecting lines and small branches on each side.
- Place white dots on the tips and near the center of the snowflake.
- Top fix with a fixer.
Variations of the above drawings can be found more than a hundred. The main thing is not to be afraid to experiment. More interesting ideas can be found in the video below.
Video tutorial for beginners how to draw dots on the nails
In the end of the article we suggest to see a training step-by-step video for beginners. From it you will learn how to make simple drawings on nails with the help of an unusual tool. Learn to quickly make a fashionable dots design with simple schemes.
Dial a small amount of lacquer and put the tip of the ball on the nail plate.
For stains of the same size, before applying each of them, dip the instrument into the lacquer.
To draw elements of different sizes, you can put 3-4 pieces in a row, without additional dipping. But the easiest way to do this is to use dots with different diameter balls.
Put a rhinestone in the center of the putative flower.
Around the base of the flower to apply droplets - petals.
A flower similar to a Kalanchoe can be obtained by placing the points 2-3 mm apart.
Draw two large drops close to each other on the nail.
With a fine brush from below, draw the connecting lines, giving them a heart shape, as shown in the photo.
Large size dots, place 2 drops.
Another shade and smaller dots in their center make two more.
Using a thin brush or needle, draw a connecting line between them.
The outline of the bow can be emphasized in a dark color.