
Developing toys for the child that you can do yourself. Review of simple and useful toys for the child.
Content of
- What kind of educational toys can I make with my own hands from improvised materials?
- Developing the motor skills of toys with their own hands
- Developing toy a cube with their own hands
- Developing toy of a turtle with their own hands
- Developing a toy with their own hands
- Developing toys from bottles with their own hands
- Developing toys from wood with their own hands
- Developing toys from kinderov with their own hands
- Developing toys from feltwith their own hands
- Rug for children with their own hands with arches, with buttons
- Toys for developing carpet with their own hands
- Touch pad rI have children of their own hands
- Video: Developing toy for the child with his hands
Educational Toys perform the function of stimulating the acquisition of certain skills. Depending on the age, the child must be able to perform certain actions. For this is the timely neuromuscular development of the child. Toys help to develop better abilities.
What kind of educational toys can I make with my own hands from improvised materials?
- All toys that are performed by their own hands must correspond to a certain age of the baby. Until the first year of life, the child only learns to interact with the outside world, he develops a grasping reflex, the first control of the coordination of the
- is born. During this period the toy should be bright and attracting attention. It is also important that its elements are sufficiently large, the component part of no more than two or three parts. Homemade beads, balls from rags, rattles
- are good. After about six months you can make matryoshkas, cloth dolls and beautiful cubes. All this develops small motor skills and promotes the speech activity of
- . After a year, you can give the child toys that he can disassemble. To study colors, toys can be combined in a gamma. Well develop associative cards and cubes with drawings
- After two years the child will use plasticine, it too can be made at home. At the same time, using food coloring you can achieve any color you need. Well develop various crafts from paper and cardboard
Developing motor skills toys with their own hands
For the development of motor skills, it is important for a child to always have a bright object before his eyes with elements that he can not take in his mouth, and if he starts to bite, he will not swallow. Mostly, a toy is made of fabric, with small inserts so that the child can grab them and pull them.
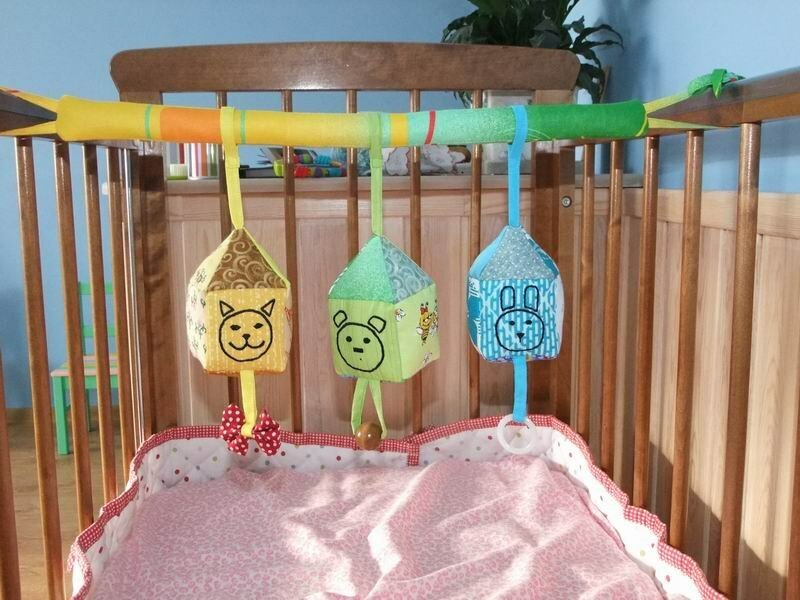
- The toy, which is presented in the picture, is made from the brightest materials at hand. As a stretcher over the stroller, a sufficiently strong plastic tube is used, inside which the rope is skipped.
- The velcro loops are sewn around the edges, with which you can cling a suspended stretch to the baby bed. Accordingly, the size should be selected after measuring your crib. Planck should not sag. It is important that the child reaches out to the toy, develops the soy motor
- The plastic tube is first lined with foam rubber, then several layers of colored towels. The towel should be cut into small pieces to wrap the tube 2-3 times. This is how the color bar is made. It is desirable to use the standard colors of the rainbow
- The very frame of the cushion is made in the form of a house, but you can choose any shape. Make a cut on the fabric, then stitch the cut out mock-ups from the fabric. On the side faces you can insert not too thick elements of the frame. If there is no material for them, you can do without them. The inside of the toy is stuffed with light foam, the toy must be lightweight.
- It is not necessary to withstand the ideal shape of each toy, the color and volume are more important here. For the ribbon of the suspension on the bar and sewing of the beckoning trick below, the same technology is used as the fastening of the bar to the crib. If the upper part is made on Velcro, then the bottom is best sewn "tightly" so that the child does not tear off the hanging element
- . As an additional factor that draws attention, it is possible to draw a marker of simple mugs that mimic positive emotions.
Developing toy a cube with your own hands
Developing toyThe cube is designed to give the baby an opportunity to touch and throw the object. Cubic form accustoms the hands of the child to large objects. It best develops basic motor skills. It is important that the child likes the toy, so you must make it very bright and saturated with elements.
- All the elements of the cube must be tightly sewn. When the child is playing with this toy, from time to time, check that its parts are not torn off to avoid injury. Do not use buttons, beads, or other jewelry in this toy. The entire décor should consist of colored fabrics that are firmly sewn around the perimeter of the
- . To develop fine motor skills on one of the faces of the cube, you can sew a thick lace with large beads strung on it. Beads should also be made of fabric, however, make sure that they move easily along the cord from side to side.
- . Making this toy, make your imagination as much as possible. You can take ideas from children's pictures. Do not be discouraged if some element turns out to be inaccurate or not as beautiful as you would like. If the child likes the coloring - for him it will be the most favorite toy
- . The pattern of any picture can be printed on paper, cut and transferred to a fabric. Beads make with a large hole in the center. You should get a bagel of any shape that the child will easily move on the lanyard, holding the toy with the other hand. It develops coordination and motor skills
Developing turtle toy by own hands
This toy is oriented to the age of one year. Like most toys, the turtle is made soft, if desired, you can attach a string with beads to the armor, which the child will rub with his fingers. The toy is quite difficult to manufacture and will require efforts from the parents to create.
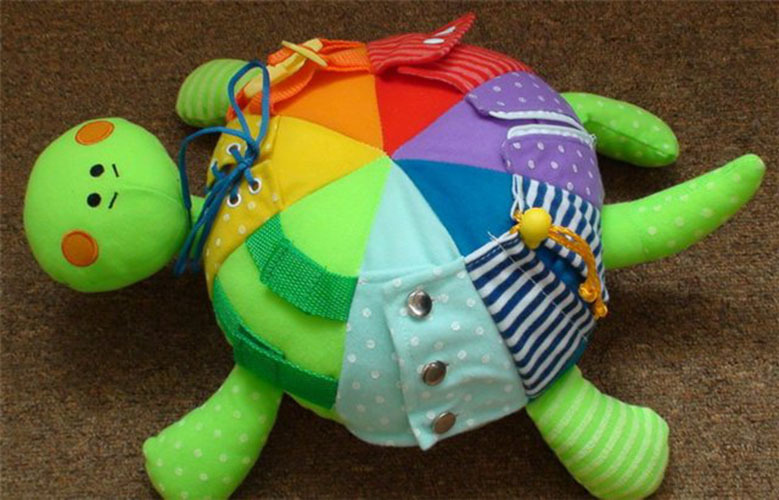
- Here before you get to work you need to properly prepare the patterns. The main body of the turtle is made quite high. This includes a shell on which it will be possible to attach a lot of ornaments and developing beads
- The head, four paws and a tail are made of the same material, small in size. The main emphasis should be on the shell, form it as colorful and diverse as possible to fill
- . The child will study this toy for a long time, if it is diverse. Only then will he not get tired of it quickly, and he will be able to develop with it. In the length of such a toy should not exceed 15 centimeters. Too big and cumbersome thing will not be interesting to the baby
- The finished case is stuffed with foam rubber, and then it is lined with a lot of different ornaments. All elements must be different not only in form, but also in color. Show maximum diversity. This will make the toy more interesting
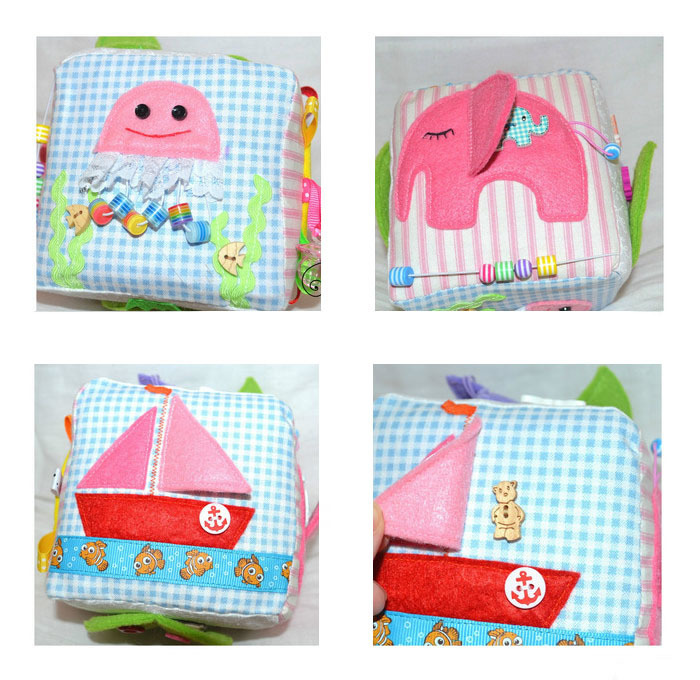
Developing a toy book with your own hands
Despite the fact that the toy really resembles a book, its simpler version can be made from one or two pages. A complex toy is a book with several turns that connect at the top with a pen.

- Each "page" is a toy made separately as a flat square or rectangle. Try to make each plane different in color. Fill the pages with interesting and instructive images of fish, pets, numbers and letters
- It is not necessary to adhere to the boundaries of the "page", some elements of the book's toy may go beyond, it will add to the child's interest, the protruding elements will want to carefully study the
- . In order for the spread to hold itsform, in a square piece of fabric, a thick cardboard is inserted in the size and on both sides is lined with a soft cloth. If desired, you can add one layer of foam rubber or a fleecy
- inside. Do not grasp small buttons and buttons on the toy. All pictures should be large, but do not make them all the same size. Remember the child, for the present, does not single out specific elements and perceives the subject holistically, the uniformity and consistency of dimensions will make the toy boring and uninteresting.
Developing toys from bottles with their own hands.
Bottles are very loved by children. With their help, you can make an excellent sensory toy for the child, which will develop visual, auditory, and motor function. To work, you need transparent bottles of small size, any interesting filler, glue and scotch tape.
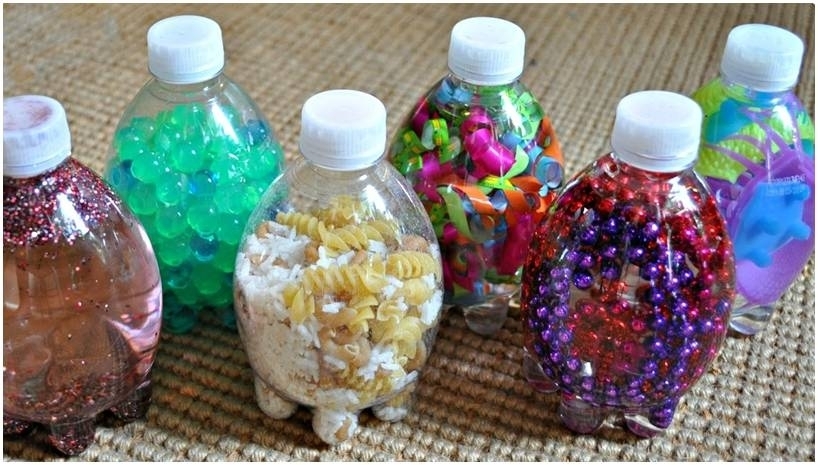
Inside the bottle you need to put a filler. It is important that it is bright and interesting. Use loose substances that make noise. Try to lay down different materials, check how they make a sound. Always leave about 30% of the empty space so that the toy sounds in the hands of the baby.
As a filler, you can use water with floating elements that will attract the child. After the filler is filled up, tightly fit the lid on the technical adhesive for plastic. Check the reliability of the cover, then wrap the cover with adhesive tape as an additional protection so that the child does not reach the cover.
Wooden toys with own hands
With a tree it is difficult to work independently, if there are no special skills. If you know how to cut figurines out of wood, make the child as many different toys as possible, with which he can develop his ability to hold heavy objects. If there are no special skills, do not worry, there are simple educational toys made of wood that everyone can do.
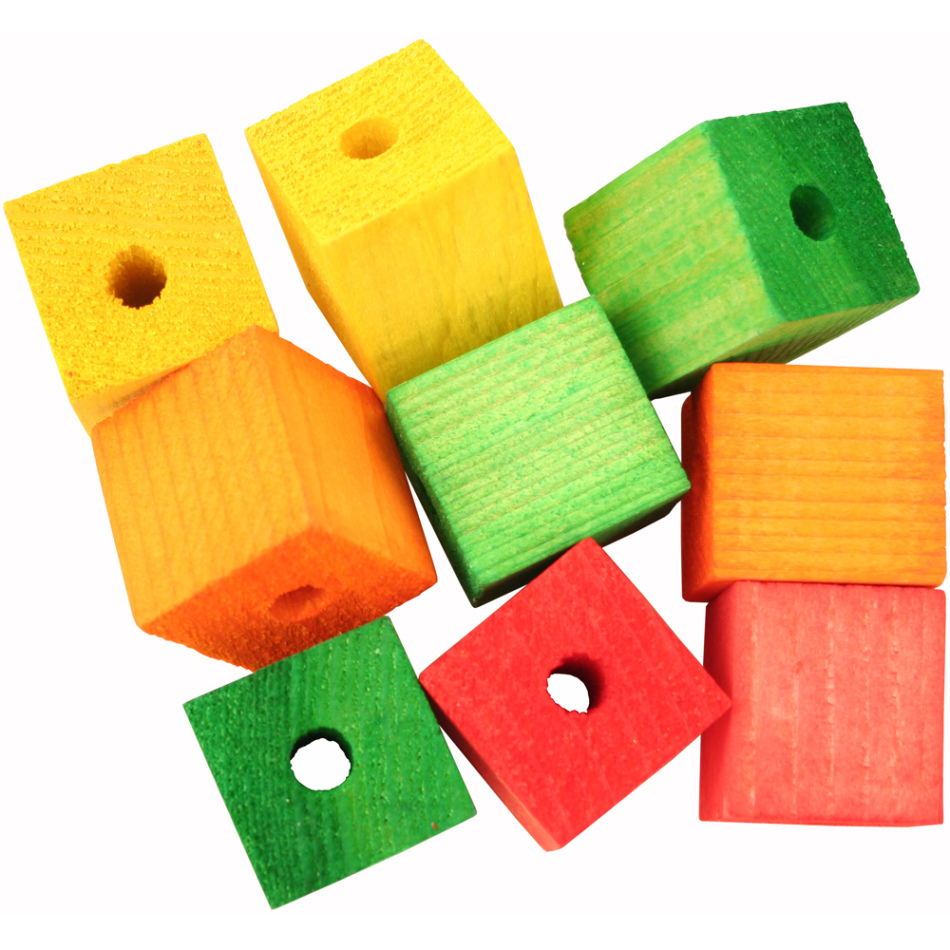
- For the manufacture of toys you will need to buy a wooden beam section of 50x50 and cut it into individual cubes. Before cutting, sandpaper along the surface of the bar, making it as smooth as you have the patience
- Measure exactly the distance of the cube and saw the bar. The cut location will also need to be polished carefully. For work, you can use a drill with a nozzle, if there is one. Or, perform this simple task manually. It is necessary that the cubes are pleasant to the touch
- To make the cubes beautiful and interesting, they need to be painted in different colors. To add excitement, you can make different holes in the center of the cube( do not forget to grind them with a round file too).Then you can leave the decorated cubes as they are, or paste beautiful pictures, letters, numbers or draw ridiculous faces on them
Developing toys from kinderov with their own hands
The most interesting thing that can be done from kinder - it's "noise" with a different tactile sensation. These toys will develop hearing, care and ability to hold small objects.
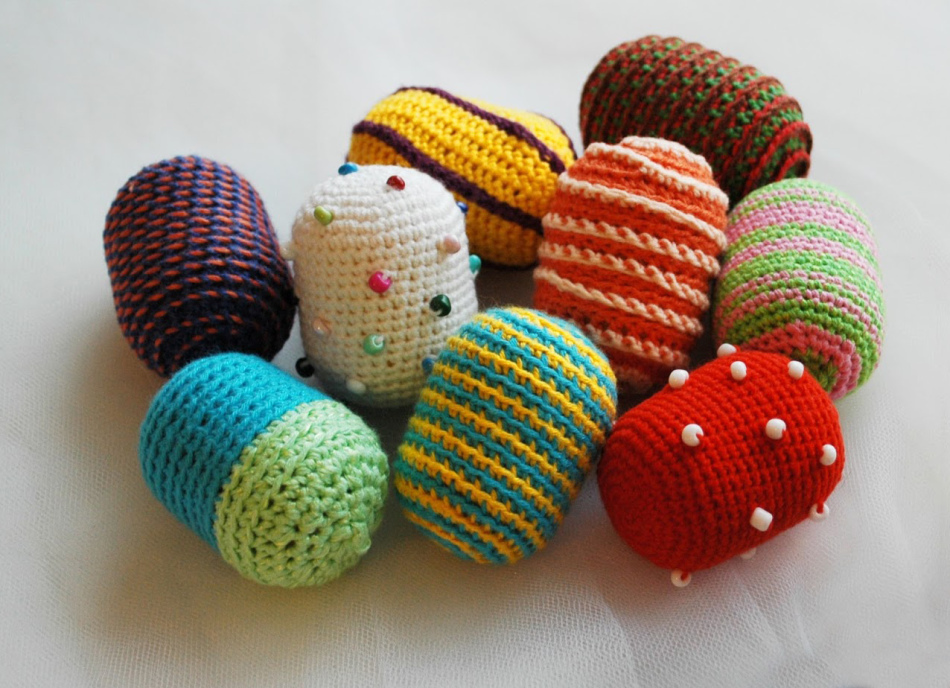
For the preparation of toys, you need to know how to knit. Tie the kindery with colored threads, make the surface as different as possible to the touch. One toy can be softer to the touch, the other is tougher. Add woven foreign elements that will change tactile signals, make the surface textured, weave patterns.
Inside each toy you need to put certain loose materials that will produce a different sound. Half of the kinder is best planted on the glue so that during the game they do not open. Make sure to make seven different toys and leave one blank. This will add variety to the child's play and improve its hearing capabilities.
Developing toys from felt by own hands
Toys from felt very pleasant to the touch and allow the child to combine visual and tactile memory. Such toys are made in the form of a book or rug.
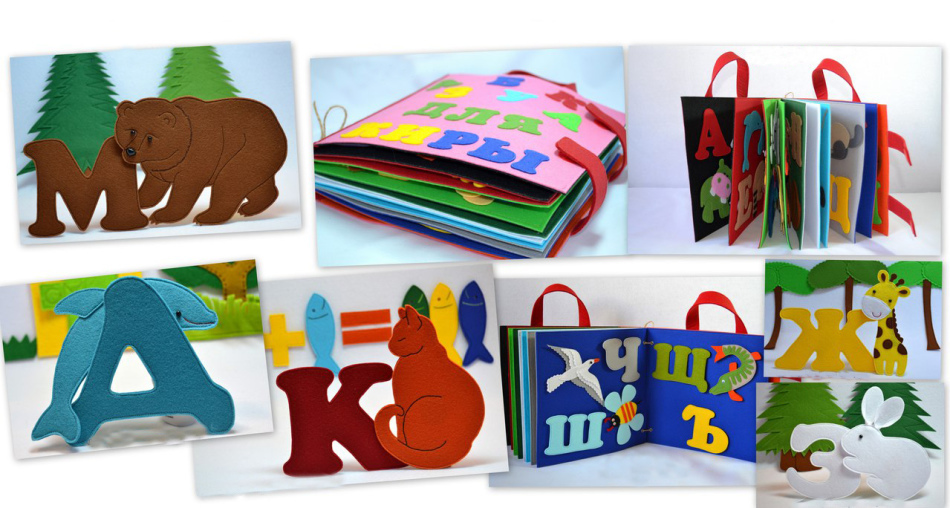
Make big letters of different colors and make them beautiful animals or other pictures. Such an alphabet can be combined into the alphabet or make separate cards. The sizes of toys choose at own discretion. If these are separate cards with letters, in the future, you can put simple words on the floor.
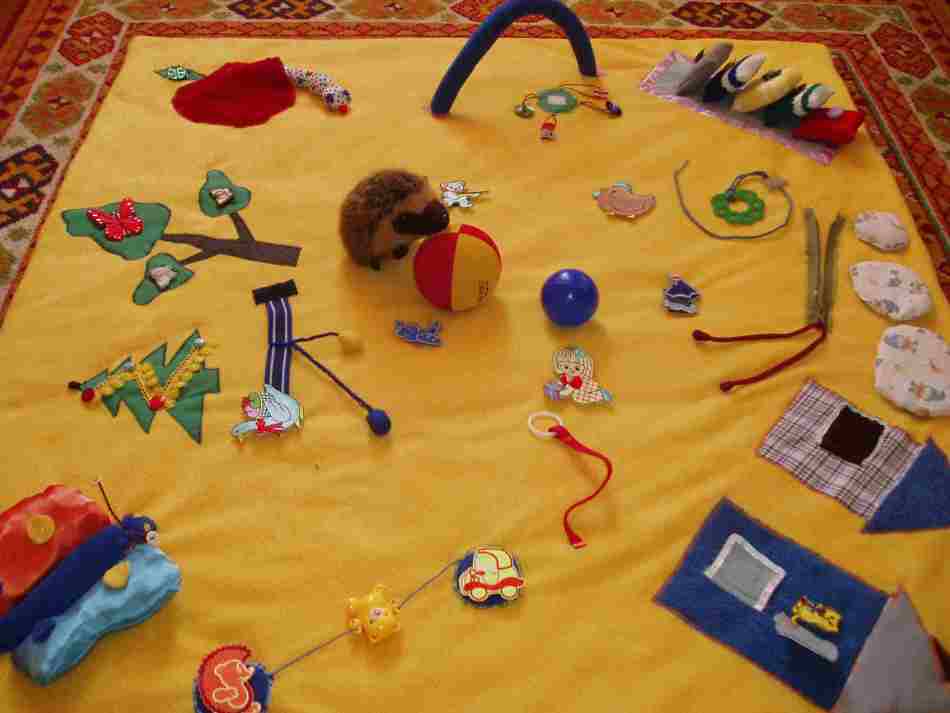
Rug for children with their own hands with arches, with buttons
This toy will attract the child's attention for a long time. High arcs are made of plastic tubes and are lined with foam rubber and colored fabrics. On such a rug for the child there are a lot of bright and colored elements that he will consider, touch and study.
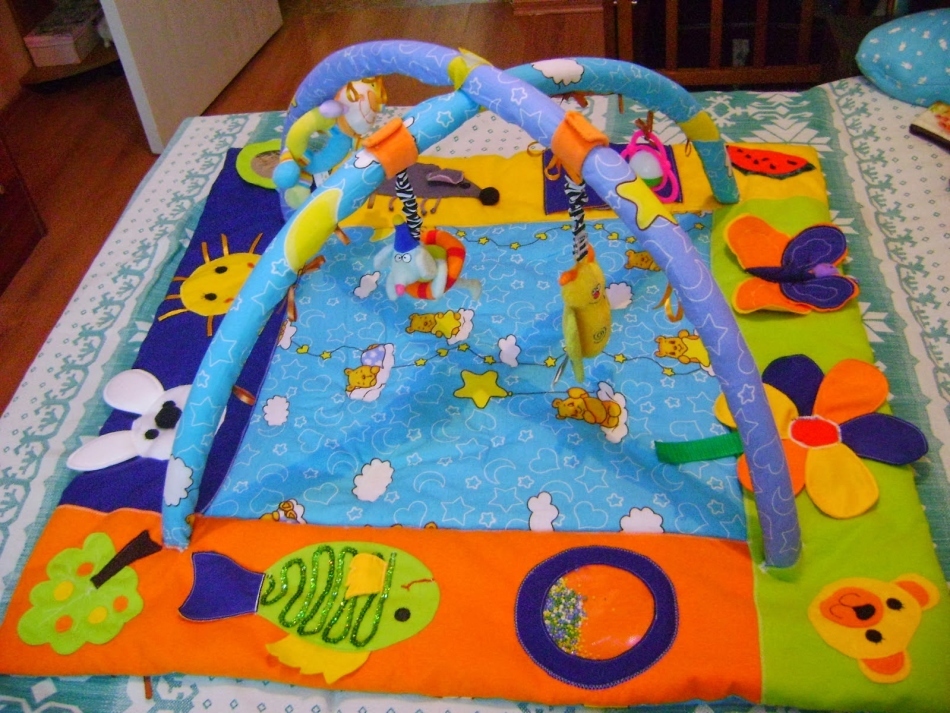
The base of the rug do not less than a meter per meter. Make it as diverse and colorful as possible. Be sure to sew a large number of beautiful and eye-catching elements. You can divide the rug into several thematic sections in order to push the child to a logical interpretation of all that he sees.
The overhanging arches must contain hanging toys. This will help develop a comprehensive perception of the world, the child will turn on the rug, look down, up and around. This is a good development of motor function.
Toys for a developing carpet with their own hands
The development mat should be filled with a lot of different toys. The more diversity there is on it, the better and faster the child will develop.
You can always replace boring toys on the rug or those that do not cause the child's interest. Carefully look after his game and, depending on it, change the filling of the rug by various additional details.
All toys for the developing mat can be completely different. Do so that they are firmly sewn to the mat and the child could not tear them away. One single rule for such toys, they must be very bright and have different shapes. If at the same time they will be completely unique to the touch - this will only be a plus.
Touch pad for children with their own hands
The touch pad for the baby should be filled with unusual toys and stripes, which he can touch with his hands. All the toys that the child liked earlier, can be sewn to the rug, giving him the opportunity to come up with his logical laws for their placement.
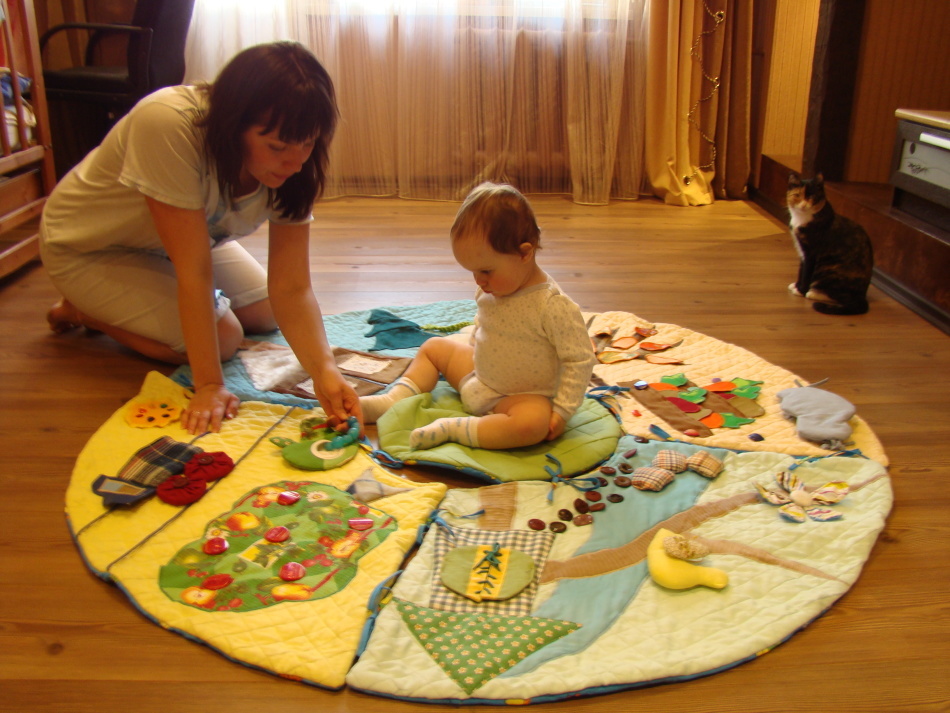
For a rug, soft toys are usually used. The rug helps to concentrate the child's attention. Most importantly, he keeps the baby in one place, fills his mind completely and gets rid of the thought of creeping to the closet and naughty there.
The sensor pad is well developed sensory perception of the environment. He gives the child an opportunity to understand how the world works, attracting colored ornaments. During the game on the mat, the child is able to develop independently without the help of adults. In this case, the baby is always in motion, which is very important for its physical development.