
Any woman wants to always look perfect, and the appearance of hands plays an important role in shaping the overall impression of it. Sometimes an unsuccessful manicure can spoil not only the appearance of the nails, but the whole image and mood. In order not to get into such unpleasant situations, you need to know how to properly paint your nails and what rules you must follow.
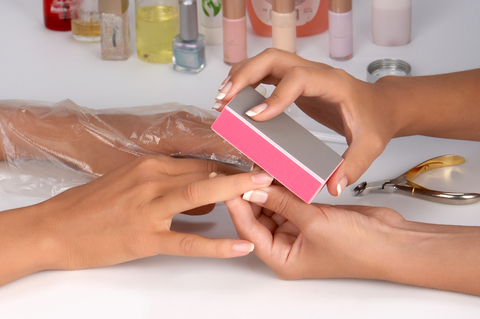
Specialists in beauty salons use the means available to everyone, and the secret of quality manicure is the thorough execution of all procedures. Divorces and unnecessary smears on the skin make your hands untidy, but the perfect look of manicure depends not only on the carefully applied varnish. A very important role is played by the proper preparation of the nails, the processing of the lateral ridges and cuticles.
Technique for applying varnish
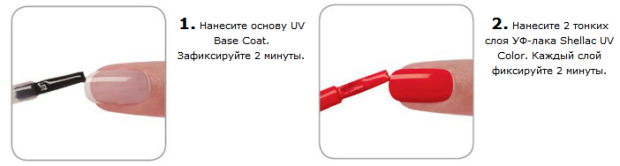
So, the nails are put in order, the cuticles are processed. How beautifully to make up the marigolds, so that the coating looks perfect and kept for a long time? Painting should be carried out in three stages, alternately applied:
- Basis.
- Lacquer.
- Fixer.
Basis of
First of all, it is necessary to apply a base coat that represents 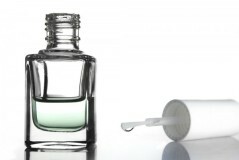 as a colorless base. It is designed to protect the nail plate from the negative effects of lacquer, as well as to level the surface.
Thanks to the base, the manicure made at home will look much better. As it can be used as a special strengthening lacquers, as well as conventional colorless bases.
Color coating
Before applying the varnish, you should prepare several cotton buds and discs, as well as a bottle with a liquid for removing varnish.
The place in which you are going to conduct the procedure should be comfortable and well lit. Varnishes are recommended to use high-quality, easily distributed on the surface.
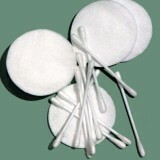 cotton wool discs and sticks
  nail polish remover
 How to properly paint nails
Painting should begin from the middle of the nail: apply a wide strip of varnish on it, without bringing the brush to the cuticle, and then begin to gently spread the coating over the entire surface. To remove excess from the brush, you need each time, dipping into the bottle, lightly press it to the neck.
Typically, the first layer does not look neat and beautiful, so you need to apply a second layer on top. In this case, the shade will become deeper and more saturated, and the surface will be even. However, it must be taken into account that the second layer can only be applied after the first one has completely dried. If this condition is not met, the lacquer will have to dry very long, and in the process of such a long drying, it is possible to accidentally break the integrity of the coating. 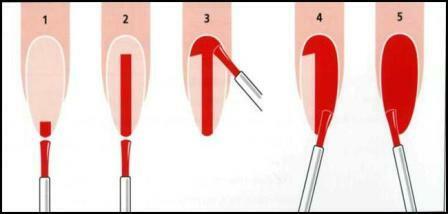
If the consistency of the coloring coating is very thick, then one layer can be dispensed with.
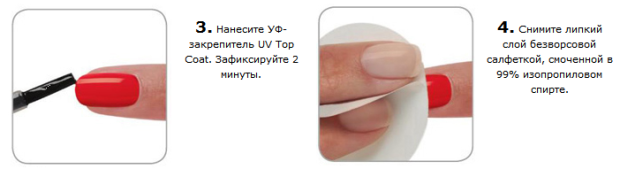
Fixer
At home, the top coat can not be applied, because not every girl is ready to wait 30-40 minutes, until all 3-4 layers have dried. However, with a protective coating, the varnish will last much longer, and the manicure will acquire a glossy sheen.
- It should be noted that the fixer should not be applied until the color varnish has completely dried. To speed up the process, you can use a special "drying", which is applied with a brush, using a spray or a pipette.
- The protective layer should cover not only the surface of the nail, but also the end part of it.
- When the last, fixing layer completely dries, you can proceed to remove excess lacquer from the skin. To do this, we use wadded disks, sticks and liquid to remove varnish. If you often paint your nails, it is recommended to use only such a liquid, which contains no acetone. Otherwise, the nails will become dry and brittle.
Short nails
Owners of small nails often encounter such a problem when, during the application of varnish on them, the manicure turns out to be not sufficiently accurate and attractive. This is due to the fact that a thick nail is very bad for short nails, and often a lot of it is not only on the nails themselves, but also on the skin around them. To avoid this, use not too thick lacquers.
It is also recommended to avoid bright colors. Red, yellow, black colors look a little nasty on small nails. Best in this case will use pastel or translucent shades.

When painting short nails, you should take into account such nuances:
- You need to collect a small amount of varnish on the brush, otherwise its excess will be smeared around the edges.
- If you want to make your short marigolds visually longer, you can not paint over their side parts, retreating from both edges by about 1 mm.
- If nevertheless you did not calculate, and the nail got too much lacquer, then you can remove only large drops. The gaps between the fingernail and the skin should not be touched, so as not to accidentally damage the integrity of the coating. When the varnish is completely dry, you should wash your hands thoroughly or take a bath: when contact with water, excess is quickly and easily washed from the gaps.
Gel-varnish
Today gel-varnishes are very popular. And this is not surprising, because they have a number of advantages over other varnishes:
- They are easily applied.
- Differs spectacular intense shine, which lasts a long time.
- Made of hypoallergenic materials, therefore do not cause any harm.
- Hold for up to three weeks.
How to apply gel-varnish
Girls who think how to learn how to properly paint nails with gel-varnish at home should take into account that it is impossible to make such a manicure without UV-lamp, grinder, degreaser, base and fixer. Therefore, all of the above should be purchased at the store. 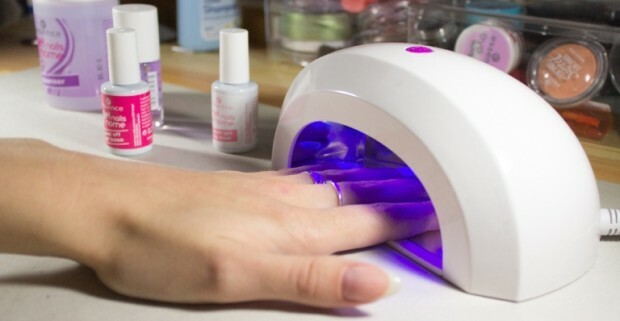
Gel varnish should be able to use properly, so that it would stay for a long time. If the technology of application is broken, the manicure may not last for several days.
- First of all, it is necessary to perform a thorough treatment of nails with the help of special cleaning liquids and allow them to dry for ten minutes.
- Next, remove the upper keratin layer of the nail plate with a highly abrasive buff and remove the moisture and dehydration residues from the dehydrator.
- A primer is then applied which will ensure a tight adhesion of the nail surface to the base gel. The primer must be applied to the end surface of the nail.
- After the primer has dried completely, the base gel base is applied, which is designed to protect the nail from the pigment dyeing pigments. The basis should be applied with a brush rubbing movements.
- The substrate is then dried in a UV lamp for 10 seconds.
- After drying, take a dry brush and polish the base layer.
- Now you can start coating yourself with gel-varnish. It should be borne in mind that it must be applied very thinly. Otherwise, jaggies, waves or air bubbles may form. When using bright, pastel tones, two coats of varnish are applied, each of which must be dried in a UV lamp for 30 seconds. When applying dark colors, it may be necessary to paint in three layers. In this case, all layers must be applied as thinly as possible.
- The next step is the application of the finish gel and its drying in a UV lamp. The drying time is half a minute. If the specified time is not respected, the manicure may turn out to be insufficiently shiny and of high quality.
If you adhere to all of the above rules, then the manicure will not be any worse than in an expensive salon. By the way, gel-varnish can be painted and nails on the legs, applying the same technology.
Gel lacquer coating, video instruction
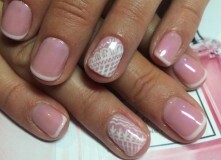
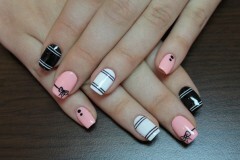
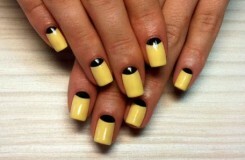
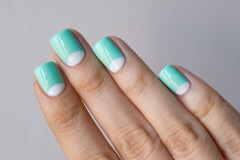
Bicolour staining
Many women and girls do not like to make manicure in monochrome colors. Perform a complex pattern on the nails can only be done by a professional craftsman, but at home it's easy to paint them with two colors, using simple technology for this.
There are a lot of ways to create a two-color manicure. Among the most common can be identified:
- Lunar manicure.
- French manicure.
- Gradient.
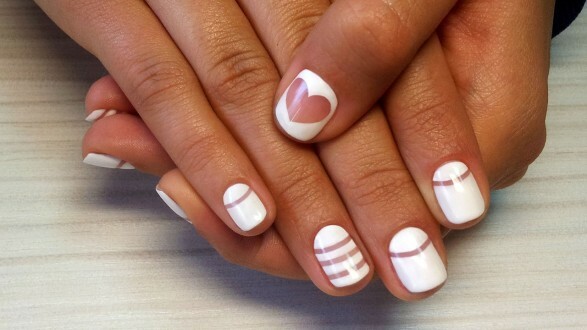
- Manicure with graphic images or ornaments.
The main rule for such application methods is the correct choice of shades. They should have not only the same density, but also saturation, warmth and other artistic characteristics.
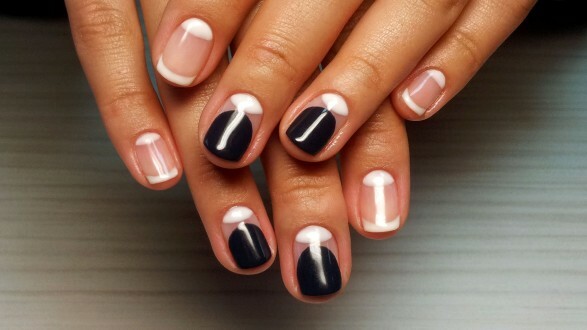
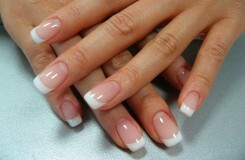
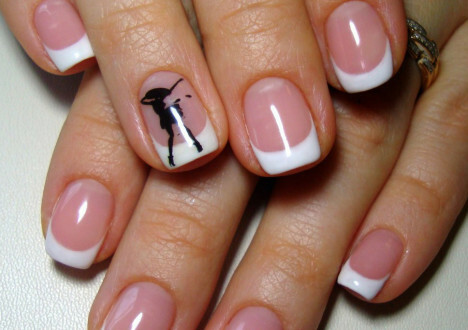
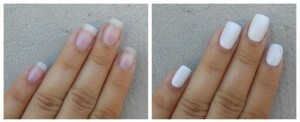
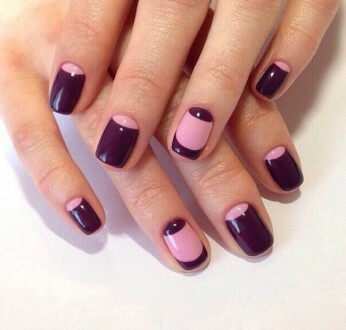
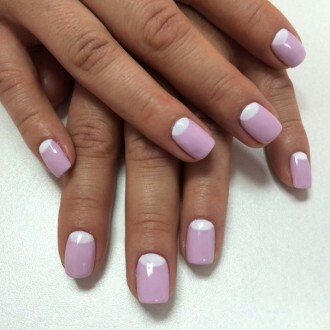
French manicure
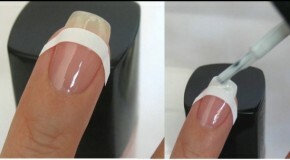
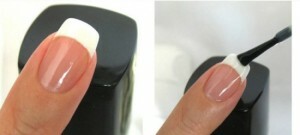
Today there are several ways how easy and beautiful to make a French manicure. As a rule, all methods require the use of special strips for the jacket. Differences can consist of the width and shape of the bands, the selection of colors, the decoration of the border between varnishes of different colors with rhinestones.
- Glue the strip for the jacket on the nail plate, leaving its tip free, and paint it with a varnish of the primary color.
- When everything is dry, remove the strip and paste the other on the painted tip of the nail. Do this in such a way that its lower edge coincides with the bottom line of the colored tip.
- Now you need to cover the nail with the lacquer of the base color and wait until it completely dries.
- Then you can remove the strip and apply a coat of fixer.
To create a French manicure, you can use different combinations of colors. The free edge does not necessarily cover the usual white, the nail technicians are increasingly using different fancy colors for the French manicure. In this case, in any case, you must adhere to the main rule: the color of the nail bed and its edge should be contrast.
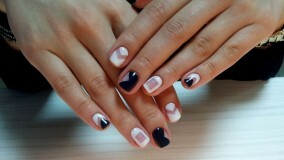
Lunar manicure
This nail design is also called a reverse jacket. For its implementation, all the same strips for the jacket are used, but they are not pasted on the upper edge of the nail, but on the bottom, forming at the base of the nail an ellipse.

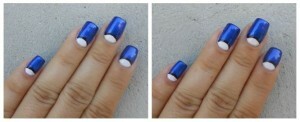
The moon manicure is especially beautiful if the crescent or ellipse is painted over with a shiny coating, for example, gold or silver. So, gold is perfectly combined with blue, black, green colors. To the silver one can choose red, blue and many others.
In the line of a smile for both French and lunar manicure, you can paste rhinestones - in this case the nails will look very beautiful and elegant.
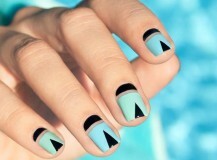
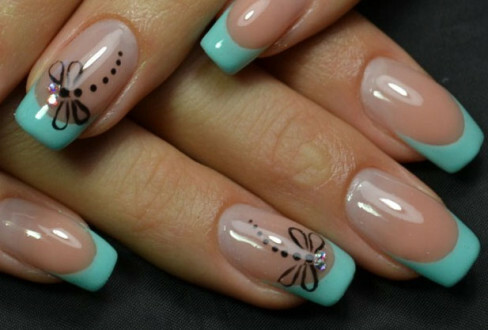
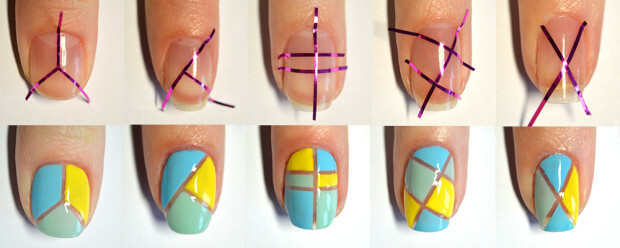
Graphics
To create a graphic manicure using all sorts of stencils, with which you can draw on the nails of various geometric shapes. As stencils, circles, bands, rhombuses, triangles are most often used. It is important that the main color is quite contrasting with the color of the figures.
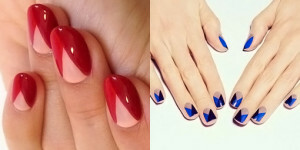
There is nothing complicated about how to create a graphic drawing. One of the easiest ways to call it striped manicure, which will require strips and two varnishes of contrasting colors:
- First apply the varnish of the primary color.
- After its drying, several bands are pasted. Intervals between the bands are painted in a different color.
- When all is dry, the strips are removed, and the nail surface is treated with a fixer.
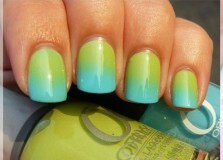
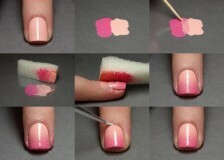
Gradient
For the decoration of nails in the technique gradient( or ombre) will require two colors of coating, palette and sponge.
- On the palette it is required to apply varnishes in such a way that a smooth color transition forms between them.
- Then sponge you just need to transfer the imprint from the palette to the nail.
- The gradient looks best on long nails. Among the most successful combinations of shades, you can distinguish warm beige and pink, green and turquoise, dark purple and light lilac.

To have beautiful and well-groomed hands, it is not necessary to visit expensive salons. The main thing is to know how simple, quick and easy to make a quality and fashionable manicure that will help you feel like a real lady in any places and circumstances.
Related Videos:
 6:40
6:40  5:57
5:57  5:10
5:10