
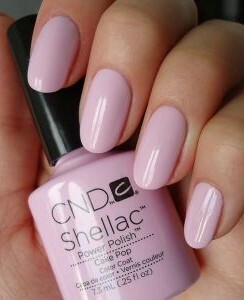
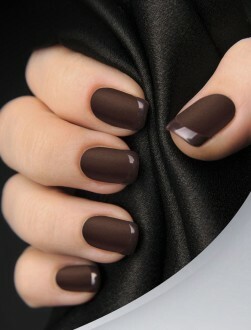
At the moment, helium varnishes are at the peak of popularity. This is because they allow you to get a perfectly smooth, beautiful, shiny coating for a long time. And the procedure itself is quite simple and is very fast. Practically all the masters of manicure own this technique and carry out the coating with gel-varnish.
Features of gel-varnish
This product is an easily soluble plastic gel that can hold on to nails for 2 weeks or more. It is applied in the same way as normal nail polish, but it needs special drying with ultraviolet rays.
 With this coating, there is no need to often repaint your nails. About 2 weeks they will look as if their landlady had just left the salon.
The coating is so durable that it is very difficult to damage. If the nails before the procedure were brittle and brittle, then after it they will acquire elasticity and strength. On the nails with a decorative coating you can apply a regular varnish, which will stick to it much better.
The main advantages of the gel coating are:
- comfort and ease of application;
- fast setting in a UV lamp;
- durability and intensity of shine and color;
- natural appearance;
- hypoallergenicity.
Observing the following rules, you can significantly extend the period of wearing decorative coating:
- Do not cut or file nails.
- The coating should be protected from any direct mechanical impact.
- If you plan to use a regular varnish on top of the coating, then remove it is allowed only liquid, not containing acetone.
- During the first day after the procedure, you need to take care of the coating, try not to let it come into contact with water, refrain from washing dishes or cleaning the house. Do not take a hot bath.
If the technology of covering the nails with gel is fully complied with, the applied material will last up to 3 weeks without loss of external qualities. In this case, no additional correction is required.
Preparing for the
procedure First you need to determine what you need to cover with gel-varnish. Usually, the following materials and tools are used:
- grinder for the alignment of the nail plate;
- colored gel-varnish;
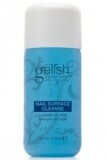
- nail polish remover or degreaser;
- UV lamp;
- basic covering;
- top coat fixer, giving gloss;
- alcohol or bezacetone liquid to eliminate stickiness.

The preparatory stage is as follows:
- First the master forms a free edge, which must be clean and perfectly flat.
- If the nail plate is stratified, then it is trimmed with a saw.
- If before doing a manicure using oil or cream, you need to degrease the surface and dry it for 10 minutes.
- To prevent damage to the coating, the cuticles must be removed.
- The upper keratin layer is removed with a high abrasive buff. This will help prevent the chipping of the coating in the future.
- Remains of moisture are removed by degreasing agent, dehydrator. To the surface that has been treated, it is not recommended to touch. Only in this case, the adhesion of the material to the nail will be strong.
Technology of nail coating with gel
The base layer of the gel serves as a link between the nail and the varnish. It does not allow colored pigments to penetrate the nail plate. Each material, including the substrate, should be applied as thin as possible. The step-by-step procedure looks like this:
- Brush a little gel onto the brush and, rubbing it, apply it on the nail plate from the free edge to the cuticle.
-
 Gently paint over the ends of the nail.
 - Once again pass the brush along the entire surface in a direction from top to bottom. Do it gently so that the gel does not get outside the nail.
- Place the fingers for one minute in an ultraviolet lamp to polymerize the base layer. If an LED lamp is used, the exposure time is reduced to 10 seconds.
- After the base has solidified, pass by a dry brush to level the dispersion layer. This will achieve an even coating without spreading on the sides.
Color paints have their own nuances, so you need to know how to correctly apply them:
- Bright and pastel shades of varnish are applied in two layers. Each layer must be polymerized in a UV lamp for a couple of minutes or in a LED lamp for half a minute.
- Applying a dark lacquer, you can get an unevenly colored first layer. When working with dark tones, it is recommended to apply not two, but three very thin layers. Too thick coating can form waves.
- Gel-lacquer of any shade to distribute as much as possible evenly, without forgetting to stain the ends. If you do not adhere to the rules, when applying gel-varnish on the free edge may appear waves or jags, and on the surface of the nail - air bubbles.
- After the colored layer, the coating should be finished with a transparent finishing gel. It is applied more densely. Drying the finish coat should be given special attention. If the polymerization did not go well, then during the removal of stickiness, gloss can also be lost. The last layer is dried in a UV lamp for a couple of minutes or half a minute in a LED lamp.
At the end you need to remove the sticky layer. For this, a tool called Cleanser is used. This will help the nails acquire a magnificent gloss. The composition of the product has moisturizing ingredients that will protect the nails and the skin around them from dryness.
Removing the cover takes a little time, about half an hour. The procedure is so simple that it can be done at home without the help of a salon master. Gel-varnish is removed by spreading the nails in a special medium.
Difficulties with gel maceration are also associated with the use of a primer. When the coating softens, it can easily be removed with an orange stick.
Nail polishing with gel-varnish - video
Contraindications
As with any procedure, the gel coating has its contraindications:
- Such procedures as build-up, modeling and coating with gel, can not be performed with fungal diseases of the nails and the skin around them. Initially, it is necessary to undergo a course of treatment and only after full recovery to carry out the procedure.
- Any manipulation is prohibited if the nail plate is injured. Fresh injuries, wounds are taboo for gel coating. First, it is recommended to repair and strengthen the nail plate with silk.
- It is not advisable that the cuticle is damaged. Therefore, an edging manicure is recommended to be carried out a few days before the gel nail coating or after it.
-
 Due to the individual characteristics of the body of some people, some may reject the materials used in the procedure. This can lead to some diseases, for example diabetes. It is necessary to warn the master about them. If the procedure was previously performed and the result was negative, then this should also be reported to the specialist.
 - Professionals are not advised to cover during the period of taking hormonal drugs, antibiotics and during the course of chemotherapy.
- Is it possible to cover nails with gel-varnish for pregnant women? Experts believe that no. The toxic substances contained in the materials easily penetrate the body and can damage the fetus. Diseases of the heart and blood vessels.
Some people are allergic to the materials used in the procedure, as well as the dust that appears when filing nails.
Harm and benefit of gel coating
The use of the gel is due to the fact that it isolates the nails from any irritants. Due to the fact that the coating lasts a very long time, the nails are protected against external negative factors.
Women often use gel-varnish in order to grow their own nails without risking damaging them. Since the gel covers the plate completely, then with him you can absolutely calmly engage in any household chores, not being afraid to break or deform the nail. The coating protects the plate from delamination under the influence of household chemicals.
And yet, according to some experts, gel-lacquer can be harmful when worn for a long time. This type of coating contains polymers, which can damage the nail plate during prolonged contact. Therefore, masters do not recommend walking with gel-varnish longer than 14-21 days.
It is better that the gel is removed by the master in the salon. The procedure for home removal of the coating can injure the nails no less than the mechanical impact from the outside. After all, it is usually used pure acetone, which drains the nail plate, makes it weak and thinned.
After the gel is removed, it is necessary to give your nails a break from it for at least a week. During this time, they are saturated with oxygen, to which there was no access for 14-20 days. 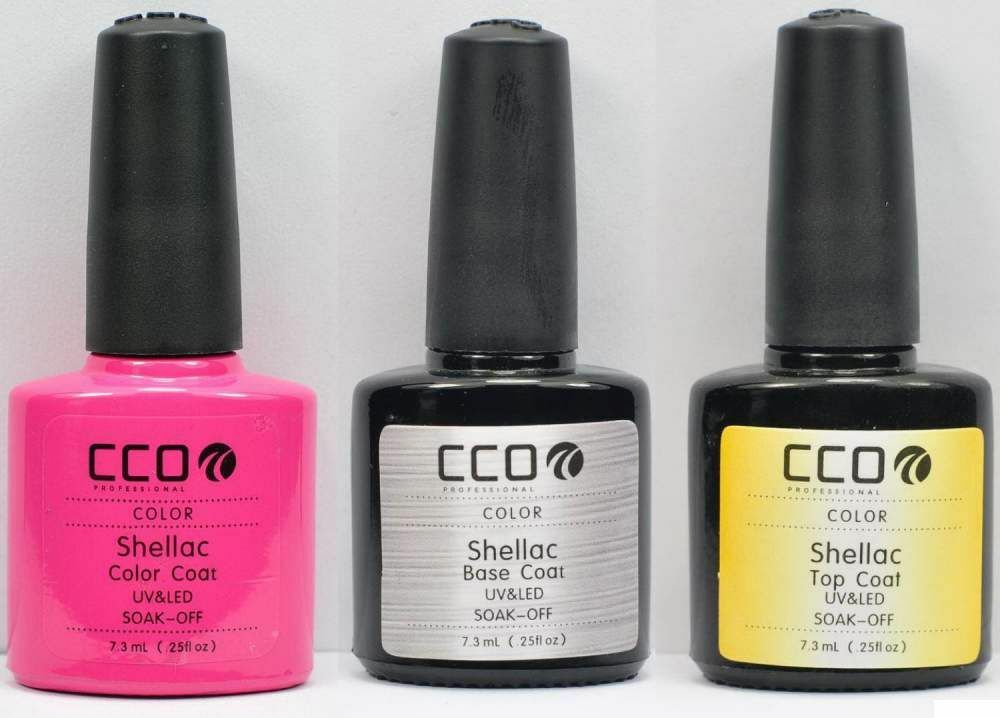
The bright palette of gel-varnishes attracts a variety of shades. But not all women know that the color coating can be deeply absorbed into the nail and into the skin under the nail plate. Therefore, even after removing the coating, the nails can have a shade of lacquer that has been removed. Usually this happens if a substandard product was used or the master did not adhere to the rules for applying the base coat or the lacquer itself.
In any case, the presence of harmful compounds in direct contact with the nail plate for a long time can not be useful. After such manipulations, the nails may look weakened and need to be treated and restored.
Pedicure with gel-varnish
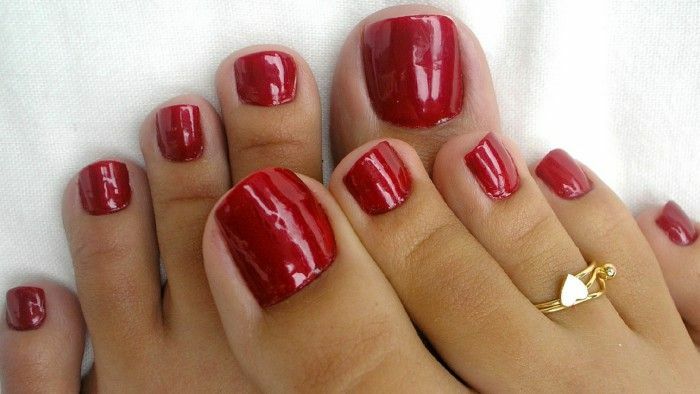 The process of covering the nails on the legs with gel-varnish practically does not differ from the procedure on the hands:
- Cuticle is removed in advance. In doing this, do pedicure before the procedure itself is not recommended not to injure the delicate skin and the nail plate itself. If the cuticle has grown a little, then you need to push it away with a spatula, but do not cut it off.
- Nails on the legs are polished, so that the material is better attached to the surface.
- Degrease and remove the minute dust particles from the surface of the nail, as they can provoke peeling of the coating.
- Apply bondex so that the gel is as flat and beautiful as possible, and also kept as long as possible. For him, use a separate brush because of its excessive stickiness.
- Apply the base coat so that the product does not get on the skin. If this happens suddenly, you need to remove it with an orange stick.

- Dry the layer in the lamp.
- Apply a colored layer of varnish. At the same stage, you should apply an acrylic pattern or glue the sequins, if it is planned.
- Colored varnishes are applied in several layers, each of which must be dried in a lamp.
- Make a top coat and dry it in a lamp. If the finishing coat is sticky, then it must be treated with a degreaser or with a non-acetate liquid to remove the varnish.
The procedure for applying funds for covering the nails on the legs and hands with gel-varnish can not be changed. But you can experiment with the design. Gel-varnish does not freeze without a lamp, therefore the drawing can be adjusted at its own discretion.
Decoration is carried out during application of 1-2 layers of colored varnish. Top of the nails are covered with top and dried in a lamp. Rhinestones and pebbles are put on the top layer before it is dried. This procedure can be carried out at home, you only need to buy a lamp and a starter kit of necessary materials. Related Videos:
 3:38
3:38  1:57
1:57  3:27
3:27