In this article, we show how to correctly draw in stages, Santa Claus and Snow Maiden.
Contents
- How to draw Santa Claus in pencil in stages for beginners and children?
- How to draw a Snow Maiden in pencil step by step for beginners and children?
- How easy is it to draw Santa Claus in boxes?
- Drawing of Santa Claus and Snow Maiden for drawing
- Video: Drawing lessons. How to draw Santa Claus?
New Year is rapidly approaching, and not to hit the dirt face, it is better to prepare a gift in advance. One of the easiest gifts is still a postcard. A postcard is easy enough to make, it is beautiful in its original design.
In fact, a postcard is a huge space for creativity. Draw, decorate it can be anything and anyhow. The main limitations here are your imagination and real possibilities.
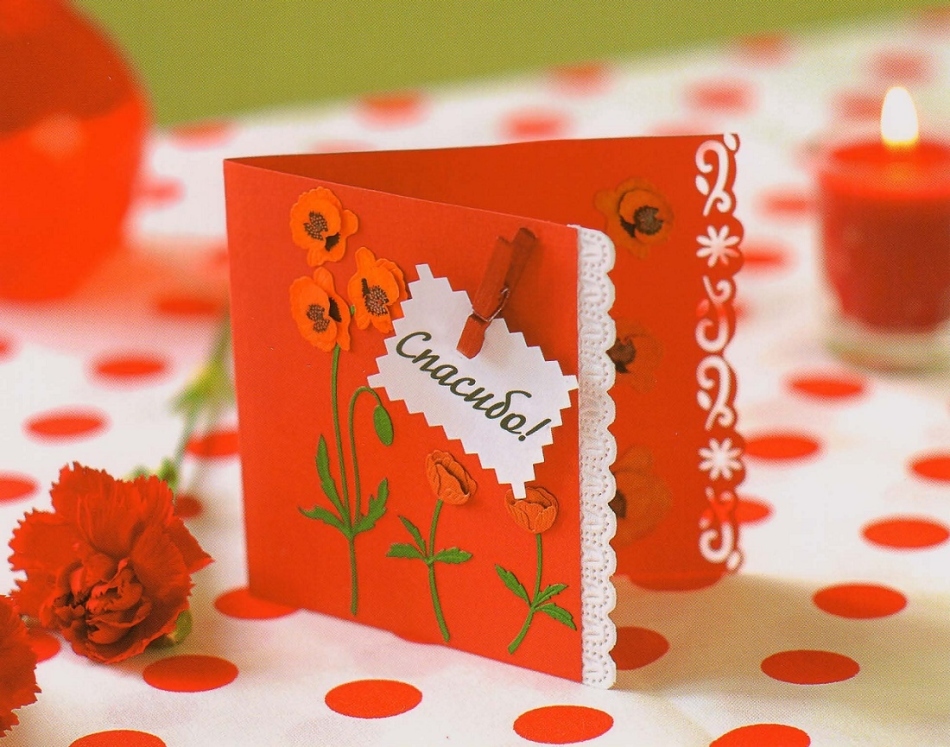 Postcard - a pleasant surprise
 Especially the postcard is good when you do not know what to give to a person. To receive as a gift a beautiful homemade card will in any case be pleasant. Another postcard can be used instead of an envelope when you give certificates or money.
In the New Year's greeting card, it is customary to use the most recognizable New Year symbols: Santa Claus, Snow Maiden, Christmas tree, gifts, snow, clock-chimes.
In this article we will tell you how to draw beautiful Santa Claus and Snow Maiden for a New Year's card step by step.
How to draw Santa Claus in pencil in stages for beginners and children?
So, now we will give a drawing of two Santa Clauses, which can be repeated even by a small child.
You will need:
- eraser
- simple pencil
- colored pencils, markers or paints
- patience and perseverance
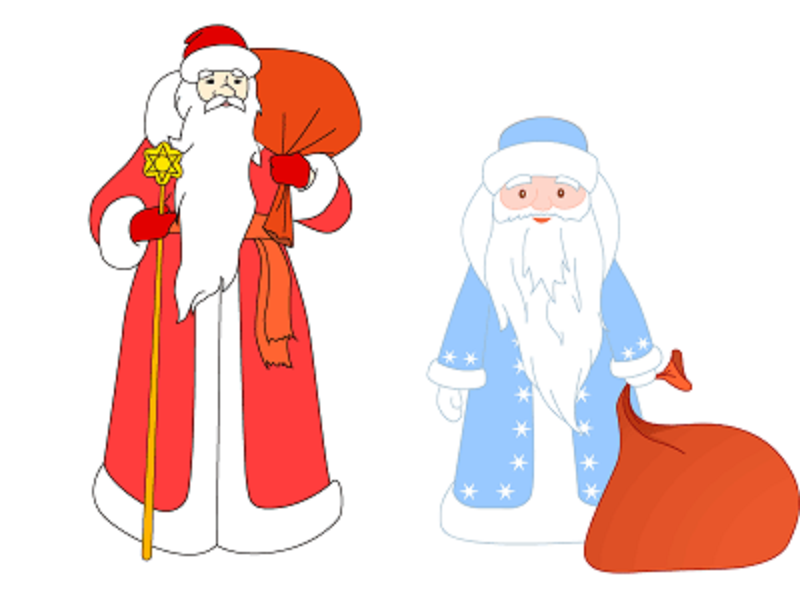 We will try to paint such Santa Clauses!
 First draw the Santa Claus that is on the right. It's easier to draw.
Step 1. Begin to draw Santa Claus from the head. Draw a face that looks like a mask for diving or a cloud( or rather, that part of it that the cap and beard do not hide).Then draw the nose, eyes. From the top immediately complement the cap.
Step 2. The hat is ready, proceed to the eyebrows and mouth. The eyebrows are partially covered with a cap, so do not draw them too low. We draw the mouth strictly under the nose, retreating very little distance.
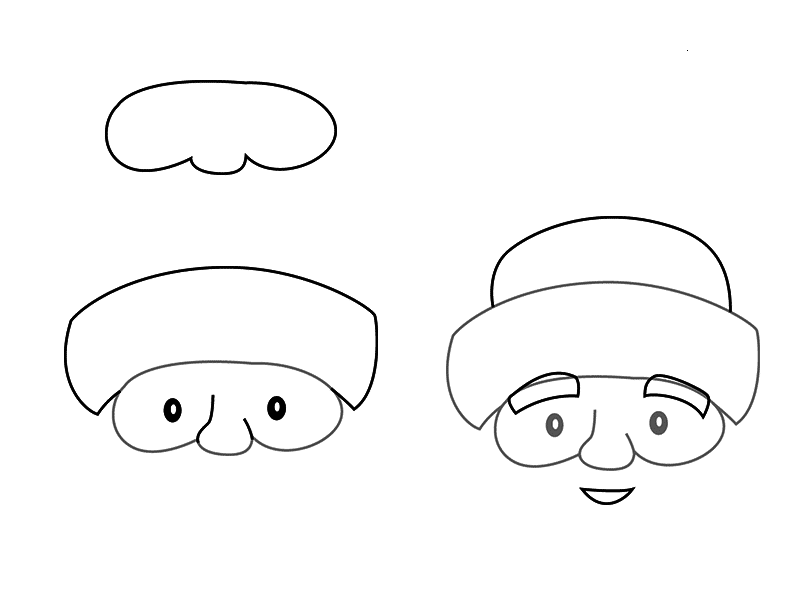 Face and Hat of Santa Claus
 Step 3. Draw a beard, slightly tilting it aside so that the picture is more realistic. Mentally draw a straight invisible line from the nose perpendicular down. Where the beard ends, the line becomes visible. From her in both directions below, draw a flat horizontal line.
Step 4. Complete the trapezium from the lateral sides of the beard to the bottom horizontal line. Now draw a fur: move away from the vertical line in the center about one centimeter in both directions, draw two parallel lines, as in the picture. From the bottom half-circle also draw a fur, as shown in the picture.
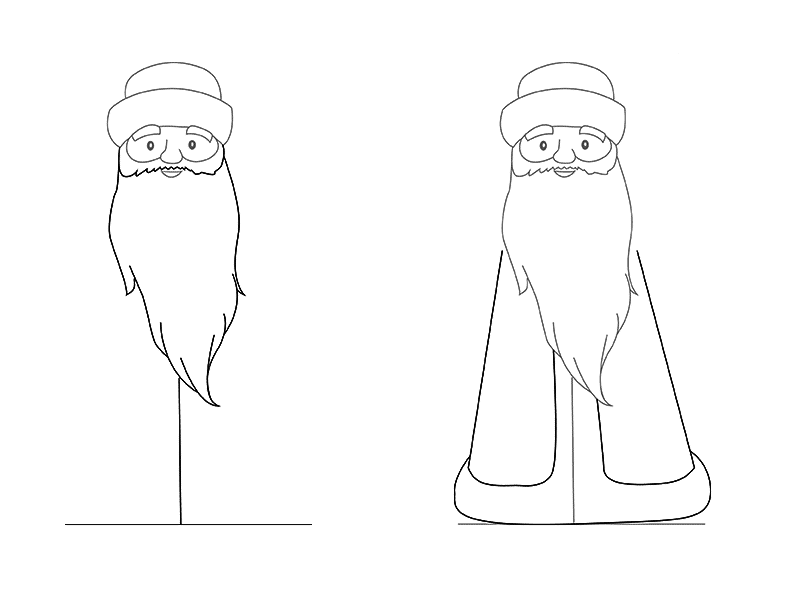 Beard and frost of Santa Claus
 Step 5. As shown in the picture, draw your hands and collar to Santa Claus. Note that your hands will be on top of your torso, so prepare an eraser to erase excess lines.
Step 6. Now draw a bag with gifts and gloves. To draw a bag, draw a circle of irregular shape with a sharp curl at the top. Draw the hands as shown in the picture.
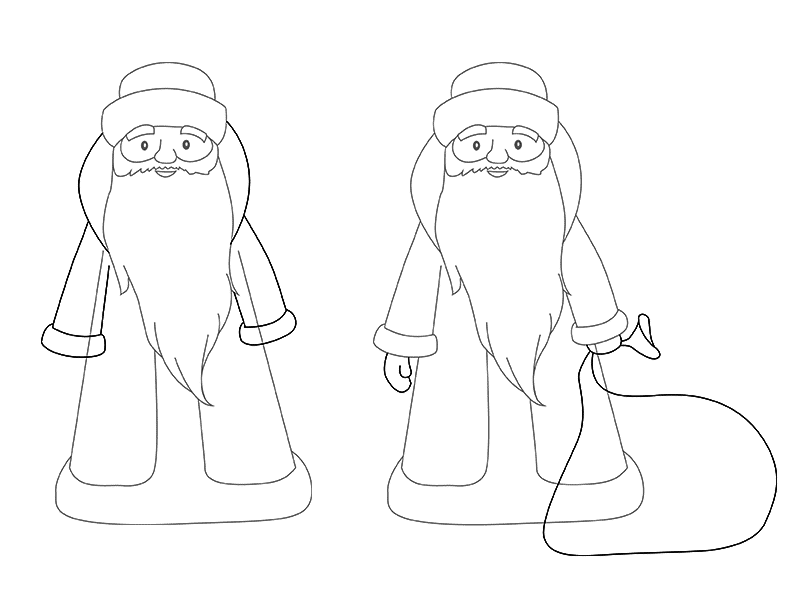 Draw a bag with gifts!
 Step 7. It remains to draw the details. We make the beard more realistic, adding additional vertical lines, similar to the sharp teeth. At the bag in the place where the hand of Santa Claus, we make several folds.
Santa Claus is almost ready!
Step 8. Now color the grandfather and decorate his fur coat with stars.
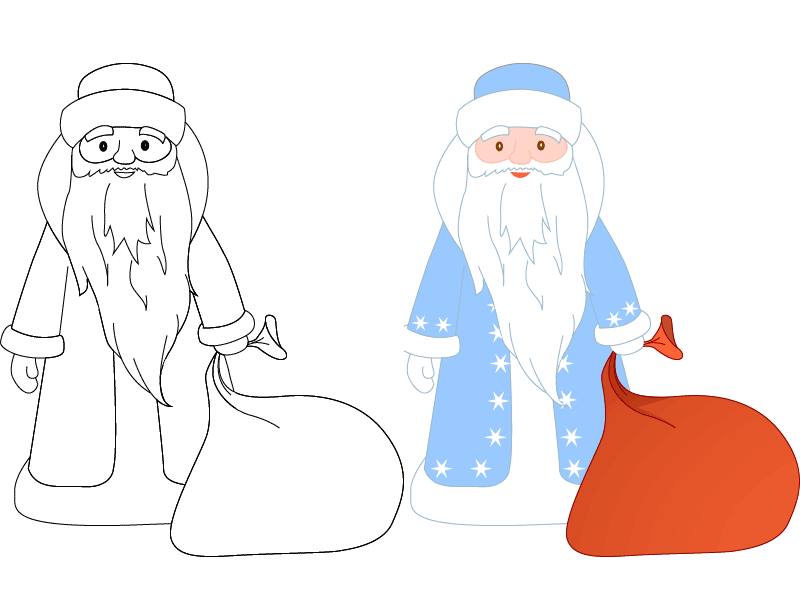 The drawing is ready!
 Now draw Santa Claus in the red coat, the one that was on the left. His drawing is a little more complicated.
Step 1. Draw a "mask for sleep," that is, the face of Santa Claus. Until we draw the eyes and hat.
Step 2. Begin to draw a face: we make a nose, it should be slightly flattened like a potato. From the nose we draw a mustache, in the upper part we have eyes.right above the eyes - eyebrows.
Step 3. Drawing the cap. First we make a volumetric semicircle in the upper part of the head, then we paint the top part of the cap.
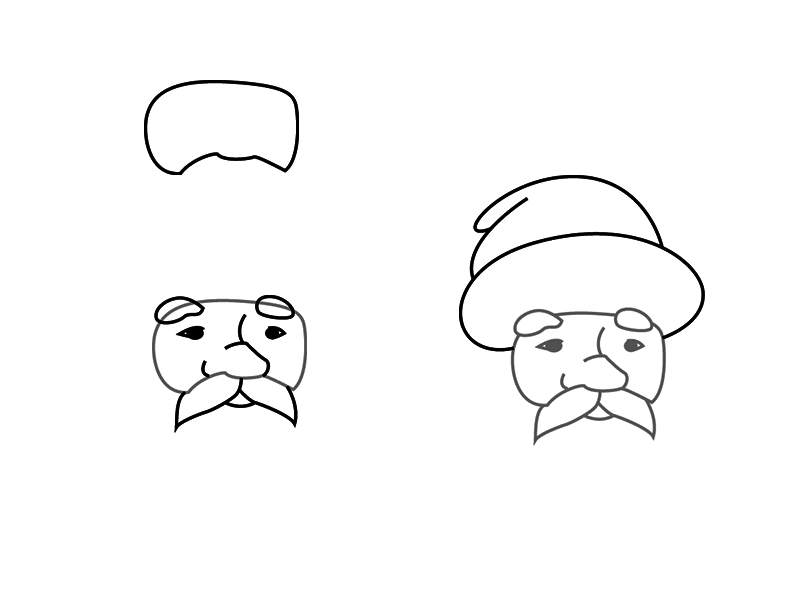 The face of Santa Claus
 Step 4. We begin to draw the torso of Santa Claus. It should turn out to be quite voluminous. Repeat the lines shown in the picture. Do not paint the hands yet, we leave them just circles.
Step 5. Now we paint the beard and the bag well. The beard should be quite realistic, so we make it an "acute" contour, drawing some hairs. Do not overdo it at this stage. We begin after the beard to draw a bag, which Father Frost holds on his shoulder. Do not forget about the folds on this very bag. The hand that holds the bag is made more oblong, add a thumb.
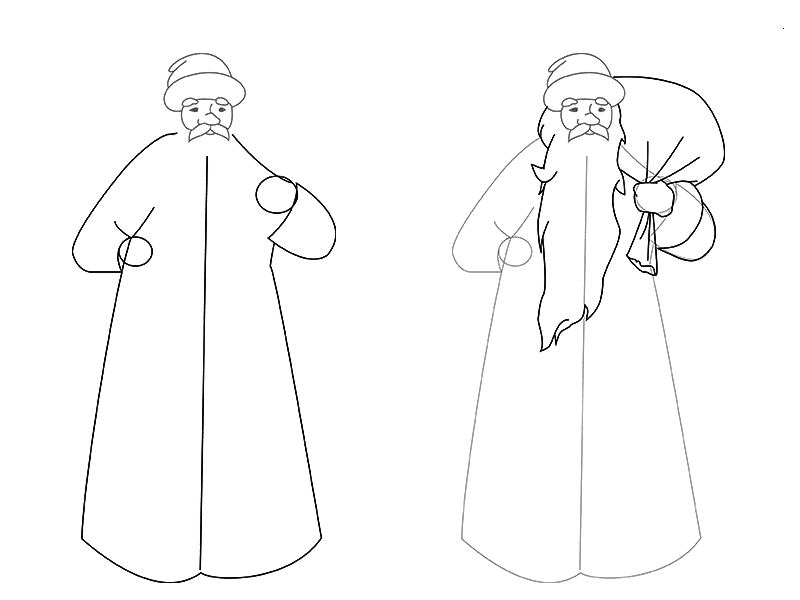 Drawing a beard and a bag
 Step 6. To the left of the head draw the part of the bag. Draw the left hand and sleeve. Draw a staff consisting of a long stick and a snowflake at the top. Note that the staff expands to the bottom, so do not make it the same in all places. Step 7 .Now you need to give the bottom of the fur coat a normal appearance. Draw fur, drawing it inside the contour of the fur coat. The lines are made slightly gently so that there are no abrupt transitions.
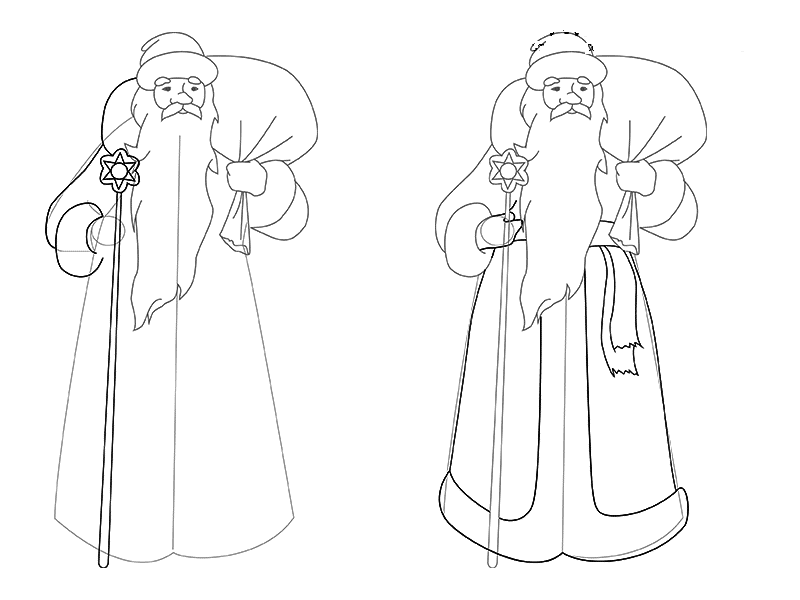 Drawing a fur coat
 Step 8. Santa Claus is almost ready. We get rid of the invisible lines with the help of the eraser and make the contour of the fairy-tale character more clear.
Step 9. We take color pencils, markers or paints and already in color we work through the whole drawing. Unpainted leave the fur on his coat, on his grandfather's hat and his beard.
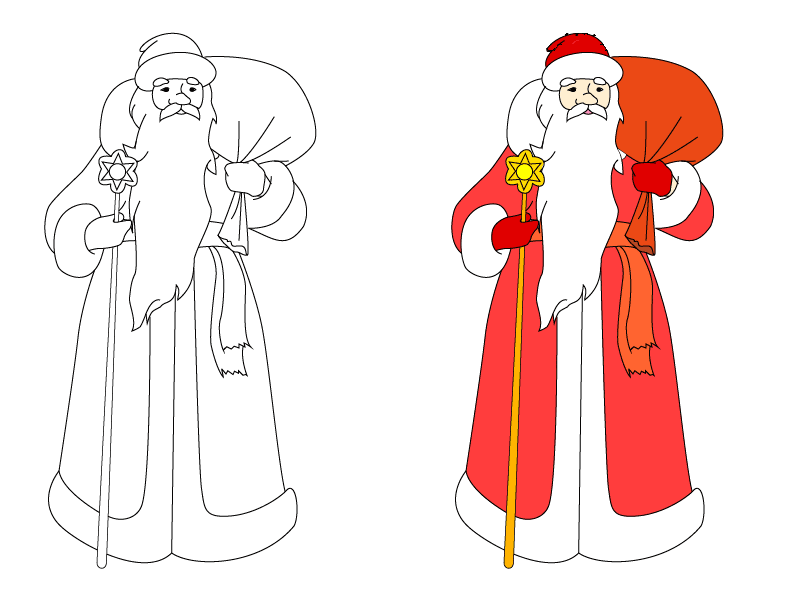 Santa Claus is ready!
 And here are some more options for drawing Santa Claus, which will look great on a New Year's card!
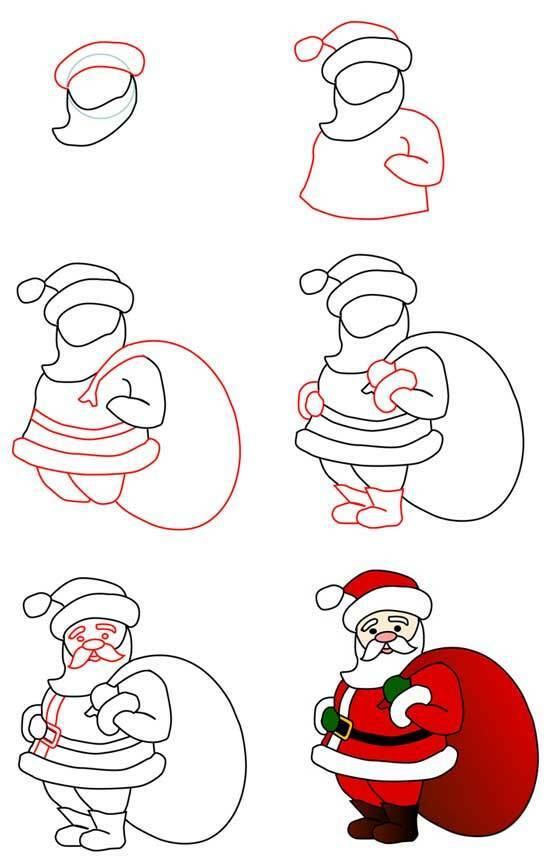 In this scheme, you can quickly draw a Santa Claus
 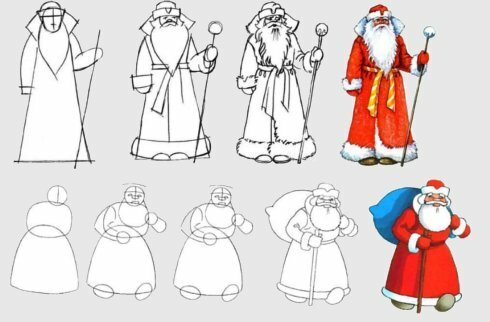 Two different Santa Claus
 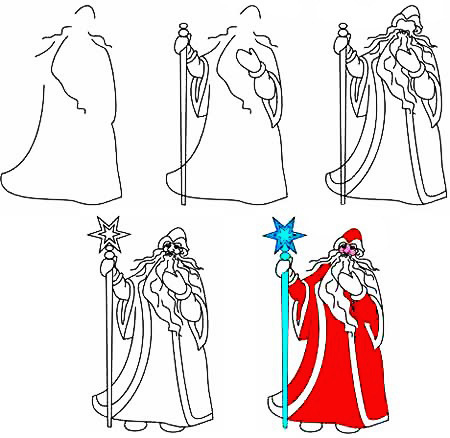 Beautiful and simple drawing of Santa Claus
 And now we will show some cards with Santa Claus, which, perhaps, will be a source of inspiration for you.
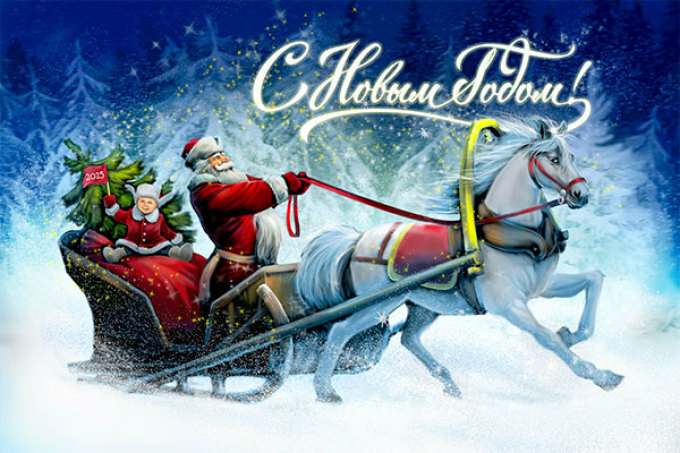 New Year card with Santa Claus and sleds
  Santa Claus in the Motherland - postcard
 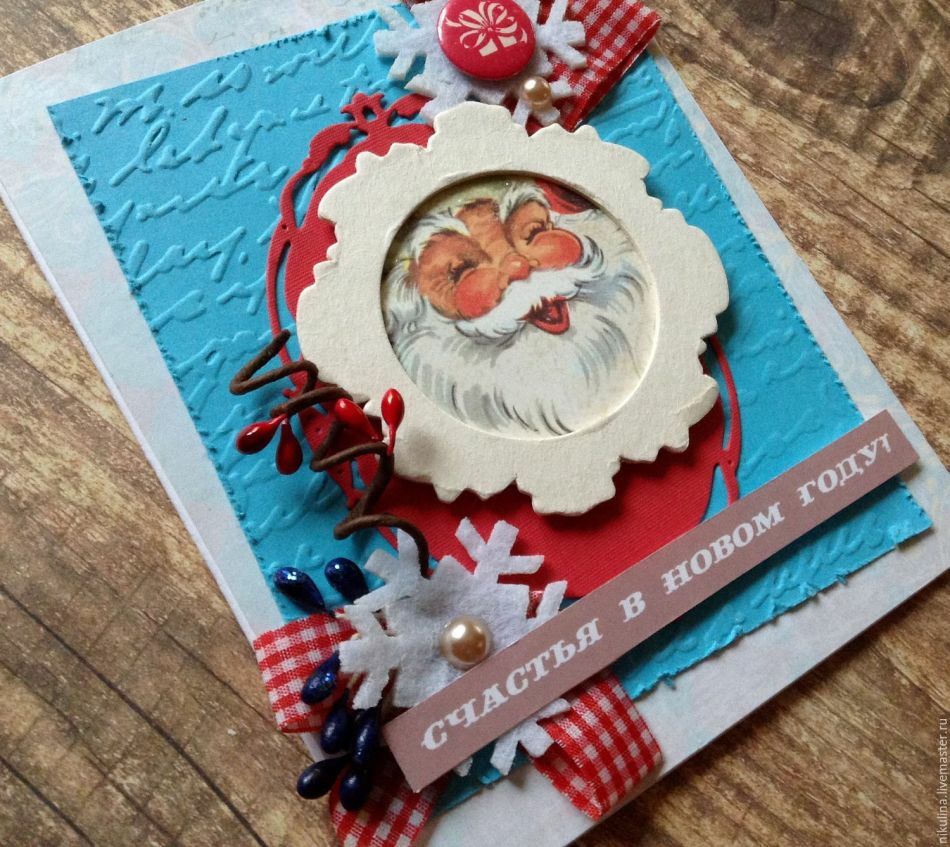 postcard with Santa Claus with his own hands
 How to draw a Snow Maiden in pencil step by step for beginners and children?
The Snow Maiden is an important character of Russian fairy tales, Granddaughter of Santa Claus. He is young, tender and beautiful. Always accompanies his formidable grandfather, helps animals in the forest and gives out gifts.
It's not very difficult to draw a Snow Maiden. In this part of the article we will give examples of drawing Snow Maiden in stages in two versions: childish and more realistic.
Step 1. Drawing the head. To do this, draw an ellipse( slightly flattened from above and below the ball), draw the eyes, nose and mouth. This is the very beginning.
Step 2. Now we make the Snow Maiden more realistic. We add a cap, not forgetting that all the lines should be smooth. Draw the chin so that it stands out against the background of the cheeks.
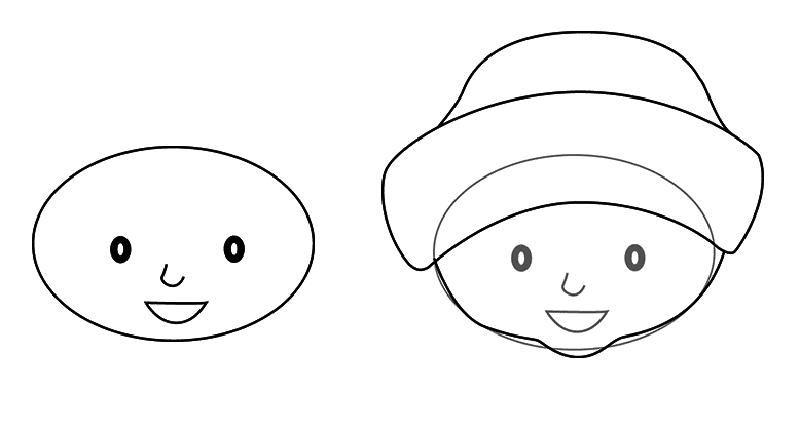 Draw the head of the Snow Maiden
 Step 3. At this stage we draw eyebrows, ears and ornaments. From the ornaments of the Snow Maiden there will be earrings in the form of snowflakes, as well as a brooch on a hat. Do not forget to draw eyebrows.
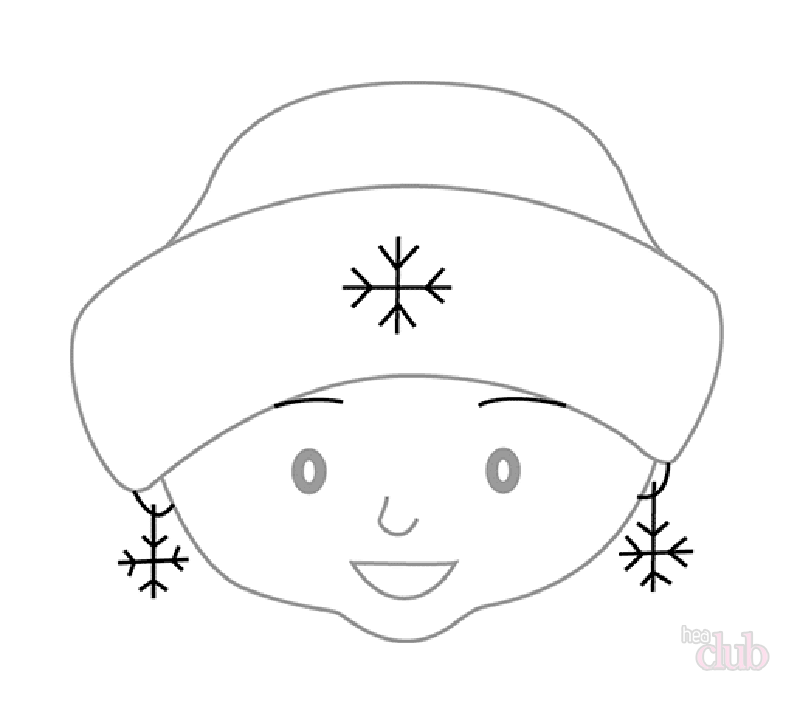 Drawing the face of the Snow Maiden
 Step 4. Begin to draw a fur coat. First, from the ears down we draw a collar. Each side of the collar consists of two perpendicular lines. Straight in the center we run from the chin to the end down a straight vertical line, and below, a horizontal line perpendicular to it. This will be the basis for the future fur coat.
Step 5. Again draw from the collar a trapezoid - two straight lines going to the hem of the fur coat.
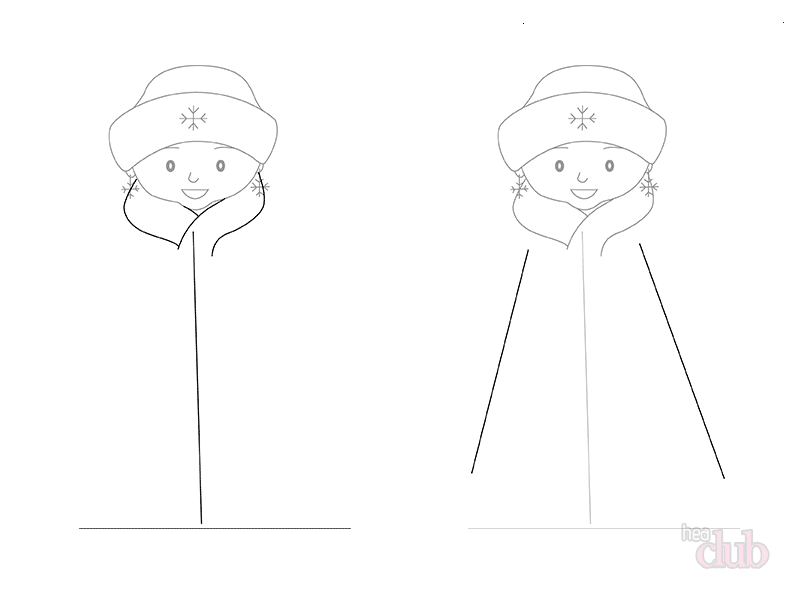 We begin to draw a fur coat
 Step 6. At the fur coat draw fur ruffles, going on the bottom and vertically. Fur should be drawn with flowing lines, do not try to draw it on the ruler. Observe the perspective.
Step 7. We plan the middle of the fur coat. You can do it by eye, but you can measure it with a ruler. We draw a horizontal line in this place, which will serve as a guide for the hands. Now draw your hands. They start from the collar and end just on the horizontal line that we just held. A few centimeters above the line draw fur on the sleeves.
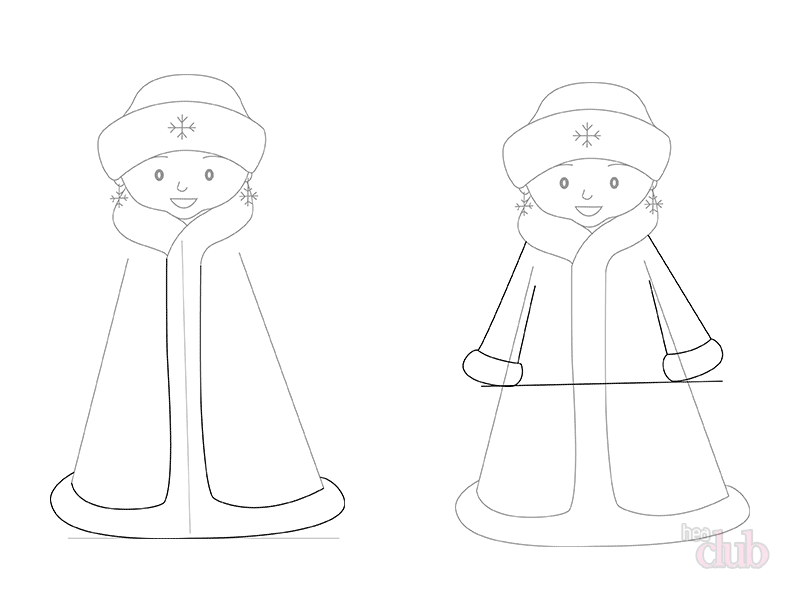 Begin to draw a fur coat
 Step 8. Now we draw gloves of the same shape as in the picture. In one hand the Snow Maiden should have a bag. The bag is an ellipse of irregular shape, strongly stretched from above, in the place where the Snow Maiden holds it. Now draw the folds near the bag - just a couple of lines and the bag looks bulky.
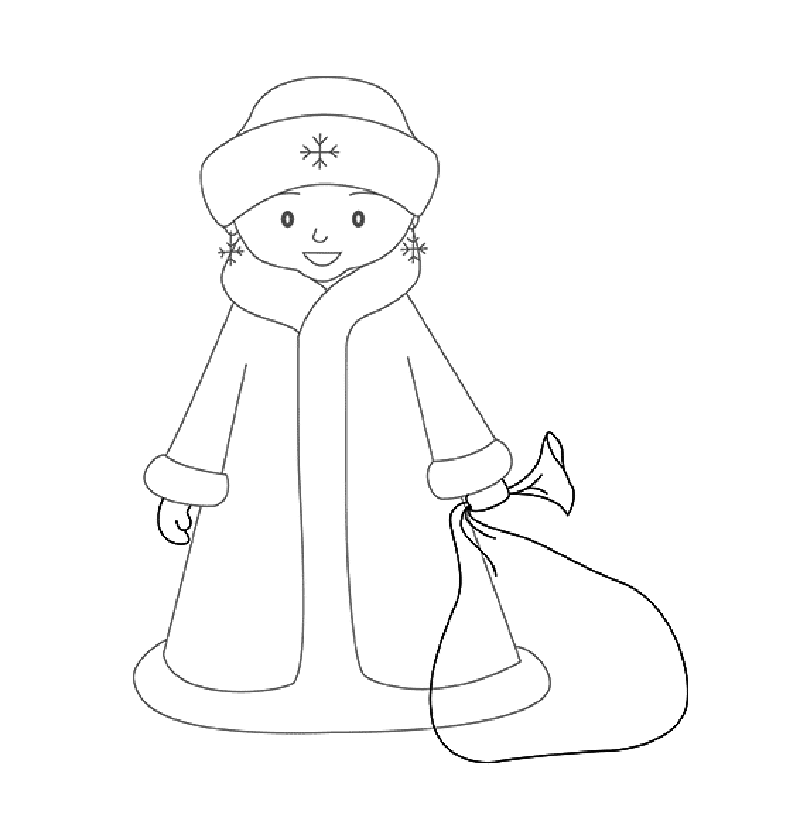 Drawing the bag
 Step 9 .Dorisovyvaem asterisks on the sleeves and the fur coat. If you want to achieve minimalism, then just skip this step.
Step 10. Finish drawing the Snow Maiden, adding color to the drawing.
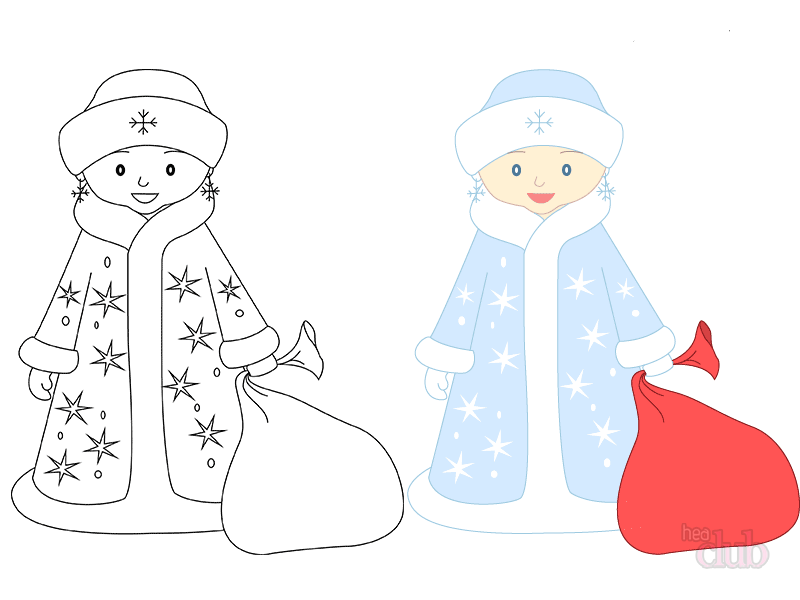 Figure Snow Maiden is ready
 Step 1. Draw the contours of the Snow Maiden, as in the photo. We start with the head, gradually adding a few smooth lines for jewelry on the head and the silhouette of the trunk.
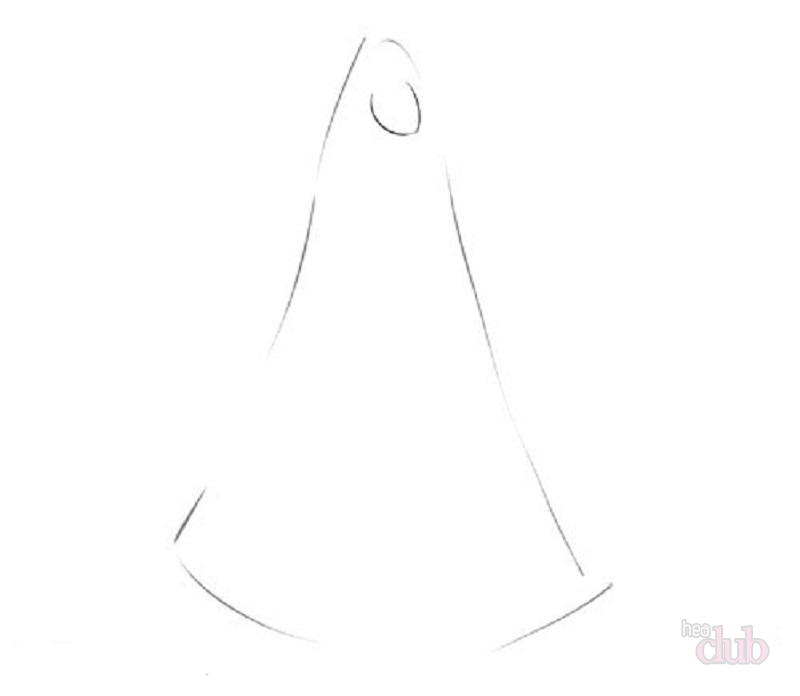 Beginning with
 Step 2. Now draw the "frame" - in the upper part of the body we designate the circle - there will be a waist and chest. From this mug we hold two sticks - these are the future hands. The lower part of the trunk( where the hem will be) begins to draw more clearly.
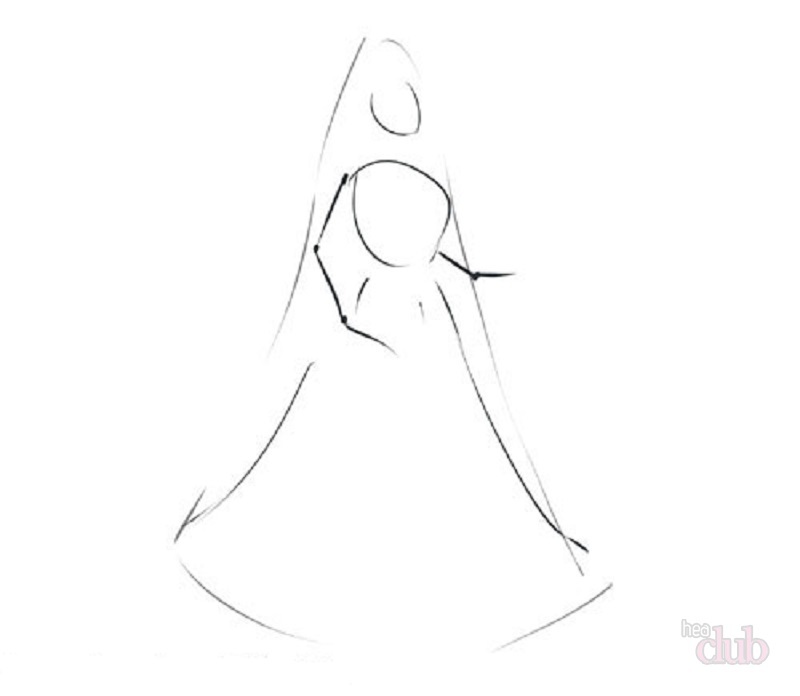 Drawing the basis of
 Step 3. Begin to detail the picture: we add sleeves, mittens to the hands. Do not forget to make fur on the sleeves. At the same stage, we draw a face - the face of the Snow Maiden is always kind, with a smile.
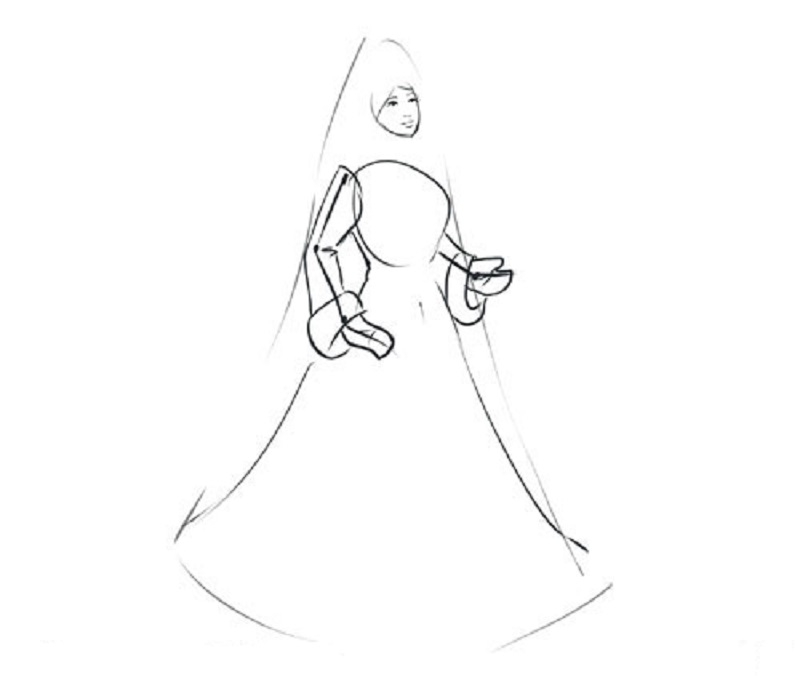 Image Detailing
 Step 4. Now it's time to draw a collar on a fur coat that is between the top of the trunk and the head. Draw the cap as shown in the picture.
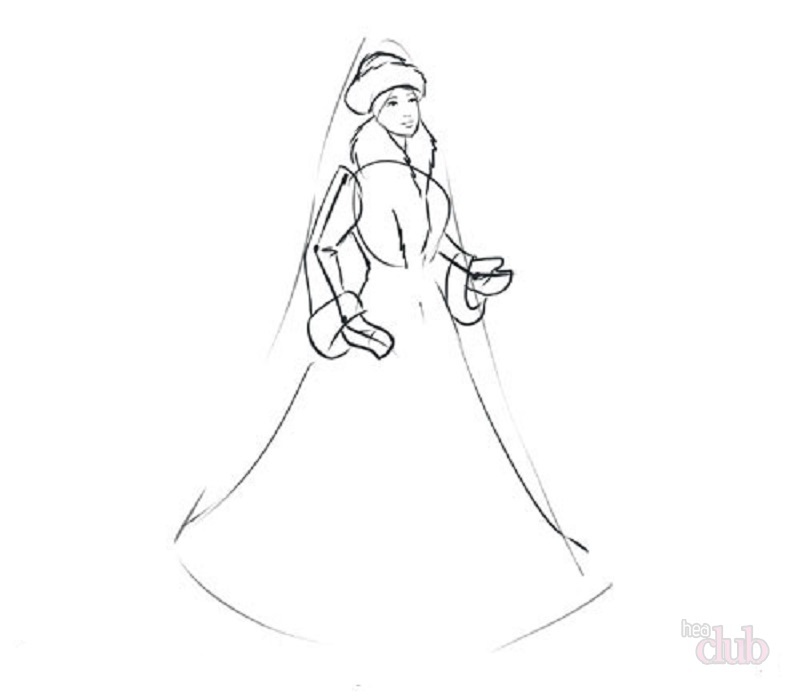 draw a hat and collar
 Step 5. At this stage, the image of the Snow Maiden is almost ready. Draw the granddaughter of Santa Claus with a braid, like in the picture and draw the lower part of the fur coat( fur, dress and hem of the fur coat).All the extra lines are erased by an eraser, in some places it is possible to draw folds.
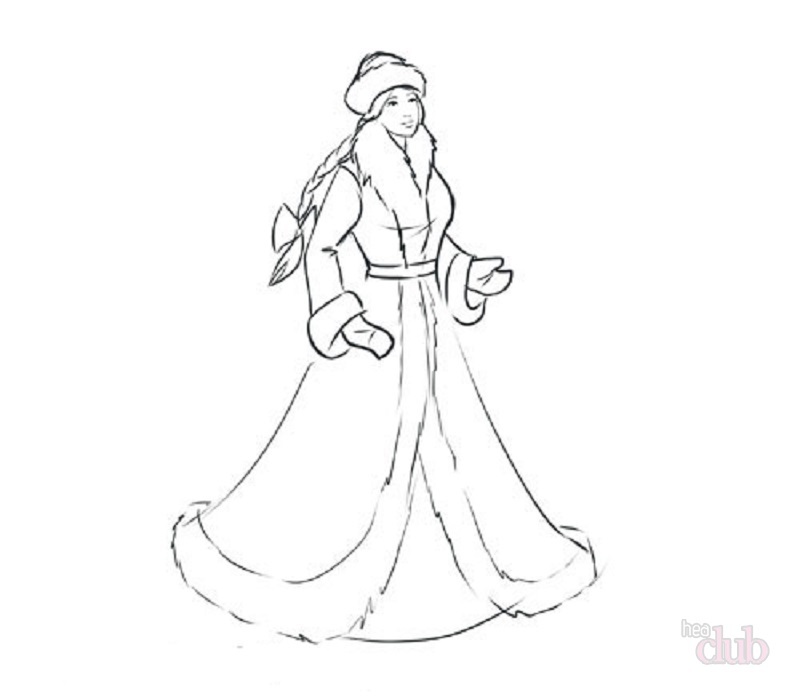 Work is almost ready
 Step 6. Coloring what we got. This option is black and white, but you can, of course, use colored pencils, markers, paints. Traditionally, the clothes of the Snow Maiden are blue or white, and the hair is golden.
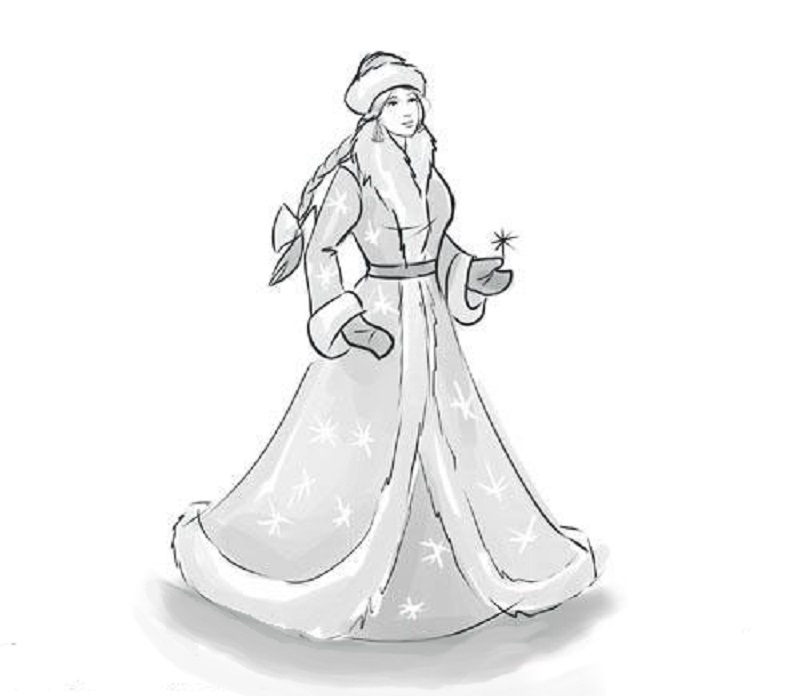 The drawing is ready!
 How easy is it to draw Santa Claus in boxes?
It's very easy to draw Santa Claus on cells. This task can be performed even by a preschooler or a pupil of the first or second class.
Be attentive - it is useful to you in this task!
Choose one of the drawings below, take a sheet of paper in a cage, felt-tip pens and draw!
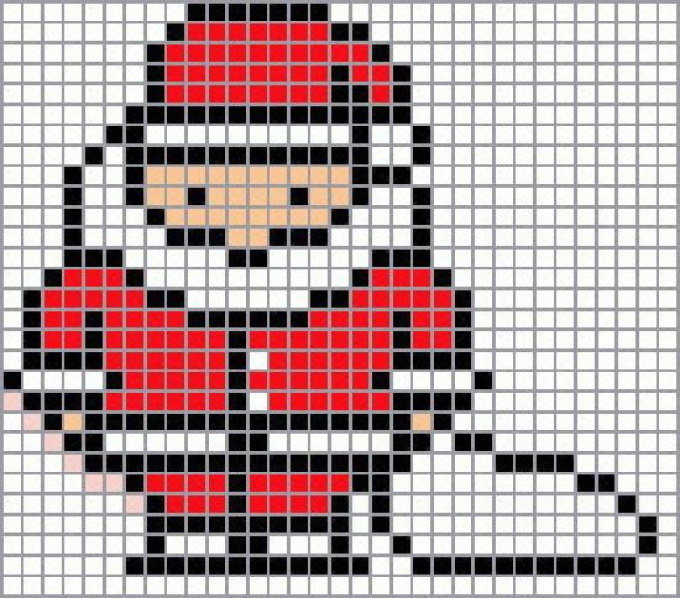 variant 1
 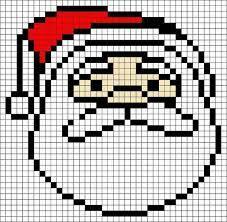 Option 2
 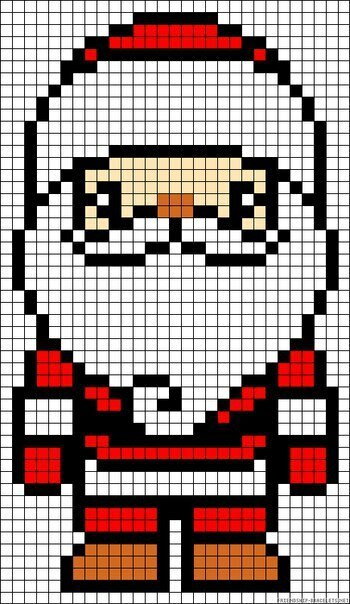 Option 3
 Drawing Santa Claus and Snow Maiden for drawing
If you already know how to draw Santa Claus and Snow Maiden - start improving your skills. One of the most effective ways to learn to draw better is to start drawing. During the drawing, you remember some elements, techniques.
For drawing, you can use the following pictures.
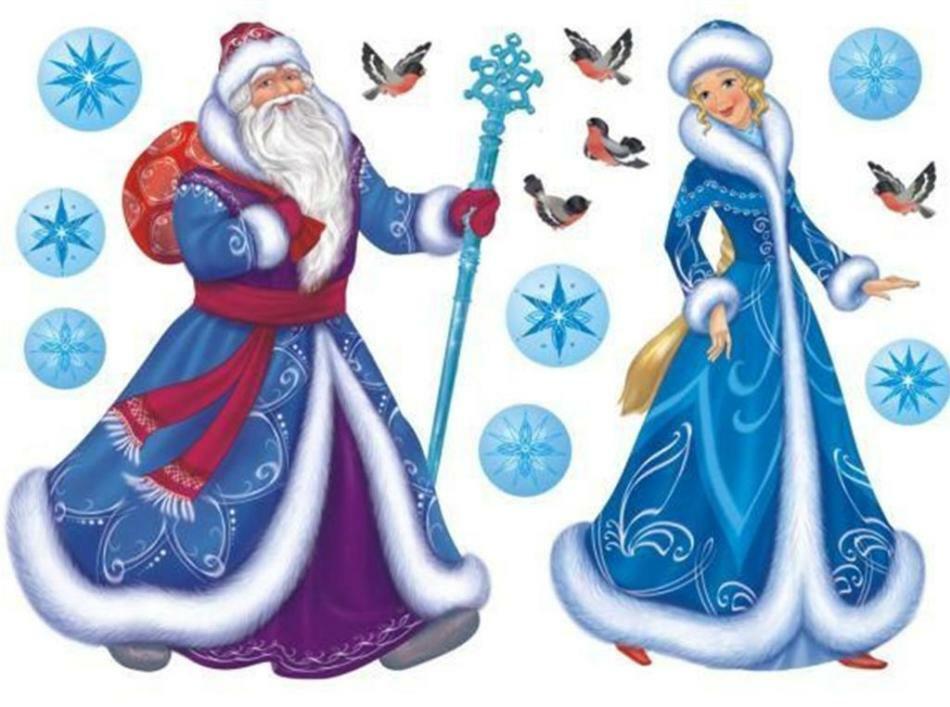 Option for Painting 1
 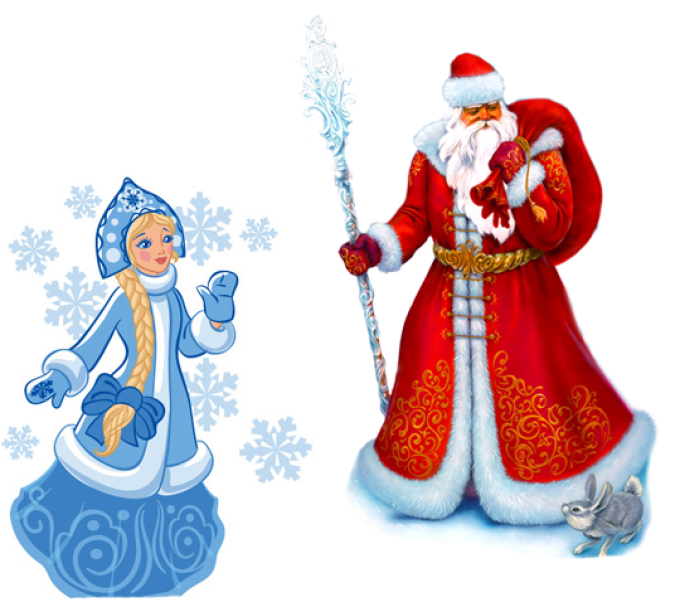 Option for Painting 2
 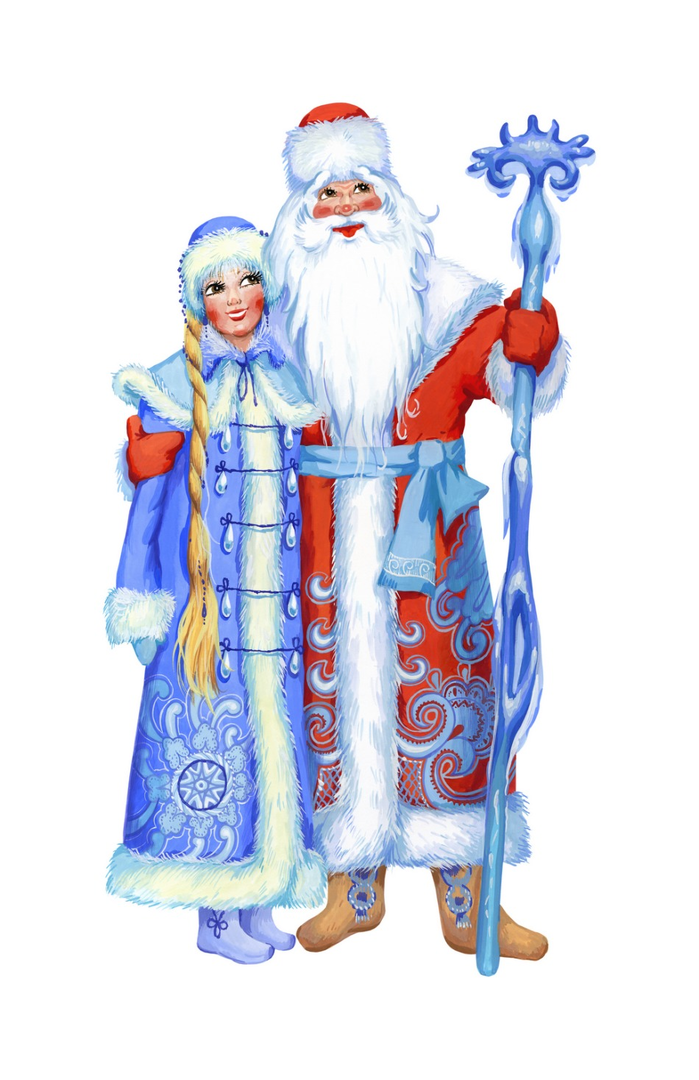 Variant for Painting 3