
tradition to give otkrytochku because of the significant events and celebrations goes back more than two centuries. Despite the fact that modern information technologies have entered our life: mobile communications and the Internet, we are still happy, having received a gift from a close person, a colorful postcard to the New Year with our own hands.
However, modern postcards look quite different than those that we received twenty years ago. We no longer want to congratulate each other with the faceless products of the printing industry, which stamped them with unlimited circulations.
In place of boring standard cartons came postcards, skilfully made in-house, in which the man who made them put a piece of soul, warmth and care. One of the most beloved of our holidays has always been a new year: it is with him that we connect our dreams and hopes for a better future, exchange gifts with people close to us.
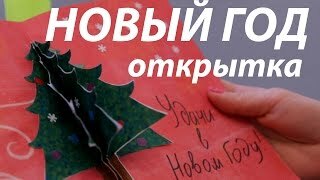
A postcard to a man for the New Year 2017 with his own hands
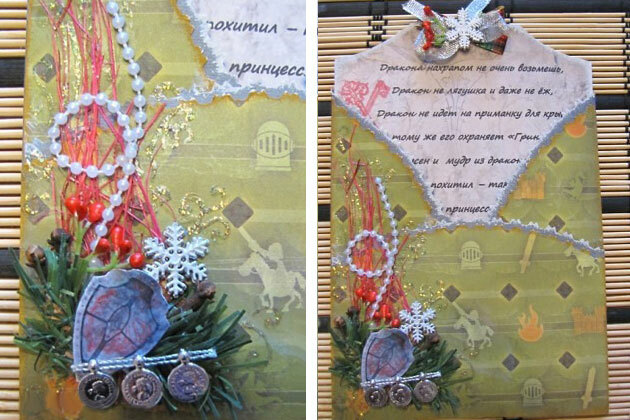
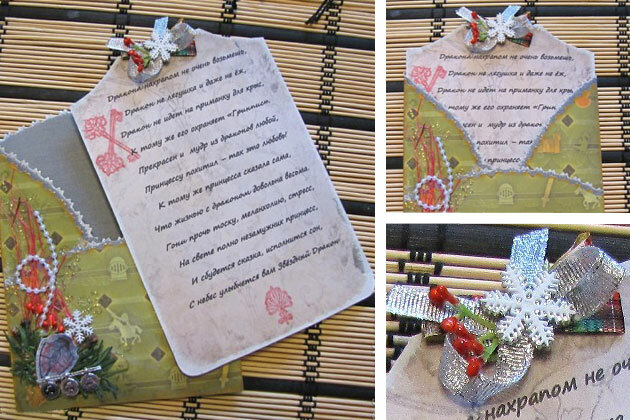
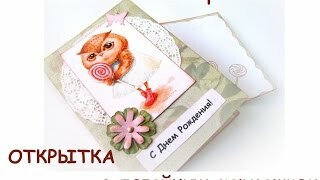
The original postcard for a man can be a pocket with a New Year's greeting. In recent years, it has become a fashion trend to necessarily link the congratulatory text with the patron of the coming year - one of the twelve animals of the Chinese horoscope.
Having found a suitable poem on the Internet, we add everything we want to wish a person dear to us and print out the text on the home printer. Of course, for this we need a leaf of a thick cardboard, the edges of which can be stained with acrylic paints and decorated with ornaments using suitable dies.
 7:27
7:27 56443 views, 639 like
 1:00
1:00 3354 views, 45like
 0:33
0:33 5775 views, 14 likes
How to make a postcard-pocket?
For this we will need:
- A leaf of a tight gift paper with a "male" pattern.
- Small details( you can any knightly attributes, taken from a children's game).
- Several sisal fibers.
- Small snowflakes.
- Carnation( spice, a few things).
- Thread of artificial pearls. Artificial berries and imitation spruce twigs.
- Bow of silver ribbon.
- Silver braid.
Sequence of execution:
- From the gift paper we simulate and glue the original envelope-pocket.
- The edges of the pocket are neatly pasted with a narrow silvery braid.
- In the lower left corner of the pocket create a beautiful composition of sisal fibers, beads, berries, snowflakes and spruce twigs. Fragrant carnations are desirable to place among artificial needles: they will simulate fir cones while simultaneously flavoring the postcard.
- In the foreground of the composition we fix small details( imitation of weapons, shield or fragment of knightly armor).
- At the top of the sheet with a congratulation anchoring small but effective bow of silver braid decorated snowflake artificial berries and grapes.
- We put a beautifully decorated greeting in the ready-made pocket.
 8:54
8:54 1454 views, 25 likes
 7:31
7:31 934 views, 23 Laika
 9:30
9:30 552,139 views, 3332 Postcard Laika
woman for the New year 2017 with his own hands
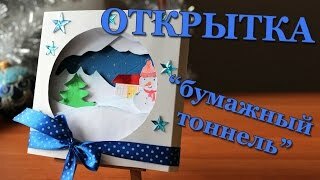
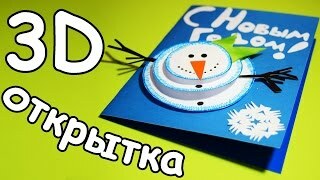
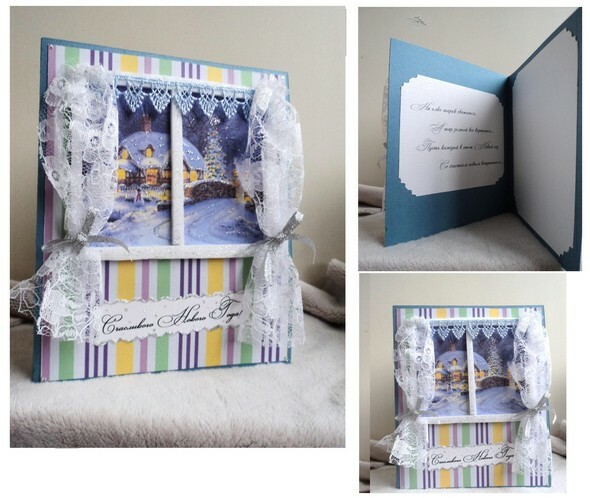 Holiday card for the New year, made with his own hands, and intended as a gift a woman can be a three-dimensional simulation of a cozy winter window. Below you can find out how to make it.
We will need:
- A sheet of dark blue cardboard.
- Gift paper in stripes.
- Trimming guipure, tulle or lace.
- Silver braid.
- Tape narrow lace.
- Picture depicting a beautiful winter landscape.
- Trimming of ceiling tiles or thick felt.
Sequence:
- The sheet of blue cardboard is bent in half.
- Paste the inside of the postcard with coated white paper with beautifully decorated corners and a pre-printed greeting.
- The front side is made out with a striped gift paper: it will simulate wallpaper on the wall surrounding the window.
- We paste a beautiful winter landscape( it will be visible from the window).
- From the stripes of ceiling tiles or thick felt we simulate the window frame and paste over the winter landscape.
- From a piece of ribbon lace we make a lambrequin and fasten it to the top of the frame.
- Curtains Wizard from scraps of tulle and guipure, glue on the sides of the window, intercept the narrow tape and tying her bow.
- Under the window we place a strip with a beautifully executed greeting inscription. It can be printed on a printer or cut from an old postcard with the help of figured scissors.
 5:44
5:44 1509 views, 37 likes
 0:33
0:33 8913 views, 13 like
0:33 5,775 views, 14 likes
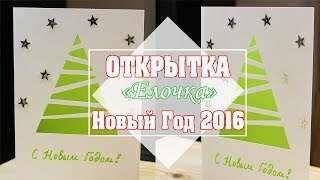
Postcard mother for the New Year 2017 with his own hands
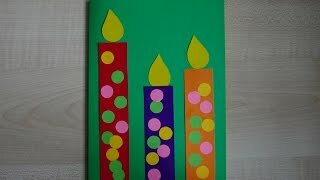
 Even the most simple card with applique, hand made baby will be very expensive gift for his mother.
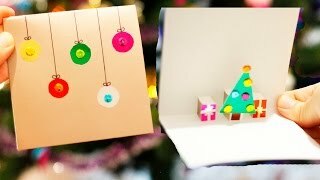
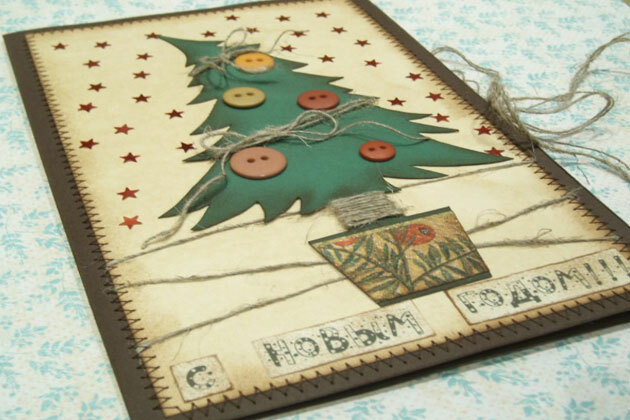
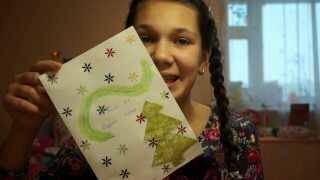
Give your child a piece of cardboard folded in half and leaf fern( or any dried plant, whose leaves are shaped like a Christmas tree).
- We paste a leaf on the front side of the postcard: this will be the basis of the New Year's tree.
- We decorate the Christmas tree with ready-made sparkles or circles of confetti, which the child can independently make from a colored foil or pages of a glossy magazine.
- Taking a thin brush and white gouache, you can depict snowflakes swirling around the Christmas tree.
- Simulate drifts from pieces of cotton wool and paste them under the Christmas tree.
- Congratulatory inscription( if the child can already write) can be done by hand.
- The same applies to the text of the congratulation: made with touching children's scribbles, it will warm any mother to the depths of the soul.
A very small child can please his mother with a postcard, decorated with the help of purchased stickers. These stickers are sold in sets and come in the form of asterisks and various geometric shapes. Offer their baby and help him make a simple appliqué in the form of a Christmas tree.
 1:03
1:03 61829 views, 692 like
 6:34
6:34 2871 views, 20 like
7:27 56443 views, 639 likes
Postcard for the New Year 2017 with your own hands
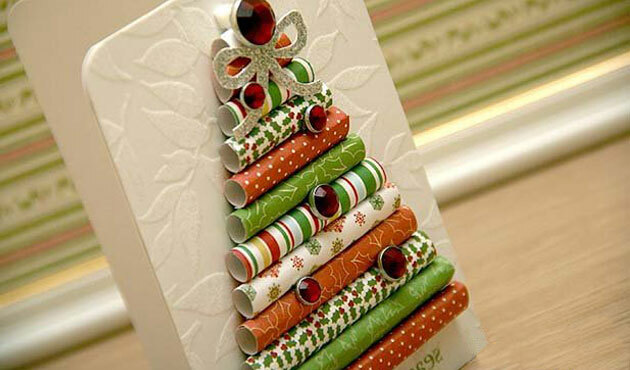 A card with herringbone executed by the hands of a child will be no less expensive to his dad. Quite original, it will look with a Christmas tree made of paper tubes. What is required for this?
- Colored thick cardboard.
- Scrap paper.
- Adhesive PVA.
- Beads, sequins, beads.
Sequence:
- Bend the cardboard in half.
- We mark out the future postcard, we are determined with the size of the Christmas tree.
- Paper for scrap is cut into rectangles, rolls and glue tubes from them. The length of the tubes should be different, corresponding to our preliminary markings.
- Having made a sufficient number of tubes, we begin to glue the Christmas tree on the cardboard. Down put the longest blanks. With each new tier their length should decrease. We glue the tubes together.
- We decorate a ready-made Christmas tree with ready-made sparkles, beads and beads.
- Together with the child we write congratulations to your beloved father.
1:03 61829 views, 692 like
 6:13
6:13 89 views, 3 likes
7:27 56443 views, 639 likes
A postcard to a friend for the New Year 2017 with your hands
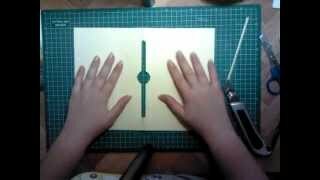
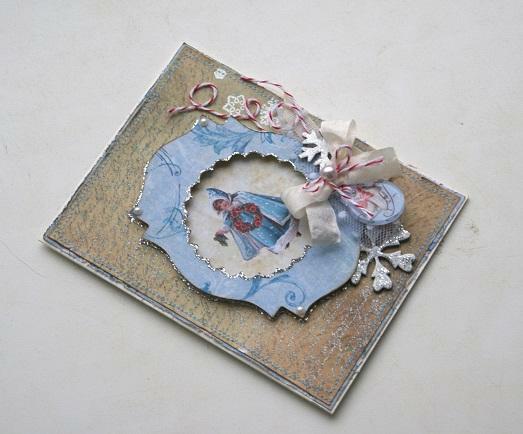
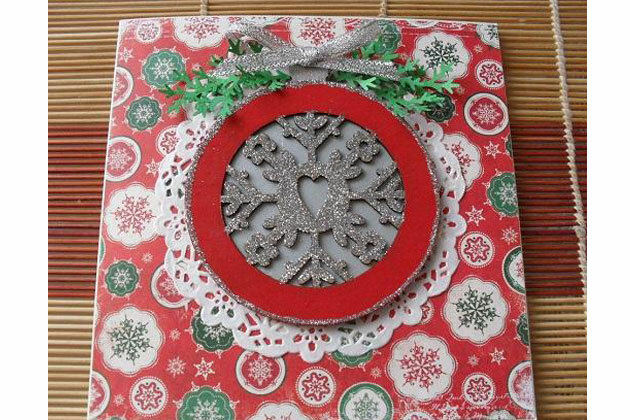 A beautiful postcard made in an unusual technique will be a pleasant surprisefor a beloved friend. On the front side, you can cut a round window and decorate it in the form of a beautiful Christmas tree ornaments.
We will need:
- A stick of dense cardboard.
- Gift Paper.
- Large silvery snowflake.
- A piece of bright colored felt.
- Narrow silver ribbon.
- Round paper napkin with carved edges.
- Paper fir twigs.
Sequence of execution:
- We make the basis of the postcard: fold a sheet of cardboard in half. The front side is pasted with beautiful gift paper.
- Draw a circle for the future window using a compass or any rounded object. The diameter of our circle should correspond to the diameter of our snowflake( it can be bought in the department selling Christmas ornaments).
- Close the window with a piece of silver metallized cardboard.
- The edge of the slotted window is made out with a paper napkin with lace edges( we cut the middle of the napkin by the same diameter).
- We make the volume edging of the window from a thick felt: making the necessary markings, cutting out the ring and pasting it on top of the paper lace, like a frame.
- The edges of the frame made of felt can be decorated with gel with silvery sequins.
- In the center of the window, place a snowflake and glue it to the silver cardboard.
- In the upper part of the resulting Christmas tree ball we glue an imitation of a metal fastener made of the same silvery cardboard.
- On both sides of the "fastening" we strengthen the paper fir twigs( ready-made or cut-in by ourselves).
- The center of "fastening" is decorated with a ribbon made of silver ribbon.
- A ready-made postcard from the inside is pasted with beautiful paper and we write on it the warmest wishes.
1:03 61829 views, 692 like
 3:12
3:12 109 views, 4 like
 0:32
0:32 1212 views, 2 likes
Postcard to a friend for the New Year 2017 with your own hands
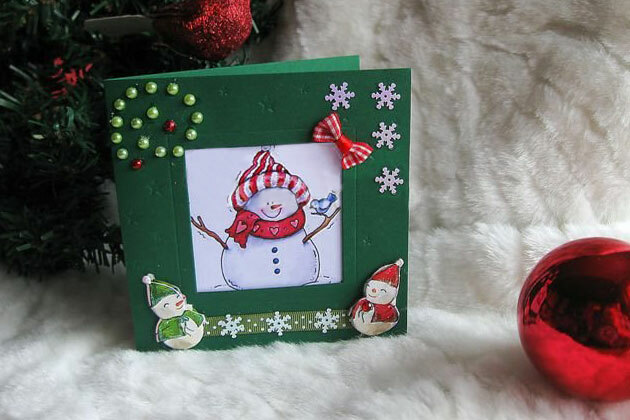 You can please a friend with a funny card with a smiling snowman.
Required Materials:
- Dense green cardboard.
- Picture of a happy snowman.
- Double-sided bulk adhesive tape.
- Simple double-sided adhesive tape.
- Ready 3D stickers.
- Halves of mother of pearl beads.
- A piece of a reps tape.
- Stamp.
- Glue "Titan".
Stages of work:
- We fold the card, mark and cut out the window from the front side of it.
- In accordance with the size of the window, we select a suitable picture and cut it out, making an additional allowance of 0.5 cm on each side( it is necessary for attaching the picture to a bulk tape).All the markings are done with a simple pencil. Cut the picture, erase the auxiliary lines.
- At the edges of the front side of the picture, attach small squares of double-sided scotch and glue the snowman to the back of the future postcard. At the same time, the impression should be created, as if a snowman were looking out the window.
- At the bottom of the postcard we attach a piece of the ribbon ribbon( using double-sided scotch tape).
- The edges of the tape are hidden under 3D snowmen-stickers.
- Apply a few drops of glue, attach the sequins to the tape as snowflakes.
- The same paillettes make out the top corner of the postcard.
- The upper right corner of the window is decorated with a bright bow of fabric.
- In the left corner we have and paste halves of mother of pearl beads.
- A liner for the inside is made of scrap paper, cutting out a square of the right size and processing its edges with a curb punch.
- We glue the liner on a double-sided ordinary adhesive tape.
- Using an acrylic stamp, we will carry out an impression of a congratulatory inscription.
 14:41
14:41 106098 views, 2868 likes
 6:32
6:32 44037 views, 726 like
7:27 56443 views, 639 likes
A greeting card for the new year 2017 with their own hands
 A Christmas card with a button applique will be a pleasant surprise for your beloved grandmother. Bright, unusual and very simple to manufacture, it will become the center of admiring attention at the moment of the solemn presentation of gifts.
Materials needed:
- Thick white cardboard.
- A large number of large and small buttons of different colors.
- Beads, beads, sequins.
- Cutting felt.
- Globules of multi-colored wool yarn.
- Glue "Titan"( for ceiling tiles).
Production sequence:
- Bending the cardboard in half, prepare the basis for the postcard.
- With a simple pencil we make an easy sketch of the Christmas tree.
- We spread the image of the Christmas tree from the buttons, filling the painted outline with them densely. We glue the buttons, alternating them in color and size, leaving no spaces or gaps.
- We decorate the Christmas tree with small beads and paillettes.
- On the vertex we strengthen the asterisk, carved from a bright felt.
- From pieces of felt cut out a large number of squares and rectangles, which will simulate a mountain of gifts at the bottom of the Christmas tree. Each "gift" is tied with a smart bow made of woolen yarn( you can skip some strings before knitting a bow with a small button).
- Beautifully group "gifts" under the Christmas tree and paste them.
- We write a touching greeting inside the postcard.
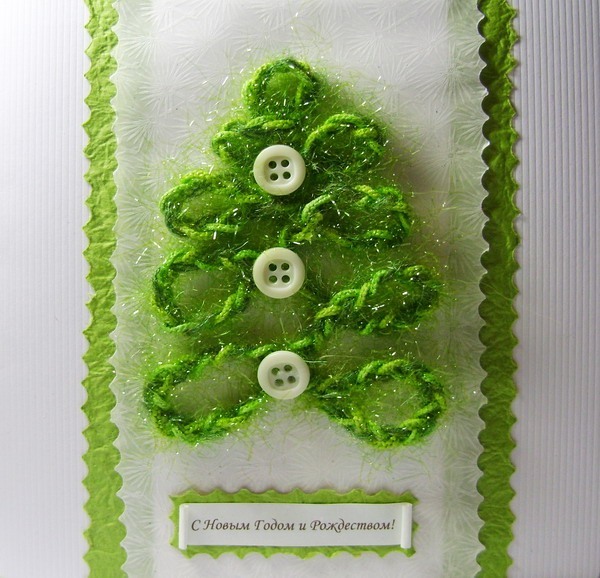 Another version of the gift for the grandmother can be a postcard from the threads. Taking a fluffy yarn of green color, we will lay out the silhouette of the Christmas tree with a thread and stick it on a thick cardboard with a curly edging. In the center we will glue three large buttons. The original card is ready!
 2:13
2:13 366 views, 24 likes
6:13 89 views, 3 like
Greeting card to grandfather for the New Year 2017 with his own hands
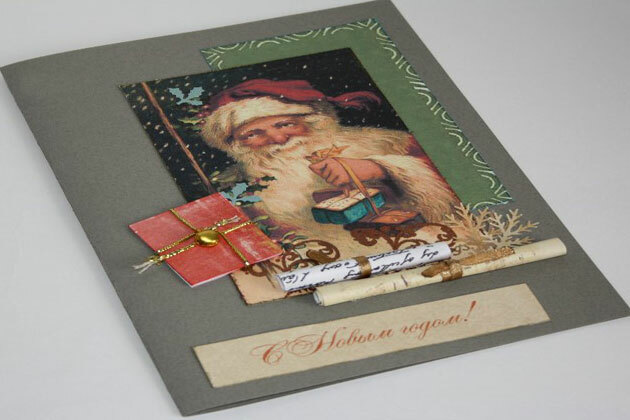 Dear grandfather can make a postcard, something reminiscent of the traditional, but only the old times and with an indispensable modern "zest".
What do we need?
- A piece of dark cardboard.
- Picture depicting Santa Claus( carved from a magazine or an old postcard).
- Several strips of paper for scrap or pages from a glossy magazine.
- Golden braid.
- Decorative tambourine.
- Artificial sprigs and berries.
Sequence of actions:
- In the center of a folded cardboard we glue a picture depicting Santa Claus. You can preliminarily attach to it a narrow rectangle of one-color colored paper, placing it closer to the top corner of the postcard.
- To the bottom of the picture we attach a few tubes of glossy paper with the letters, bandaged with golden ribbons: this is an imitation of the congratulatory scrolls. They can be further decorated with paper fir branches.
- The side of the picture( just above the "scrolls") is decorated with a voluminous image of a gift tied with a golden thread with a tiny bob.
- You can also decorate it by cutting a pair of snowflakes from an openwork paper napkin.
- Congratulatory inscription is performed by hand, using a gel with sparkles( or cut out of an old postcard).
 4:07
4:07 72704 views, 997 like
 3:11
3:11 9 views, 1 like
 2:23
2:23 20 views, 2 likes
Postcard to daughter for the New Year 2017 with your own hands
 Mom-needlewoman can please her beloved daughter with a greeting card with the image of a beauty - Snow Maiden.
Required Materials:
- Leaf of dense cardboard.
- Cardboard with silvery letters.
- Picture with the image of the Snow Maiden.
- Gel with sparkles.
- Woolen yarn.
- Finished silvery snowflakes.
- Satin braid, strip of floral net, beads, sequins.
Sequence:
- We fold the cardboard in half. To the front side, using a sewing machine, we attach a leaf of a beautiful dense cardboard with silvery letters. Thanks to this application, the postcard will be stronger and more solid.
- Using a simple pencil, we mark out a round window( the edges of the circle can be made curly).Cut out the window with a clerical knife.
- In order for the postcard to acquire an original look, you can select a window using a beautiful frame. To make it, we take a beautiful cardboard and make an edging of any shape. We glue it with the help of glue "Titan".
- The outer and inner edges of the frame will be surrounded with gel with silvery sequins.
- We will make a frame with one edge of snowflakes, an elegant bow made of braid, woolen yarn and floral net.
- We glue the inside with light paper and write New Year's greetings.
7:27 56443 views, 639 like
 5:09
5:09 938345 views, 58356 likes
 1:52
1:52 692 views, 20 likes
Postcard son for the New Year 2017 with your own hands
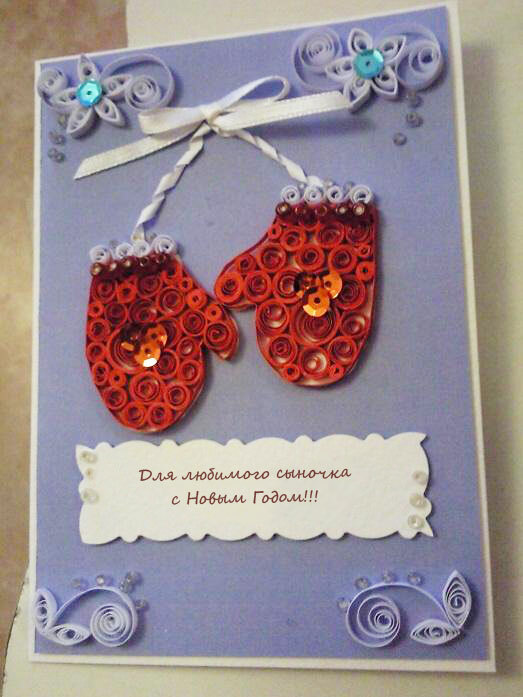 For your beloved son, you can make a postcard in the popular quilling technique today. Artfully made gloves will clearly demonstrate how great is the desire of the mother to please her child.
Materials needed:
- Blue cardboard.
- Narrow strips of red and white paper.
- Beads and sequins.
- Satin ribbon.
- A greeting inscription printed on a color printer and carved with figured scissors.
Sequence of execution:
- We make the basis of a card from blue cardboard.
- We cut images of a pair of warm mittens from dense white cardboard and fill them tightly with twisted red paper ribbons twisted in spirals. The edge of the mittens is made of strips of white color, and their middle is decorated with sequins.
- We put the finished gloves in the center of the front side, connecting them with a satin ribbon and tying it with a bow.
- The upper corners are decorated with exquisite white flowers, imitating frosty patterns. In the middle of the flowers glue the glitter.
- In the lower corners we perform "frosty" curls, decorated with transparent beads.
- Under the mittens we attach a congratulatory inscription.
 0:19
0:19 7187 views, 10 likes
 12:39
12:39 21679 views, 1170 likes
 1:25
1:25 2319 views, 108 likes
New Year card for the New Year 2017
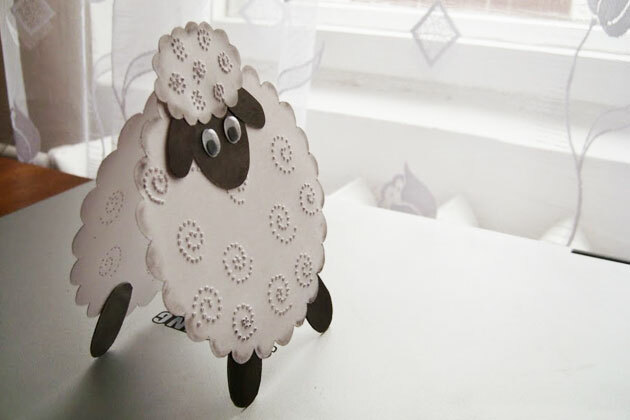 Volumetric postcard for the new year Goats( sheep)- an excellent occasion to please your beloved girl by giving her a postcard-amulet depicting a lovely sheep - the patron of the coming year. To do it you will need no more than half an hour and a modest set of materials. So, we need:
- A sheet of white and dense textured paper.
- A piece of black half-board.
- Finished eyes for toys.
- Scissors: simple and curly.
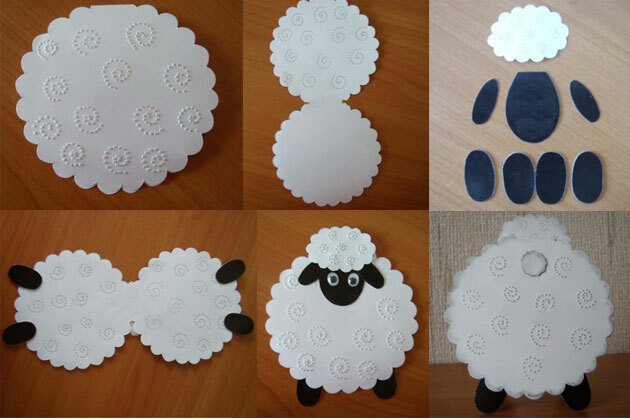 Production sequence:
- Fold in white invoice paper and draw a circle on it using a circular or any round shape.
- Cut out a circle with a scissor, leaving a small piece of the fold intact, so that the postcard can open.
- From scraps of white paper we make an oval hat and a small round tail.
- On the sheet of the black half-cardboard we mark the muzzle, a pair of ears and four legs. Cut out all the details with the help of conventional scissors.
- Before assembling the postcard, we lay out all the details, achieving the greatest expressiveness of the image. Our postcard will stand, therefore it is necessary to arrange the legs so that they coincide.
- Gently glue all the details, timely removing excess glue with a soft cloth.
- Our postcard-amulet is ready. You just need to write the warmest words inside and give your beloved girl along with the New Year's gift.
7:27 56443 views, 639 like
 3:29
3:29 252 views, 2 like
 3:39
3:39 1009179 views, 1237 likes
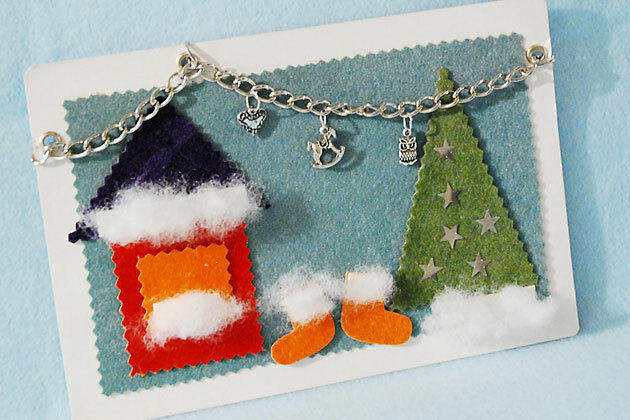
Postcard to his brother for the New Year 2017 with his own hands
 Make a postcard for a brother quite a force even a small child. Of course, if you help in work will be an adult member of the family. Let's find out how to make it in a fashionable technique called card-making.
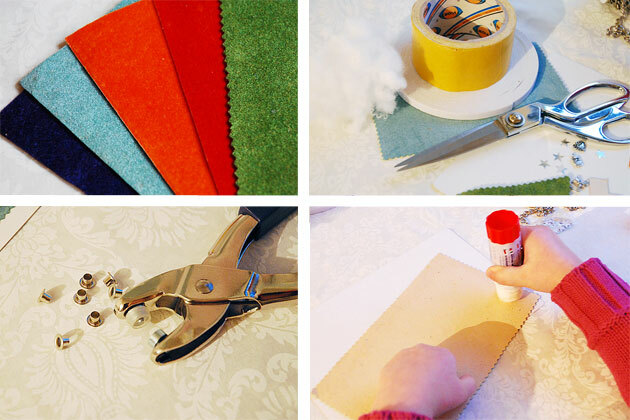
Our postcard will be a vivid picture with a border of cardboard-base. To execute it we need:
- A sheet of very thick cardboard( measuring 21/15 cm).
- Set of colored velvet paper.
- Double-sided bulk adhesive tape.
- Sequins for asterisks.
- Metal chain( length of 22-25 cm).
- Several acrylic or metal pendants and rings for attaching them.
- Synthetic or cotton wool.
- Glue "Titan" or glue stick. In extreme cases, the usual clerical glue will do.
- Conventional scissors and zigzag scissors.
- Special press-bolt and three eyelets.
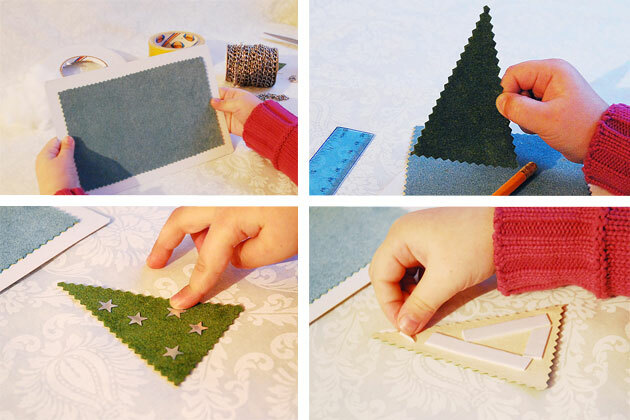
Stages of execution:
- We cut out a rectangle measuring 18/11 cm from blue velvet paper with zigzag scissors and paste it to a sheet of white cardboard: this is the background of our postcard.
- Using the same scissors, cut out a triangle tree( with sides 6 /9/ 9 cm) of green velvet paper. We adorn it with paillettes-asterisks.
- To the back of the Christmas tree we attach strips of bulk scotch and place it on the postcard.
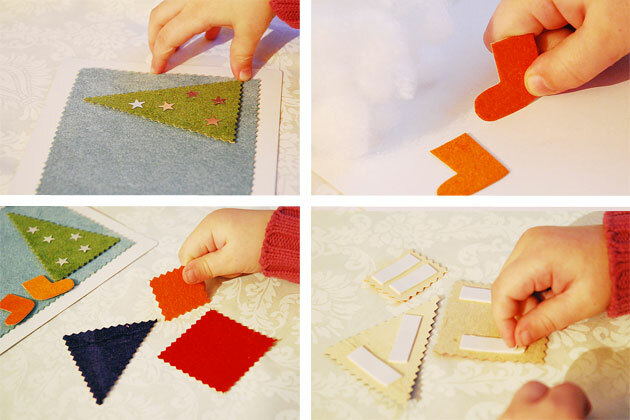
- From red velvet paper we make two New Year's boots for gifts and fix them with the same scotch tape.
- In the same way we cut out and paste the house.
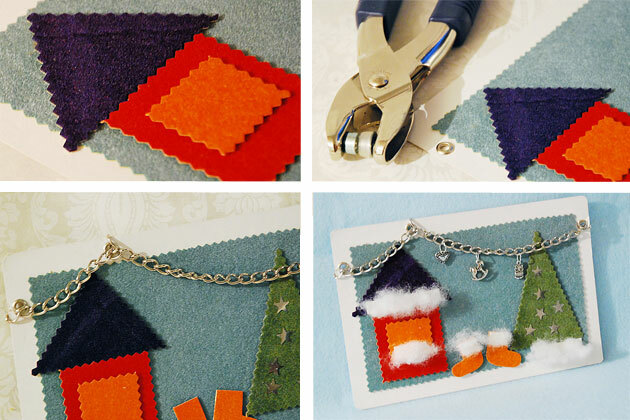
- In three places we make holes with the aid of a louver press. Using detachable rings, we attach a chain to the postcard and decorate it with funny pendants.
- To simulate snowballs we use cotton wool balls, attaching them to the roof of the house, boots and at the base of the Christmas tree.
6:13 89 views, 3 like
1:03 61829 views, 692 like
6:32 44037 views, 726 likes
Postcard to your sister for the New Year 2017 with your own hands
 Your beloved little sister can enjoy a very delicate and original card from beads. It will take no more than a quarter of an hour to make it, but as a result, a very nice addition to the gift will be obtained.
Materials needed:
- Thick blue cardboard.
- Three pieces of New Year's paper with a pattern of a similar color scheme.
- Mother-of-pearl white beads of different diameters( preferably three sizes).
- Flat double-sided adhesive tape.
- Narrow nylon ribbon.
- Hot glue.
Sequence of work:
- We lay out a cardboard square postcard.
- The front side is made out with squares and rectangles of New Year paper, arbitrarily placing them on the cardboard and gluing it with two-sided adhesive tape. The most important thing is that the composition is original and harmonious.
- With a simple pencil, we make an easy sketch of the silhouette of the Christmas tree and begin to paste the beads of the bottom row using hot glue. In the process of gluing, we alternate beads in size, trying to place the smallest of them in the upper tiers of the tree.
- After pasting a Christmas tree, at the bottom of the postcard we make an elegant bow of translucent kapron tape. To do this, with a sharp clerical knife, make a small incision in the fold, pass the ribbon into it and tie a bow.
- We guarantee that any girl will be delighted with such a postcard. Multiply her joy by finding suitable good verses on the Internet. Sign it by hand or print the congratulation text on the printer.
6:13 89 views, 3 likes
5:09 938345 views, 58356 likes
 8:51
8:51 203372 views, 2505 likes
Related Videos:
1:03 5:44  2:43
2:43