
Mrs. - changeable nature, who just love to experiment with their appearance. Girls with smooth straight hair dream of lush, elastic curls that will hold on all day long. Create beautiful curls on medium hair can be done in a home environment without the use of professional devices and special fixing means. To learn how to make stunning locks of any caliber, familiarize yourself with the techniques that are presented below. Here you can find an option for every taste.
Advantages of curls on medium hair
 Curls small
 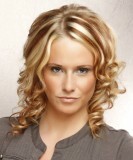 Curls medium
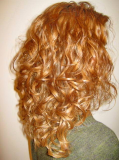
 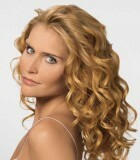 Curls large elastic
 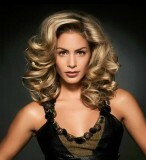 Curls soft bulk
 - It will take a little time to create a beautiful hair.
- Daily image change.
- On average hair, you can create stunning stylish styling.
- Curls on the middle length will be held throughout the day, unlike long hair, which under their own weight straighten faster.
- It is possible to create curls of different caliber: small, medium, large elastic and volumetric soft.
- With the help of curls you can correct the shortcomings of appearance.
Curls with a hair dryer
This method is the most simple and popular. To create curls in the home, you will need a special nozzle-diffuser and styling products.
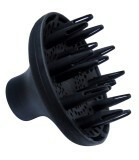 Foam diffuser for the hair dryer
  Styling products
 Instructions for creating curls with a hair dryer:
- Wash your hair thoroughly with shampoo, use a balm.
- Dry the curls with a heated towel, but do not rub, but pat them. When they are semi-dry, comb them with a comb with sparse teeth so that they do not get confused.

- Treat strands with foam or mousse with a thermal protection effect. To curls turned soft and airy, apply the product on the palm of your hand and squeeze the hair in your fist.
- Put a diffuser on the hairdryer, put a bunch of hair in it and dry it with a jet of hot air. Do the hair dryer spiral, circular motion. First, dry the ends, and then the radical region. Dry the strands in random order.
- It turns out a magnificent, stylish styling, curls look natural. The result can be fixed with a varnish. Done!
Turning hair curled
To make hair curls, you need foam or wax to model the hairstyle, varnish with a high level of fixation and scallop.
Stacking steps:
- Wash your head. It is necessary to wash off the hair with dust, dirt, old styling products, otherwise hot styling will damage them more.
- Treat strands with fixing means. Allow hair to dry naturally, in extreme cases - with a hair dryer. You can only spin dry hair!
- Divide the strands into 2-3 horizontal sections, fix the strands with clamps.
- Begin to turn from the nape of the neck. Separate the thin strand, tighten its tip between the plates and wind up almost to the root. Screw the rest of the hair in the same way.
- When the curls cool down, you can smoothen them with your fingers and sprinkle with varnish.
- Then release the hair from the middle level, comb, divide into strands and wind.
- Repeat the same for the top level. Curly curls are ready!
To less damage to the curls, heat the curling iron more strongly and hold a little less than necessary.
Classic curls with the help of curlers
To create medium light curls, you will need a water spray, a scallop with rare teeth, stowage, velcro-velcro, lacquer with an average level of fixation.
Technique:
- Wash your head, lightly dry the curls with a towel. Wet hair should be combed with a scallop.
- Treat strands with gel, foam or mousse.
- Divide the curls into 2 horizontal and 2 side sections. Begin to twist from the back of the head or temple, as you prefer.
- Take a thin curl, wind it on the curlers in the direction away from yourself.
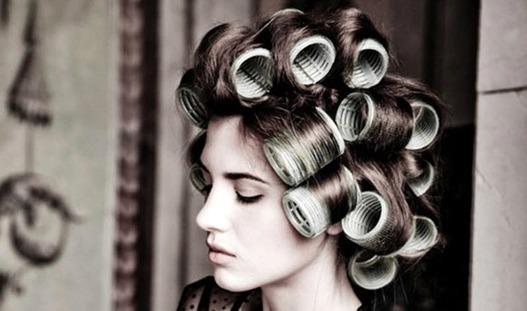
- When you wind all your hair, dry it with a hair dryer. The second option is drying in a natural way, but for this you will need extra 3-5 hours.
- Carefully remove the curlers, straighten the curls with your fingers, sprinkle with varnish. Done!
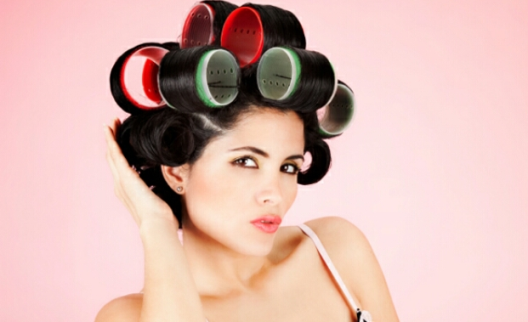
Curls with the use of the thermobigi
To create light, beautiful curls, you will need thermal rollers with an average diameter, scallop, modeling tools, varnish with a high level of fixation.
Technology of creation:
- Prepare the curlers: plug them into an outlet or heat in a saucepan.

- Clean dry strands with gel or foam.
- With the help of a comb, divide the hair into 3 large strands: one in the center, the other on the left, and the third on the right. Begin to twist curls from the central part, fix the side with a hair clip, so as not to interfere.
- Separate the middle part into several thin lines near the forehead line, wind the curlers on them. Then go to the top of the head. If want, that tresses beat identical, twist them only from itself. To get a variety of curls, wind them in different directions.
- Go to the side strand. Begin to twist from above, curlers should be located horizontally.
- After 30-50 minutes, carefully remove the curlers, straighten the curls with your hands, sprinkle with varnish. Done!
Creation of curls with thermobigi - video
Large curlers for creating light waves
To create curly curls, you will need curlers of the largest caliber.
Instruction for creating:
- Treat pure dry locks with mousse, distribute it along the entire length. So the curls will keep the shape for a long time.
- Divide the hair on the center and side sections.
- Begin to twist from the middle of the forehead. Hair curlers should be in a horizontal position. To create free waves, twist strands in different directions( from yourself and to yourself).To maintain this effect, you can use curlers with different diameters, so the curls will look even more natural.
- Go to the side sections, separate the thin strands from above and wind them.
- Drizzle the curls, curled on curlers, with a strong fixation lacquer.
- After 30 minutes, gently untwist hair, straighten them with your fingers. Done!
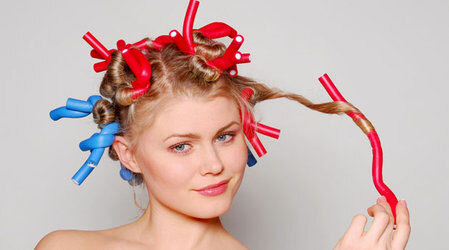
Elastic spirals with thermobigi
- Preheat the thermal rollers with the smallest diameter.
- Treat clean, dry strands with a fixative.
- Divide the hair into 3 sections, as described above.
- Wind curlers on thin strands, make sure they are positioned vertically.
- After half an hour, carefully untwist your hair, sprinkle with varnish.
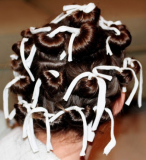
Curls with the help of the hairpin
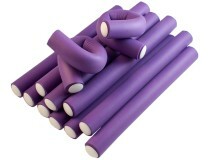 Babies are soft curlers made of foam rubber with a wire base, they do not harm the hair, you can sleep with them. To create chic curls on medium hair, follow these steps:
- Clean wet hair with gel or foam.
- Divide the hair into 3 horizontal sections, fasten them with clasps.
- Begin winding from the occipital area.
- Divide the lower level into thin strands, tighten the ropes tightly to the root area, fasten the hairpin with a bow or knot.
- Place the plaits in a staggered order so that no cracks can be seen.
- Wear a handkerchief or special mesh on top.
- When the hair is dry, gently untwist it. The drying time is from 3 to 8 hours.
- Correct your hair with your hands, if desired, treat with varnish.
Volume and soft curls
To make light curls, you will need large Velcro curlers.
Instruction:
- Clean dry hair, treat with styling, comb with comb.
- Begin to twist from the line of the forehead to the top, separate the strand, wind up to the basal area to yourself.
- Go to the side strands, begin to twist from above.
- After 3-5 hours, carefully untwist curls, straighten your fingers, sprinkle with varnish.
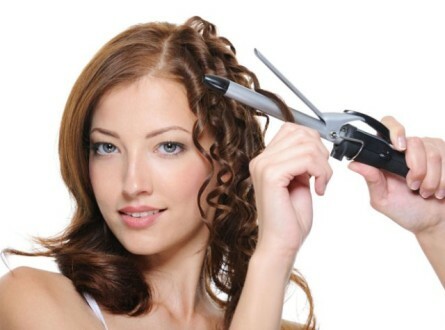
Curls with a straightener
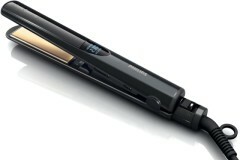 To do this you will need a universal rectifier model with long and narrow plates, rounded ends. To wind curls iron simply, for this, perform the following actions:
- Comb the clean dry strands, treat them with foam.
- Preheat the iron, separate the thin curl near the temple, tighten between the plates near the root, slightly turn, pull down to the end. Do not strongly compress the plates or stop at one place, so you can burn your hair.
- Repeat the procedure for the rest of the hair mass.
- Treat the hair with varnish. Done!
Creation of curls with ironing - video
Other methods
Create beautiful curls with old pens, pencils or plastic beverage cans:
- Treat wet hair with a fixative.
- Screw on improvised means, then carefully pull out, fasten the loop with a hair clip.
- Dry hair with a hair dryer.
- Release the curls.
To create ringlets in retro style you will need wax and invisibility. This hair looks great with the bang. 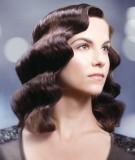
- Secure the locks with locks at the point where the wave will be.
- Treat curls with wax in the form of a spray.
- Dry hair with a hair dryer.
- Gently remove the invisible. Done!
Light curls can be created with the help of hands and varnish with a high level of fixation:
- Comb the strands.
- Screw curl on finger, finish with varnish, after 4 minutes release.
- Light waves look natural and attractive.
Hair can be curled with a rubber band:
- Clean wet hair treated with styling.
- Wear a rubber band whose width is not more than 2 cm.
- Screw strands into it and slightly lift it upwards so that the main volume is on the top of the head.
- Dry hair with a hair dryer.
To create small tight curls, you will need ribbons made of dense fabric:
- Cut the ribbons, whose width is 20-40 mm, and the length is 100 mm.
- Clean wet strands with simulated gel.
- Separate the thin curl, wind on the fabric strip, tie the tape.
- Repeat for the remaining hair.
- After 5-8 hours, carefully untwist.
- Do not brush your hair, just fix it with your fingers. Done!
Salon procedures for creating curls
If you are interested in long-term styling, then you need to go to the hairdresser.
- Carving is a professional perm, which is created by applying chemical compounds on strands. The cosmetic preparation consists of fruit acids, and therefore it almost does not damage curls. The effect lasts 1-3 months.
- Bio-shaving is the most gentle way. Thanks to a special protein, the biological agent has a beneficial effect on the hair, strengthens and moistens them. Curls become elastic, shiny. The duration of the brewing process is from 3 to 6 months.
 Carving
 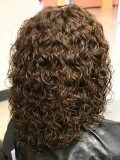 Biowave
 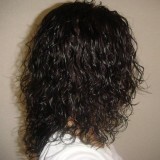 Perm perm
- Perm is the most aggressive way to create curls, the result lasts about 9 months. Hair after "chemistry" needs a long time to restore or even have to shear.
The average length is universal for making curls, they last longer and look great. Now you know a lot of ways to create beautiful ringlets of different caliber. It is enough to master a pair of techniques to look delicious every day!
Related Videos:
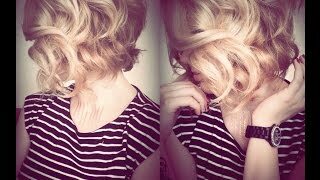 7:38
7:38 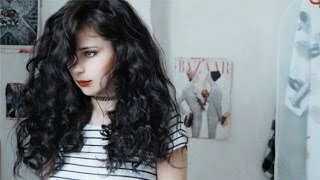 2:05
2:05 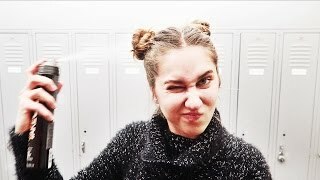 11:50
11:50