
Dolls are not just toys for little children, though most often they are meant for these purposes. Throughout the history of human civilization, they have invariably been present in the life and culture of any people, without exception, despite the level of its social development. There are so many varieties of dolls that separate collections and encyclopedias are devoted to this topic.
- In what technique can you make
- Making a doll in a free style
In what technique can you make an
Making an author's doll is a special direction of modern applied art. Such a thing is more for contemplation than for playing. After all, the doll of author's work is most often performed in a single copy and represents the fruit of a long and painstaking work.
For the production of dolls with their own hands, there is a huge number of specialized techniques and techniques, thanks to which, sometimes even from improvised materials, you can make a worthy copy. But still, with a professional approach, the creation of author's dolls is becoming quite a costly process, which in some cases can still pay off with the generous attention of others or worthy of selling.
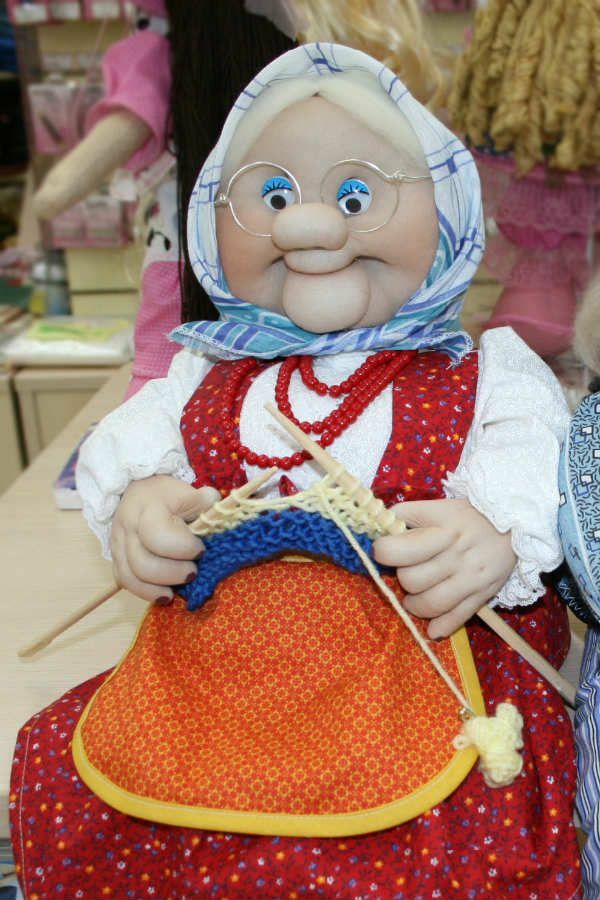
All existing dolls can be divided into two groups: soft and hard.
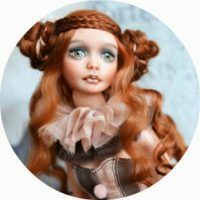
Soft dolls are most often made of thread and fabric with or without a frame, but the most popular in this category are dolls made in the technique of sculptural textiles.
This technique allows you to create toys that anatomically resemble real people, with a "live" expression and really unique features. Most often these dolls are called "stocking dolls", because one of the main elements for them is elastane or kapron, from which well-known stockings and pantyhose make everyone.
When creating an author's textile doll for the beginning, a wire frame is formed. Further, observing anatomical similarity, joints and muscles are wound on this "skeleton", which are then covered with a sintepon to add a volume doll. And after that, kapron comes into play, which is very similar in color and texture to the skin of a person.
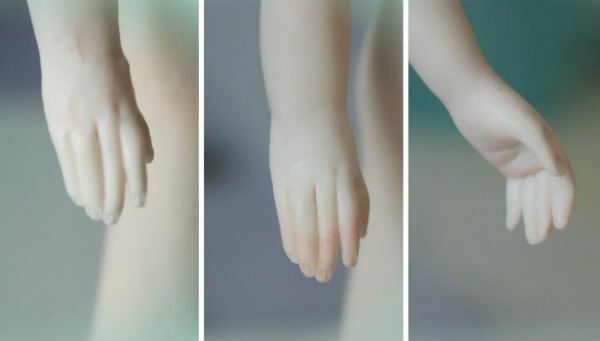
With the help of special tighteners, pads and certain nylon stretches, just create all the features of the face and body of the doll. Talented craftsmen can easily reproduce in their creation any oval of the eyes, the shape of the nose and cheeks, the expression of the lips and even the smallest wrinkles.
The most popular hard dolls include wax, wood, porcelain, polymer clay, plastic and polyurethane products.
The techniques of creating dolls made of polymer clay and plastic are quite fascinating, but labor-intensive. Depending on the type of doll, it can be created on the frame and without it. Every detail, whether it is a pen, a leg or a head, is carefully measured out and neatly sculpted to maximally replicate human features, and then carefully baked or dried.
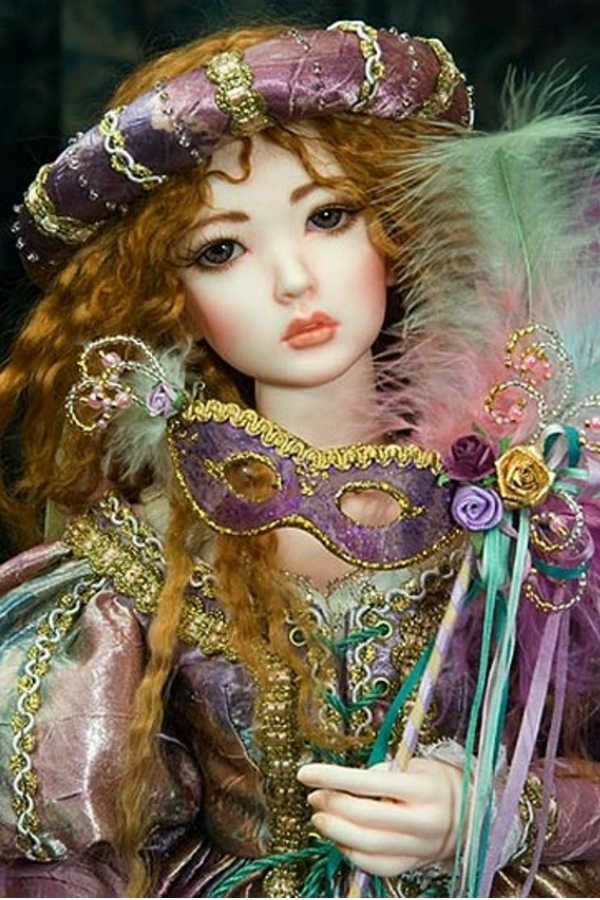
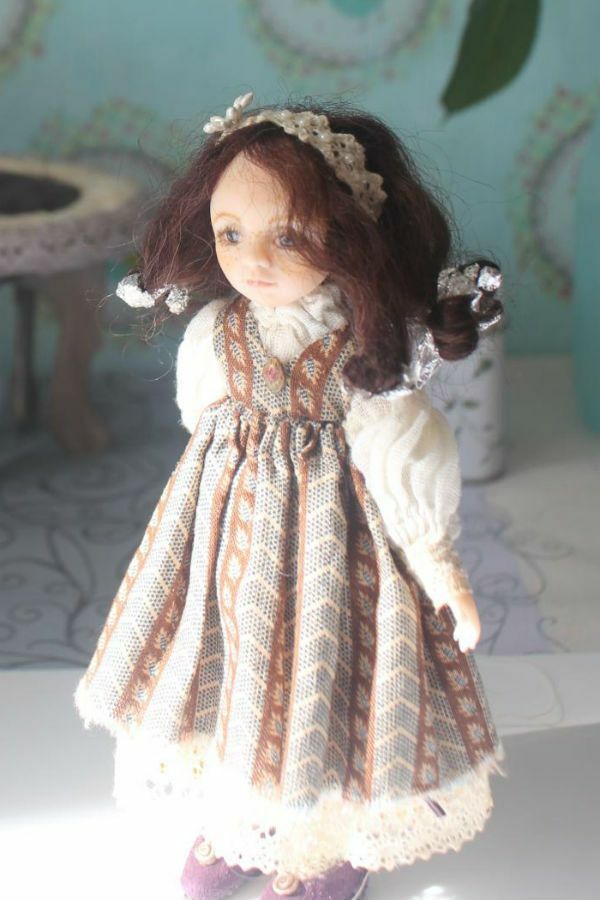
Subsequently, a wig is put on the prepared base, an individual attire is sewn, exclusive make-up and decorations are added. Sometimes looking at such an author's doll, the thought arises that she is alive.
And, finally, consider the most difficult option - the technique of creating a hinged doll. Of course, you can try to create such a toy yourself with the help of master classes and authoring techniques, but in the modern world this technique has already become a separate business strategy and has been called BJD( ball-jointed doll).Now the development of such models is done by real sculptors, and details for them are cast manually on special equipment made of polyurethane, hard and non-elastic material.
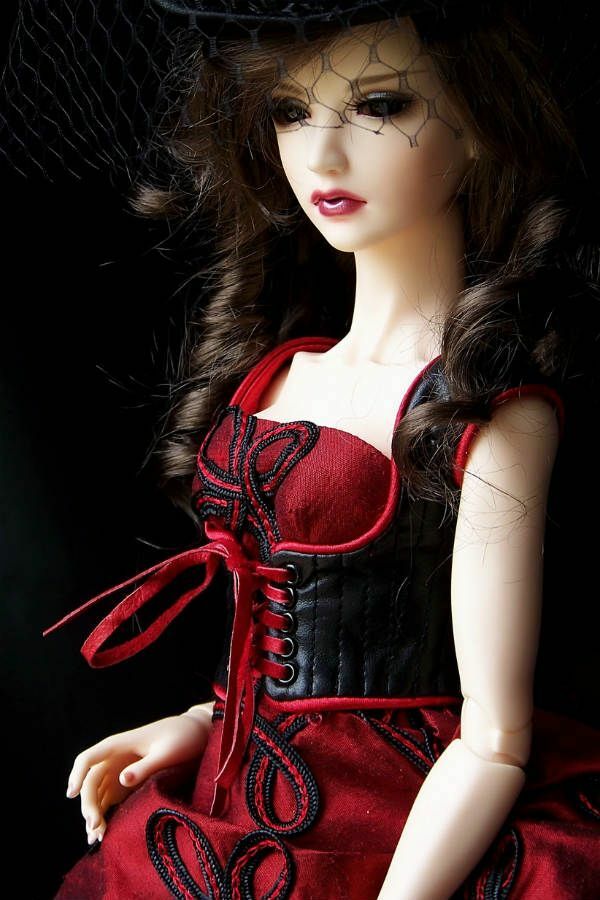
All parts of the doll's body are connected to each other by means of hinges that anatomically repeat the location of the main joints of the human body. Due to this design, a hinged doll can accept almost any pose.
Even though it does not have a rigid skeleton, it can stand evenly. To order such a doll is not a cheap pleasure, but you can choose for it any desired parameters: image, shape and color of the eyes, hair, make-up, clothing. But to make it really a copyright model, it's best to do it yourself.
to the table of contents ^Making a doll in a free style
By itself, a free style implies the use of any techniques at your discretion, without the original copying of our recommendations. Just stick to the basic principles, and in the choice of color palettes and material, operate with your wishes and views on this account.
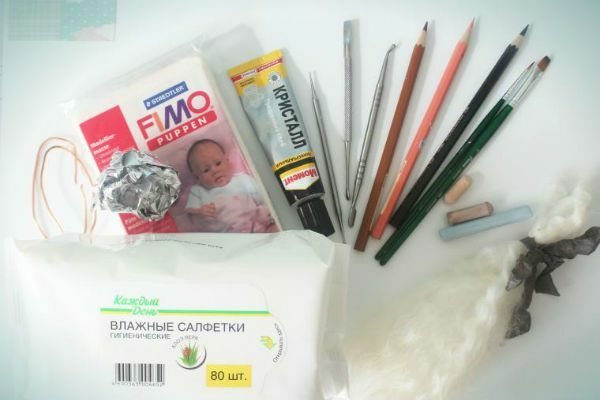
You may also need acrylic paints, brushes and quick fixing glue.
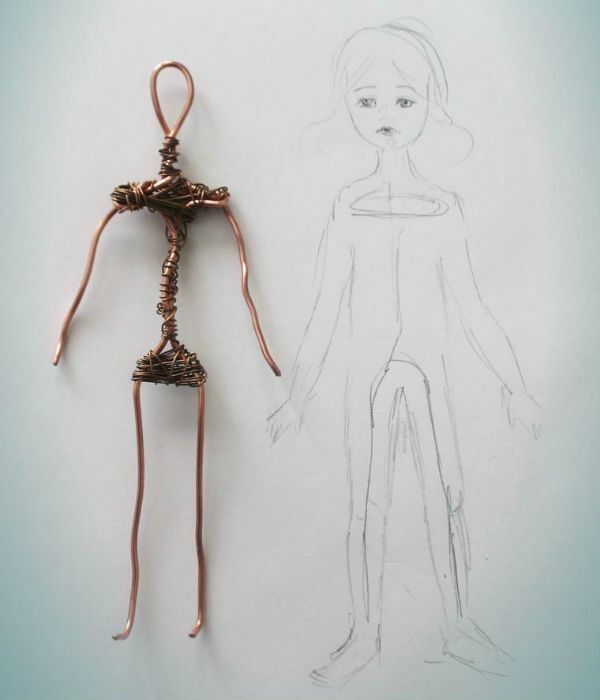
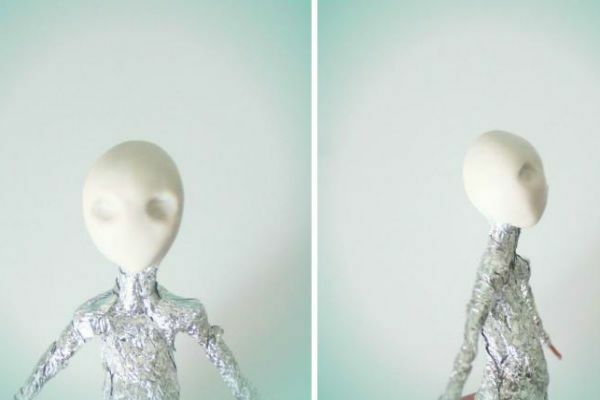
In our lesson, the work on creating such a craft in a free style should proceed in the following sequence: from the wire it is necessary to form the trunk of the doll. Next, wrap it with foil, forming a trunk. After the polymer clay build up the mass, make the body realistic, apply color transitions to the face and visible areas of the body( use crumbled pastels or diluted acrylic paints), build hair, make clothes. Here's what the result should be:
For this, the following materials are needed:
- suitable for baking polymer clay;
- strong, thick wire for the formation of a frame;
- soft foil( you can take food);
- wipes are damp, not containing alcohol( to smooth the surface of the doll);
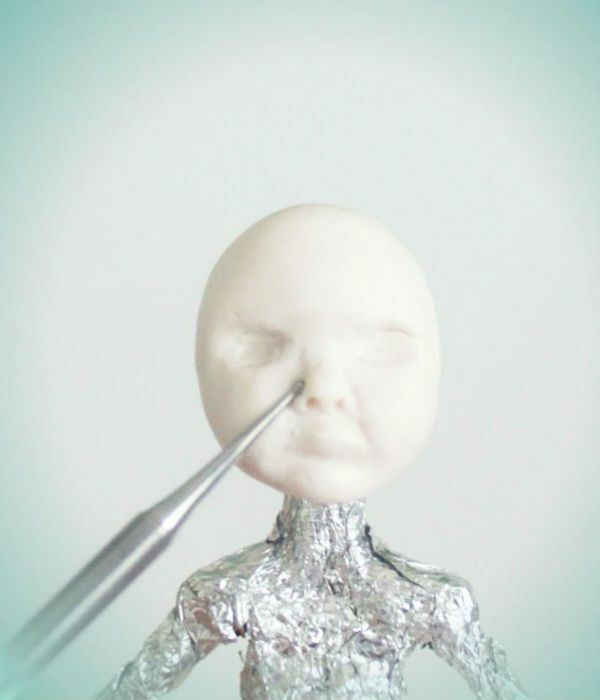
- manicure spatula and needle( for the elaboration of details of the face).
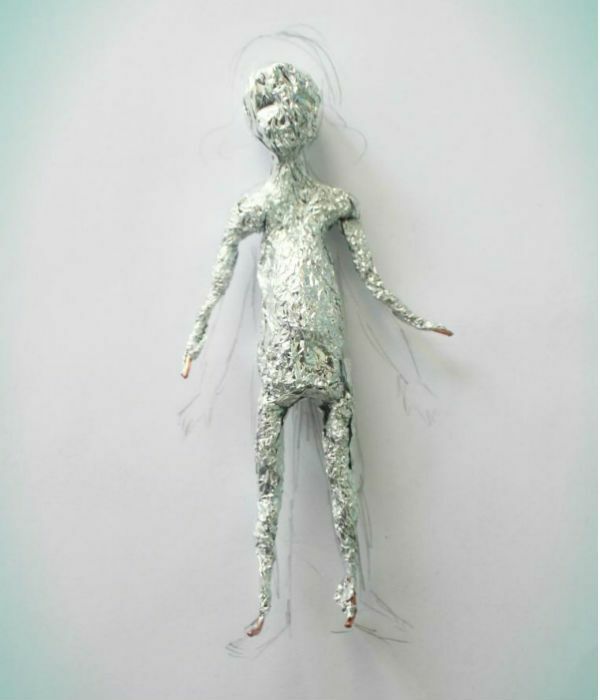
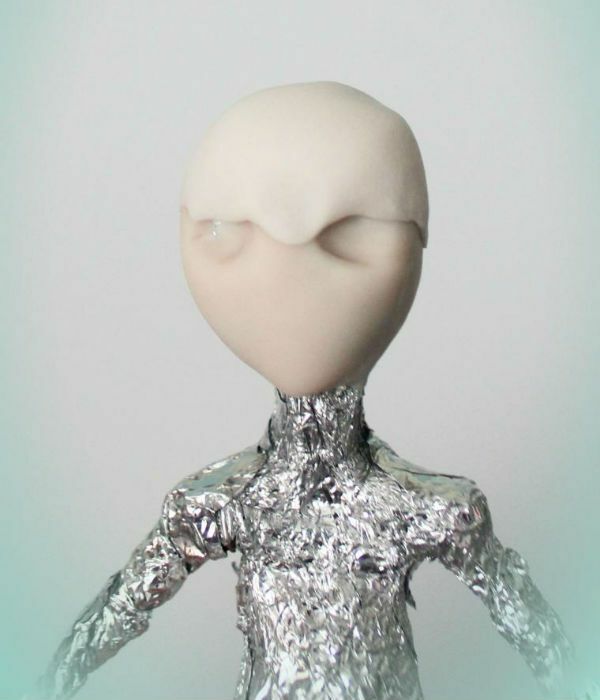
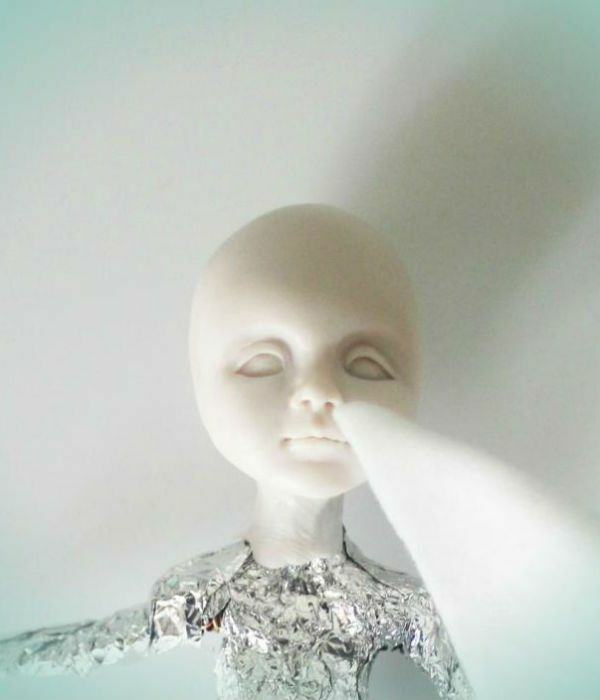
After the frame has been wrapped in foil, it is better to start the doll from the head. Having made eye sockets, wipe the workpiece with a napkin, leveling the surface. Now the workpiece must be fixed with half-baking( 30 minutes at 100 degrees).
When the workpiece cools down, continue to form the head, building up the layers of clay. Use a needle to mark the mouth, nose, and other facial features.

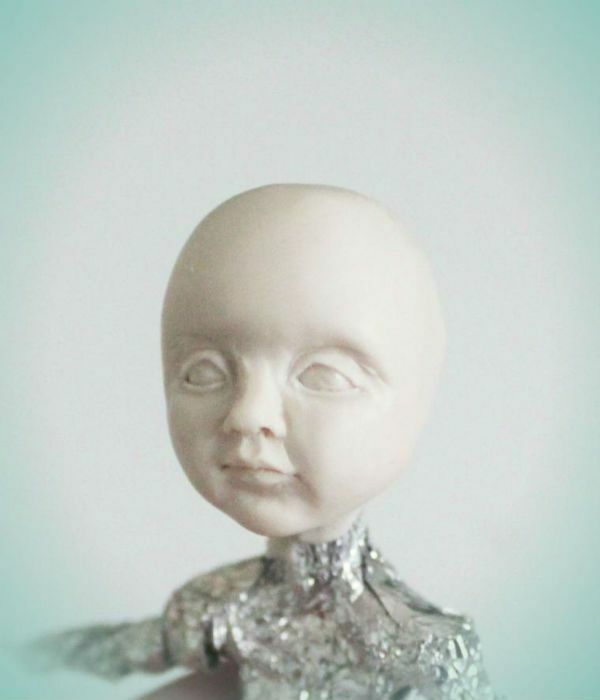
Only when you are satisfied with all the details of the face, trespass to polishing with a napkin( be careful, do not press).Wrap the napkin in one layer on the head of any thin oval instrument and walk along the surface of the workpiece.
After finishing with grinding, apply the crushed pastel in the required quantity to the right places. Remember that after burning, the brightness of the pastel will increase, do not overdo it!
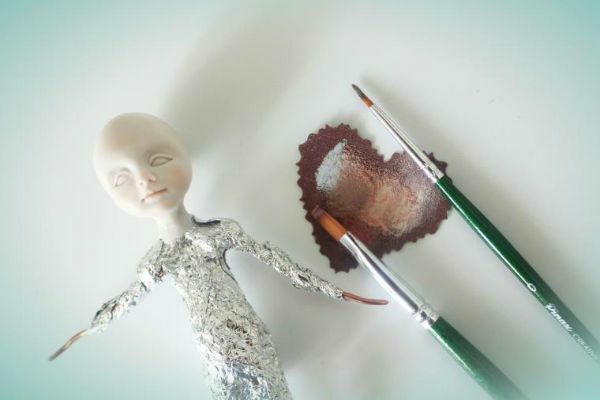
After finishing with the pastel, send the workpiece to the second half-bake.
After cooling, make dolls of ears and transgress to build up the body of the toy.
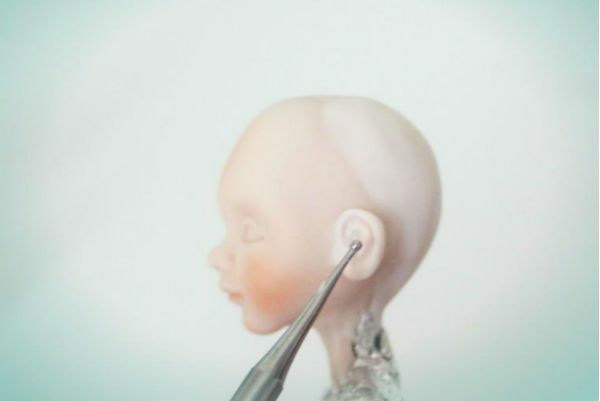
First, completely mold the torso, then the limbs. Grind the result and send to complete baking for 35 minutes at 135 degrees.
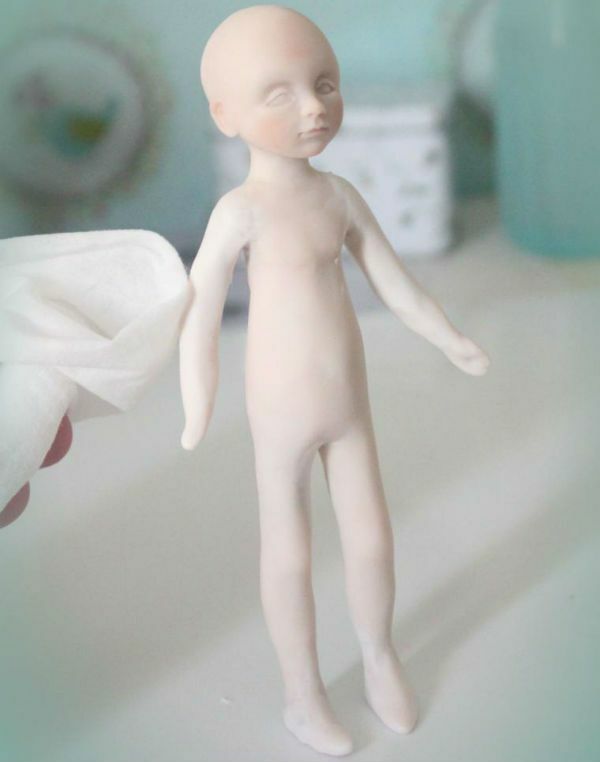
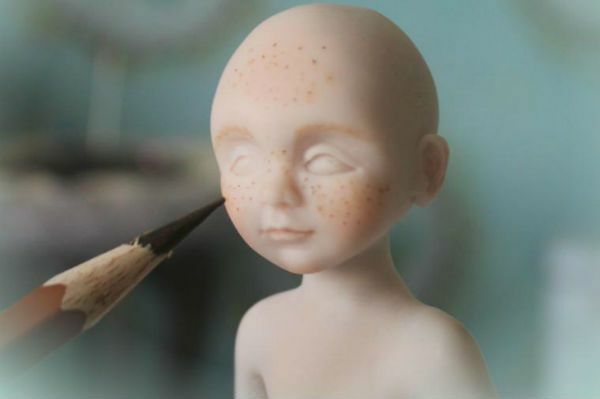
Next, use sharply sharpened watercolor pencils to decorate your face.

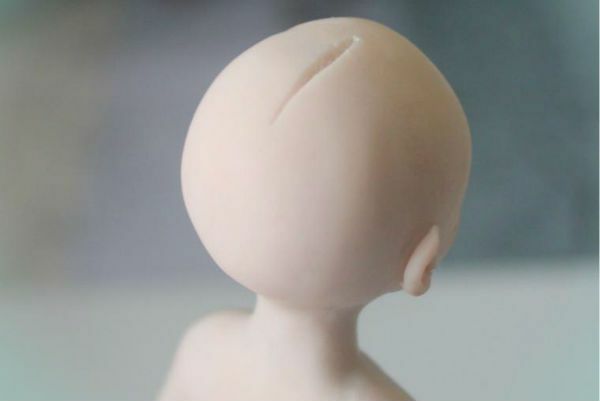
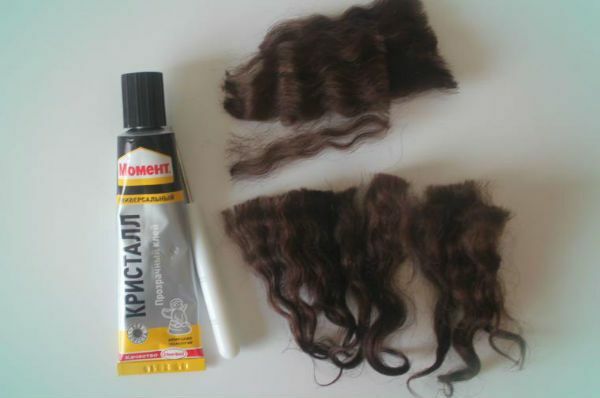
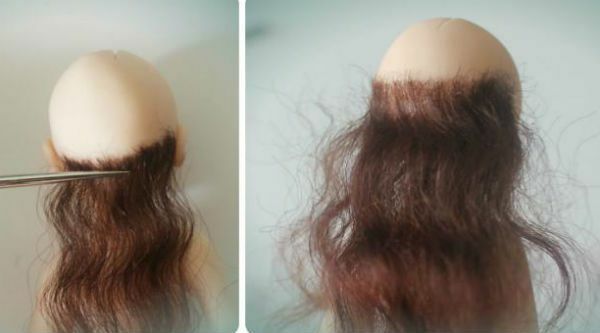
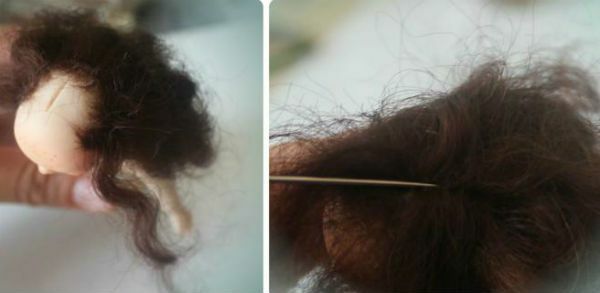
Now I need to build my hair. Make a cut on the vertex. Begin to glue the tufts of hair from the nape, rising higher. The slot will become a natural part on which you must stop.
It remains only to sew a suitable outfit for the pupa and wear a toy.