
Manicure sliders are stickerswith a pattern or pattern printed on their surface. This is a great way to bring your nails in order and give them a well-groomed look without visiting the salon. Let's look at the main varieties of this kind of manicure, and also we'll take a closer look at how to use sliders for nails.
Features and advantages of
Sliders for nails deserve high popularity among the fair sex. This is mainly due to the ease of use and beautiful appearance.
The slider picture is attached to a thin adhesive tape, which is securely fixed on the surface of the nail. Initially, the sticker is on a special substrate, which is carefully removed before use. 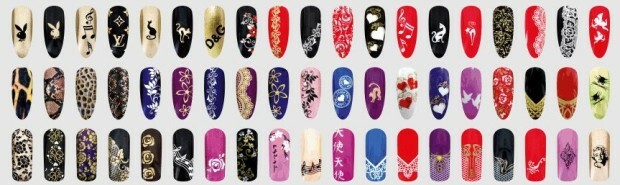
Sliders have the following advantages:
- To create a manicure with the help of such stickers, special skills and knowledge are not required. If you follow the instructions below, absolutely anyone can cope with it.
- The presented products are incredibly light and easy to use.
- This manicure does not take much time, so it is perfect for busy people. It can be done even half an hour before leaving home.
- Stickers look beautiful and attractive. Thanks to them, you will get the impression that your manicure was made in a professional salon.
- Today, there are a lot of different images and patterns. Therefore, every girl will be able to choose the most suitable option for her image.
- Sticker sliders can be used in absolutely different manicure techniques and with any base. It all depends on your imagination and the original idea.
- Longevity. This manicure can retain its attractive appearance on nails for up to 14 days. In some cases, it is possible to wear it for up to 3 weeks.
- Stickers are absolutely safe for nails.
Species
Existing sliders can be divided into 3 types, which differ from each other only in appearance. Each of them has its own merits and features. So, nail stickers are:
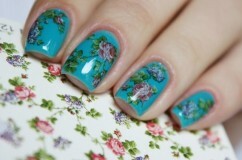
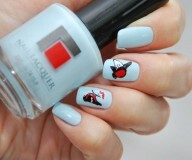
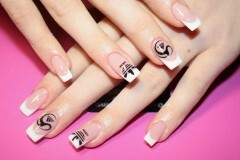
- On a transparent basis. Often these are sliders with bright patterns and patterns printed on their surface. Especially popular are the stickers imitating the artful painting. As a rule, sliders on a transparent basis are applied to a light coating.
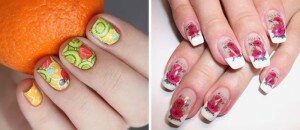
- On the entire nail plate. These are stickers with a ready-made design, allowing you to completely cover the entire surface of the nail with a pattern or pattern. This variety can be used absolutely with any coating or even without it. Today it is the easiest to use. On top of these sliders are often fixed with a transparent varnish, which allows you to save a long time manicure.
 Sliders on a transparent basis
 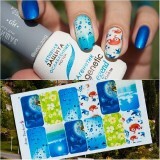 Sliders for the whole nail
 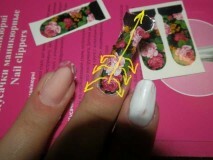 Thick sliders
- Tight stickers are suitable for all manicure techniques. They can be used also for nail extensions. Similar labels have slightly more thickness than previous versions of sliders.
Sliders also differ in the way they are glued. There are:
- Water-based. It is supposed to soak the image for a few minutes in preheated water.
- Translated. The sticker is simply removed from the dense base and pasted onto the nail. This variety is the easiest to use.
Labels can be classified according to their design:
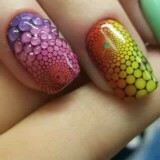
- With a three-dimensional image - one of the most interesting and original varieties. They are a complete 3D drawing. Typically, these sliders are made on a translucent film. Therefore, they must be applied on a color basis. Please note that this kind of manicure is suitable only for long nails.
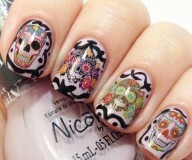
- Photo sliders. Instead of a pattern or pattern, a photographic image of high quality is applied to the surface of the sticker.
- With a dot pattern. Most often these are products with a floral or geometric ornament, located on a translucent film. Often they are used to create a refined French manicure.
- With a pattern on the entire surface of the nail plate - this is ideal for those who want to quickly create a beautiful manicure. It can be used on both natural and false nails.
Tools and materials
To work with sliders, you need to prepare the following accessories:
- Small scissors that you need if you need to cut something.
- Manicure accessories to bring your nails in order.
-
 Tweezers, which should be used when separating the stickers from the substrate.
 - A small bowl filled with warm water. It is necessary if you are working with water-based sliders.
- Fixing cover.
- Toothpick.
- Dry cloth.
As is clear from the above, to create a manicure with stickers you need a set of simple and easily accessible materials and tools. This is another significant advantage of the sliders.
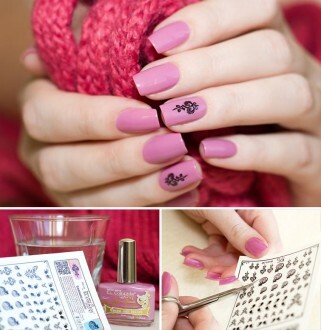
Water-based stickers
Let's take a detailed look at how to use these sliders:
- The nails are prepared for application of the manicure: align their surface, remove the cuticles, cut and degrease the plates.
- A top coat of a suitable shade is applied from above. Most often choose light colors.
- Pour warm water in a pre-prepared bowl, the temperature of which should not exceed 40 ° C.In it, lower the sticker and hold for 40 seconds, and then take out, shifting the film with the pattern from the substrate with tweezers.
- The edge of the sticker is gently glued to the surface of the nail plate, and then attached completely.
- Attaching the sticker to the nail, you should gently smooth it with a toothpick. This will eliminate the unevenness and get rid of the air bubbles formed under the slider.
- On top, apply a fixation coating and allow it to dry.
Please note that after applying manicure, contact with water should be completely ruled out for the next 40 minutes.
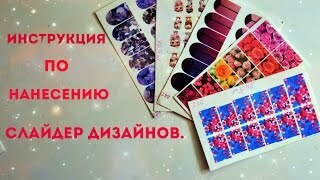
How to use water stickers for nails - video
How to use the transfer decals
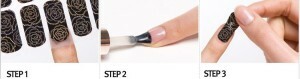
Now let's look at how to glue the transfer sliders:
- First you need to select the image you like, and then pick up the shade of the base lacquer.
- Nails are prepared for application of manicure.
- Cut with the help of scissors from the labels the desired pattern that will match the shape of the nails.
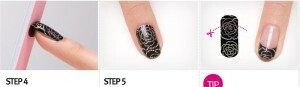
- The slider is separated from the substrate and gently pasted onto the surface of the nail plate, and then leveled with a toothpick.
- On top coat the nail with a fixing varnish and allow it to dry. For a better effect, apply the coating two times. This will save the manicure for a longer period.
Now you know how to apply sliders to create a beautiful and smooth manicure. This procedure is very simple and does not cause any difficulties. This manicure will take no more than 30 minutes.
How to make a nail polish gel
The sequence of applying the sliders in this case is as follows:
- Nails are prepared: file, grind, remove the cuticle and degrease the surface of the nail.
- As a base, apply gel-varnish and dry it for 2 minutes using a special UV lamp.
- The sticker is removed from the substrate and applied to the surface of the nail with the adhesive side.
- Smooth the irregularities and eliminate the formed air bubbles.
- A fixing varnish is applied from above and allowed to dry for 3 minutes using a UV lamp.
Interesting design options
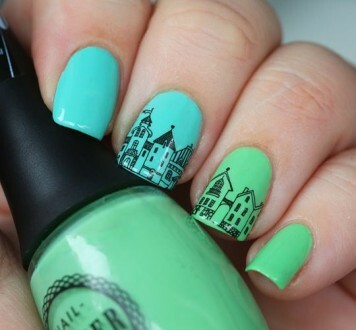
Today there are a lot of different designs, colors and patterns. Let's look at some of the most interesting options with which you can give your image a highlight.
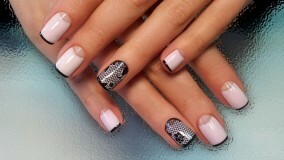
- Lacy patterns - a sophisticated and romantic version of manicure.
- Metal motifs - these can be metallized images, a smooth base of silvery hue or a pattern in the form of lace.
- Lunar manicure using beige and pastel shades.
- French manicure.
Thus, having studied the variety of stickers and figuring out how to make sliders on the nails, you can easily make a beautiful and neat manicure yourself at home. And now you do not need to visit expensive salons.
Related Videos:
 3:22
3:22 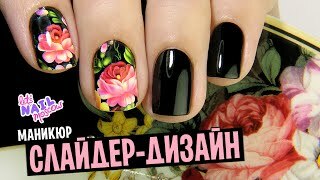 5:03
5:03  11:29
11:29