A gift made with one's own hand is always more precious to the heart of the recipient than the shop item. After all, the donor spent free time, his work, his imagination to create a surprise, you can say the soul has invested to please the originator of the celebration with a special object with unique energy. A detailed master class will help to make even a beginner needlewoman a very cute cover for a tablet made of leather or other material.
- From the old book cover
- From the fabric and cardboard
- From the
- envelope From the suede
- From the skin
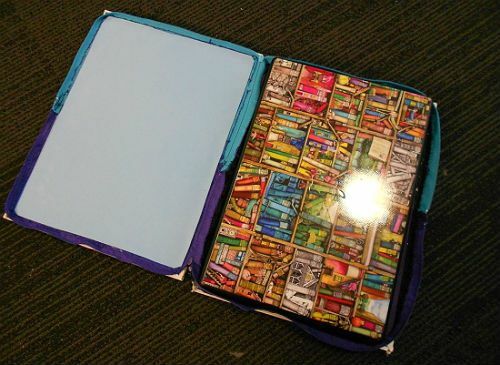
From the old book cover
The original cover for the tablet book is very easy to make even with minimal sewing skills. With such a casing the tablet will be reliably protected from mechanical damage, since on both sides of the cover there will be a tight cardboard.
Consumables:
- 2 long zippers;
- cover from an old book without pages;
- 2 pieces of thin regenerating sponge;
- keeper's tape( edging tape);
- scissors;
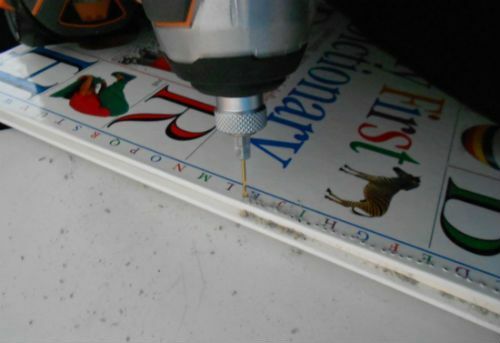
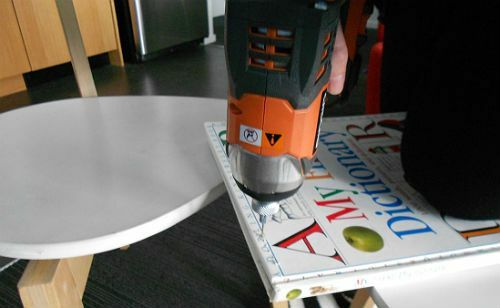
- awl or electric drill;
- 2 needles of different diameters;
- strong thread;
- glue gun.
The cover is chosen taking into account the area, the thickness of the tablet and both pieces of the sponge. The tablet should be completely covered with a cover on both sides, but do not hang around in it. The cover must be removed from all pages.

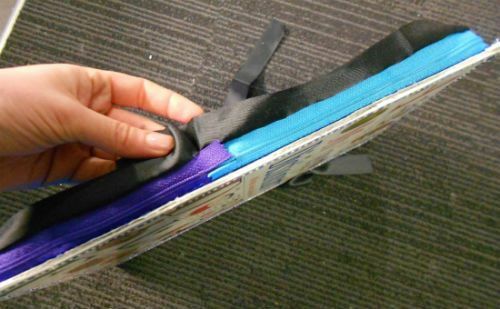
Sew on the tape to each of the zippers, connecting the keeper's tape with a clasp only one side.
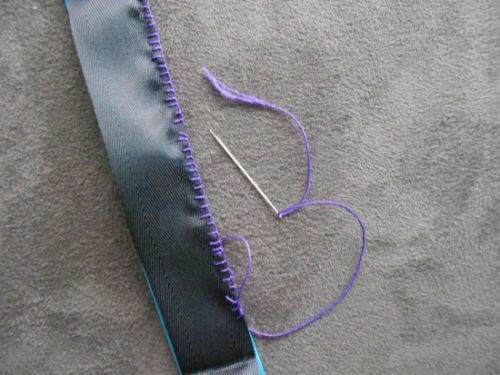
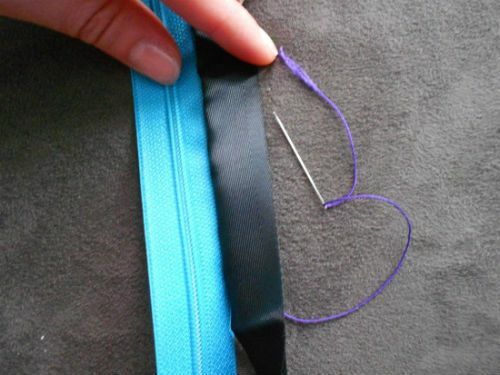
Lightning fastens on the cover, which has previously made a lot of holes on the outer edge, using an awl or an electric drill with a thin drill( step no more than 3 millimeters).Fasteners are placed so that the sliders meet in the middle of the cover.
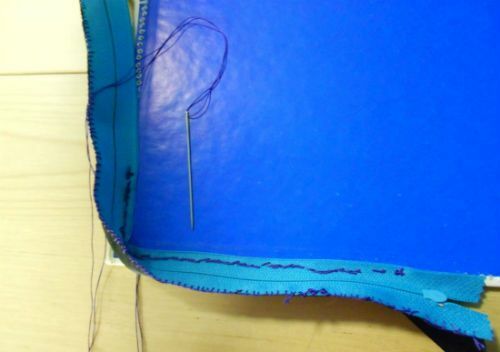
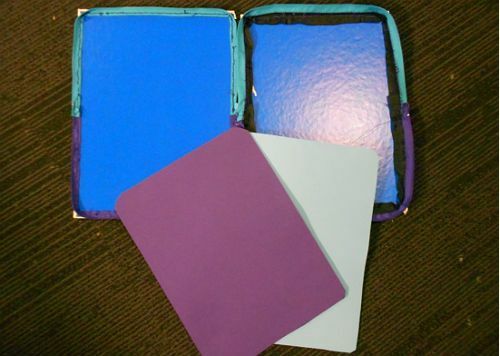
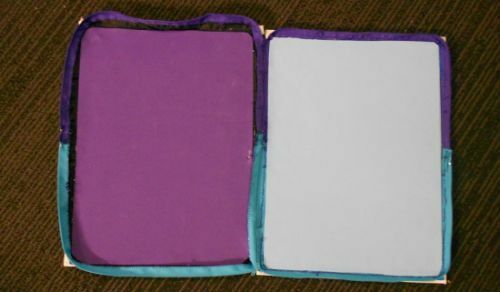
On the inner sides of the cover with glue gun glued to a piece of sponge, which will play the role of a buffer and decorative finish. In the same way, you can make a case for the phone.
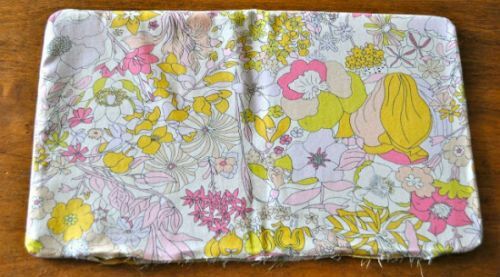
Of fabric and cardboard
Consumables:
- tight material( cotton, jeans);
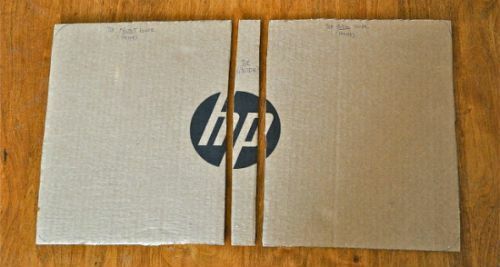
- old cardboard box;
- thin durable braid;
- scissors;
- sewing machine;
- ruler;
- tissue cleavage pins;
- glue gun;
- needle with threads in the color of the selected fabric;
- flat rubber band not more than 1 centimeter wide;
- hair elastic;
- aerosol adhesive.
Two large workpieces are cut from the cardboard, equal to the area of the tablet, and one narrow, the width of which corresponds to the height of the gadget. The paper base for the cover should be strong enough, but it should be easily pierced.
At the outer corners of large parts, roundings are made, after which the casing stiffeners are placed on the underside of the pre-ironed matter. If the dimensions of the material allow, then it is folded in half to get 1 large billet of 2 parts.
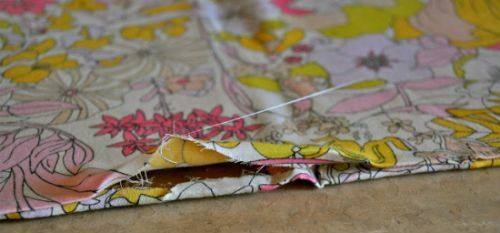
The cartons are outfitted with a small allowance for the seam. If you cut out 2 parts, then join them on 3 sides, leaving the fourth not sewn - to insert solid workpieces.

After performing the stitching, the fabric is turned out, ironed. After inside the "pocket", large cardboard blanks processed with adhesive solution are built in. A narrow detail can be removed - its task was only to help make the fabric pattern of the desired area.
The hole in the fabric cover must not be stapled. Many needlewomen process the fabric edges with glue and wrap them inside.
For strings use a strip of fabric, folded in half and stitched in the middle, and then cut into 2 parts. Instead of strings, you can put velcro. Fasten them on the cover, like the corners of the rubber band, with a glue gun. For the sake of beauty, rectangles of the same fabric as the cover are pasted.
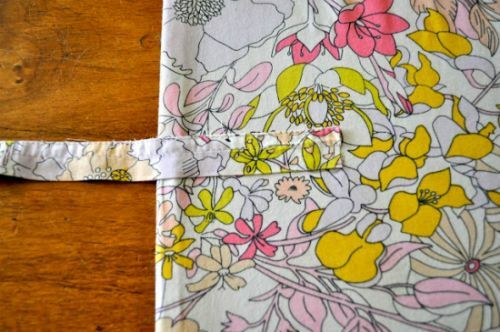
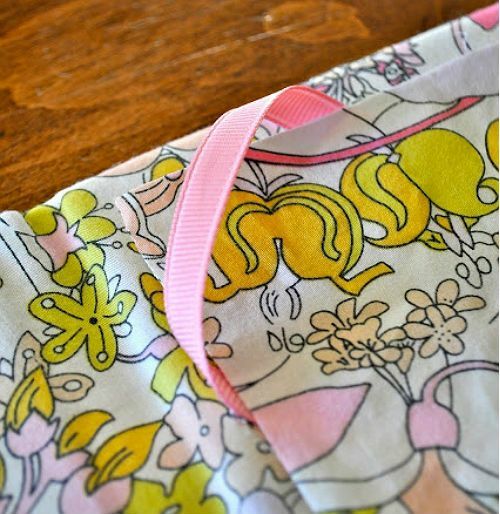
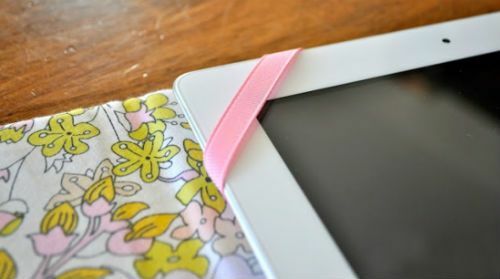
A thin rubber band for hair is used for additional safety against the loss of the tablet from the cover.
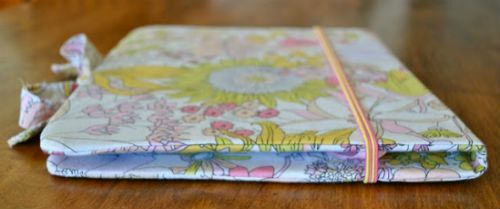
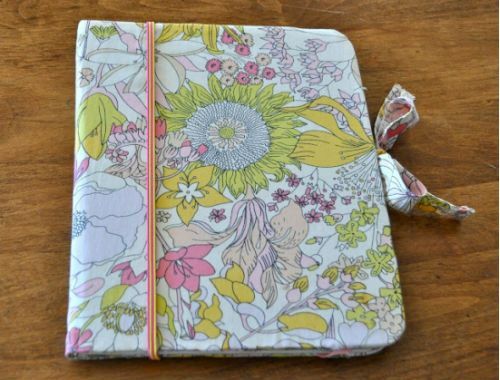
Fashionable tablet case with your own hands from the fabric is ready for testing for durability!
to the table of contents ^From the
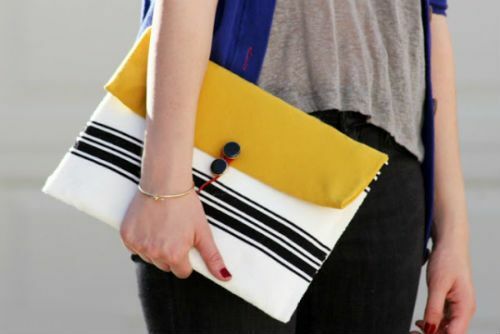
envelope It's easy to make a cover for the tablet from an envelope for wrappers with an insulating insert in the form of an air bubble film or a usual plastic folder for papers. Such a fashionable casing for a gadget will cost a mere penny.
Consumables:
- cut fabric of the desired color;
- glue gun;
- stapler;
- glue stick;
- pins;
- a pair of buttons;
- needle;
- thread reel;
- braid;
- scissors.
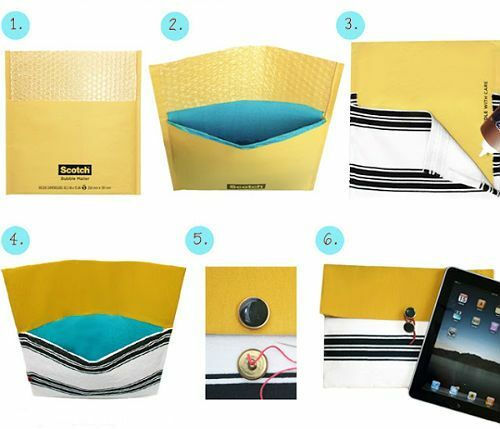
All decorative works are limited to gluing with the inside and outside of the envelope. Before fixing the fabric, first remove the bubble film from the envelope, then put the tablet in the envelope and determine the required depth of the cover, then shorten the back wall of the envelope, then it will become the cover of the resulting case. Now you can paste the product with a cloth and sew on the buttons( one on the lid, the other on the envelope) and the string for the loop.
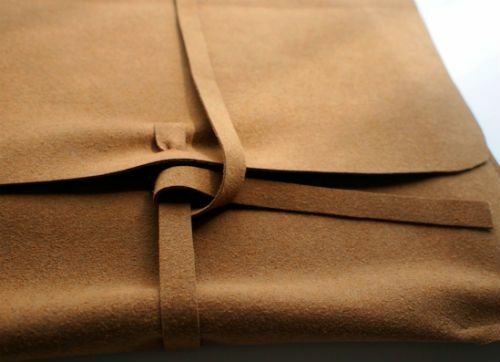
Suede
Consumables:
- piece of suede or any material that does not require edge processing( better if the material is thin - it's easier to stitch);
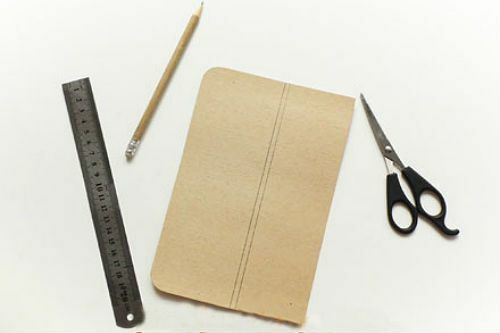
- paper for the pattern;
- pencil;
- ruler;
- sewing machine( in its absence, you can handle the seams by hand);
- thread in tone material.
The shape of the envelope for the case is simple. After folding the part in front of the stitching, only 2 lines of joints must be made. On the unfolded pattern, the seam trajectory is marked with a red dashed line.
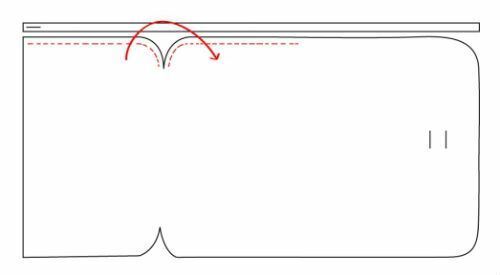
To cover the case close to it, it is necessary to equip it with a strap-string. On the cover it is fixed in the slot, the place of which is also indicated on the pattern.

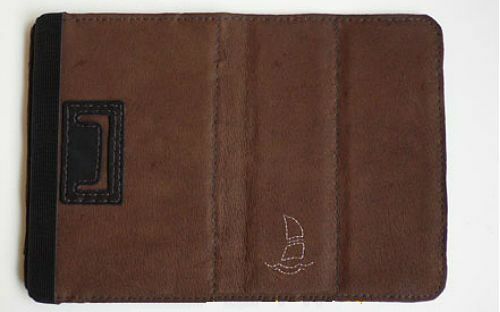
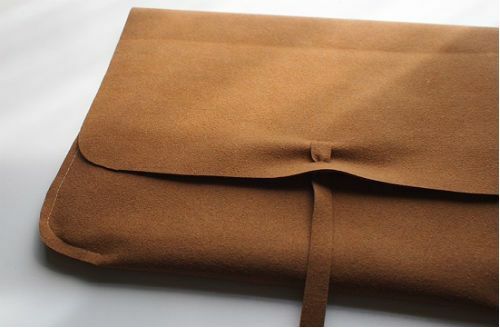
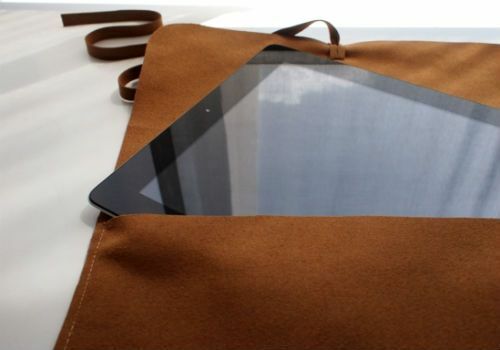
Leather
Consumables:
- thick cardboard;
- piece of leather;
- foamed polyethylene( not more than 1 mm thick);
- fabric( it is better to take a non-sliding);
- scissors;
- needle;
- glue "Moment";
- packing plastic;
- pencil;
- chalk or a piece of soap for cutting;
- strong thread( preferably reinforced);
- thread for shoes;
- thread with lurex;
- a flat rubber band with a width of 10 millimeters - 50 centimeters;
- a flat rubber band 20 mm wide - 25 centimeters;
- ruler.
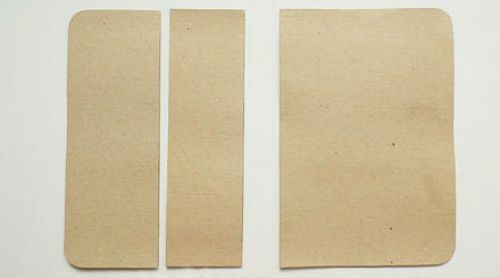
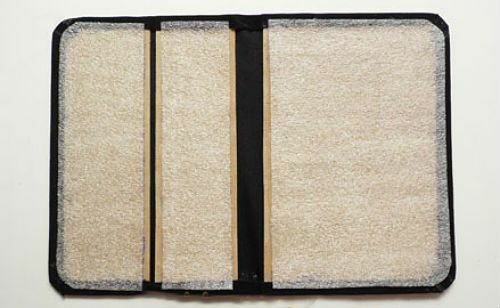
The design of the case for a similar tablet is quite simple: from the thick cardboard, 2 pieces are cut, while the dimensions of the cardboard blanks on each side must be 3 millimeters larger than the corresponding parameters of the tablet. The two outer edges of the blanks should be slightly rounded. One of the details in height is divided into 2 equal parts. From the one with the right angles, cut off a strip 5 mm wide.
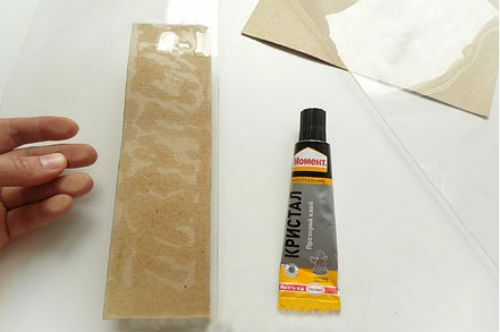
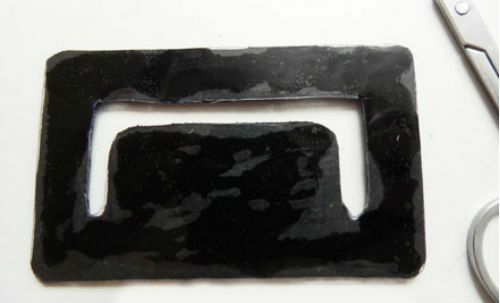
Three cardboard blanks of different widths are to be glued with the "Moment" glue onto the packaging plastic, this will give them strength. After a time, after the glue has dried, the edges of the cardboard relieve the protruding transparent surpluses of plastic.
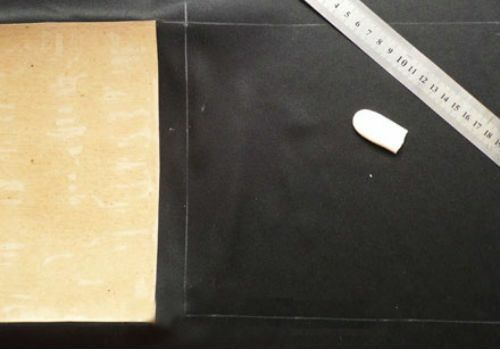
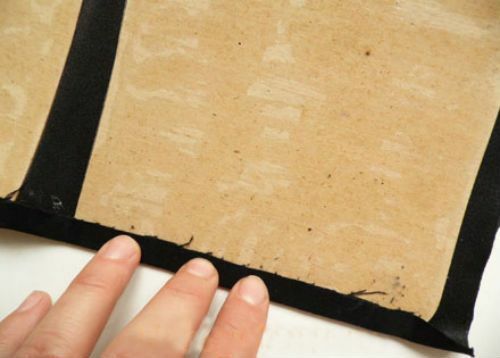
On the underside of the ironed fabric, attach parts of the frame, placing them plastic coated on top, and rounded edges in different directions. In this case, from the first part to retreat 2 centimeters, and from the second( narrow) - 0.5 centimeters. In order to avoid the displacement of the parts, the guides should be drawn on the fabric using the side of the first carton blank as a guide. After the end of manipulation, the fabric, with glued to it blanks, put under the press.

After drying, the excess fabric should be cut, leaving centimeters allowances along the entire perimeter.
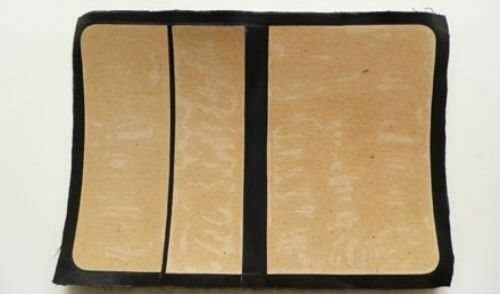
Loose the edges of the fabric and glue to the inside of the frame, cutting off the excess over the rounded edges.
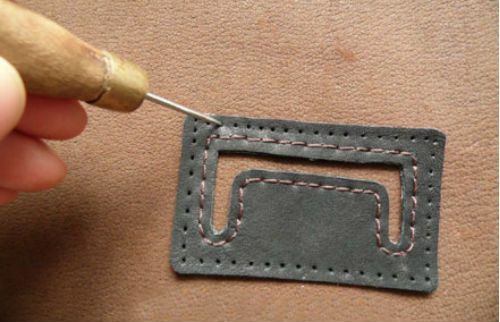
On a piece of leather on the underside, place a tissue-cardboard frame and circle its contours with a pencil. When cutting, move strictly along the intended contour.

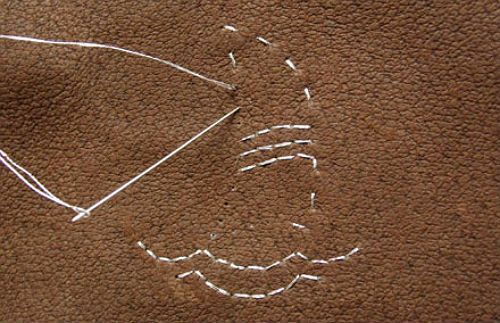
To decorate the cover for the tablet, you can make a drawing by sewing its outlines from a paper sketch to the skin.
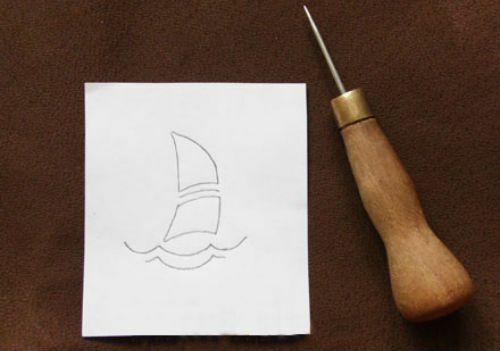
Needle with lurex yarn to perform embroidery, using the seam "back needle".
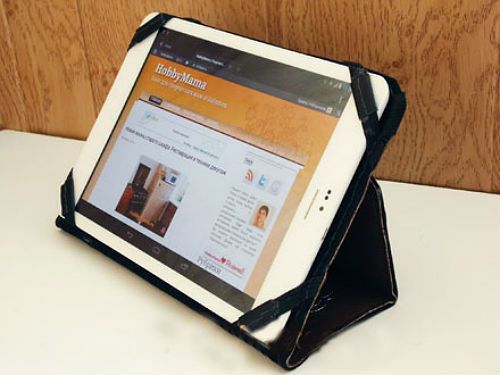
To ensure that the tablet can be placed in the horizontal position in the future, the casing should be equipped with a clip with a "tongue".In the absence of rough leather, the remnants of the piece for the outer cover of the casing will fit for this part, only it will have to be strengthened by gluing the packaging plastic.
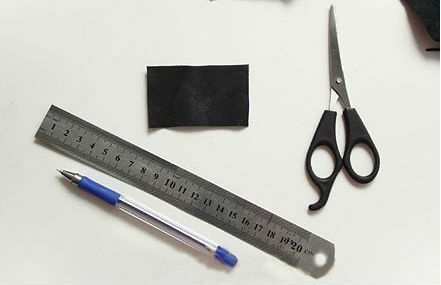
In a rectangle with sides 7.5 to 4 centimeters you need to make a manicure scissors C-shaped hole 0.5 centimeters wide.
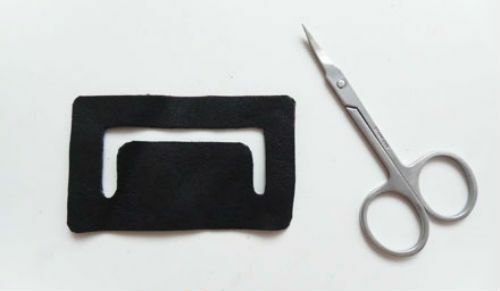
Having strengthened the obtained part with plastic and cut off the excess, pierce the hole along the outer and inner perimeter, making sure that the chain of holes passes in 2 millimeters from the edge of the clip.
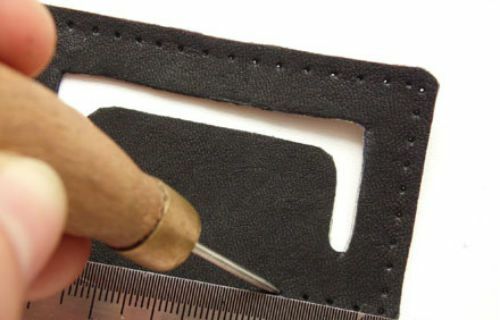
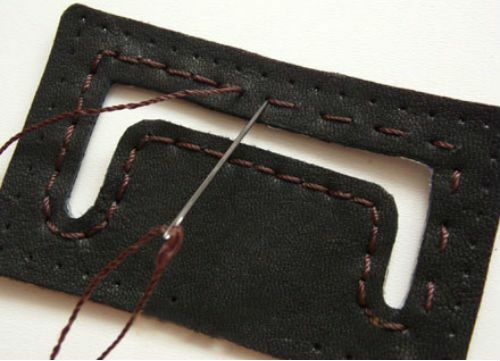
On the marking, perform the firmware of the internal circuit.
On the back side of the folded cover, mark the place to fasten the clip, taking into account that it should be centered between the top and bottom edge of the cover and 2.5 centimeters from the outer edge of the cover. Duplicate the chain of holes near the outer perimeter, glue the piece along the same line, but on the inside.
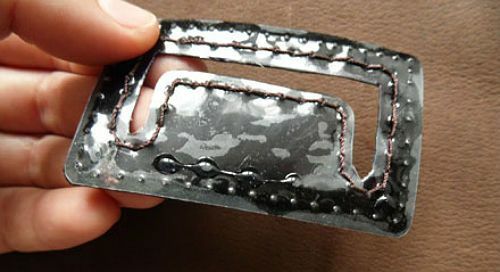
Glue the part and the stylus to duplicate the holes, piercing and the outer part of the back of the case. After sew the clip.
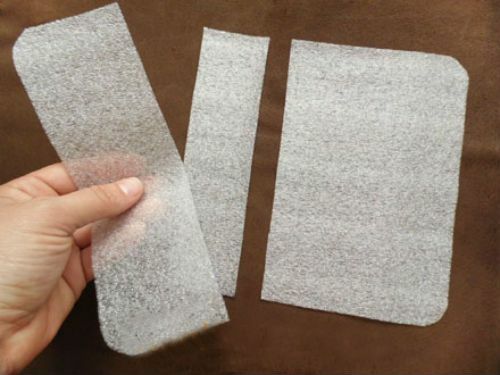
From foam polyethylene to cut out parts, which are 0.5 centimeter less than cardboard elements for the cover.
Place soft plates on the frame from the side, which will be connected to the leather lining.
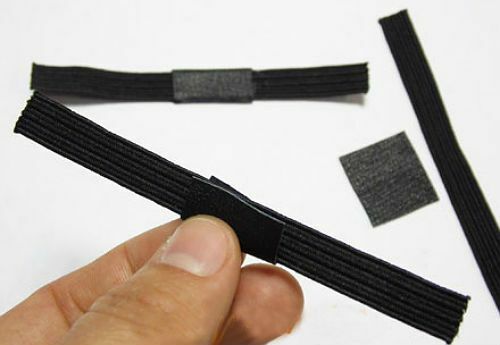
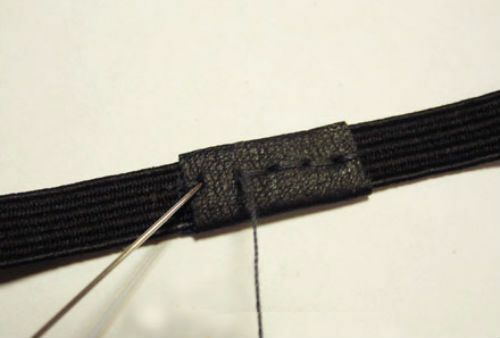
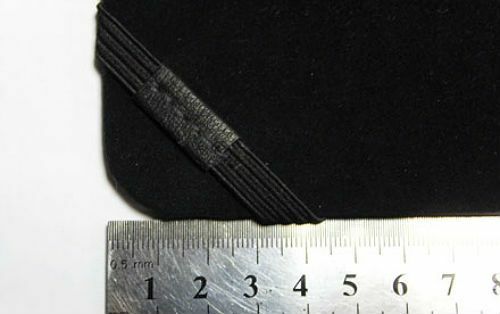
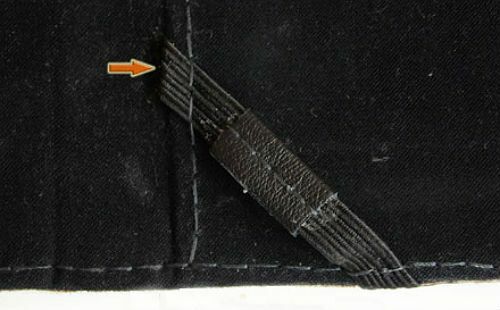
For tight fixing of the tablet, the cover on the edges should be equipped with 4 elastic bands 1 cm wide and 8 cm long, with anti-slip leather elements, which must first be sewn to stretchable locks.
From the wide rubber band to carry out the buckle for the boot.

By gluing the inner and outer parts of the cover, a series of holes must be made along its perimeter with an awl, retreating 4 millimeters from the outer edge. After performing firmware reinforcement thread.