
For every girl in her childhood, tapes were almost a favorite material for creating various crafts. And today needlewomen all over the world use ribbons and various fabrics to create embroidery, jewelry, hair accessories and much more. From the tapes you can do a lot of interesting things, for example, flowers.
- Flower of kanzashi from tapes
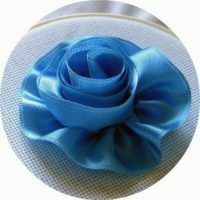
- Making flower from tape gro-grot
Flower of kanzash from tapes
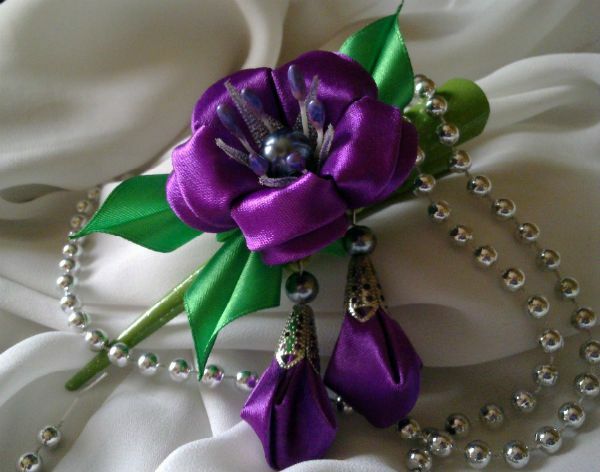
In today's master class we will learn how to create an amazing clasp with a bell, made in Kansas technique. Probably, for beginners this lesson will seem a little difficult, but it's worth a try anyway.
For work we need:
- purple satin ribbon 1 meter long, 5 cm wide;
- green satin ribbon - 1 meter by 2.5 cm;
- satin cord - 10 cm;
- beads - 3 pieces( one large 0.8 cm and two medium sizes 0.4 cm);
- holders for beads - 2 pieces;
- pins for beads - 2 pieces;
- stamens - 6 pieces( optional);
- hair clip "crocodile" length 12 cm;
- large button;
- tweezers;
- needle;
- scissors;
- round pliers;
- burner, soldering iron or lighter;
- glue gun or universal adhesive.
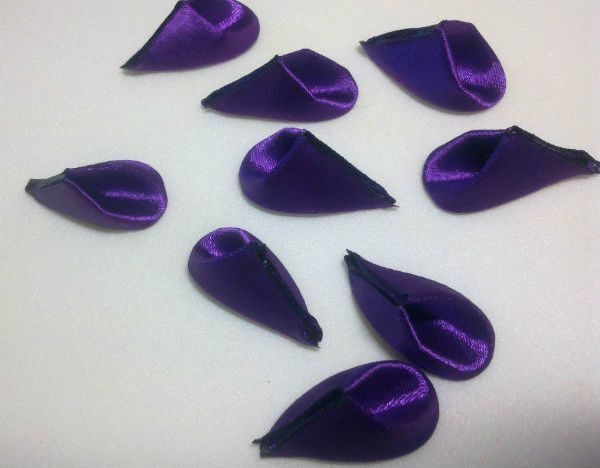
First you need to make 10 round petals. To do this, from the purple tape you need to cut 10 identical squares of 5 by 5 cm in size.
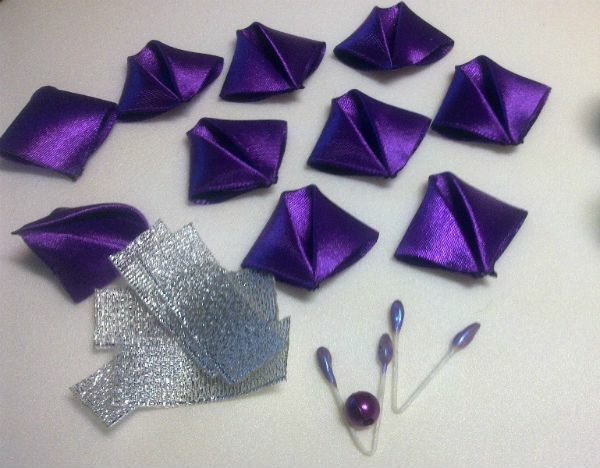
Take one square and fold it in half to make a triangle. Now, pull the two lateral angles to the bottom corner to get a blank like the photo and process its edges with a lighter so that it keeps the shape and does not crumble.
Do the same for the rest of the squares.
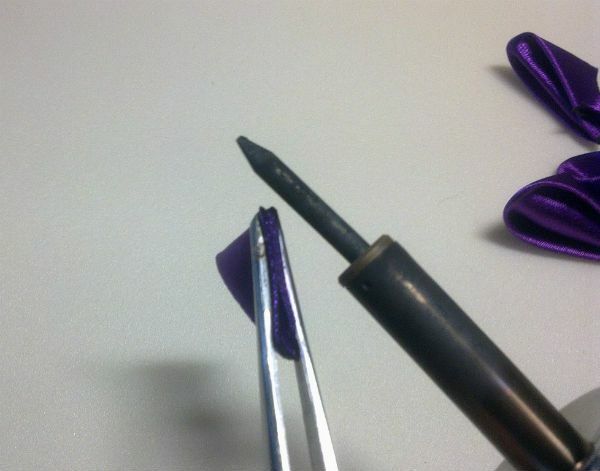
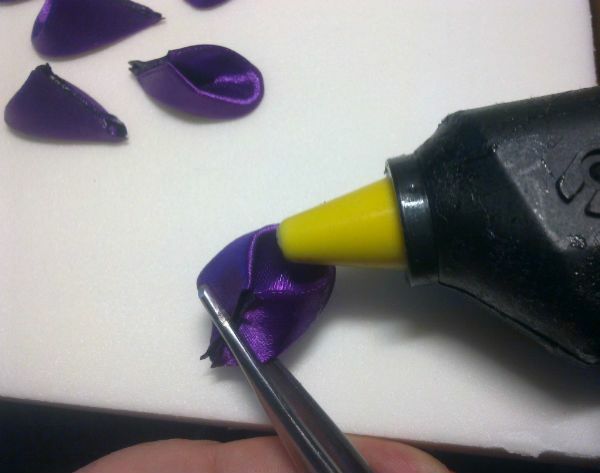
Now take the edges of the workpiece back, grip it with tweezers, cut off the uneven bottom edge and work with the burner, as shown in the photo.
The seam obtained after cauterization is gently glued to the back wall of the petal. Similar actions are carried out with all the petals.
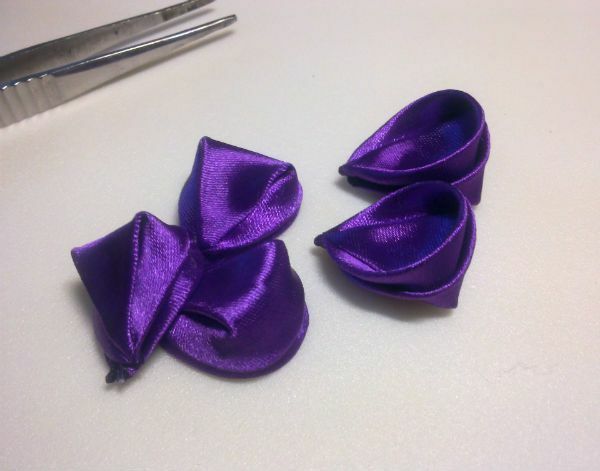
Next, we divide the petals into two parts and one half( 5 pieces) is simply turned inside out.
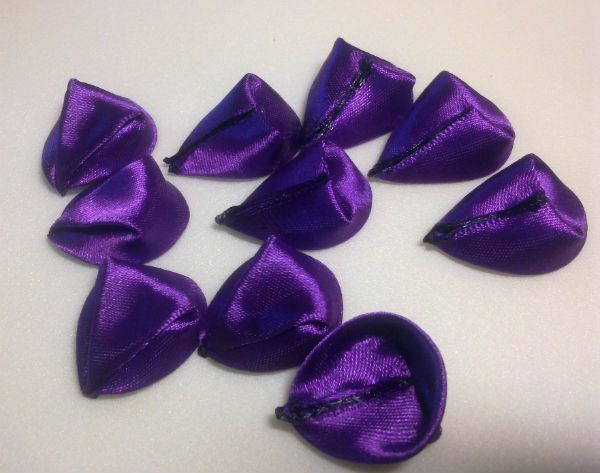
Now add a pairwise round petal with an inverted and glue them together. As a result, we should have five ready-made double lobes.
If desired, each petal can be further decorated with elements from the facet.
To do this, cut out the details in the form of triangles, treat their edges with a cigarette lighter and glue them to each petal.
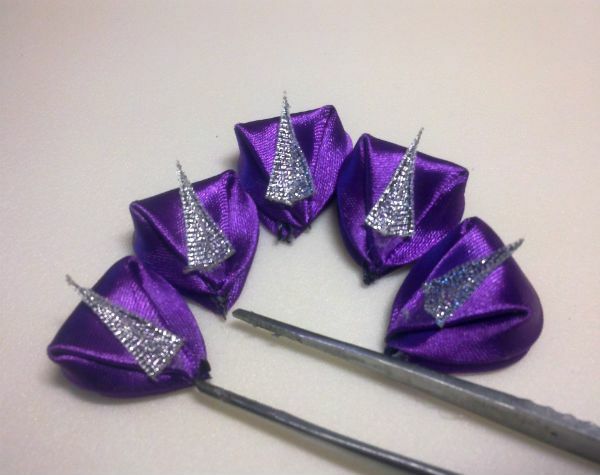
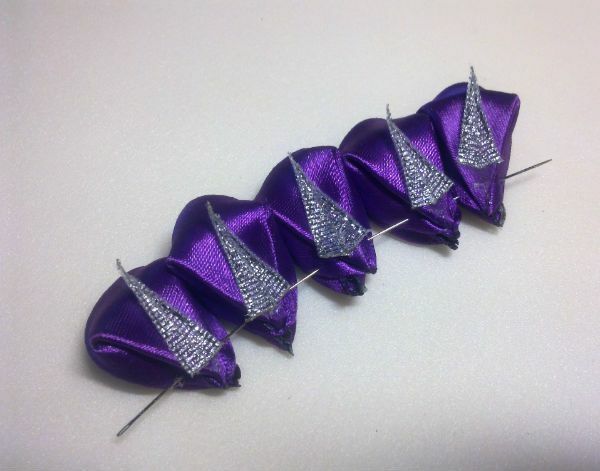
Now all the ready-made petals are collected on the needle with decorative triangles to the center and tighten the thread, but not too tight.
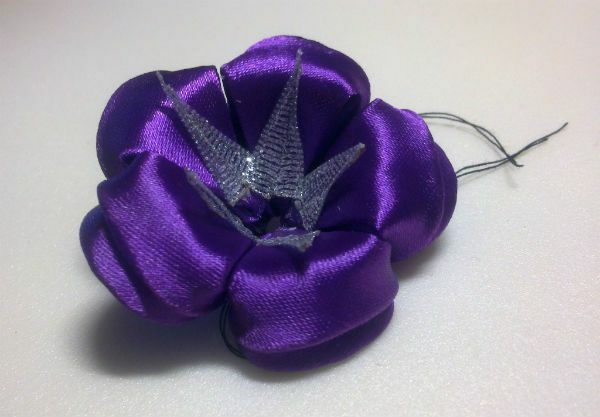
It's the turn of the stamens. If you do not have ready, then they are easy enough to do by yourself.
It is necessary to take a tight thread and plentifully spread with PVA glue when it completely dries cut it into 6 parts. The edge of each piece is dipped in nail polish and let dry. Your stamens are ready.
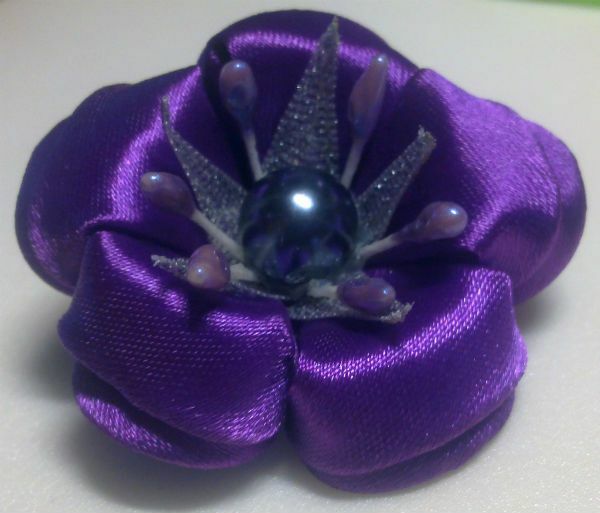
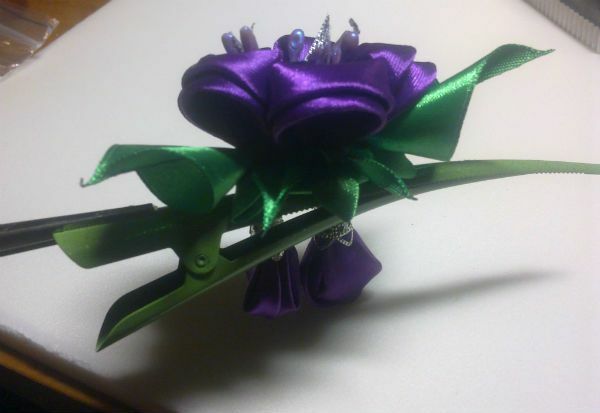
Lubricate the stamens abundantly with glue and insert into the hole in the middle of the flower. Mark the center of the product with a large bead.
Your bell is ready, you can proceed to making buds. To do this, you need to make 4 round inverted petals, two for each bud. Fold them in pairs and fasten with glue.
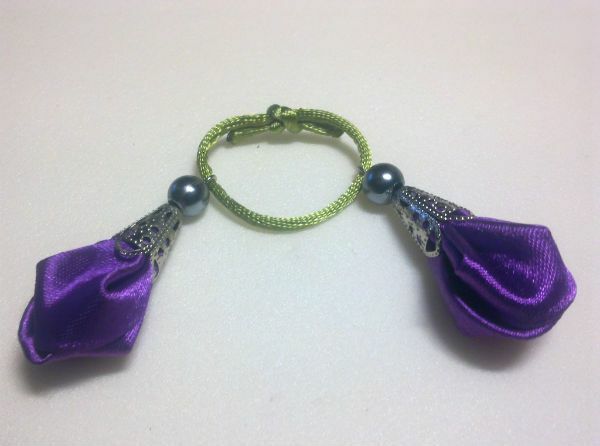
Using holders for beads and pins, we make two movable suspensions. With the help of round-nosed pliers, cut the pin and give its end a ring-shaped shape, as shown in the photo. Previously, each pin should be inserted into the holder and put a bead on it.
Through the resulting rings, stretch a small satin lace. And inside the holders we put buds, previously smeared with glue.
It's time to put it all together. For the basis, take a large button, which must be wrapped in a green satin. To do this, cut out the mugs from the green tape, burn it and go along the edge of the marking. Then put the inside of the button, apply a little glue on it and tighten the thread tightly.
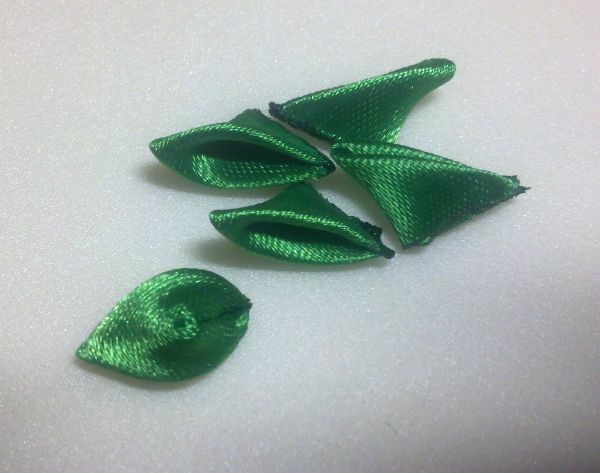
To fill the empty space between the base and the bell from the green ribbon, we make several turned-out petals. To do this, cut out 5 equilateral squares. Each element is folded three times in a triangular shape. We cut off uneven edges, scorch the free side and turn it inside out.
We paste the resulting leaves to the base, and the base itself to the clip for the hair. If you want to add more greenery, you can attach a few larger scraps of green satin ribbon, curling them with a cone and singing.
Here's an elegant decoration we have!
to the table of contents ^Making a flower from a grounder tape
This master class will require the following materials from you:
- about 50 centimeters of a grounder tape( tape width - 2 centimeters);
- several beads or beads;
- threads that match the color;
- pin and hot glue in the gun.
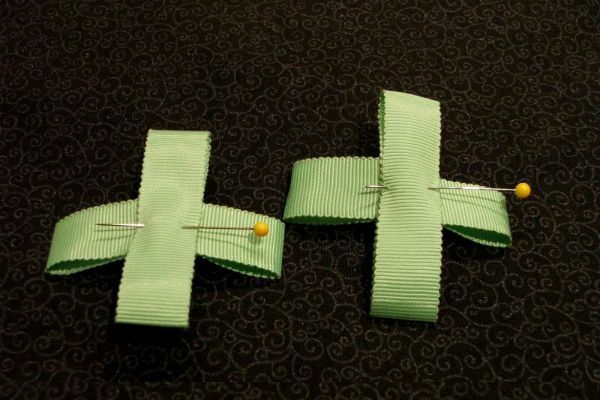
Cut four lengths of tape 10 centimeters long and 1 centimeter wide.
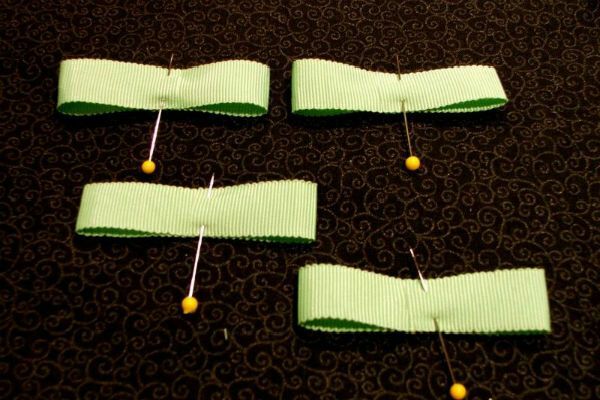
Fold the lengths of the bands as shown in the figure, receiving the loops, the ends of which are superimposed one on the other.
Each of the loops grind with pins.
After this, take one of the prepared pieces and place it on the other at a right angle. Repeat with the other two prepared intervals.
When two "crosses" of ribbons are ready, put them on top of each other at an angle of 45 degrees to get a kind of flower.
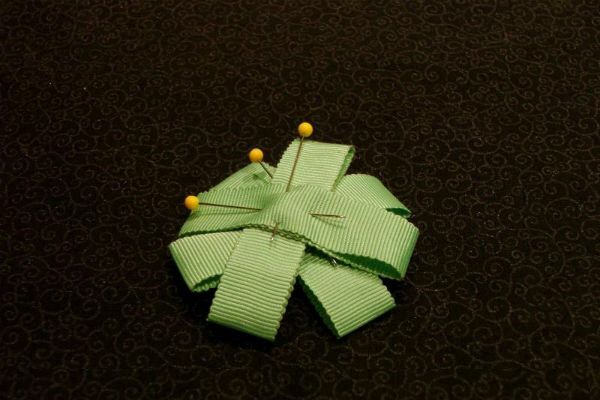
With a thread that matches the shade, you need to sew all the layers in the middle. Try to do it carefully, so that the flowers turn out neat. Sew around in a circle to surely flash not only the layers, but also the ends of the bands.
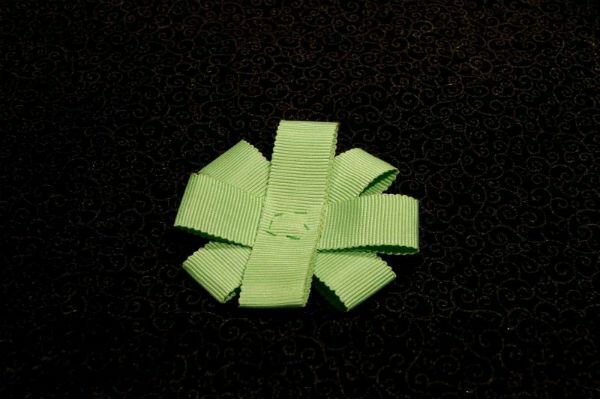
The base for the flower is ready, now you need to make a decoration.
To do this, take the beads or beads, which will blend in with the color of the ribbons, match the shade, or contrast.
Begin to sew from the middle. In this case, you do not need to flash all the layers, you can attach the beads exclusively to the first layer. Insert the thread with the knot into the first layer, make a stitch, the needle will come out.
Then put on one bead or bead. Continuing in the same way, make a kind of heart of the flower. The amount of beads depends on how large they are, and how bright you want to make the middle. Choose the amount you want, but do not forget about the measure.
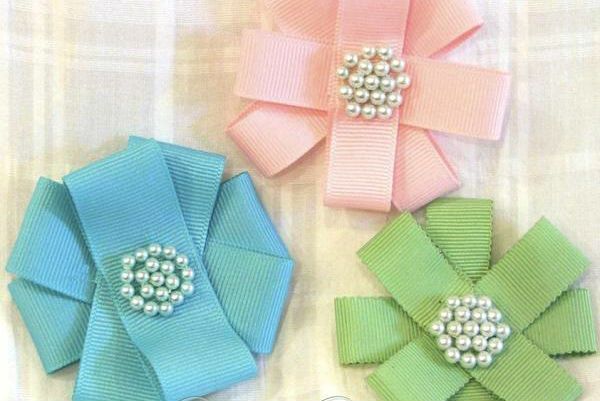
Bead sewn in circles, first the first circle, then the second, and, if necessary, the third.
Your brooch, made in the form of a ribbon flower, is ready, now you can decorate it with the desired piece of clothing or accessory.