
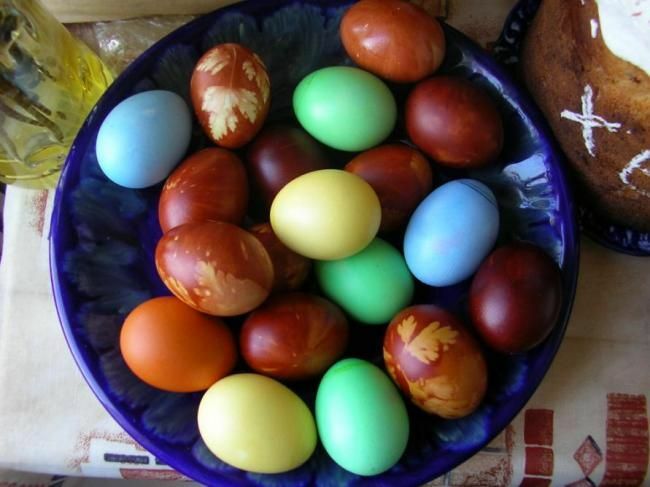
Now that sells all sorts of dyes and specialty chemicals, it is worth considering that the eggs colored with natural substances, more natural, more beautiful and safer.
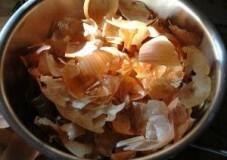
We will tell you how to paint eggs with onion husk. This is the most accessible and uncomplicated way. In addition, for all the time of the existence of this tradition, a more ecological and beautiful method of staining eggs, perhaps, has not yet been invented. Thanks to the husk, all sorts of shades of red are obtained, and if you take it from the Yalta onion, the violet color of the shell will come out.
Why paint eggs, where is this tradition from
 ? There is an Easter tradition to exchange krashenki with each other. The custom has ancient roots. History says that Mary Magdalene decided to bring the message of the resurrection of Christ to the emperor Tiberius.
It was not customary to go on a visit empty-handed, so she took the most affordable gift - a chicken egg, considering that it is very symbolic: at the top - a shell, and inside - life. Is not this the embodiment of eternity?. .
The Emperor did not believe her words, saying that this can not be the same as the fact that this egg of white color will turn red. It immediately turned red. Hence the custom followed.
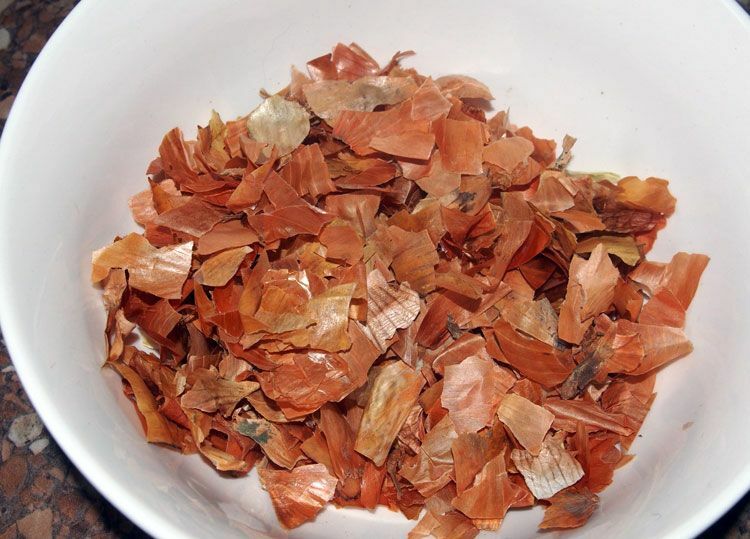
Make krashenki with the help of the onion peel
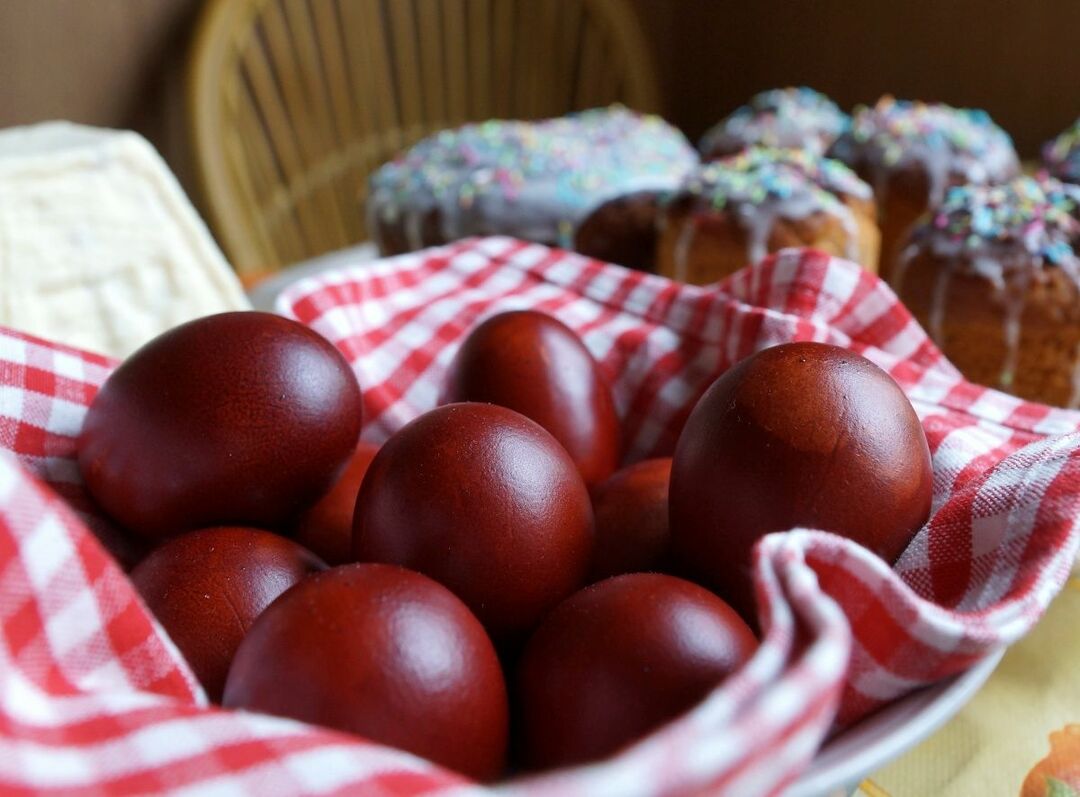 We will paint eggs in the onion( husk).The samples are white and brown.
Ingredients:
- husks - about a liter pot;
- water - 1.5 l;
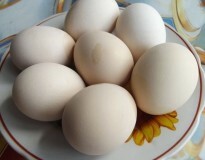
- eggs.
- salt - 1 tbsp.l. .
Preparation:
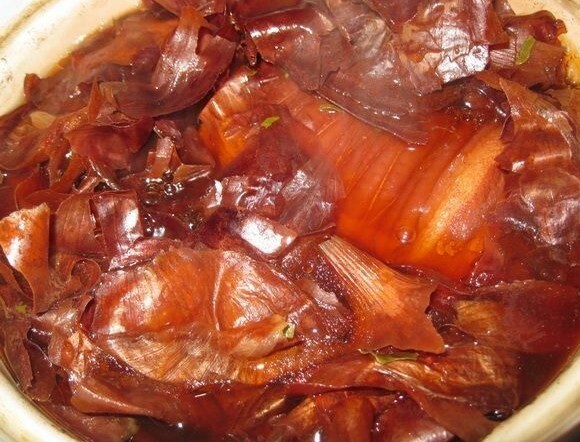
- We pour the water in advance on the collected onion husk.
- Solim.
- Boil 50 minutes before getting the broth.
- Let's stand for two hours.
- Filter.
- In the strained broth of eggs cook for ten minutes, periodically turning them over.
- Put into cold water.
- Let's cool down.
- Take it out and wipe it well with a dry towel.
Note:
If the decoction is not filtered from the husk, the color may be uneven.
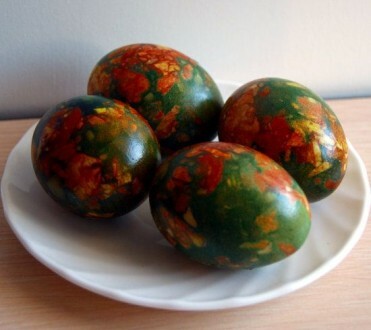
Marble eggs with the help of the onion and green peel
This recipe is for those who want to get an original decoration for the festive table. Painting eggs with a peel of onion and greens is easy. This is a short process, but the result will be beautiful: the shell will be marbled. 
It is necessary to take:
- eggs;
- greens;
- husks;
- thread;
- gauze or nylon;
- rubber gloves.
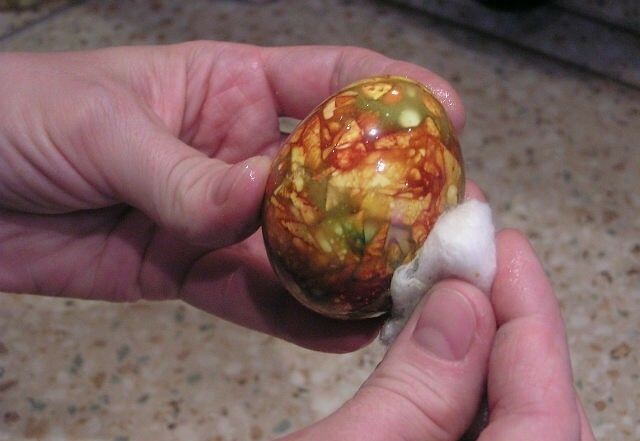
 The process of painting the husks:
- Remember the husks, it will become smaller.
- Wet the eggs.
- Roll in the husk( or put).
- In kapron we put the egg together with the stuck hull.
- We tie it with a bag and fix it with threads.
- Unnecessary end is cropped.
- Varim.
Greening process:
- Wear rubber gloves.
- Pour water into metal utensils and put eggs.
- Solim.
- We pour greens( there can be more than one bubble) - do not worry, the dishes will be washed off.
- Cook marble Easter eggs in onion husks with greens.
- Take it out and rinse it in cold water.
- Remove the gauze.
Note:
- Try to grind the husk with a coffee grinder, then the effect will be even more beautiful.
- Eggs, painted in this way, each obtained individually, depending on the volume of the spent greens and hulls.
How to make marble eggs - video
Several ways to create a pattern on a shell
You can vary this Easter decoration by painting eggs with onions and applying original patterns. In these recipes, we will tell you how to color eggs correctly so that the shell turns out with patterns.
We will need:
- The onion husk.
- Eggs.
- Fig.
- 1 tbsp.l.salt.
- Elastic bands or threads.
- Leaves of cilantro, parsley or other.
- Gauze( kapron).
- Vegetable oil.
Marble krashenki
Variant of preparation:
- The husk from different kinds of onions( red, yellow, orange) is mixed.
- We add small paper pieces.
- Together with a wet egg wrap in kapron( gauze).
- Cook for 30 minutes on low heat.
- Rinse under cold water. All is ready!
Spotted pattern
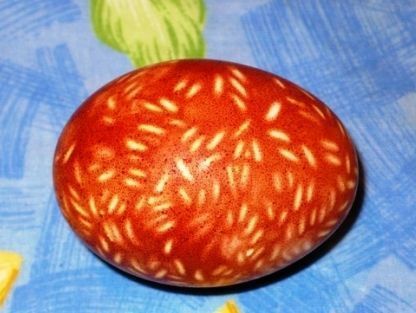 Method of preparation:
- Eggs are wetted.
- We dip into rice( dry).
- Tightly wrapped in gauze( stocking).
- Put in the onion broth.
- Cook for about ten minutes.
- We take out.
- Rinse in cold water. Done!
Note:
- You can take peas instead of rice, you get round spots.
- A special effect is obtained if olives are cut into rings attached to the eggs.
Be sure to make wonderful krashenki with a pattern!
Striped eggs
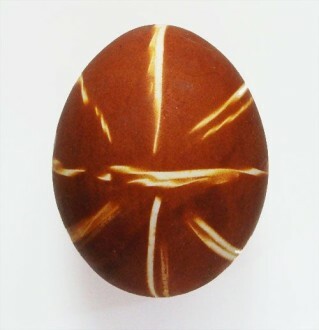 To obtain striped eggs before cooking in husks, they should be wrapped with elastic bands or threads.
How to diversify:
- Make several krishyonks with strips arranged horizontally.
- Several - with vertical stripes.
- On the other, arrange the strips chaotically.
- On the left, make the symbolic crosses.
This Easter decoration will be even more beautiful if you rub it with cotton wool dipped in vegetable oil after painting. It's gonna be great!
Lace pattern
Fairy tale and magic lurk in krashenkah with such ornaments! Amazing patterns, wonderful curls, cunning loops are obtained thanks to lace. Get these delicious krashenki simple.
Process:
- Eggs are wrapped with one layer of lace.
- We fasten it with a knot or with thread.
- Varim.
- Remove the lace.
- We admire the result!
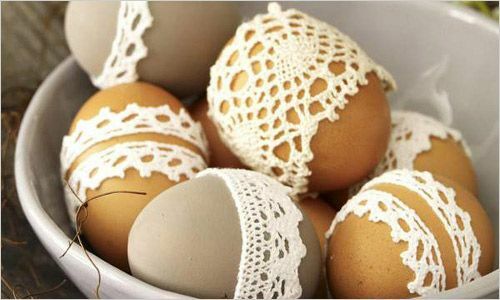
Note:
In addition to lace, you can use for the same purpose other textured material, for example, a plastic mesh, in which fruit is sold in stores.
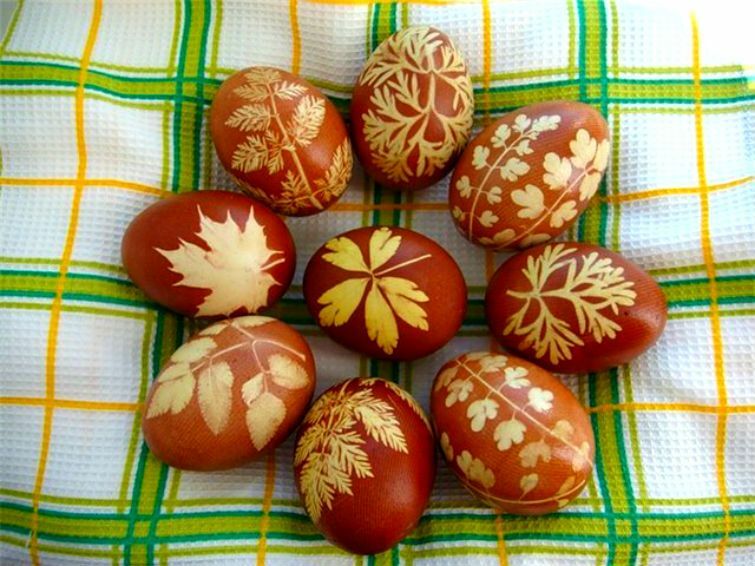
Painted pencils( the first way)
An incredibly beautiful shell turns out if you attach to it the leaves of any plants. Some of them even give a shade, for example, a birch leaf stains a pattern in yellow.
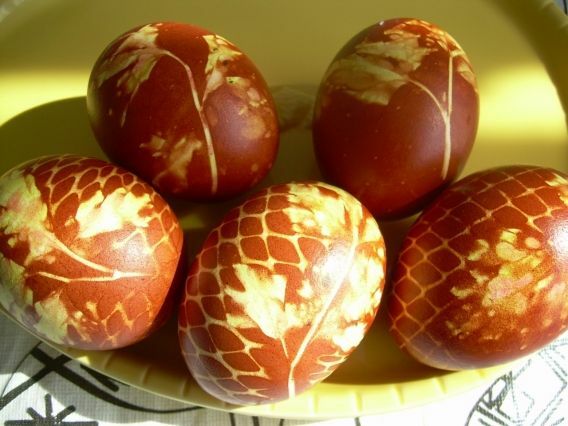 Preparation:
- Prepare leaves( from flowers or other plants).
- Apply them to the egg and wrap it with gauze( tightly).
- Cook in a decoction of husk, as usual.
Enjoy the beauty!
Easter eggs with a leaf pattern - video
With a picture( second way)
You can make unusual lines on the shell, surreal skylights, draw snowflakes, trees, etc.
Execute:
- Take the electrical tape and cut out of it everything we needit would be desirable( hearts, snowflakes, droplets, etc.)
- We put them on a shell.
- Varim.
- Unhook the electrical tape.
We admire how beautiful it turned out! 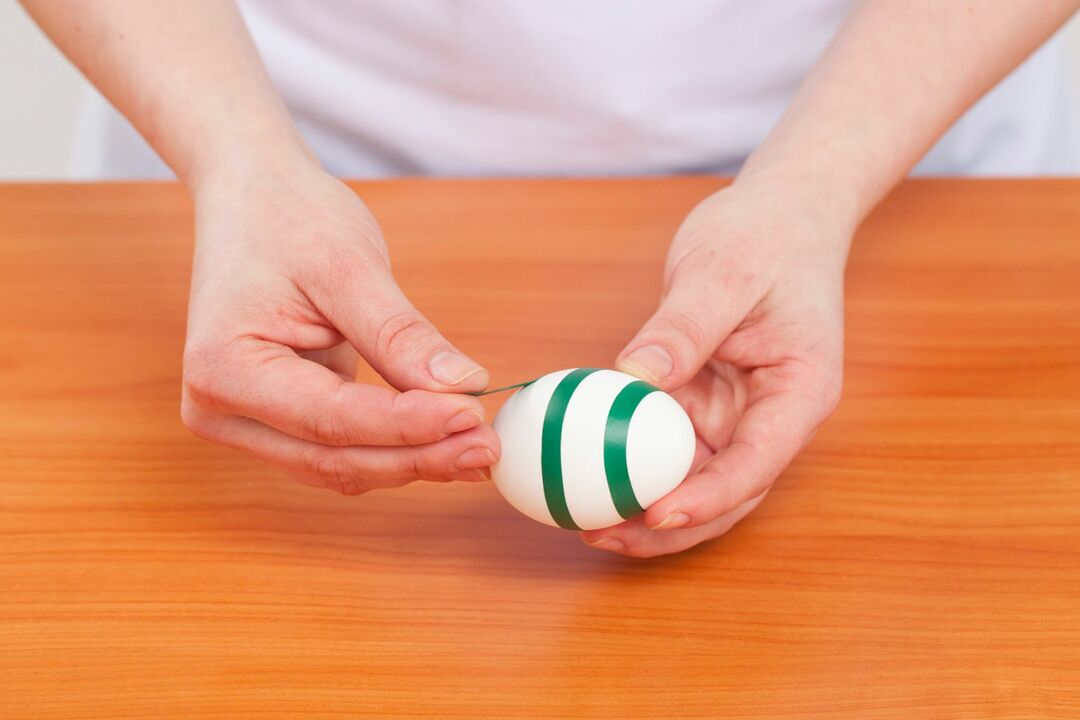
Note:
- Adults usually do not have time for such applications. But who says that adults should do this? Bring the kids to work. Children will be very pleased with such an assignment.
- Can get caught tape, which can only be torn off the shell, but the positive result is still obtained much more often.
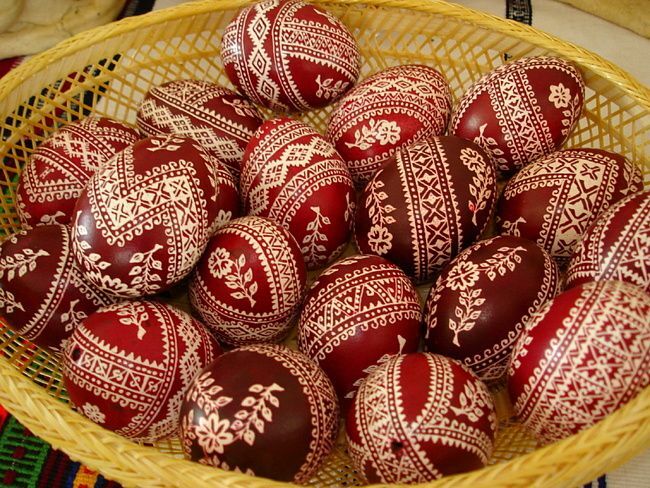
Draw with a needle
Create the magic yourself! We take a needle and begin to scratch something on an egg, painted with husks. Complex ornaments or some incredible drawings can not be used by everyone. But you can scratch the inscriptions, such as "Christ is Risen!" Or make a nominal egg for memory. Believe me, this is quite an exciting activity. 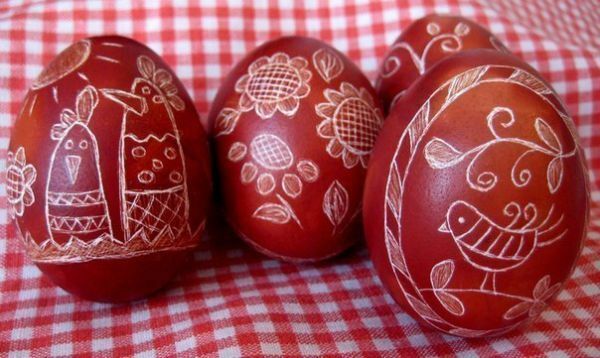
We decorate with the help of colors
There is nothing complicated in this way.
Preparation:
- Instead of leaves or rice we tie flowers to the eggs( you can take shaggy, for example, chamomile, etc.).
- Wrapped in 2-3 layers of nylon( gauze).
- Cook in onion broth.
- We get it.
- "Undress", removing the nylon.
Enjoy the result. See for yourself that it's easy and beautiful!
Gradient krashenki
 Thanks to this method you get unusual, solemn krashenki. The manufacturing process will be slightly more complicated than the previous ones, but the result is worth it.
What you need to do:
- Choose the dishes that allow you to set the desired number of eggs in the desired position.
- We put eggs vertically.
- At 1/3 pour the decoction of the shell and cook for five minutes.
- Add another 1/3 of the broth and cook three minutes.
- Pour the broth so that the eggs are completely covered by it.
- Cook for five minutes.
- Merge.
Doing krashenki and painted with wax
This method is more time consuming, but the most mystical and magical. Eggs are incredibly warm and warm.
Cooking process:
- We paint eggs with onions, keeping them in a decoction from the husk until a subtle shade is obtained.
- Take the hot wax and make them patterns or inscriptions.
- Put into a concentrated broth and stand for 3-4 hours( you can leave it for the night).
- When the shell gets an intense brown color, we take out and remove the wax with a napkin.
Painting with a beetle
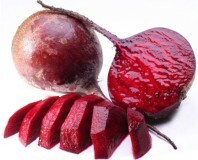
A rich burgundy shell will come out if the krashenki do in a beet broth.
Required products:
- beets - 3 pcs.;
- water - 1 l;
- vinegar - 1 tsp;
- salt.
Preparation:
- Clean beets.
- Grate on a coarse grinder.
- Top up with water.
- Make a decoction.
- Boil the eggs in the broth for 10 minutes.
- Allow to cool.
- Remove and wipe with a tissue.
Notes:
You can simply boil the eggs and grate the beet juice. 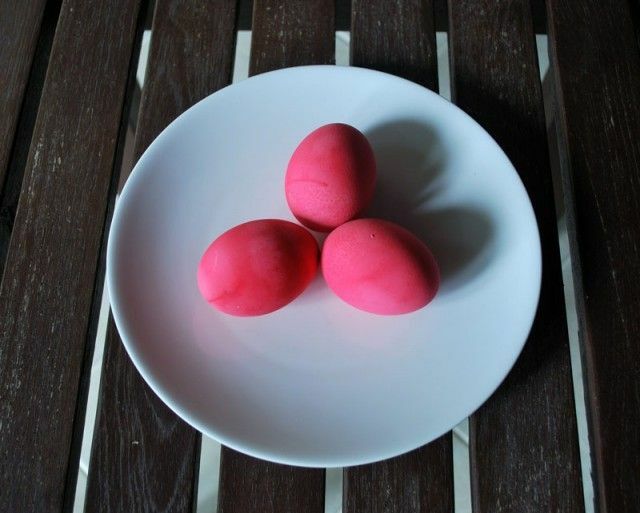
Tips for successful coloring
- Eggs for uniform coloring need to be washed.
- White is more suitable, because light and bright colors will not appear on the brown ones.
- So that they do not crack, it is recommended to stand eggs for two hours at room temperature. In addition, you need to pour 1 tbsp.l.salt, not a pinch, as some think.
- You can rub them after staining with a cotton disc dipped in vegetable oil to give a glossy effect.
- The onion husks are harvested well in advance. The more it is, the more intense the color.
- The husks of yellow, brown or red color will give an appropriate shade of the shell.
- When staining with husks, the color turns out to be quite resistant, but many mistresses try to fix it by treating them with vinegar for maximum reliability.
- If you want to surprise friends, paint some quail eggs. They look tender and touching.
- We paint with other natural substances.
There are many ways to paint Easter eggs with different natural dyes:
- An intensive and beautiful color can be obtained by preparing a decoction of blueberries for painting. With the help of natural coffee, you can get a beautiful brown color. It is enough to boil ten minutes of eggs in strong coffee, and then dip into vinegar.
- In the same way, it is painted with black tea. You will get a new shade of brown. If you take three tablespoons of turmeric and dilute them in 0.5 liters of water, cook the products in this mixture, get a golden, chic color.
- Curcuma can be replaced with curry.
- The birch leaves will help to get a wonderful shade of yellow.
- Red cabbage will color the shell in blue.
With the help of these recipes and tips the holiday of Bright Easter will turn out even more sincere and warm! Successful coloring and joy to you!
Related videos:
 6:45
6:45  3:55
3:55  2:02
2:02