
While environmentalists and various international organizations "scream" that plastic bottles are a real catastrophe and that billions of dollars are needed to solve the problem of pollution by environmental bottles, ordinary people find a simple way out of the situation - they give plasticbottles a second life. The handicraftsmen and needlewomen make them as convenient objects that are designed to make life easier, as well as pretty beautiful compositions for decorating the house.
- Making butterflies from bottles
- Crafting birds from plastic bottles
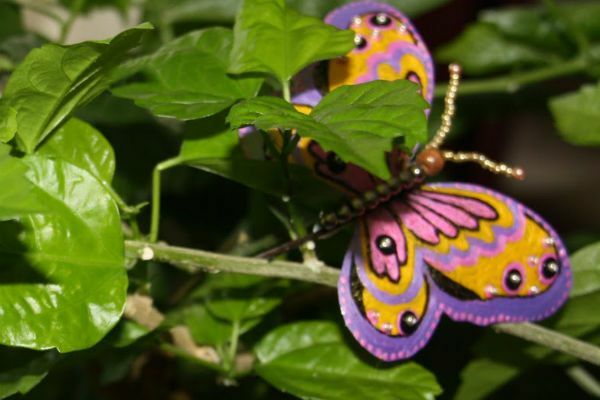
Making butterflies from bottles
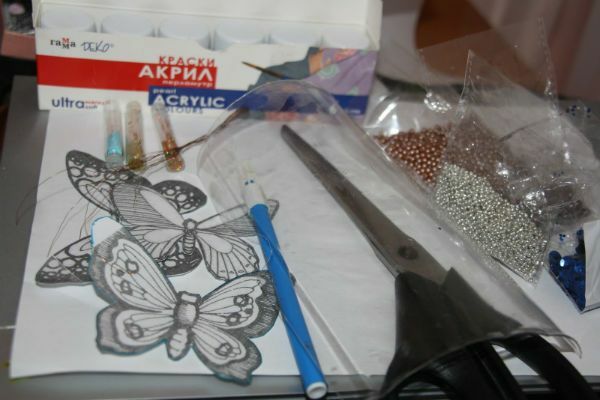
For example, from such bottles you can make beautiful butterflies. Here's what you need for this:
- an empty 2-liter plastic bottle;
- paint with a "metallic" effect( gray or silver);
- translucent acrylic paint;
- beads and sequins for decoration;
- fishing line;
- paper;
- marker.
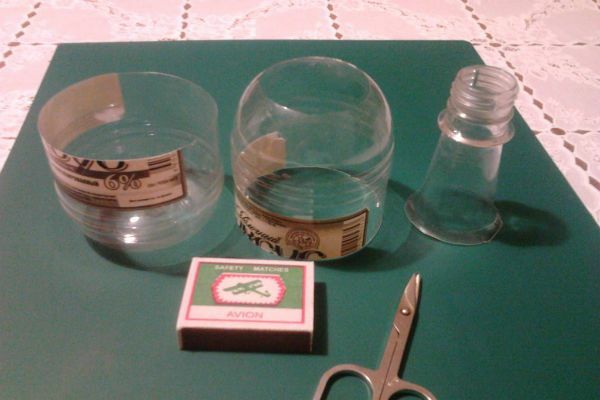
From the tools you will need:
- brush;
- scissors;
- needle.
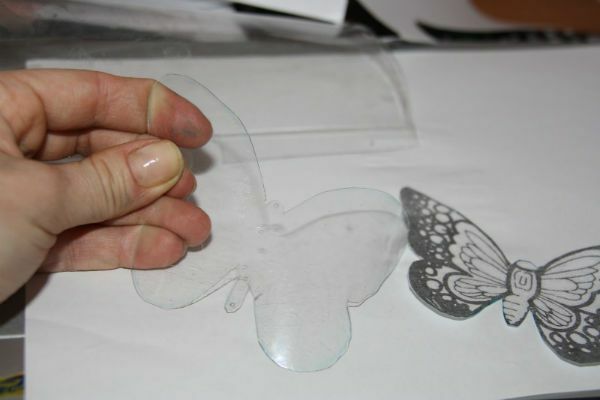
Draw a butterfly on paper, be sure to draw lines to give the drawing a realistic feel. Cut the butterfly, this will be your template. Cut out a square from the bottle that is slightly larger than your template. Place the pattern on the plastic, and cut out. Repeat as many times as you need butterflies.
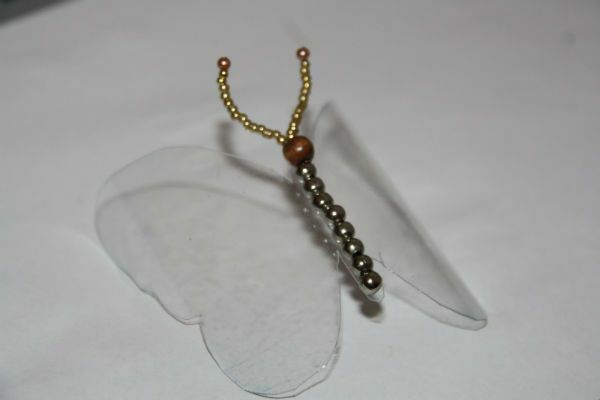
Now you need to add the details. Paste on the back of the butterfly body beads. For convenience, they can first be threaded onto a wire and formed at the same time antennas-antennae.
Draw on the part that was the outside of the bottle, using the paint. Draw the outer edges of the wings, as well as the pattern on the wings. Set aside to dry. The drying time depends on the characteristics of the paint, it is best to leave it overnight and start working on the next day.
Now apply a transparent paint with pearl effect to the butterfly wings. You can use, as this master class shows, colors of different shades. In the end, you can supplement the result with sequins. Allow to dry.
Now you need to create a place for hanging butterflies. To do this, cut off the bottom of the plastic bottle and make a hole in it with a needle or a screw( the number of holes is determined by the number of butterflies).Now make one hole in each wing of each butterfly( only the upper wings are affected).
Now take the fishing line, cut a piece of necessary length, stretch it through both holes in the wings. Tie the wings together, not too tight, leave one end longer. You attach it to the stem from the bottom of the bottle.
Repeat the same with the rest of the butterflies.
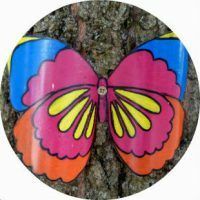
When all the butterflies are tied, you can decorate with a finished composition of bottles any room in your house.
to the table of contents ^Blowing of birds from plastic bottles
Another variant of crafts made of unnecessary colorful plastic bottles can be the surprisingly beautiful and original handmade red-breasted bullfinch.

For work it is necessary to prepare:
- plastic bottles of different colors( preferably transparent, white, black, blue and red);
- scissors and clerical knife;
- glue gun;
- self-tapping screws;
- 2 small buttons for the eyes.
This work is quite painstaking, so beginners can take a long time.
To begin with, prepare an image of a natural bullfinch and print it on a color printer. Such a picture will help you to choose the most suitable colors of plastic and properly distribute the feathers on the craft.
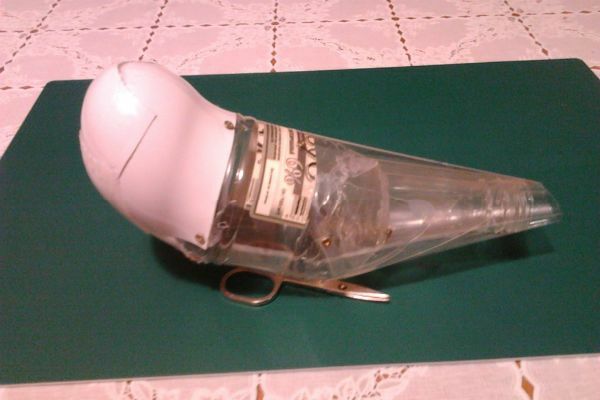
We make the trunk of the billet from a small but three-dimensional transparent plastic bottle. To do this, it must be cut into three parts.
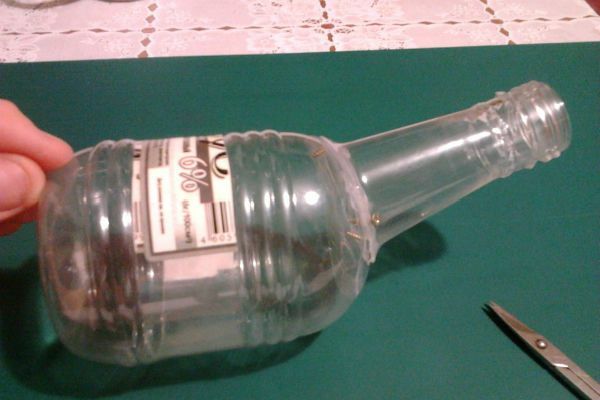
To make a small compact body, the upper part of the bottle is firmly inserted into the bottom and glued with a glue gun.
And the neck, which will become the backbone of the bird's tail, is displaced 15 degrees upwards and fixed with screws, as indicated in the photo.
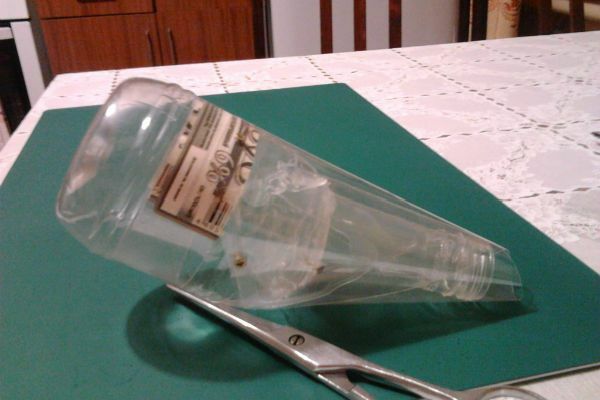
From another bottle, cut out the part and with its help we compare the difference between the tail and the back.
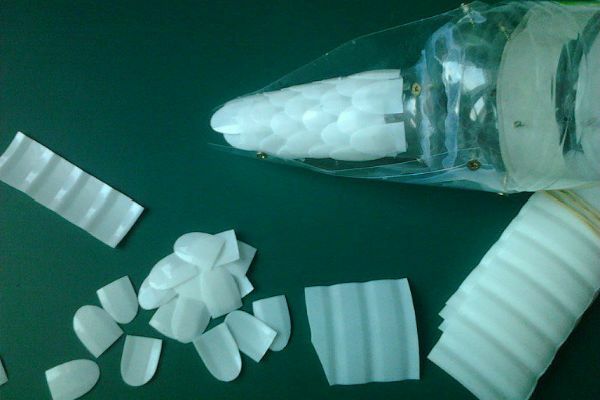
Now go to the creation of the head. To do this, from white bottles of yogurt we cut out several elements and, with the help of screws and glue, we form the neck and head of the bird from them.
From white plastic we cut out details in the form of feathers about 40 pieces, and placing them in a staggered order, pasting an article in the tail area, thereby hiding the neck of a plastic bottle.
Now from black plastic we cut out larger feathers of oblong form. Separately, we form wings and tail from them and attach them to the workpiece with screws.
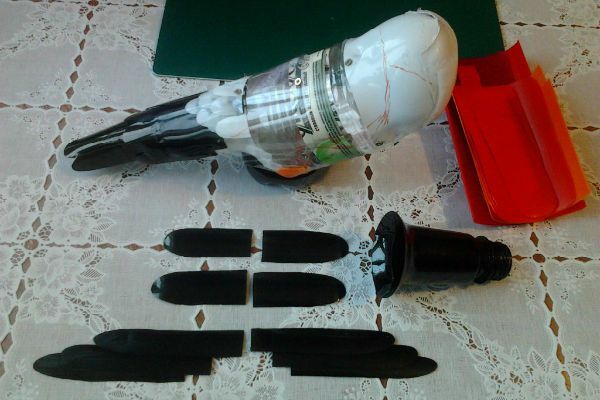
From a red bottle for ketchup we cut out feathers for an ornament of a tummy and a breast and we fix them with the help of a pistol, stacking in a staggered order.

Checking with a photo of a live bird, we make out the back with the help of blue transparent plastic.
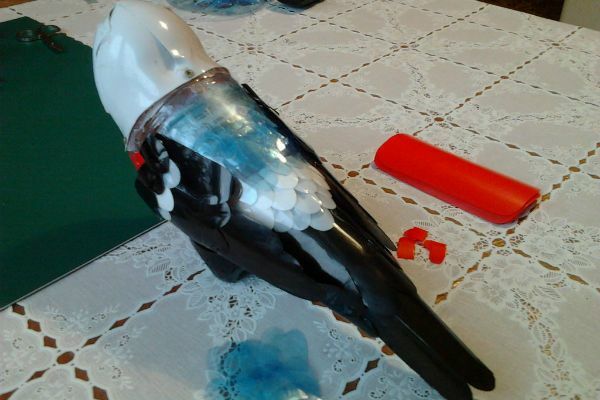
We continue to glue the breast and back until we reach the head of the product.
First attach the lower part of the beak, then the top, and then all the other feathers.
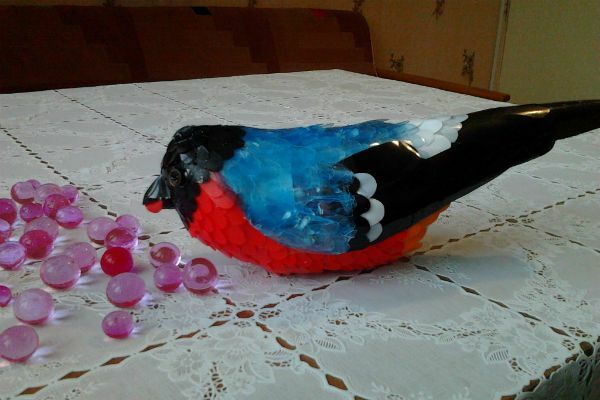
Finish the assembly by setting the eye-button. The Bullfinch is ready! You can decorate it with a berry or a branch of mountain ash, placing it in the beak of a bird.