The molding from a salted dough can be interesting for both children and adults of any age, because in fact, it is in many ways reminiscent of working with gypsum or clay. In addition, from this unpretentious and comfortable material you can create crafts of any complexity, which are very beautiful and unusual in appearance.
- How to make a dough
- How to dry
- How to dry
- How to make an ice cream soup
How to make a dough
For its preparation you will need:
- two glasses of ordinary flour;
- one glass of finely ground salt;
- half or three quarters of a glass of water;
- one or two tablespoons of wallpaper glue( optional);
- a few drops of food color;
- spoons;
- measuring cups;
- deep dishes in which you will mix the ingredients.
Let's start mixing.
In a deep container, mix two cups of flour and one glass of salt.
The required amount of water varies from half to three quarters of the glass. First, pour in half, and then add a little bit in the next step.
Mix and mix, adding a little water, if the material is too dry or hard. The resulting material must be dense, but at the same time suitable for work.
To make the material more elastic, supple and improved for work, you can add to it one or two spoons of wallpaper glue.
If you want a colored product, add a little food coloring to the material( literally a few drops).If you want to make the material natural, add to it for coloring natural ingredients - coffee, curry and so on. Stir the material until the colorant spreads evenly.
to contents ^Storage
Wrap the material in a plastic bag. For long-term storage put the dough in a bag with ziplok clasp and place it in the refrigerator. Do not forget to make the inscription on the package, so as not to confuse with anything.
However, you may need to add a little water or flour to it( depending on the consistency) the next time you use it. If the dough becomes too sticky, add flour and salt, if too dry - add a little water.
to the table of contents ^How to Dry
After you have given the desired shape to the dough, you can dry it in two ways:
- In the air. This method is suitable for thin or small objects. Place them in a warm dry place and leave to dry for two to seven days. Drying time depends on the size and thickness of the product. Turn the products from time to time to dry evenly;
- In the oven. Baking is suitable for products made from unpainted material. The temperature in the oven should be about 95 degrees. The drying time depends on the size and thickness of the products, as a rule, it is from 10 minutes to several hours. To prevent the material from becoming brown, check the baked goods from time to time. You also can freely wrap the craft with foil. After the figures have cooled, they can be painted with a special paint.
Making an ice cream soup
Ice cream looks very beautiful, which is easy enough to do by yourself and hone the skills of a new hobby. This master class will require the following ingredients from you:
- salted dough;
- paper cup;
- paint( preferably acrylic);
- brushes;
- beads;
- colored glue( brown or pink);
- shaving foam;
- red bead;
- paper for work;
- powdering.
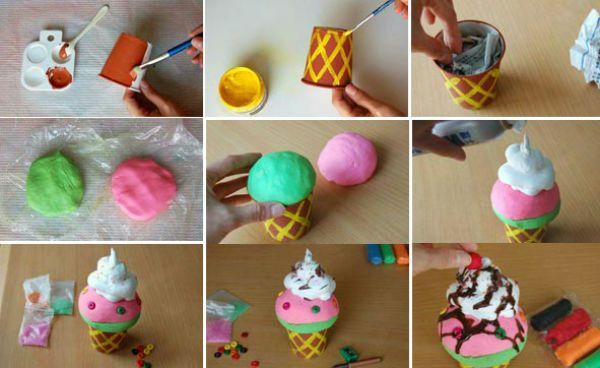
Paint the paper cup with a brown paint. If your glass has a shiny surface, then be sure to use acrylic paint. Draw the line in yellow with a brush in a criss-cross pattern so that you get a waffle-like pattern. Tear the paper or newspaper into small strips, squeeze them and fill three quarters of the ice cream glass with these strips.
Now decide what color you want ice cream. Prepare a mass of two colors( in this case, a green and pink dye was used).Use natural colors to give a more realistic look to ice cream, pink, for example, for strawberry, green for mint, yellow for mango, brown for chocolate and so on.
Roll out the resulting material into two balls. Put the first ball, tightly squeezing it into a glass, press it down so that it holds well. After that, put the second ball on top and fix it well.
Now apply a little shaving foam on the top ball, simulating the whipped cream. Decorate with a small amount of beads to simulate the sprinkling.
Make a small amount of artificial chocolate or strawberry syrup by mixing a small amount of paint and glue. Pour into a special bottle, from which it will be convenient to apply( or a tube with a dispenser).Apply on top of the ice cream. Top with "cherry", using a red bead. Also, you can simply paint the ball of dough into red for these purposes.
Despite the fact that the result turned out to be more realistic, do not forget that such ice cream can not be eaten.
After that you need to dry the salted dough well. Put the "ice cream" in a warm, dry and well ventilated place, as indicated above, and dry as much as necessary.
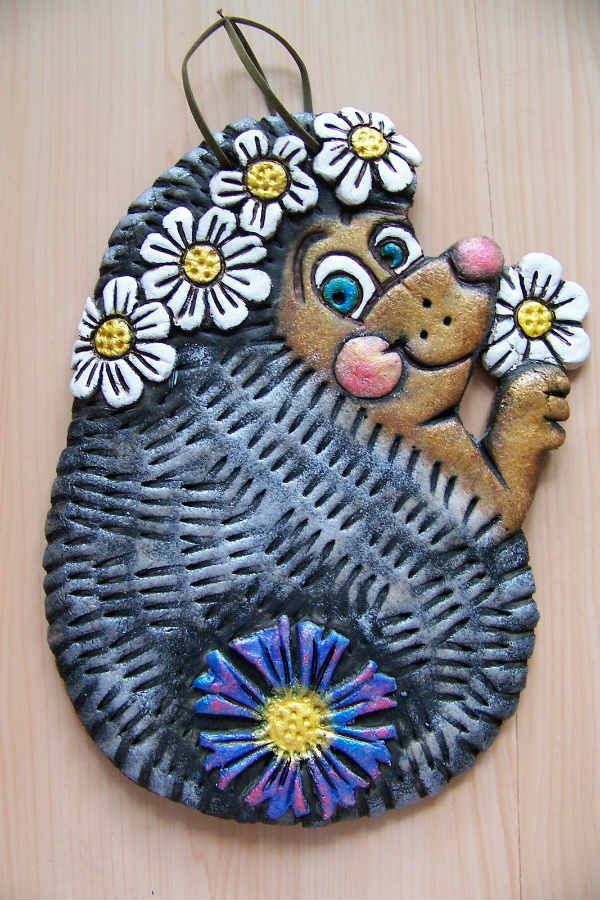
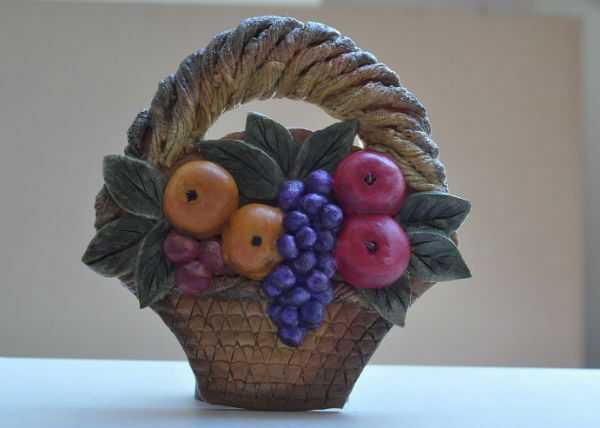
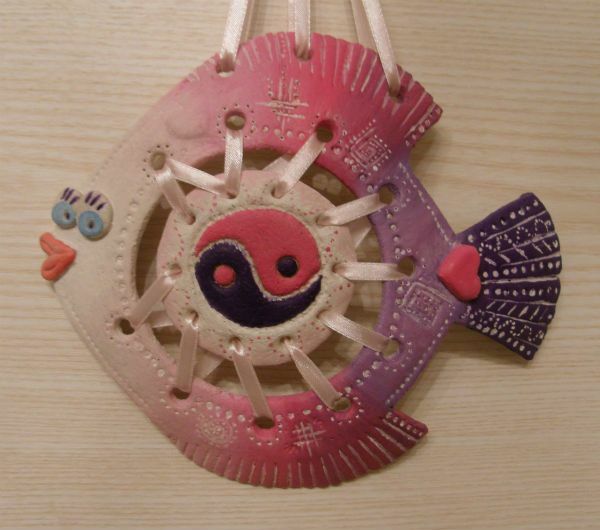
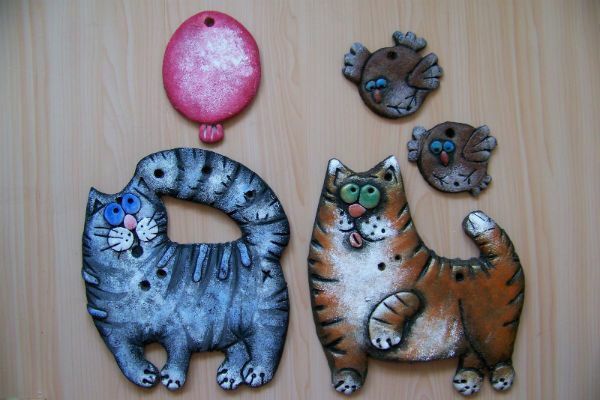
In the same way you can make a lot of other, no less interesting crafts. Here's what you can do from this material: