

Many women of fashion are constantly choosing ways to transform their jewelry for hair. One of the best source materials for this are the regular hairpins. Using them as a base, you can create a lot of interesting and original jewelry, both voluminous and miniature. We offer you six illustrated mini-lessons on the embodiment of different ideas of this nature.
- Made from ASAMAZAN
- Made of
- satin ribbons and colors Made of polymer clay
- Of
- grosnets
- canvas technology With acrylic coating
From foiamiran
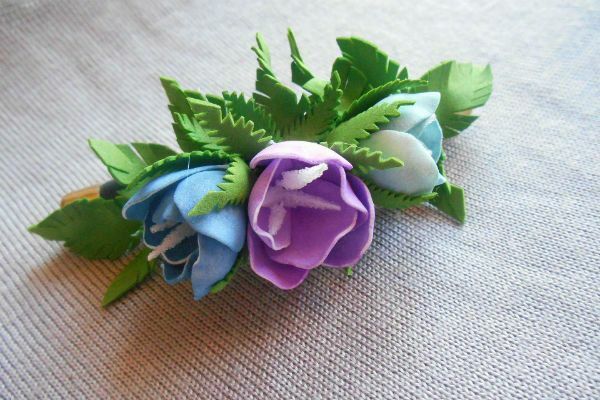
To decorate an old worn barrette with flowers from foiurane you will need:
- foiraman of white and green colors;
- blanks of stamens;Pastel blue, blue and violet;
- old barrette or clip from the barrette;
- scissors and clerical knife;
- wooden skewer;
- pencil;
- ruler;
- iron;
- glue gun;
- brush.
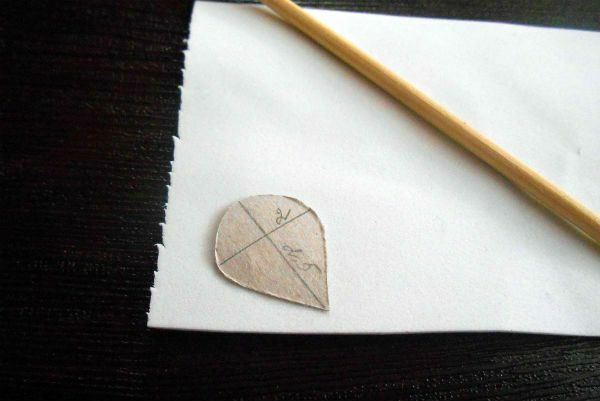
First you need to make two stencils for the petals and leaves. Draw on the cardboard a rectangle measuring 2 cm by 2.5 cm and draw on it the outline of the petal, as shown in the photo.

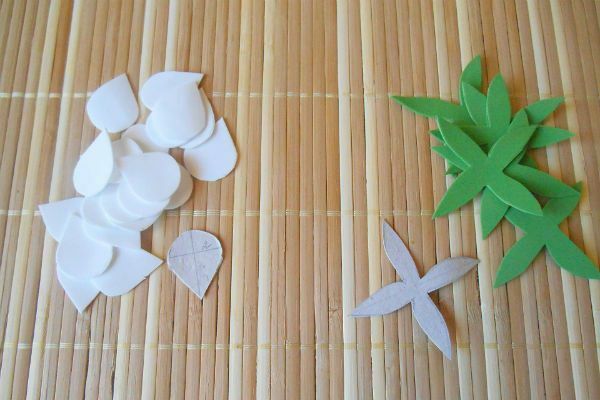
Then draw a square with a side of 4 cm and diagonals that will become the guides for the leaf petals. Draw a sheet of paper like the one in the photo. And cut out.
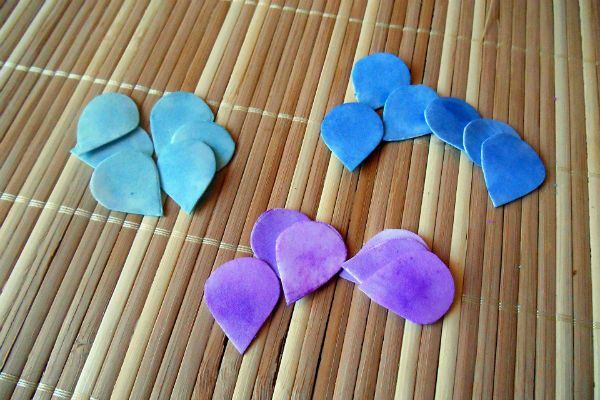
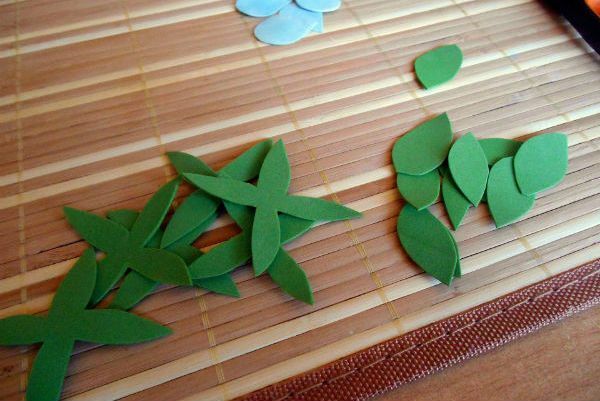
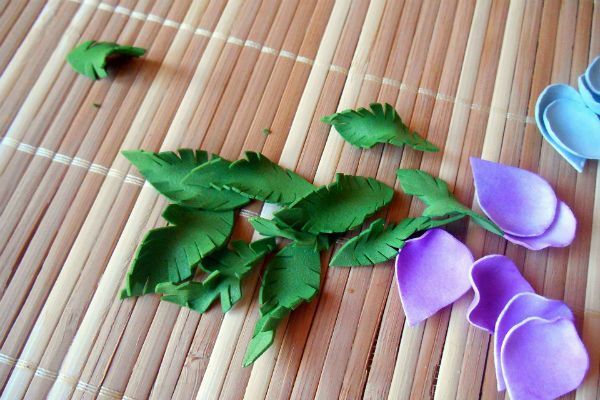
Stencils from cardboard with a wooden skewer, circle on the fomir, petals on white, and the leaves on the green and cut. To create three flowers you will need six flower petals and one for each leaf.
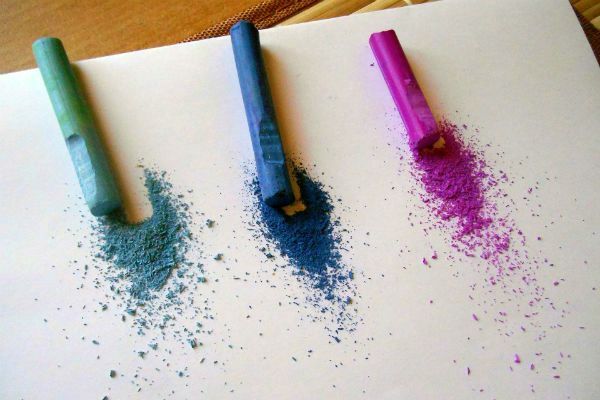
Of course, for creating colors you can take fameiran sheets of different shades, but in this master class we suggest painting it yourself in the desired color. For this you need a pastel. Take a blue, blue and purple pastel and crumble it with a clerical knife.
After slightly moistening the brush, dab it in the pastel and chop it with petals on both sides. If desired, you can do this with your fingers. The main thing is to wash the brush and hands before changing the pastel color.
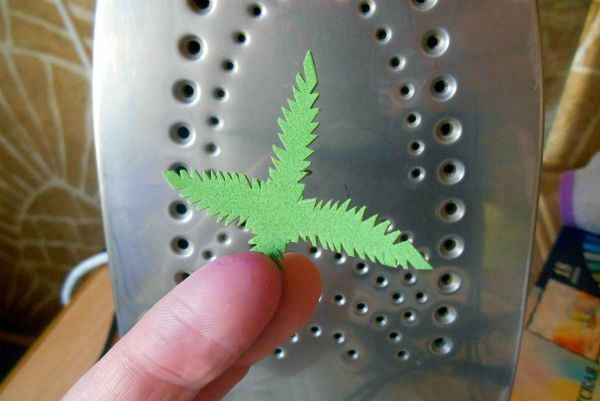
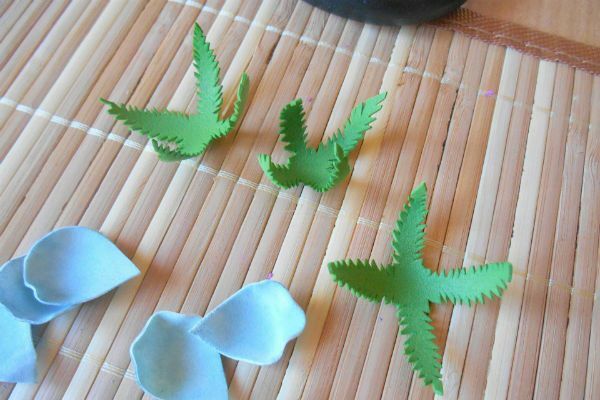
In addition to harvested green leaves, it is necessary to cut out a few more sheets that will be fastened under the flowers and help close the fastening of the hairpin. Their shape can be arbitrary, and on the sides you need to make several small incisions.
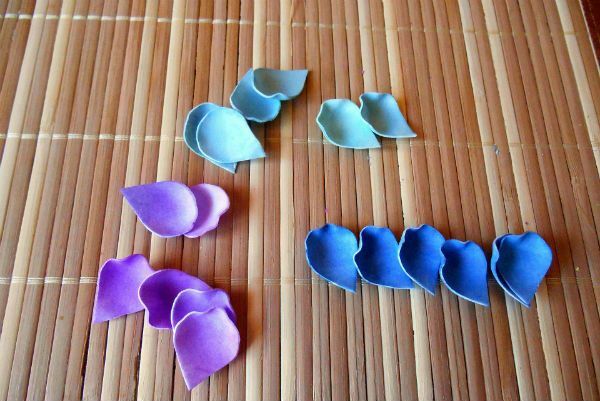
After tinting, the petals should be shaped. To do this, heat the iron to an average temperature and alternately for a few seconds, attach the petals to the iron. Then placing the heated petal on the palm, press the center of his finger and pull it down a bit.
This action will help to make the petals more voluminous, and their edges - relief.
The green leaves, when in contact with the iron, will also take the desired shape. In addition, they can be turned in the palm of your hand or rolled into flagella.
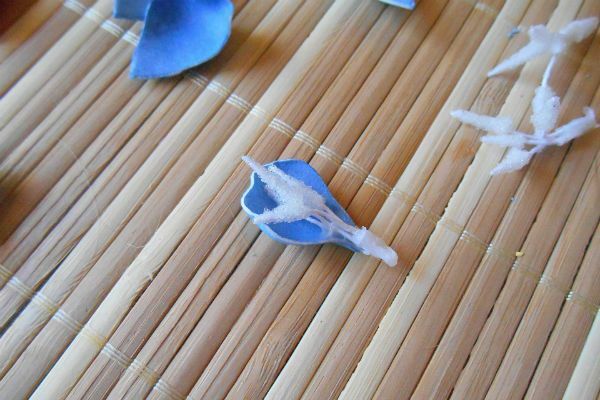
For each flower, two stamens are required. Fix them together with an adhesive gun.

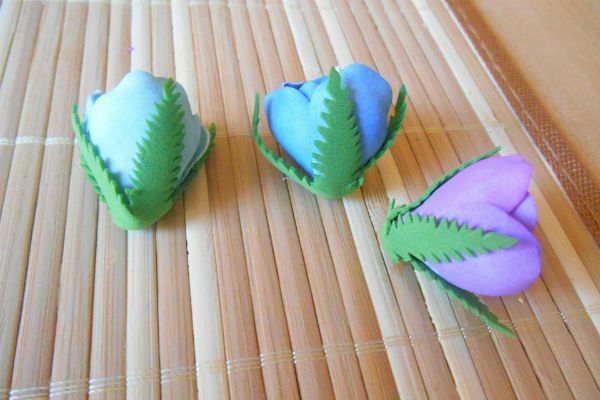
Then gently connect the first petal with the stamens as shown in the photo.
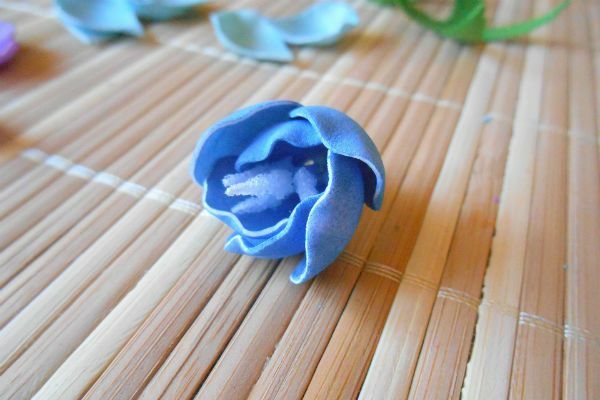
Sequentially glue all the petals in a circle so that there are no large gaps between them. Apply the glue strictly on the edge of the petal, then the flower turned out to be more voluminous. In this way, collect three flowers.
In order for the leaves to adhere firmly to the base of the flowers, the protruding ends of the stamens must be cut off.
Now go to the design of hair clips. First, glue all the green leaves on it, carefully hiding the entire surface of the hair clip.
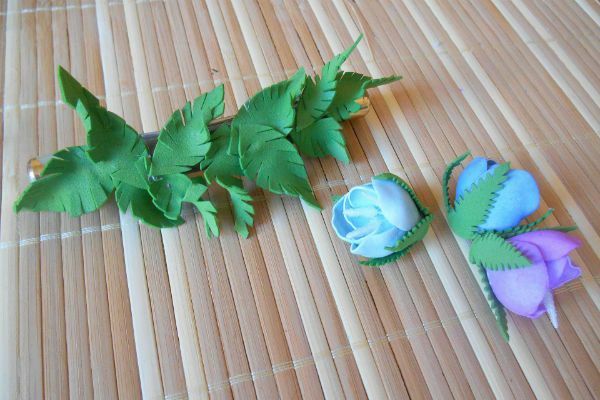
Then place flowers on the barrette, one exactly in the center, the rest - on the sides under the slope.
to the table of contents ^From satin ribbons and colors
To create a delicate, elegant hairpins from artificial flowers and ribbons, you will need:
- a branch of a rose and a russus or any small flowers and greens;
- pruners and scissors;
- satin ribbon;
- glue gun;
- piece of cardboard;
- invisible for hair.
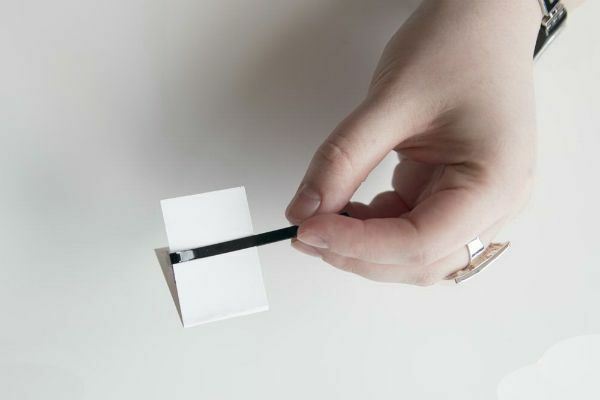
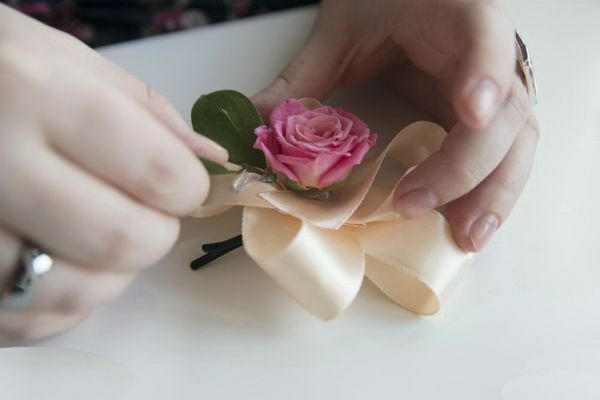
To create a base for the hair clip, cut off a small strip of cardboard, bend it in half and add the invisible to it as shown in the photo. The resulting construction glue with hot glue.
Tape the tape with a loop and fix with glue. Next, form a second loop from the tape and fix it with glue over the first, sliding slightly obliquely. Then proceed similarly to fold the loops until you get a full circle. Cut off the rest of the tape.
Get the resulting bow to the cardboard base with the invisible.

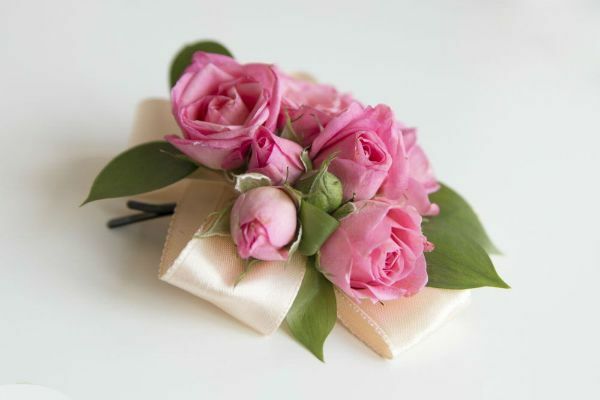
Using a pruner cut the stems directly under the head of the flower, and cut the greens into separate leaves. First try on how to place the flowers on the base, and then, applying abundantly the glue on the bottom of each element, start attaching the flowers and leaves to the barrette.
From polymer clay
To create a set of stylish autumn jewelry made of polymer clay it is necessary to take:
- polymer clay of red, orange, yellow, dark yellow colors;
- stencil for polymer clay;
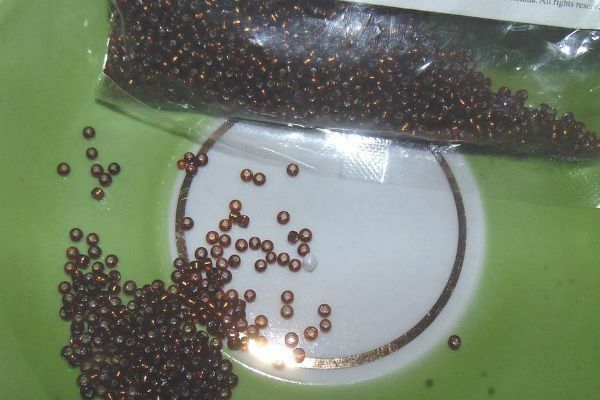
- brown beads;
- fishing line 3 mm;
- chain and lock for bracelet;Crochet clippings - 2 pieces;
- superglue;
- brush;
- scissors;
- toothpick;
- acrylic lacquer.
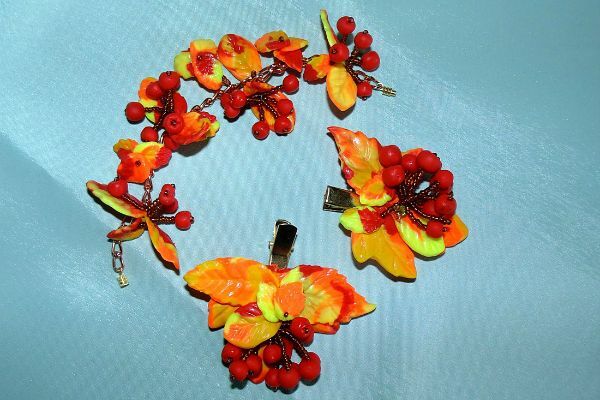
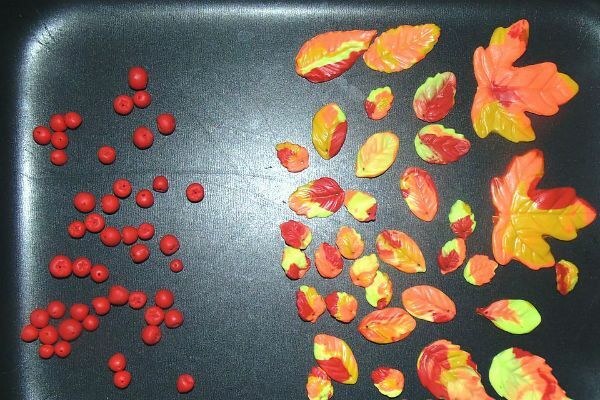
The kit will consist of a bracelet and two pins, decorated with clusters of mountain ash and bright autumn leaves.
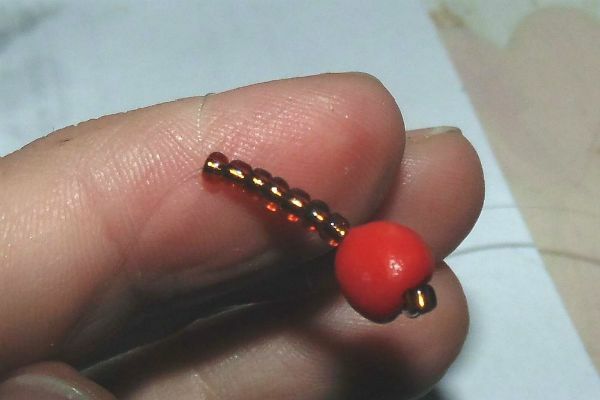
Therefore, first we'll make berries of mountain ash. Take a small piece of red polymer clay and divide it into several equal parts.
Grind the clay in your hands to give it plasticity and roll it into a ball.
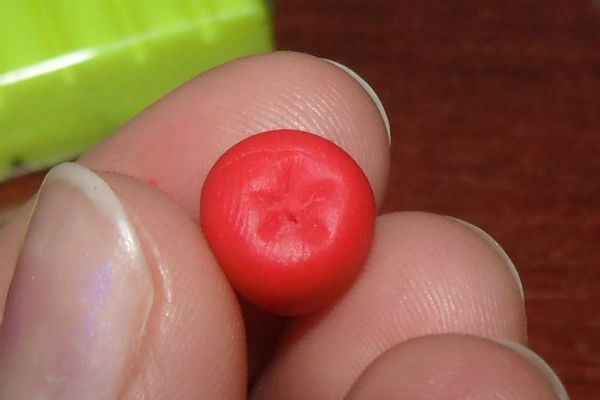
Use a toothpick to pierce the future berry through to create holes for fastening. At the entrance of the resulting hole, with the help of light pressure on the toothpick, make small, characteristic rowan grooves. For ornaments, you will need about 50 such berries.
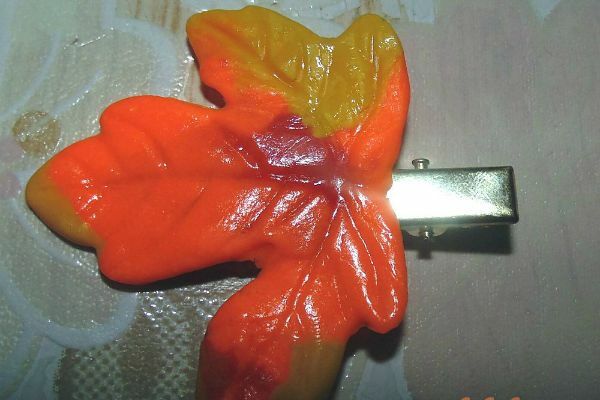
For the production of autumn leaves, take a little clay of each color.
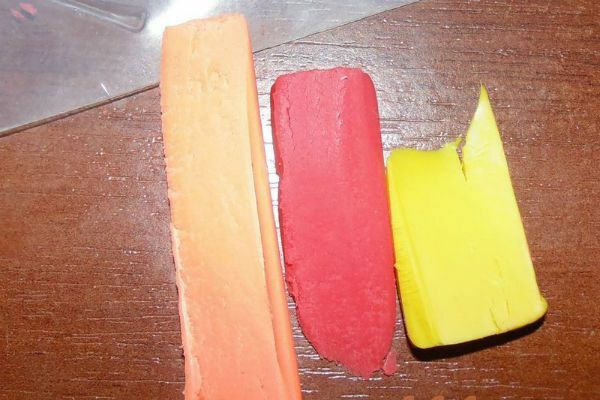
Well stir it and mix it together.
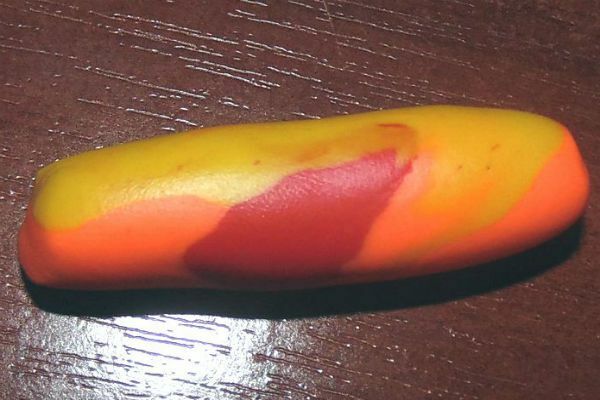
Cut the necessary amount of clay for one sheet and fill it tightly with a special stencil. In case you do not have such a stencil, roll out a piece of clay and independently give it a sheet shape. To create an invoice, you can use a live or artificial sheet, attaching it to a blank for imprinting the veins.

Remove the sheet from the stencil very carefully, as it is quite thin and can be deformed or torn.
Make several sheets of different shapes and sizes. At the base of each workpiece, use a toothpick to make through holes for fixing.
Next, put all the prepared items in a baking dish and send it to the oven for baking for 15-30 minutes at a temperature of no higher than 130 degrees.
When the specified time comes out, remove the items from the oven, allow them to cool and cover with several layers of acrylic lacquer. At this stage, the blanks will acquire strength and shine.

Now proceed to assembling the bracelet and pins. For the bracelet, take the chain to the size of the hand and attach the lock to the extreme links.
Take the beads.
Begin collecting the decorations according to the diagram below.
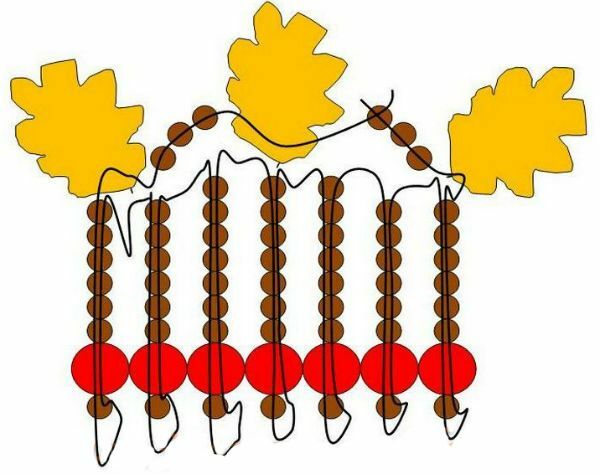
Type six beads on the fishing line, then the rowan berries and another bead and return the same line of fishing line back the same way. Tighten the line, you got the first twig. Similarly, twist the remaining six branches and connect them to the leaves.
Uncouple the link of the bracelet and put on it the first decoration.
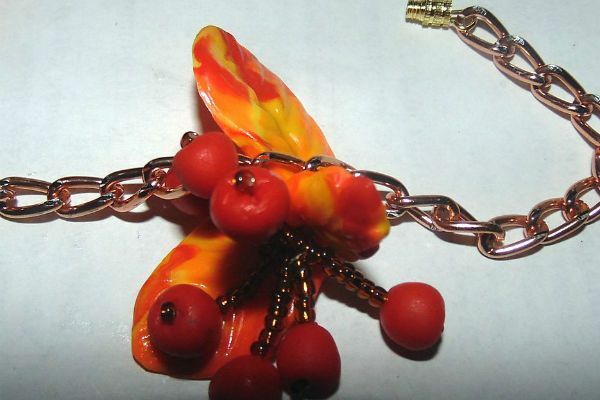
Then make 4-5 more of these ornaments and attach them to the bracelet.
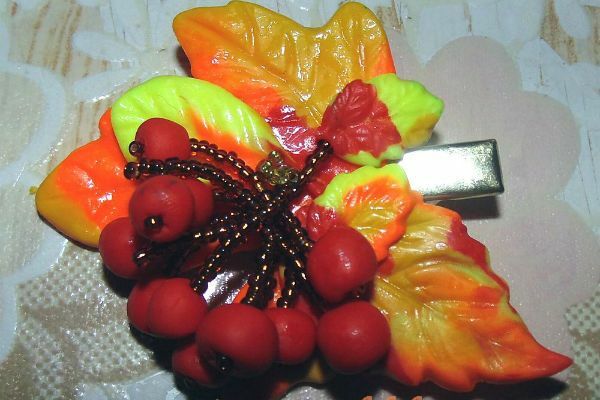
Now with super glue, attach the largest leaves to the hairpins, and fasten the bunch of berries on top of the leaf, assembled according to the scheme attached above. Just pay attention, we increased the number of twigs with berries.
Finally complete the hairpins with the remaining small leaves.
From the bands of gros-grosas
Such zakolochki were popular in the days of disco. To make a retroversion, you need:
- metal oblong hairpins of not less than 5 cm in length,
- of a grounder tape up to 4 mm wide,
- gun glue( with hot glue).
Cut approximately 60-65 cm of tape. Fold in half. The middle of the tape is attached to the base of the barrette, after stretching one of the edges through the middle, repeat the same with the second end.

Do this alternation to the end of the barrette, braiding it with a ribbon.
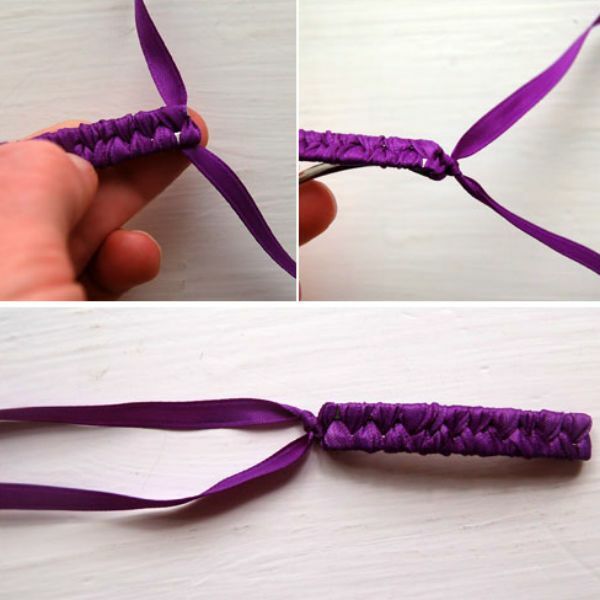
When you reach the end, tie the knot.
The tail of the tape must be twisted into a tight bundle.
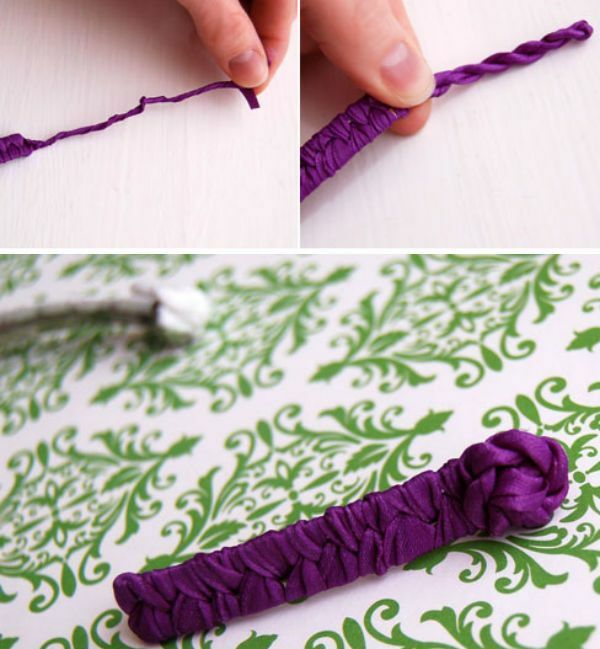
Apply a drop of glue to the base of the barrette, wind the remains of the tape-tape, forming a dense flower.
to the table of contents ^In Kanzash technique
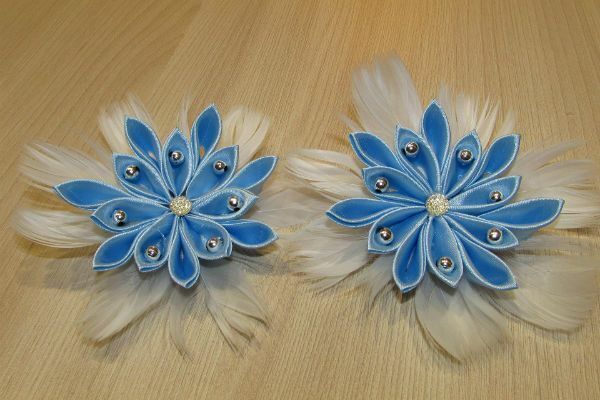
To decorate a kanto-bow in Kanzash technique, prepare:
- satin ribbon 5 cm wide;
- candle or lighter;
- scissors;
- tweezers;
- superglue;
- rhinestones and beads;
- piece of felt;
- hair clip;
- feathers.
To begin with, cut from the tape 14 squares with a side of 5 centimeters. This number of petals is enough to form a single flower.
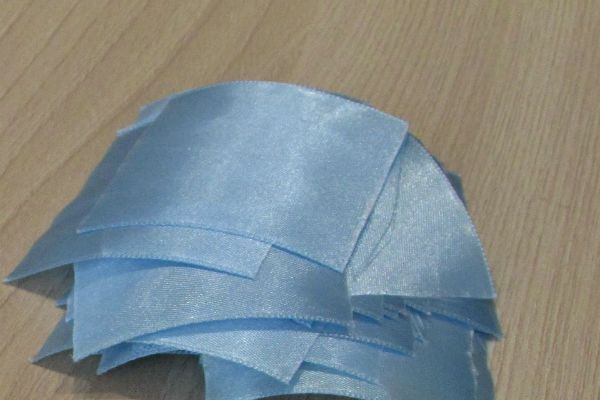
Each square bend diagonally.
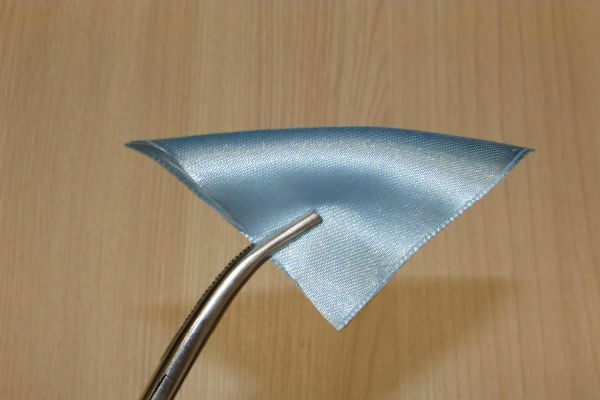
The resulting triangle again fold in half.
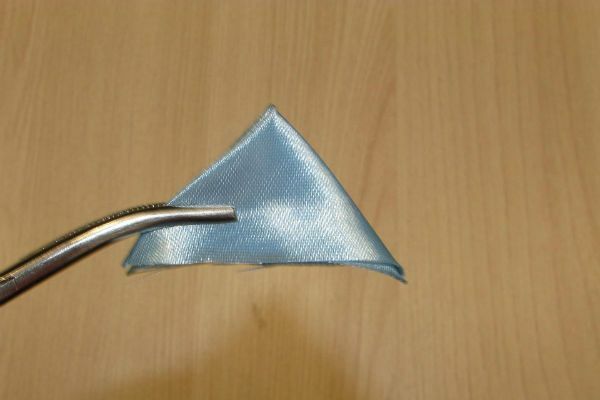
And once again in half.
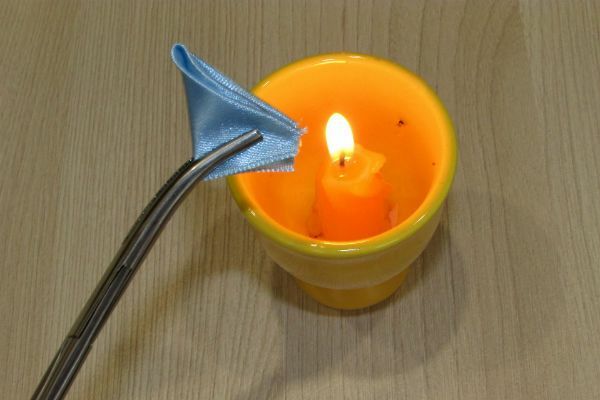
Make sure that the folds on each petal are aligned in the same direction. Uneven corner of the product should be cut slightly, and then sing over the flame of the candle and squeeze with tweezers, so that all layers of the tape are connected.
Cut the rear part of the resulting petal at an angle of 25 degrees, as shown in the photo. And also singe.

You should get this petal:
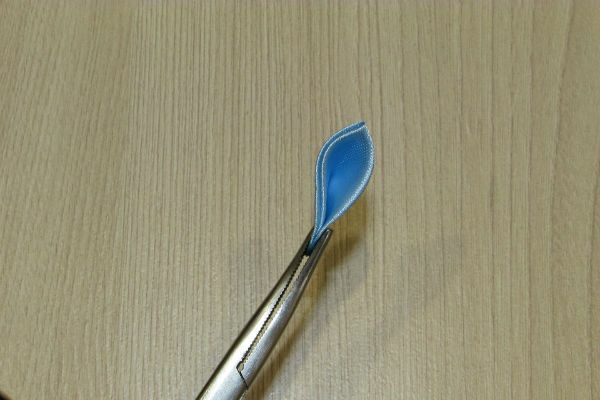
During operation, be sure to scorch all sections of the tape so that it does not pour. Otherwise, the product will quickly lose its appearance.
To seven petals, glue the beads as they are on the photo. 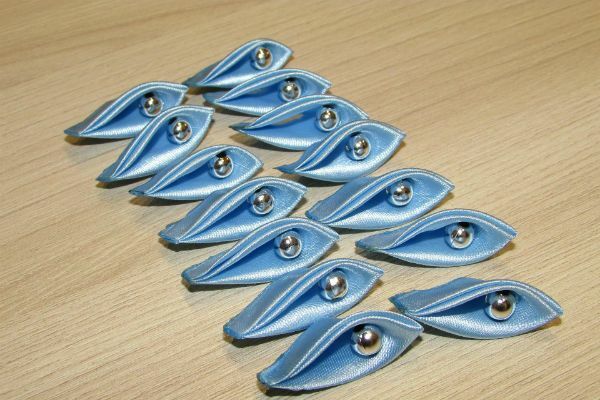 These petals will be located in the first row of the flower.
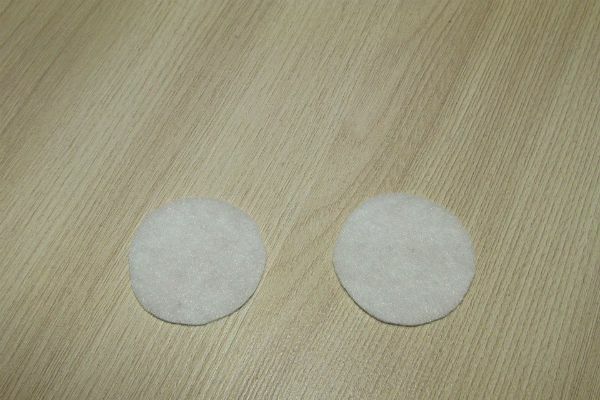
Cut out a circle with a diameter of 4 centimeters from a piece of felt. On this basis, a flower will be collected.
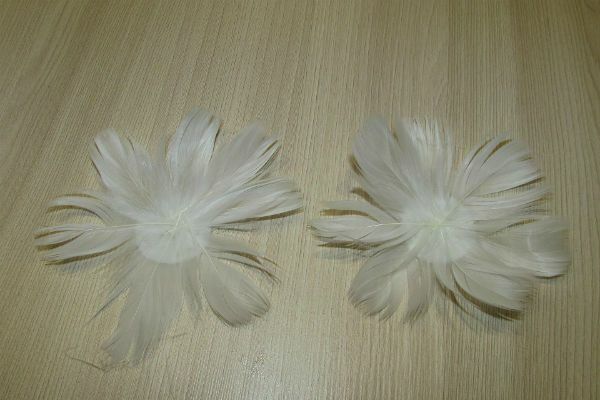
Now in a circle we apply feather-based feathers and fix them with glue. Pre-feathers need to be sorted by size and shape, if necessary cut or flattened.
Over the feathers in a circle, glue seven petals with beads. For greater reliability, first the petals can be strung on the thread and pulled together in the shape of a flower, and the top is already glued on.
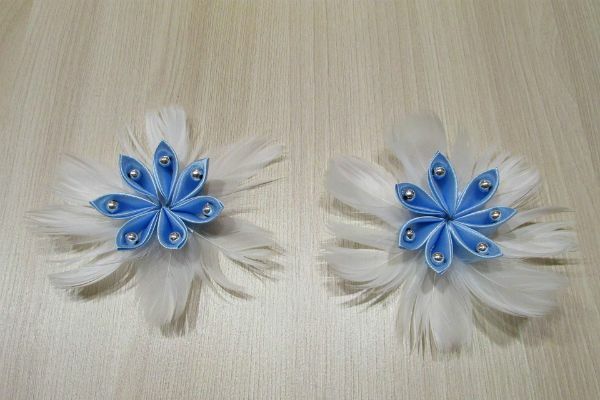
Mount the second row of petals in the spaces between the first row petals.
Decorate the center of the flower with rhinestones, and glue the clip to the back of the felt.
to contents ^Coated with acrylic
For such pins, it is necessary:
- set of metal pins;
- brushes are thin;
- acrylic paints;
- cutting board;
- varnish artistic.
First fix the clip on the cardboard. So it will be more convenient to decorate them.
Extrude the required amount of acrylic paints on the palette.
Apply the first coat, allow it to dry and then move the hairpins a little onto the clean cardboard.
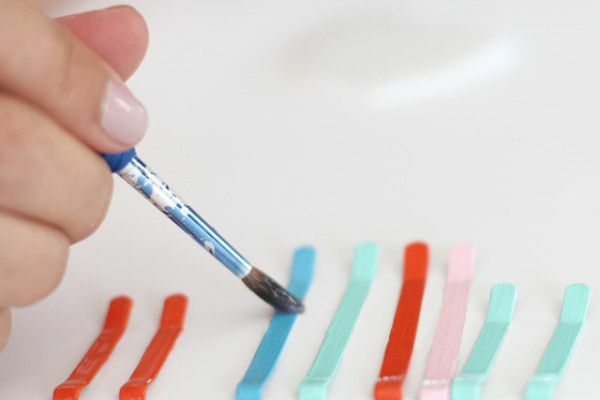
Make the second layer more saturated. Allow to dry.
The final layer will be a clear varnish coating.