Acrylic powder is a fine flowing polymer powder that, when in contact with a liquid monomer( liquid), becomes very hard very quickly. Previously, the material was widely used in the field of dentistry. Now no master of manicure can do without this powder. Acrylic powder is used to strengthen, build and design nails. Knowing what is necessary for these procedures and the order of their implementation, you can create your own nail masterpieces yourself.
- Strengthening
- Building
- In nail design
- Modeling
- Velvet pattern
Strengthening
Masters of the nail service who are engaged in coating the nail plate with gel varnish often use acrylic powder for strengthening. With the strengthening of the powder under the gel-lacquer, the nails become more dense, which allows longer preservation of both the integrity of the nail and the decorative coating. Strengthening can be done without gel coating.
Materials for nail strengthening:
- transparent acrylic powder;
- pusher, tips on a stick or cuticle scissors;
- nail file for natural nails;
- degreaser( alcohol or dihydrate);
- brush;
- lint free napkins;
- base base for gel varnish or primer.
How to strengthen nails with acrylic powder:
- Make a manicure with edging or hardware.
- With a soft nail file or a buff, cut the surface of your nail to remove the upper gloss( gloss).
- Shake the dust off the surface of the nail with a dry brush.
- Use a dihydrate and a lint-free cloth to wipe the entire nail.
- Cover the entire nail plate with the base.
- Carefully place a covered base of nails over an open jar of acrylic powder. Using a spatula or a pusher, sprinkle a lot of powder on the nail.
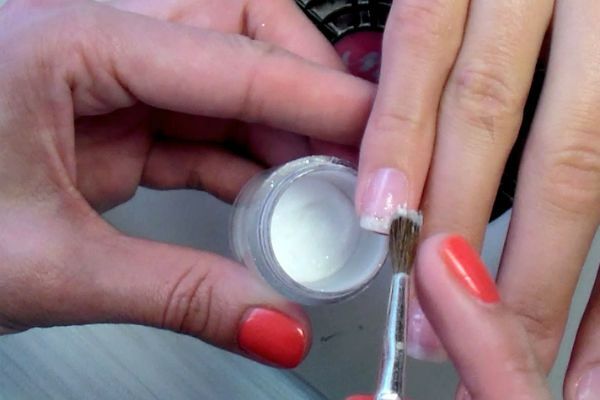
- Remains of powder should be shaken off the nail with a slight tapping on the finger or with a soft wide brush.
- If after strengthening the gel-varnish is used, then the strengthened layer should be dried in UV or LED lamp. Re-apply the acrylic base and dry again. On the second layer of the base, you can start applying the first layer of gel-varnish.
- If there are irregularities on the hard surface of the nail, you need to grind the surface with a soft bass or nail file.
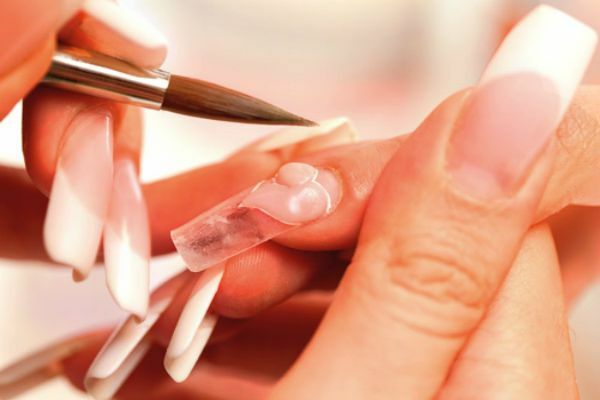
Building
Modeling long artificial nailsusing acrylic is the very first way in the nail industry. You can model nails both independently and with a manicurist.
To build up you will need:
- brush for modeling acrylic nails;
- cardboard molds or plastic tips;
- acrylic powder;
- monomer "liquid";
- primer;
- dihydrate;
- set of nail files with different stiffness.
Extension procedure:
- Make an edging or hardware manicure.
- Saw the surface of the nail with a soft bass or nail file.
- Shake the dust off the nail plate and coat it with a thin layer of primer.
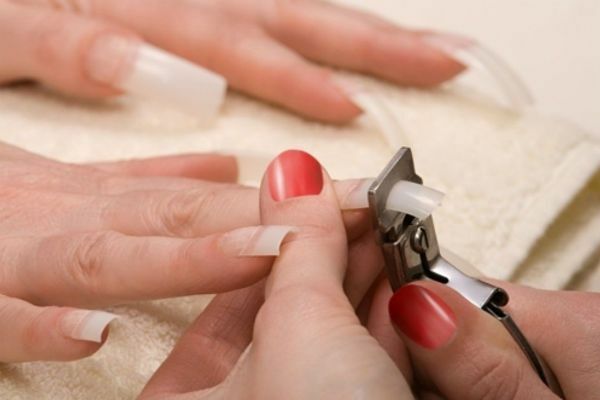
- If a cardboard form is used to model an artificial nail, it is first necessary to fix it under the nail.
- If plastic tipas are used, then with special glue it is necessary to glue it to the nail and cut off excess.
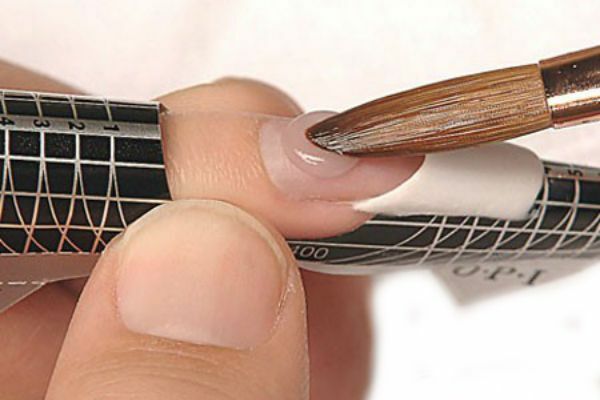
- The nail should be started from the middle of the nail plate. A brush for building it is necessary to moisten in liquid and to form a ball from acrylic, having dipped in it a wet brush. The ball needs to be put on the middle of the nail and begin to distribute the acrylic mixture evenly over the shape or tip to the free edge of the nail to the desired length.
- It's important to remember that you need to act very quickly, because the material dries quickly and if you do not hurry, everything will have to be re-done.
- After forming the length and shape of the nail, you need to carefully bring a less thick layer of acrylic to the cuticle, filling all the empty space of the nail.
- You need to wait for the hardening of the material and remove the mold. With the help of buffs and nail files, the finished nail needs to be neat and smooth.
- If the design was immediately carried out with colored acrylic powder, then no further work with the marigolds is required, except to cover with a colorless varnish.
- If there is no design and the nail is transparent, you need to paint it and perform the necessary decoration( drawings, rhinestones, modeling).
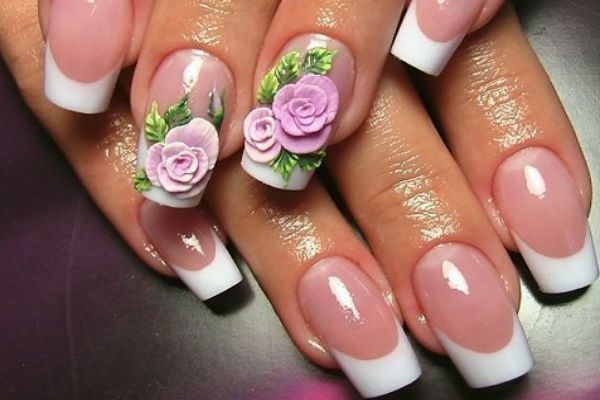
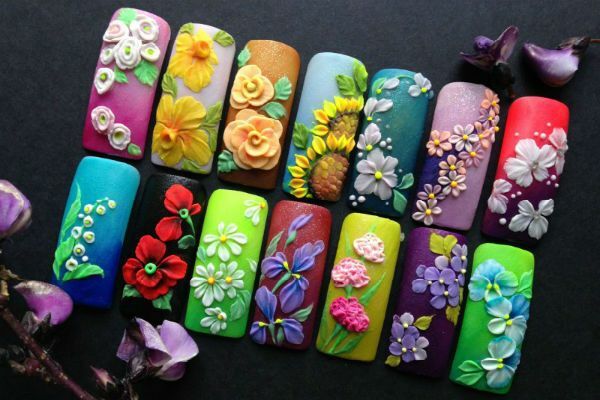
In the nail design
In the current nail industry, the acrylic powder of all colors is also used in various designs of manicure.
to contents ^Molding
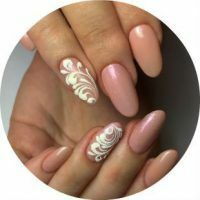
Patterns made with acrylic molding, look like three-dimensional 3D pictures on nails.
To create a pattern, you will need:
- acrylic powder;
- liquid;
- manicure orange sticks;
- modeling brush.
Drawing can be performed immediately with a colored powder or paint with a varnish after the acrylic dries.
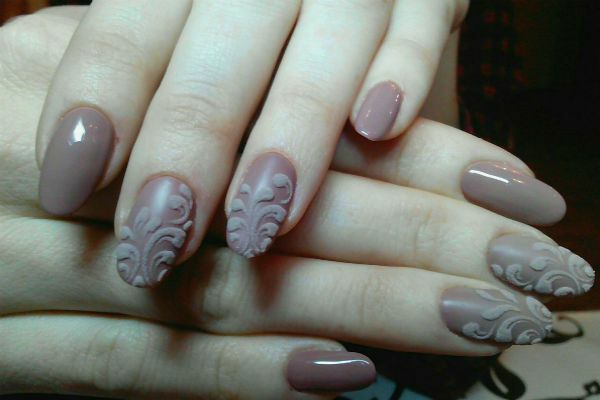
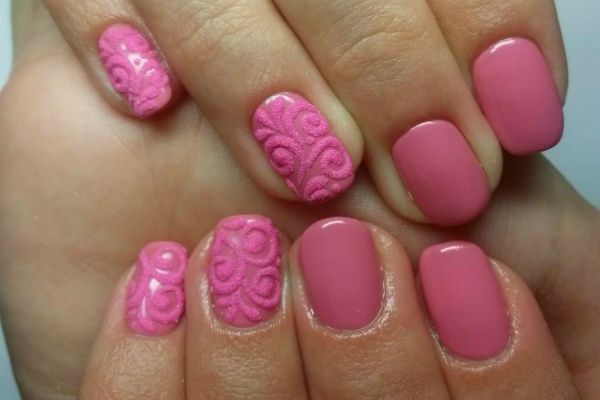
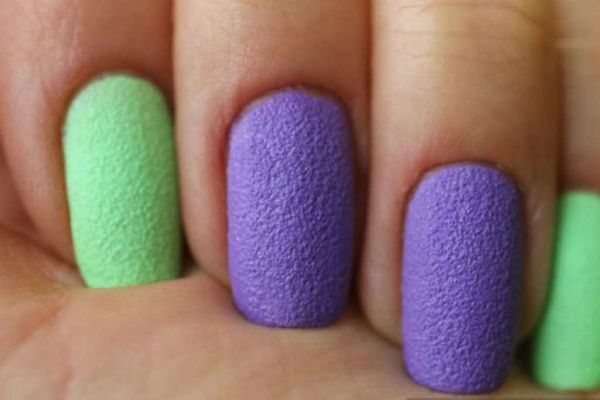
Velvet pattern
Velvety marigolds or velvet patterns came to the nail industry relatively recently. Most often, these designs are performed on a gel-lacquer coating.
To create a velvet pattern you need the following material:
- transparent or colored acrylic powder;
- base base for gel varnish;
- not hard nail files and buffs;
- dihydrate;
- lint free napkins;
- UV or LED drying lamp;
- brushes for drawing on nails;
- gel colors;
- top top coating for gel-varnish;
- gel-varnish.
How to create a velvet pattern:
- Make a nail polish or hardware.
- Saw the base of the nail plate with a soft bass or nail file to cut off the upper gloss.
- Cover the nails with a base and dry them.
- Cover the nails with all the necessary layers of gel-varnish, drying each layer.
- Cover the nails on top of the top layer, dry them and remove the sticky layer from the marigold with a lint-free cloth and dihydrate.
- If you need to make all the nails in velvet, then you need to cover it with base, top or desired gel-varnish color and cover it with acrylic powder( transparent or colored).If the pattern is executed, then it should be painted on a low-fat layer of gel-varnish and sprinkled with powder. The drawing can also be executed with a base, top, paint, varnish, everything depends on the chosen or invented design.
- Layer with powder it is desirable to dry in a lamp 2 times.
- It is not necessary to cover velvet with top, because in the final result the volume and roughness of the pattern disappear.
- Remove the leftover powder from the nail plate with a stiff brush.