
Jewelery for hair can dramatically transform the constructed image, revive it, bring a twist. Varieties of similar accessories, as well as options for using different materials for them, are many, all and not count, but more often in the course are just barrettes, rims, elastic bands, wreaths and ribbons( rims for the Greek hairstyle).They are dedicated to this master class.
- Colored wreath of flowers
- Hairpin made of polymer clay
- Bezel in Dolce Gabbana style
- Braid on the forehead of leather
- Crochet hairpiece
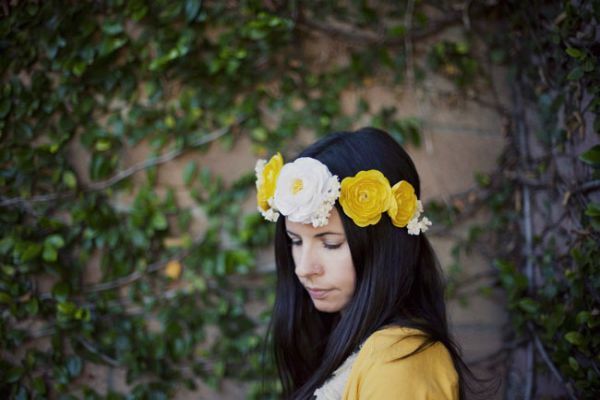
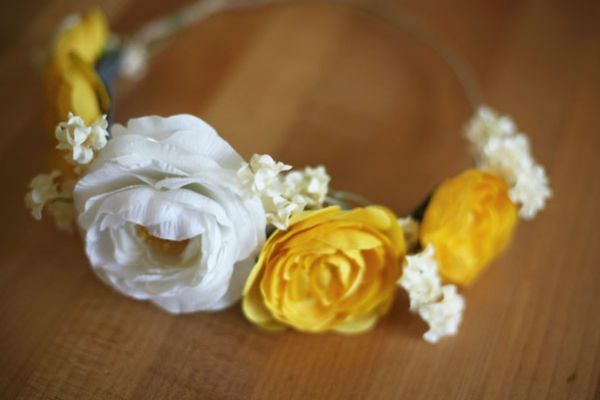
Volumetric wreath of flowers
Materials needed:
- artificial flowers of the desired color and type;
- wire is floristic thin green;
- wire is floristic thick brown;
- scissors;
- adhesive;
- felt.
The order of creation of a wreath.
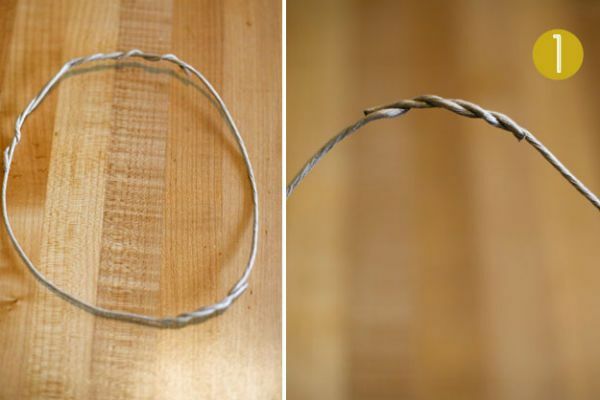
Take the brown wire and make of it a circle according to the size of the head. That is, so that the wreath sat on his head not tight, but did not fall off.
Arrange the flowers selected in advance in the desired order to externally evaluate the future wreath. In this case, it will be possible to change something or add to the general picture of the finished jewelry.
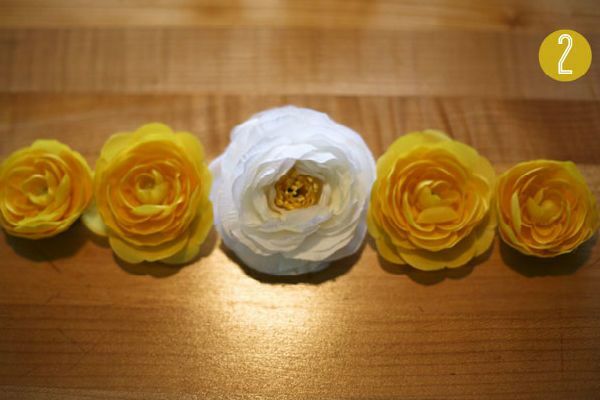
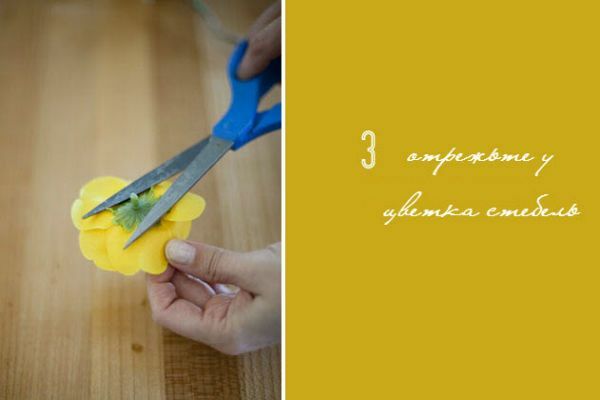
If you have stems on the chosen colors, you must cut them.
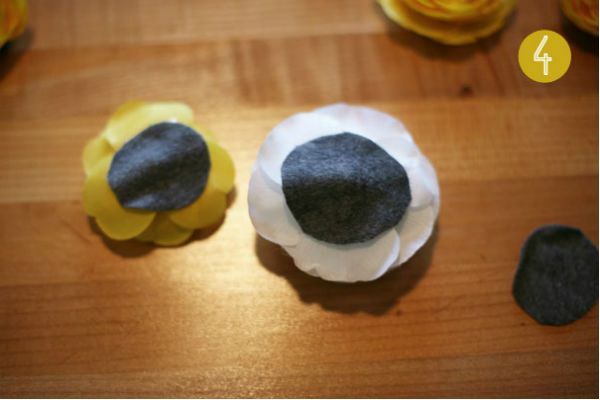
It is necessary to cut out two circles for each flower from felt. The circles must be smaller than the flower and not protrude from under the petals. The first circle of each flower glue directly to the flower itself, and the second circle, with the help of glue, attach the flower to the wreath.
Follow the prompts on the suggested pictures.
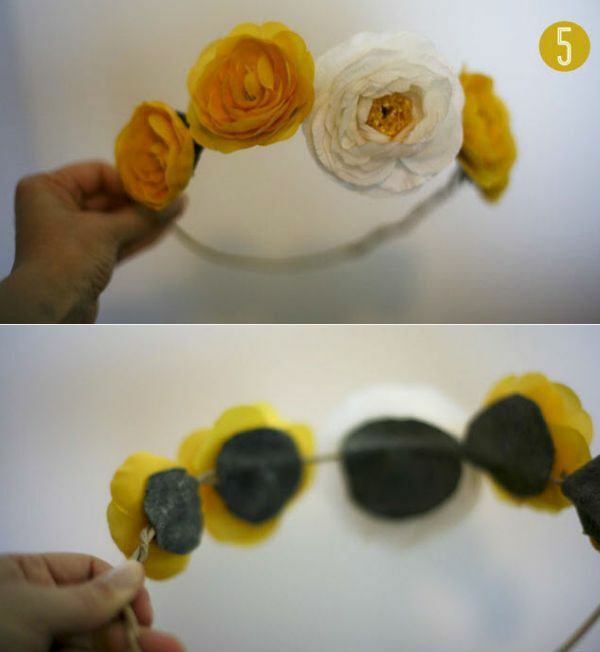
Spaces on the wreath between the main colors can be filled with small flowers or any other ornaments.
Mount them best with a thin green floral wire. You can attach the leaves, beads, rhinestones, etc. to the flowers, it all depends on your own imagination and preferences.
Hairpin of polymer clay
For work you will need:
- standard hairpin mechanism( can be purchased at the needlework store or use the mechanism with an old barrette);
- polymer clay required shades. In this case, you need colors to create a pumpkin: yellow, orange, brown and green;
- conventional paper clips;
- food foil.
First, roll a small uniform roller of yellow clay about 1.5-2 cm in diameter and at least 10 cm in length.
After this, roll out the orange clay so that its width is equal to the length of the yellow roller. The thickness of the formation should be about 0.3-0.5 cm.
Wrap the orange layer around the yellow roller.
After that, roll a thin layer of brown clay.
Wrap a yellow-orange roller in the seam.
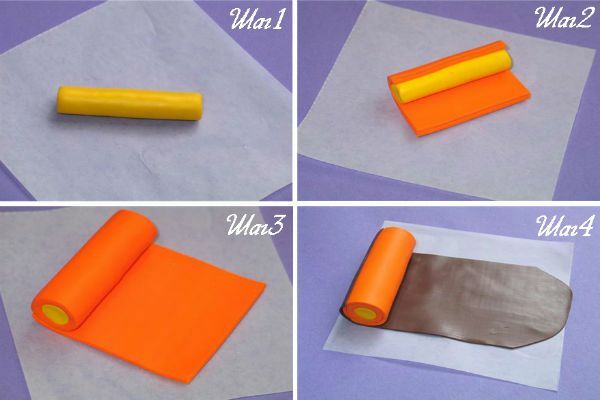
Squeeze it as shown in the photo.
Cut the workpiece in half and put it next to it.
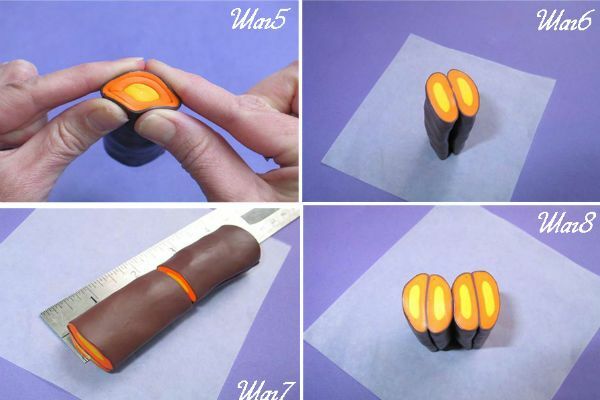
Connect the two cuts together.
Cut a piece a centimeter wide and insert a paper clip into it.
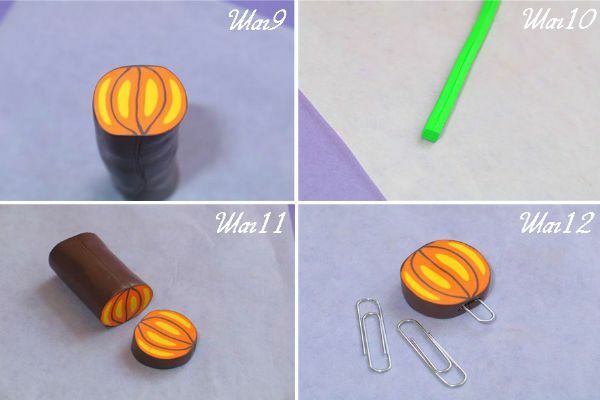
Add the green clay.
On the green clay layer, apply all the billets of pumpkins. Combine everything with the barrette mechanism.

The workpiece must be sent to the oven. Firing should last at least 30 minutes at a temperature of 100-130 degrees.
The metal part of the hairpin must be wrapped in foil before being sent for firing.
After processing and cooling, the hairpin can be varnished if desired.
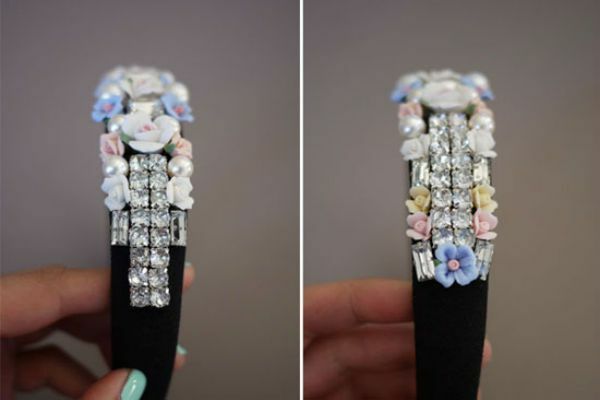
back to contents ^Dolce Gabbana-style rim
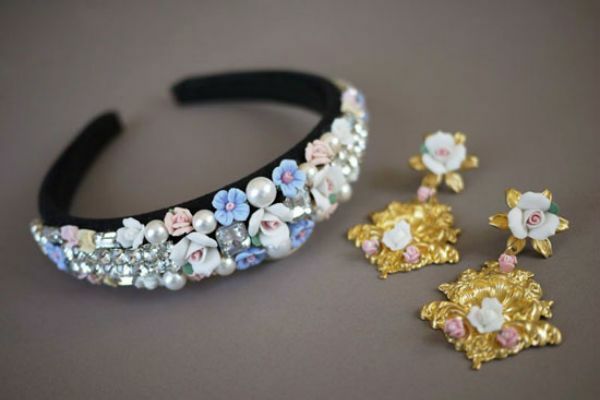
We offer you the description of creating a rim in Dolce Gabbana style.
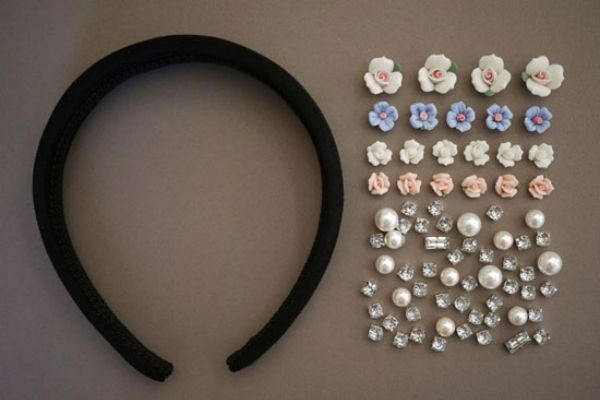
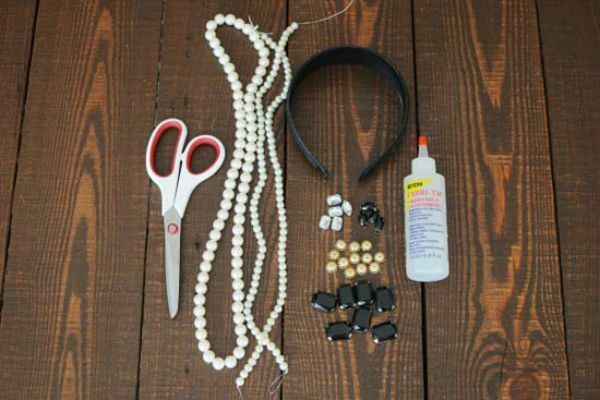
Required Materials:
- classic bezel, best suede( black, golden or white);
- adhesive;
- decorations( rhinestones, all kinds of ceramic or metallic flowers, pearls, beads, pebbles);
- toothpick or brush for glue;
- plastic for easy use of the adhesive.
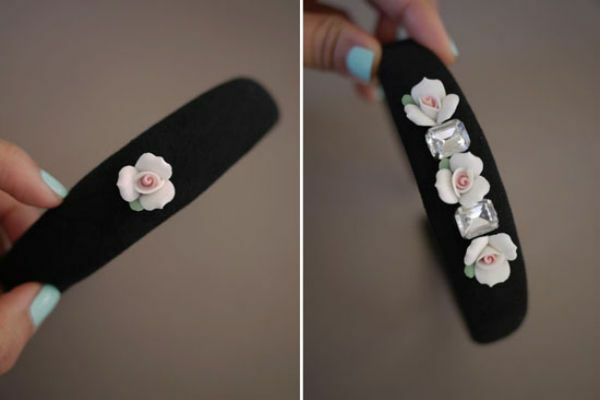
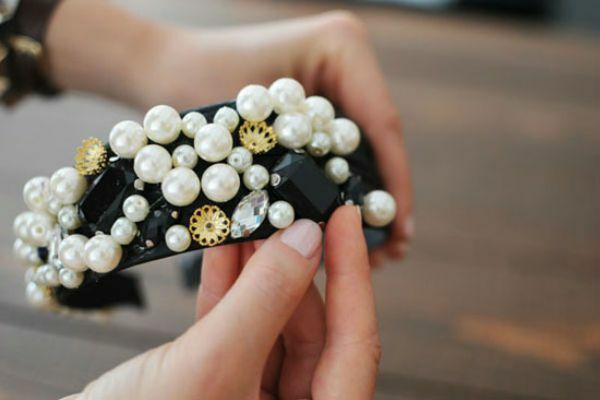
For convenience, it's best to mark the location of future ornaments at once on the rim, so that the product is neat and its decor looks aesthetically pleasing.
In order not to stain the bezel with excess glue, it is worth using a plate or any convenient hand-made item. On it to squeeze out a small amount of glue, and with the help of a toothpick or a brush to put directly on the adorned decoration.
Try to select jewelry that will harmoniously complement each other.
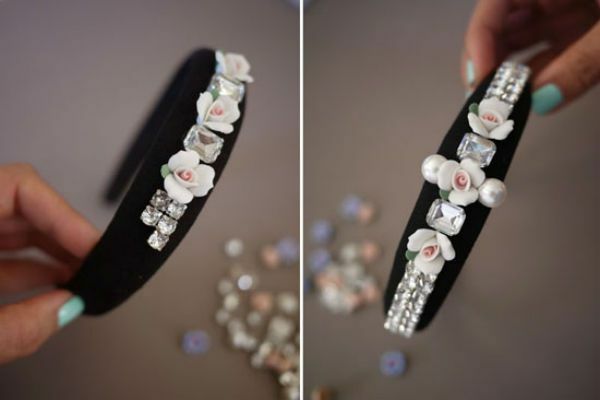
You can use this master class and repeat the identical proposed bezel or design and create your own individually.
To ensure that the bezel does not get tangled in the hair, it's necessary to leave not decorated about 5 centimeters from each end of the bezel.
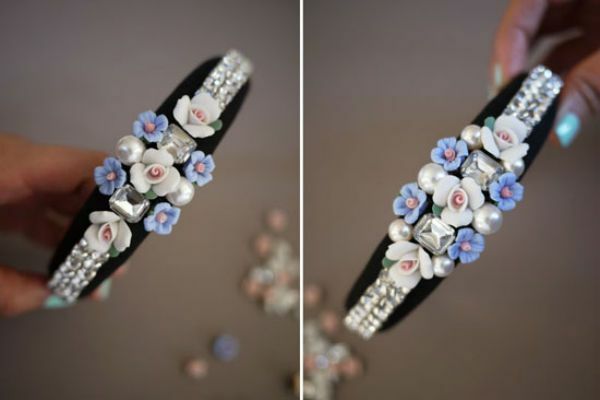
So you get a natural tiara of your own production, combine different decorations in new variants of rims and thereby create masterpieces in the style of the famous Italian brand.
Braid on the forehead of leather

This is a variant of the Greek bandage with clear lines and without much convolutions, it looks very simple but tasteful. This plan can create jewelry for hair from ribbons.
Necessary materials:
- strips of leather or dermatine 3 pieces( 2-size 2in38 centimeters and 1-size 1.5 inches by 5 centimeters);
- knitted elastic band for the color of the selected skin;
- scissors;
- adhesive;
- needle and thread( can be sewn on the sewing machine).
We take one long strip of leather and begin to make a bow. Determine the middle of the strip and lay it on two sides in two steps. Locked loops with each other are fixed with glue. We should have a bow over the bow.
Take a smaller strip and wrap it around the bow, forming its central pad. Be sure to grease with glue.
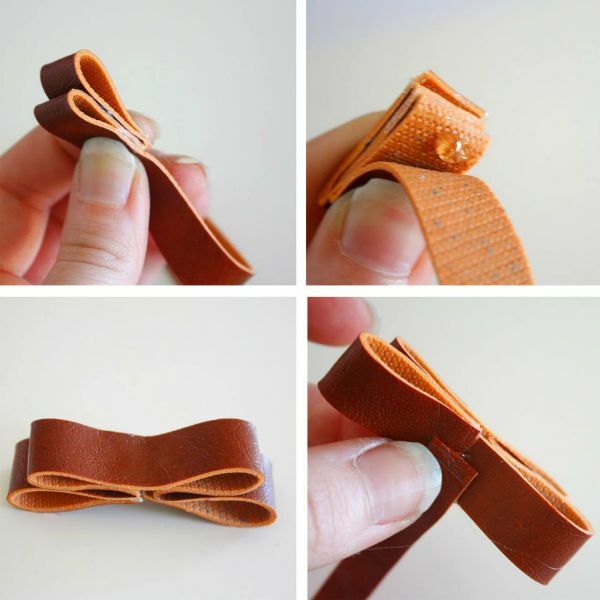
The finished bow is fastened with glue to the second long leather strip. In this example, the bow is on the side, you can arrange it as you like.
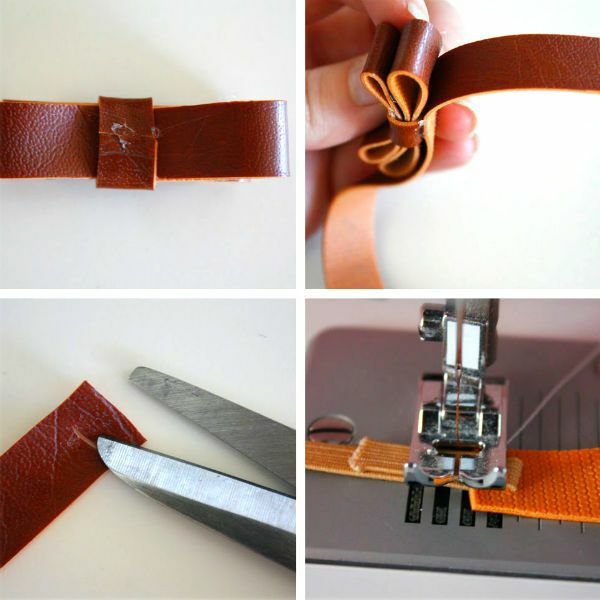
On the ends of the leather bezel, use a pair of scissors to make slits for inserting the rubber bands.
Cut the elastic band based on the size of the head circumference. From the very girth, take off the length of the leather strip and add about 2 centimeters to the bend and sewing.
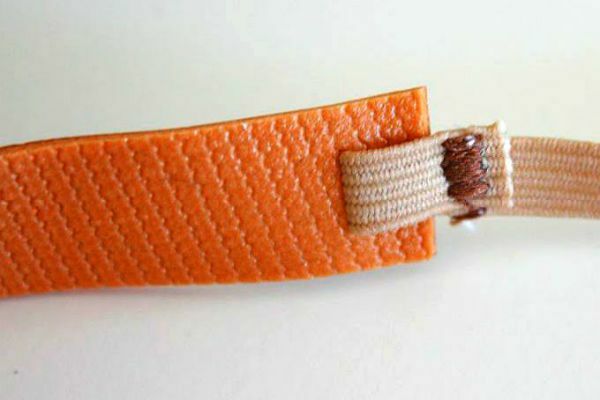
Insert the elastic and make a bend in the slots on the leather strip. Sew the elastic band by hand or stitch it on the sewing machine. Extra edges of elastic bands on the bends can be cut with scissors.
to the table of contents ^Hair band crochet
Necessary materials:
- simple plain hair band;
- hook for knitting( to choose the thickness of the thread);
- thread is knitted in the desired color and thickness;
- scissors.
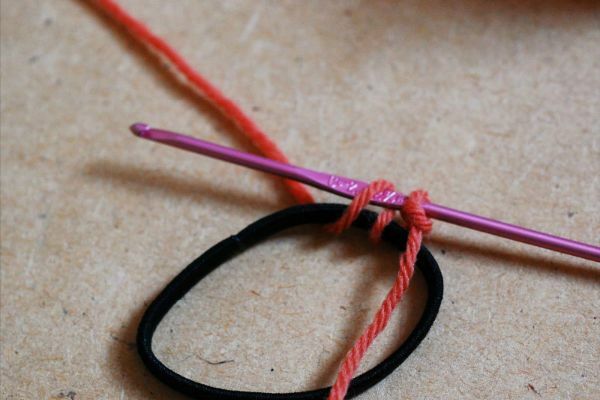
We dial the loop on the hook.
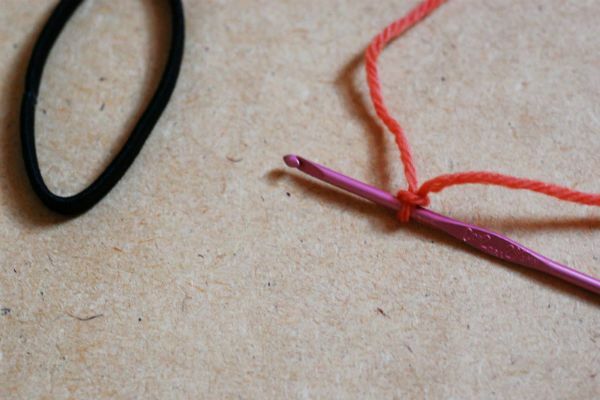
We fix the string on an elastic band.
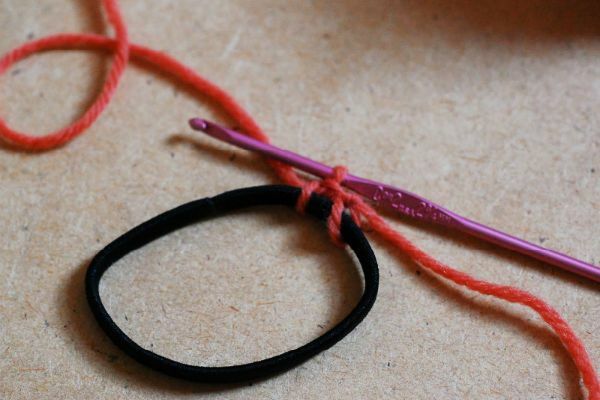
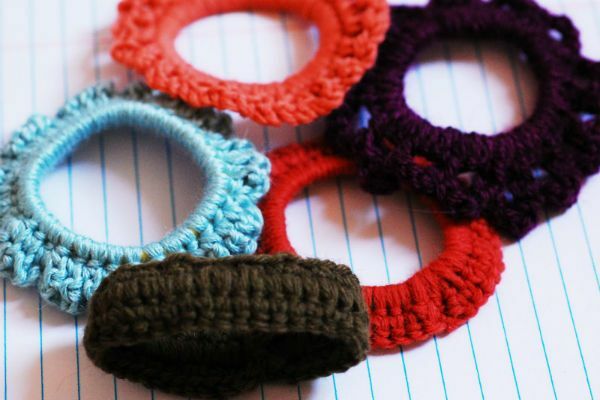
We tie a rubber band around a circle with simple stitches with a crochet.
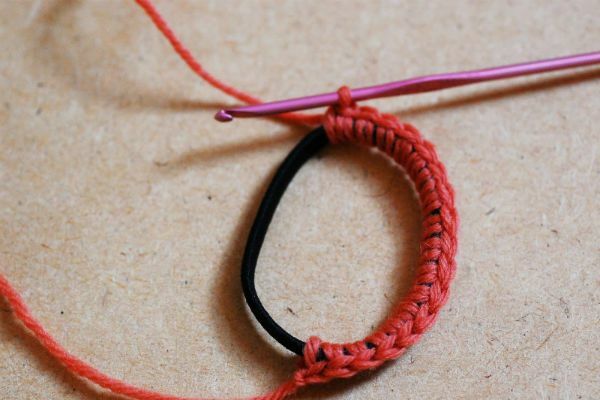
The last loop is fastened with a connecting post.
The second row we tie a rubber band around the circle making the edge with the festoons( we collect 3 air loops and we tie the connecting column in the loop of the previous row passing one loop).
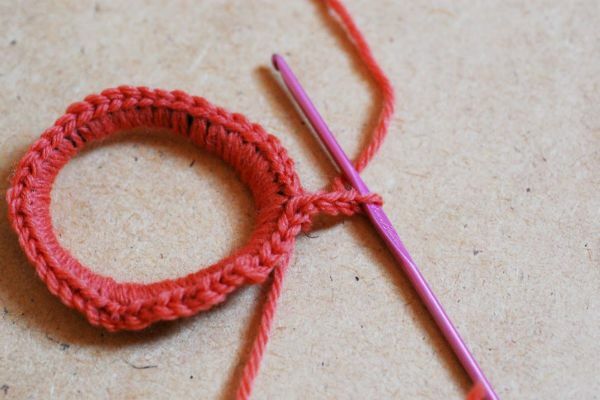
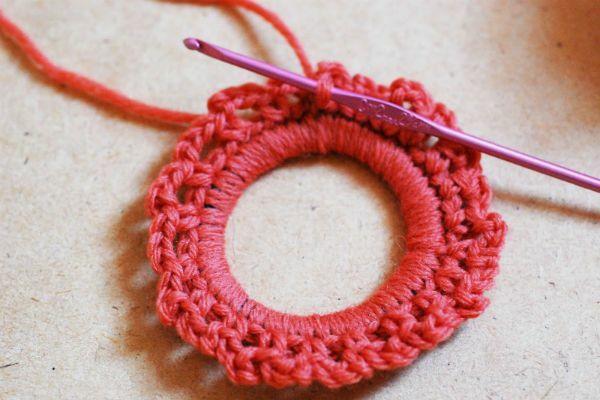
At the end, fix the thread, cut and hide the end.