Bead embroidery is an art that allows you to create stunning voluminous paintings, decorations and other handicrafts. Learn to embroider with beads can even without having special skills in sewing and needlework. The process of embroidery is very simple, and the result is flawlessly delicious. With properly selected material, you can easily create a bright bead-piercing picture or beaded icon. You can create decor elements and decorations yourself.
- Embroidery technique with beads
- Embroidery of bracelet
- Making brooch
- Free schemes
Technique of embroidery by beads
Embroidery of paintings and ornaments can provide for either full beadwork or partial embroidery. There are special sets for embroidery with beads, which can be purchased at specialized handicraft shops or through online stores. Having everything you need for embroidery( beads, fabric, thin needle, thin thread or fishing line), it is necessary to choose a method of sewing this or that technique of embroidery with beads.
Basics of the technique are as follows:
- Securing single beads( sew a bead to the fabric with a simple stitch).
- Fastening beads with smaller beads( sew a small bead with a simple stitch, creating a larger volume effect).
- Seam "needle forward" - the beads are sewn with stitches, removing the needle all the time to the front side of the fabric, the thread fixing stitches are placed from the wrong side.
- String seam - beads are sewn by surrounding each bead with a thread, fix the fasteners from the wrong side, pulling the needle into the next bead. To give the embroidered section the effect of roughness, it is necessary to return the needle with the thread through the entire fragment of the embroidered line, passing through all the beads, and fix it from the wrong side.
- Seam fastener - the beads in the right amount of thread on the thread, and after, evenly sewn to the fabric, dividing each bead.
- Stitch "Monastic" - each bead is fastened with a simple stitch, only diagonally. The method visually resembles a glass bead or embroidery by a cross. Most often such a seam decorate beaded icons.
- Sewing seam - by performing a simple suture seam, you need to attach a bead to each upper loop.
Embroidery of the bracelet
For work we will need:
- base for embroidery;
- original leather;
- base of metal for bracelet;
- needle;
- thread or line;
- scissors;
- bicones;
- beads for pearls;
- beads of jasper oval shape two pieces;
- Czech beads of dark gold color;
- Czech milk beads;
- Czech beads are golden, iridescent;
- Czech beads are brown;
- crystal gold plated.
The color range of materials can be at your discretion. It is not necessary to follow the one given above.
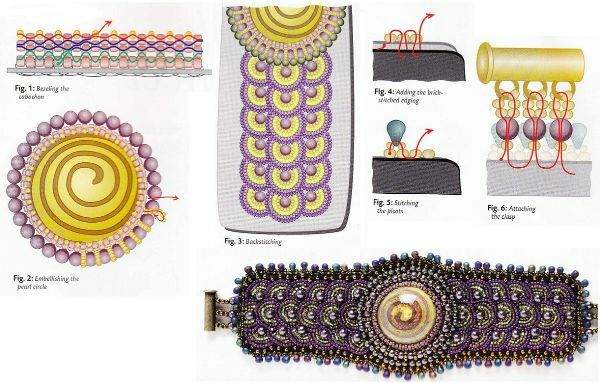
In the beginning of work it is necessary to fasten in the center of the future bracelet a crystal of the Rivoli, after that it is necessary to sew it first with beads of milk color, bicones andagain with milk beads.
Next, select the resulting embroidered zone beads of dark golden color. We plan the location of our three pearls and sew them. We are guided by the photo material attached to the article.
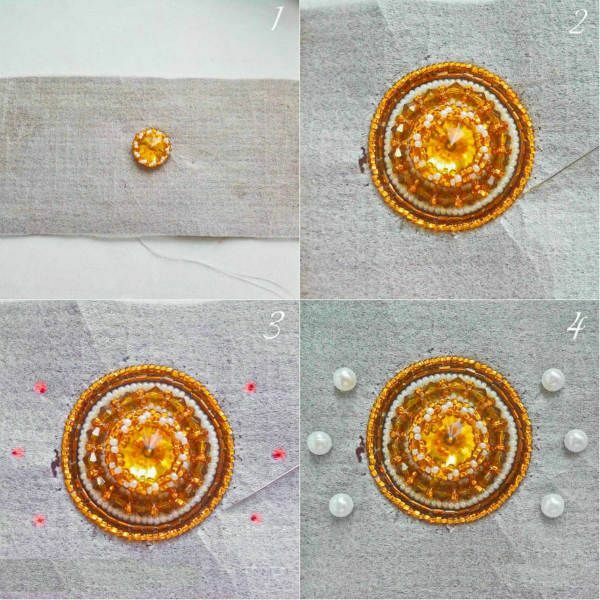
We sew around the sewn pearls with a dark Czech cabin and beads. Sew on two more pearls on each side, as indicated in the picture and cover them first with a milky color, after Czech felling and at the end with gold color.
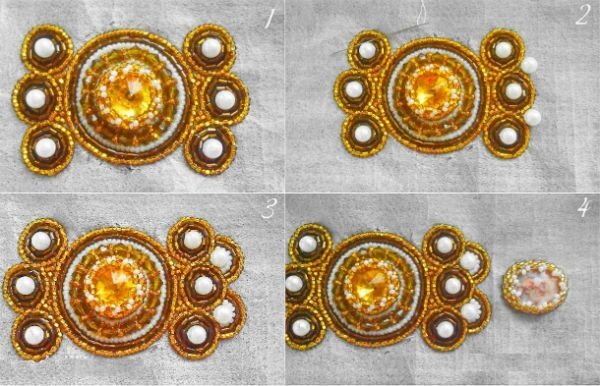
At a distance of about one centimeter on each side of the already created central fragment, it is necessary to sew on the bead of jasper and sewn with beads in this order: milk color, brown felling, gold color.
Finally, at the ends of the bracelet, one oval bead is sewn, and the skin is covered in two rows with a dark brown chopping board, and next is a gold bead.
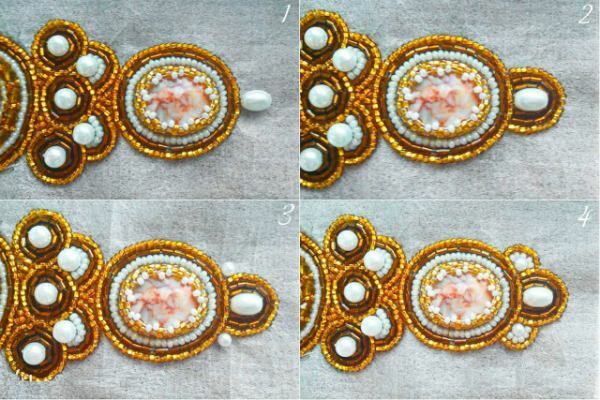
Next, we complement the two sides of the central oval bead on a small pearl and select them with beads. That is, from the central fragment of the crystal of the Rivoli it is necessary to decorate the two sides of the bracelet identically, proportionally to one another, based on the hints on the pictures.
At the end of the process, you need to glue the embroidery to a special metal base for the bracelet. We finish the work by gluing the natural leather and adjusting the edges, covering it with beads of rainbow color with an overlapping seam.
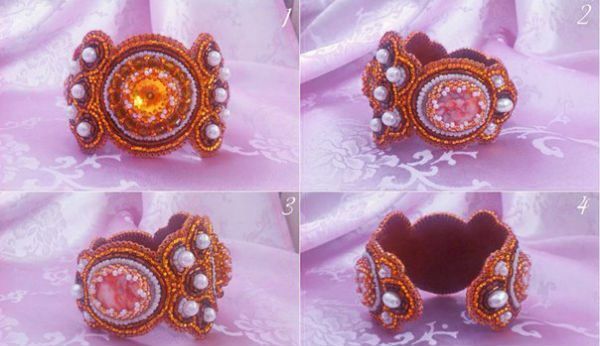
Already ready bracelet must be bent into the desired shape on the arm.
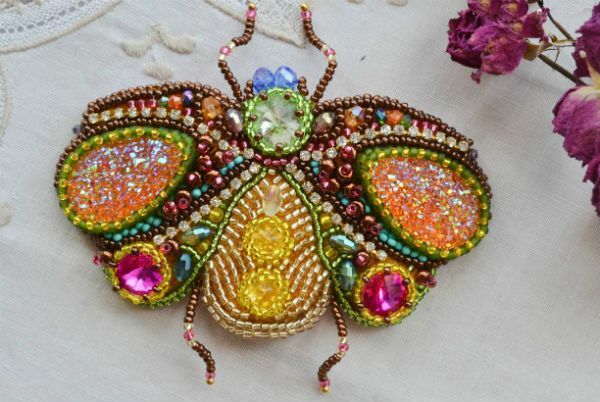
Making brooch
This decoration will be in the form of a bug.
For work we need:
- felt of any color;
- metal frame;
- original leather;
- adhesive;
- rainbow cabochons from resin in the form of drops;
- different glass beads;
- pin pin for brooch;
- beads of different sizes and colors;
- different in size crystals of rivoli;
- transparent thread;
- crystals on the chain;
- long pins with balls at the ends.
First we perform the marking on the felt of our future beetle and we sew cabochons-droplets, maintaining symmetry, as shown in the picture.
We trim cabochons with green matt beads in one row.
We fill the upper part of the wing with beads and beads at our own request or as shown in the picture( brown and raspberry beads, plus beads bicones orange, blue and iridescent).And the bottom part is also filled with beads of brown and crimson flowers.
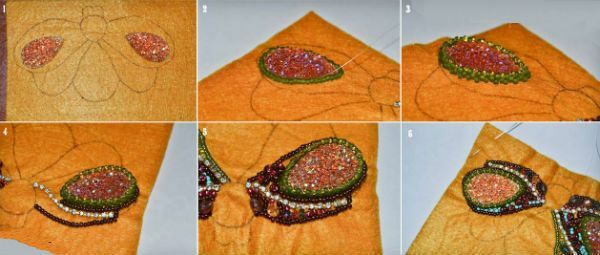
The remaining space on the lower part of the wing must be sewn with turquoise.
On the contour of the second wing you need to embroider a row of green beads, insert the rivoli and trim with one mosaic row of yellow.
Flush the second row of the mosaic, combining and alternating the yellow and brown beads. At the top of this wing, attach the rhinestones to the chains.
The remaining space should also be filled with beads( green, yellow, matt, brown and turquoise) and insert the rainbow rhyols based on the tips on the pictures.
Inside the beetle's body, you need to insert an oval bead and rivoli, and trim with yellow beads.
Blank space to sew in half-circles with golden beads, slightly pulling together the body, forming its bulk.
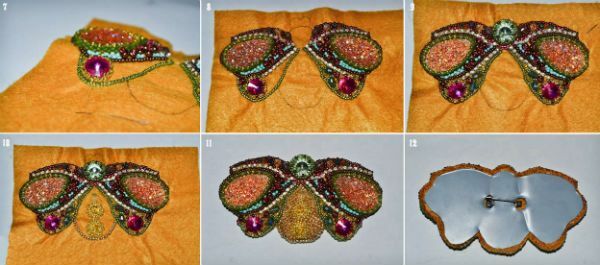
You need to cut off the extra felt and glue the finished canvas with the beetle on the metal frame.
After it is necessary to make holes in the right place and fasten pin pin to the brooch.
Stick on the wrong side for neatness of the look and hold the shape of the brooch with natural leather.
With the help of a pin with a ball on the end, form and attach the legs and antennae to the beetle.
Correct the edges, braiding them around the bead with a suture seam.
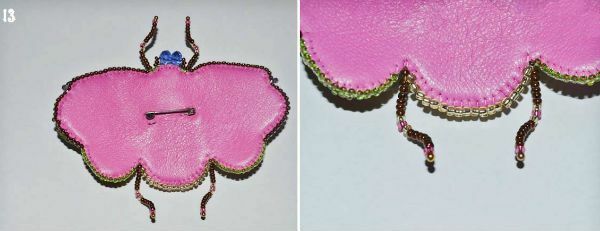
Give the forms of an insect the desired bends.
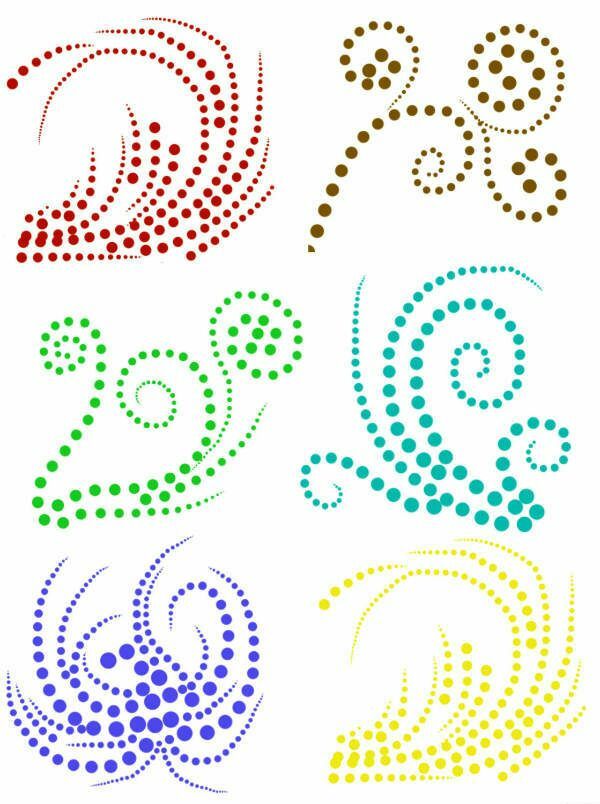
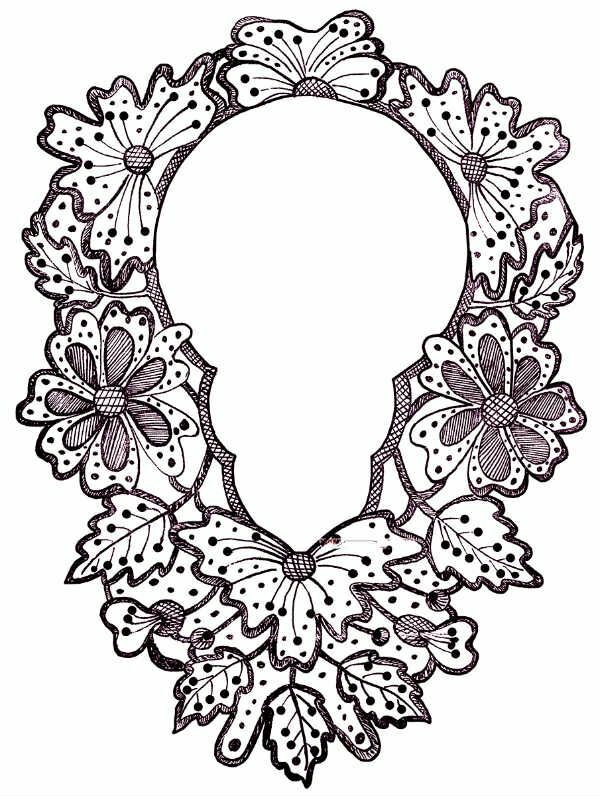
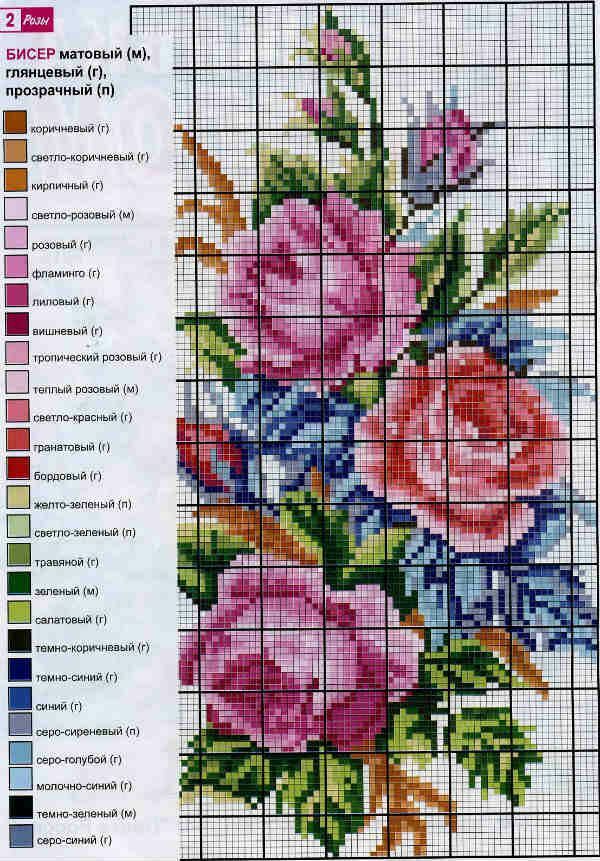
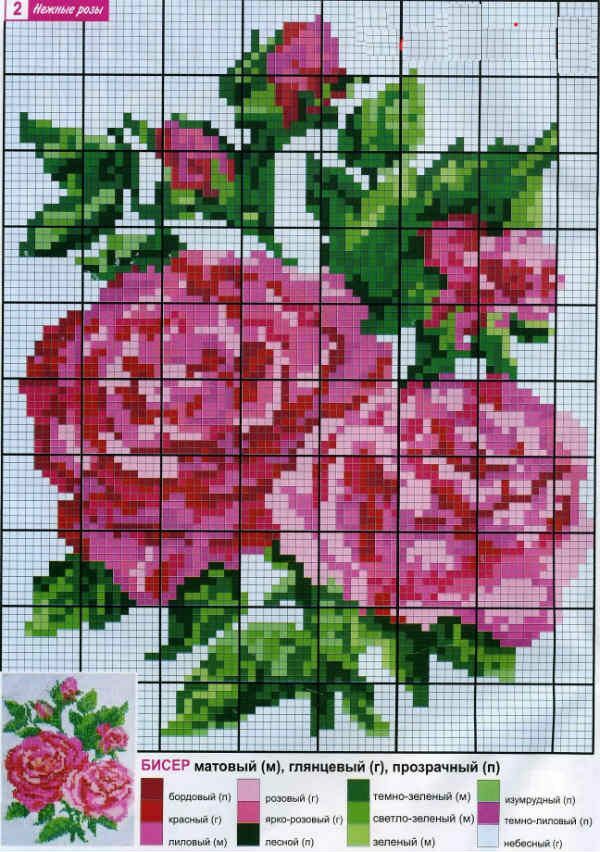
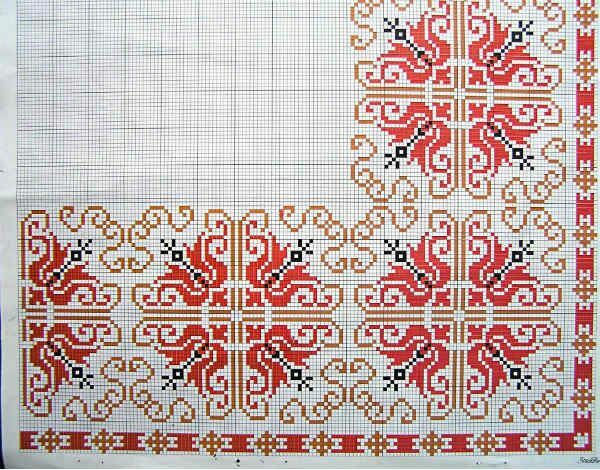
to the table of contents ^Free schemes
Bead embroidery is universal, with its help it is possible to create a variety of various decorative objects and ornaments. Come up with something new, experiment. Use for this purpose the above-mentioned universal schemes, which are suitable both for creating ornaments, and for embroidery on clothes or for creating paintings.