

As a result of such skill as papermoplastics, incredibly interesting and original products can be obtained, which can be applied in many areas, for example, as a decor of a room or elements of ornaments. Undoubtedly, such handicrafts look chic, but, it is necessary to say in advance, it is very difficult to work in this technique and even simple products will make you tinker.
- What is the use of paper-plastic
- Original rose-card
- Making a plastic rose
This master class is devoted to the topic of creating paper roses, the level of complexity of which is considered acceptable for beginners.
What is the use of paper-based plastic surgery
Paper agglomeration is the art of working with paper. The principle of this technique is the ability to give a flat material( paper) a three-dimensional shape, using the simplest techniques, such as cutting, bending, twisting, weaving, gluing in a certain way, creating the necessary stiffeners.
For successful work in this handicraft technique, one must understand the peculiarities of different types of paper and cardboard, such as thickness, structure, surface roughness, density, and, of course, coloring. The ability to take into account all these features will make it possible to create expressive hand-made articles, voluminous compositions that are similar in appearance to bas-reliefs, semi-vivid panels, flowers, figures of people, animals, buildings.
There are a very large number of types of paper-plastic. Here are the most basic of them:
- origami;
- application or facing;
- quilling;
- work with corrugated paper;
- paper art.
Original rose-card
To create a voluminous postcard-rose you will need:
- pink and lilac pastel paper with density from 130 to 160 gr / m2;
- image template;
- ruler;
- scissors, stationery knife or scalpel;
- stapler;
- non-writing pen or empty ampoule;
- double-sided adhesive tape;
- glue PVA.
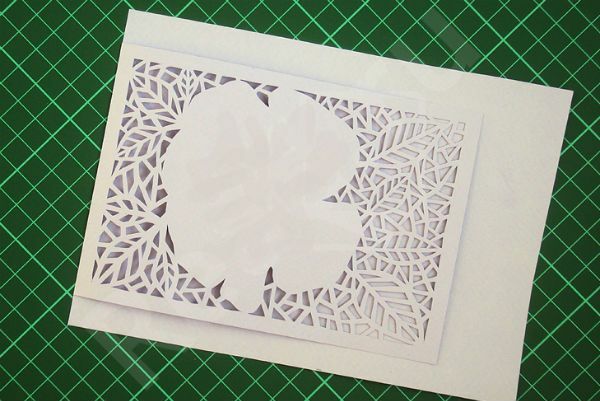
The size of the folded postcard on the template, which we use in this lesson, will be 10.5 by 15 cm ready-made.
First, print the template on a regular sheet of A4 paper.
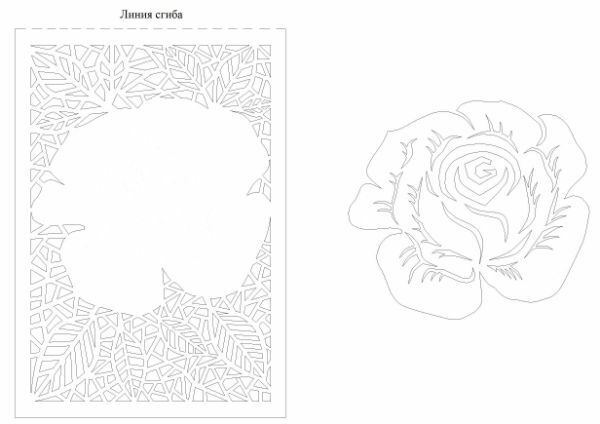
Leaving a field of 1 cm wide on each side, cut out a rectangular pattern.
Attach it to the lilac paper with a stapler( as in the photo), so that the length of the paper is 2 times greater than the height.
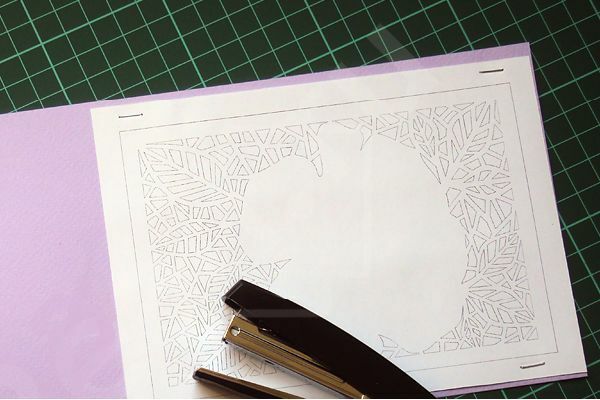
In the future, it will allow without problems to bend the paper in half and get a postcard.
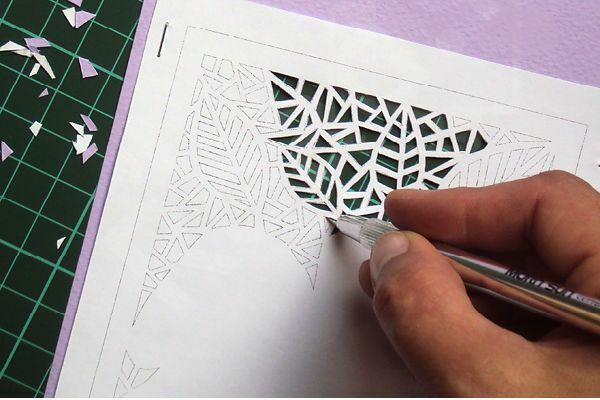
Now you can proceed to the most painstaking stage. Using a clerical knife, carefully cut out all the decorative elements on the template. Work slowly, but carefully, so as not to accidentally damage the pattern.

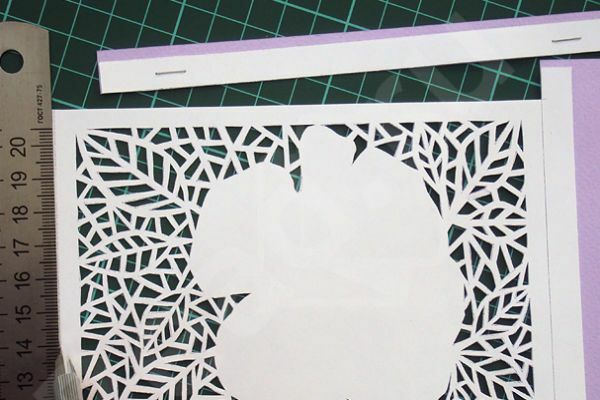
After that, aligning the edges of the postcard along the ruler, cut them with a sharp and clear movement.
Take the non-writing pen and ruler, with their help we will scribble the postcard, in other words, draw the fold line.
Place the ruler in the center of the workpiece, and strongly pressing the handle, draw an "invisible" line.

Bend the product along the fold line and cut the remaining edges.
If desired, you can tint the workpiece with an ink pad, as we did, but if you do not have this feature, you can skip this step.
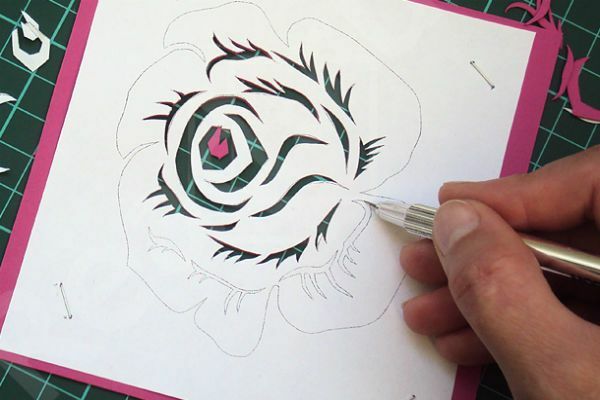
From pink paper, use a pair of scissors and a clerical knife to cut out a rose-shaped piece, pre-attaching a template to it, as well as a rectangular insert that must exactly match the size of the postcard.
The insert should be punched and pasted to the last sheet of the open workpiece.
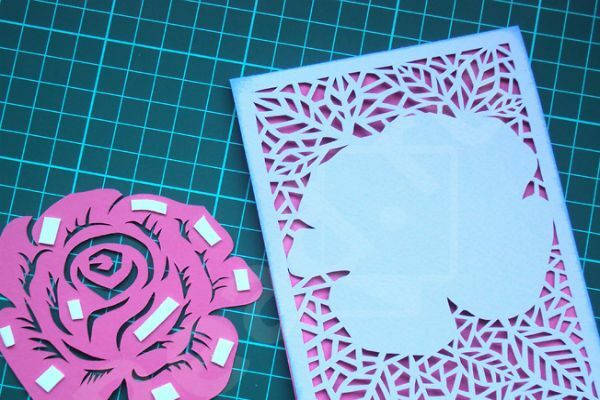
It remains to fix the rose on the front of the postcard with a double-sided tape.
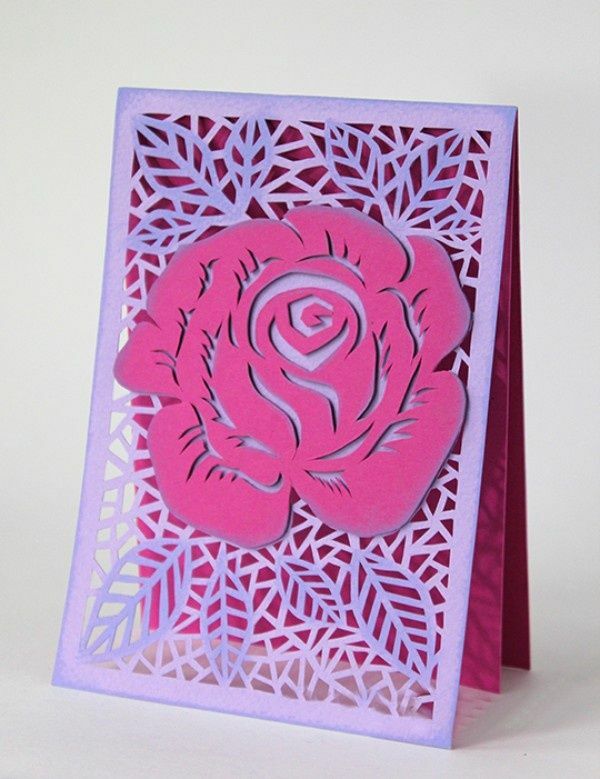
That's it! The original card is ready. It remains only to fill it with warm words and heartfelt wishes.
to table of contents ^Make a plastic rose
Conditionally, the creation of such an article can be divided into two stages. First, it is necessary to achieve the appearance of relief lines on the paper surface, then, in fact, fold it into a rose.
You will need a sheet of paper with equal sides - a square.
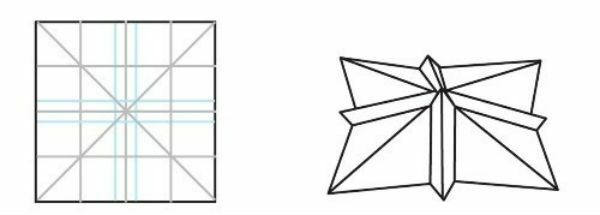
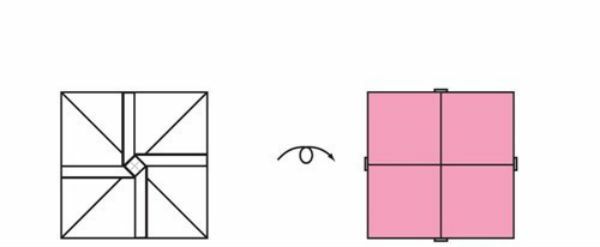
Visually, it should be divided into 16 small squares, as in the photo to the master class. To do this, mark a square with one edge of the sheet( for example, if the length of the sheet is 16 cm, then the side of the small square is 1 cm), fold it four times, unfold and do the same in the vertical direction.
Now you need to bend each corner. After that, turn our workpiece over and fold it four times - the edge to the edge.
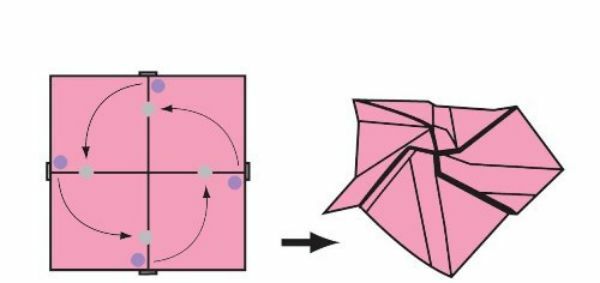
Next, you need to put a square in front of you like a diamond and fold it diagonally, forming 16 rhombuses. As a result of all these manipulations, a pattern of lines resembling a vortex should be obtained. By and large, to fold a rose, you need to fold the workpiece in half, take the center, press the ribs nearest to the center of the lines inward and begin to form the base of the flower, twisting it, as indicated on the photographic example to the master class.
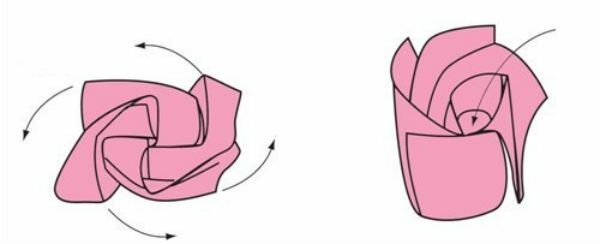
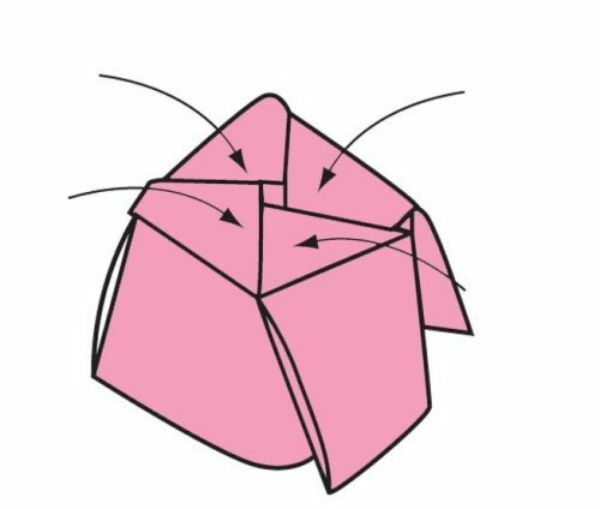

As you pull the base of the rose, its petals should automatically bloom. After that, it remains only to give them the necessary shape, a little tweak and fix the ends of the paper in the base of the rose one by one, in simple terms, inside the product.