
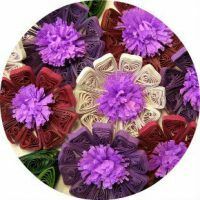
Quilling of flowers is an interesting branch of the art of paperwork, within which we will work in this master class. Such crafts in many ways are suitable for the role of classical elements of quilling, with the help of which various compositions or unusual paper ornaments are made.
- Basics and features of
- technique We make volumetric flowers quilling
Basics and features of
The essence of quilling is generally the composition of the compositions by twisting strips of paper. In the case of flowers, this technique is slightly diluted. In order to make an original flower in the quilling technique, you will need a paper with a density close to cardboard, quick-drying glue, sharp scissors, petal patterns, but you can draw them yourself. Hook or spoke to wind the paper.
The finished product can be used for many decor options, including as an independent decoration, for example, pendants for earrings or a base for a brooch.
Given that in rarefying colors are rare non-composite crafts, our master class is dedicated to the most common cases - multi-element crafts.
to the table of contents ^Making bulk flowers quilling
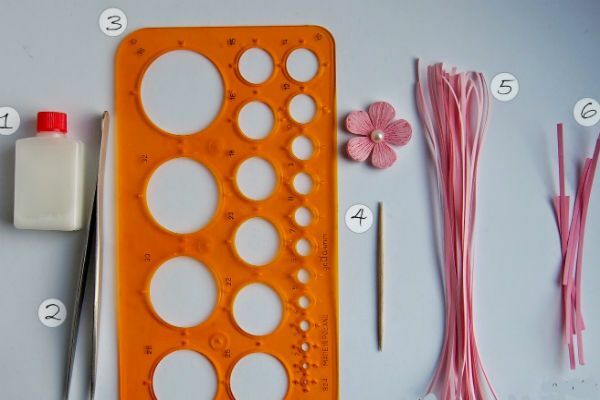
If you decide to try to learn how to create flowers in the quilling technique, then you should prepare:
- Glue PVA;
- Tweezers;
- Ruler-template;
- Special twist tool or conventional toothpick;
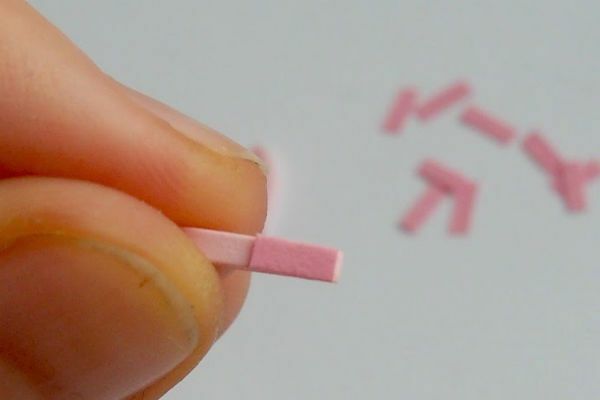
- 25-27 stripes of pale pink color, 15 cm long, 2 mm wide;
- Small stripes of dark pink color, 2 mm wide.
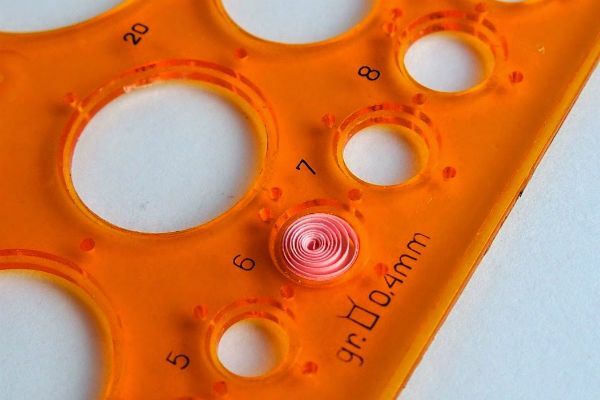
First, take a strip of light color 15 cm and fold it into a classic spiral with a toothpick.
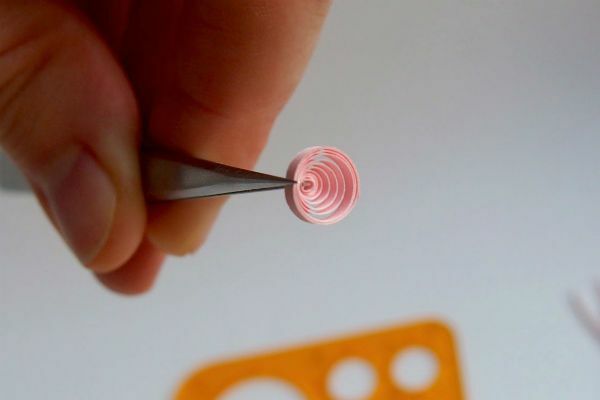
From the received spiral, it is necessary to form the element "drop" or "tear".To do this, holding the product with tweezers for the middle, as shown in the photo, compress the spiral in the same direction along the entire length.
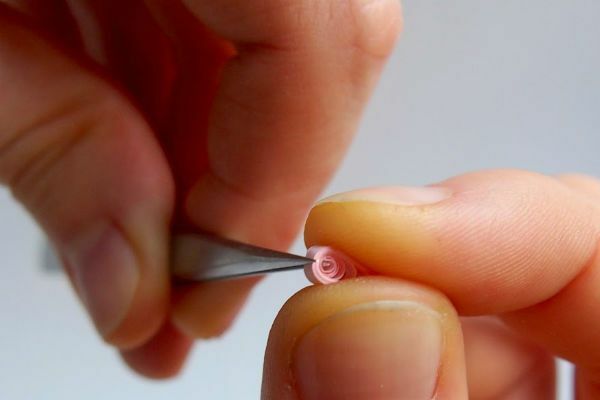
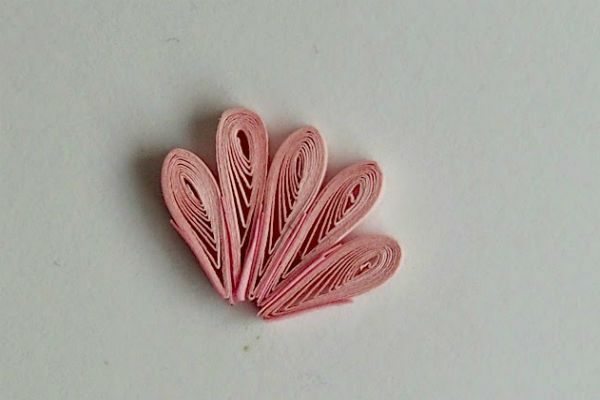
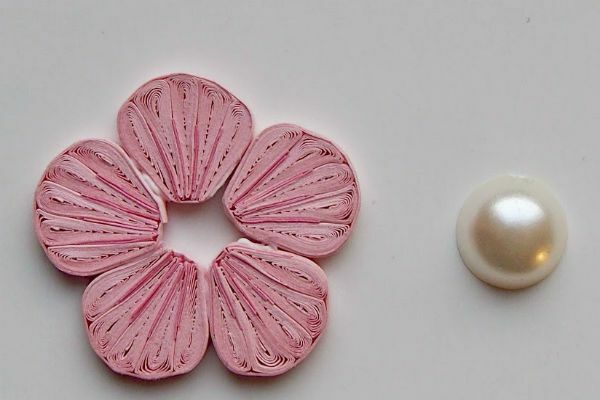
For one flower petal you need five similar elements - two "drops" with a maximum diameter of the rings of 5 millimeters and three with a diameter of 6 millimeters. Measure the diameter of the spiral by using a ruler-pattern."Drops" do according to the technique described above.
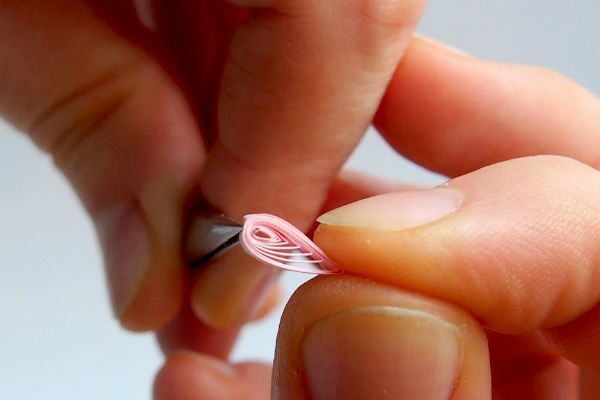
To collect the petal and give the center of the flower an interesting effect of the rays, you will need to trim the bands( 3-5 mm) of a darker color, we have dark pink. They must be glued to each "drop" on both sides.
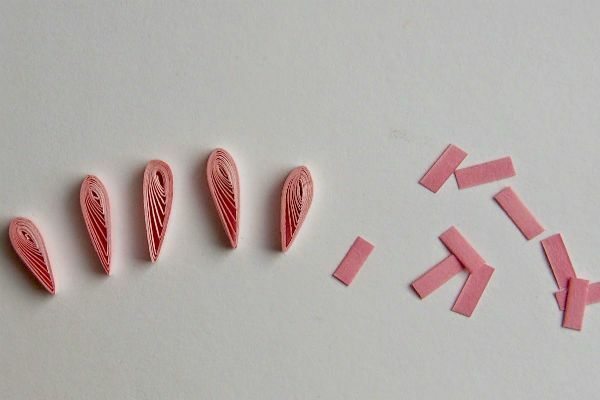
Now glue all the "droplets" between each other at the bottom and gently squeeze the top of the future petal.
We take a strip of light pink color and we glue it with glued "drops" along the perimeter. It is better to do this twice, if you intend to use the flower as an ornament.
The design in which you place the flower( bracelet, necklace, earrings, etc.) will be more reliable and will not be damaged when worn.
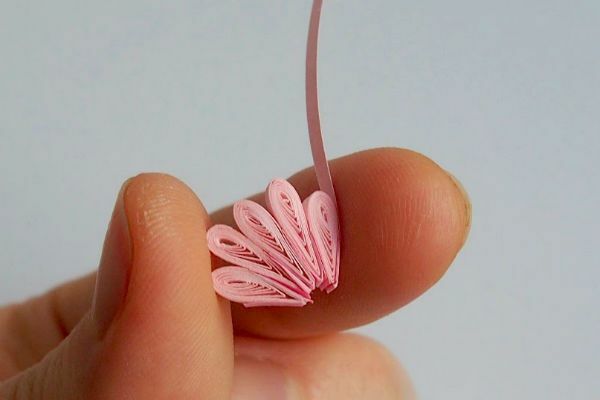
To complete, squeeze the top and bottom of the petal, holding the base. This will help remove all the sloppy spaces, and the petal will look more dense.
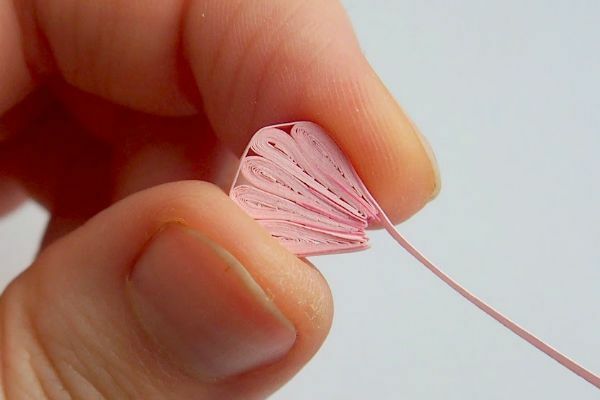
Next, make 4 more petals, repeating all the above-described actions, and make them into a single flower,as shown in the photo.

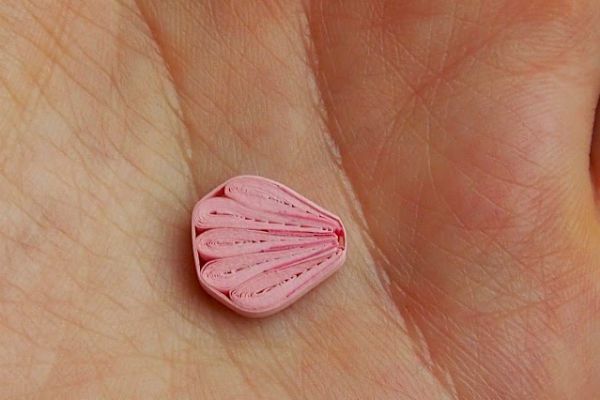
I'll decorate the middle with a bead.
This is where your work in the quilling technique can be considered finished, but if you want, you can additionally decorate the flower, "plant" on the stem, add leaflets, perhaps decorate with rhinestones, ribbon, varnish or glitter.
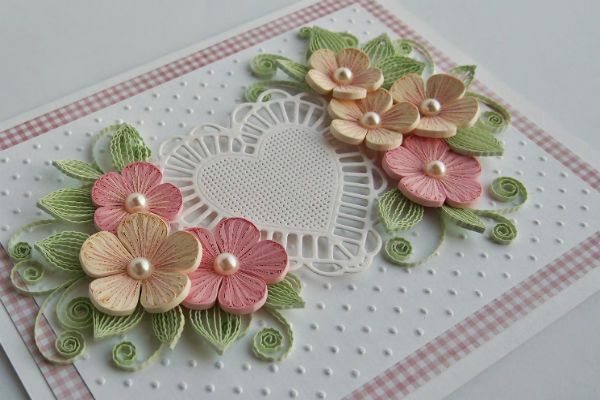
Wonderfully such neat flowers will look like one by one, and whole bouquets when decorating paintings, greeting cards or wedding invitations.