
For our country, the art of amigurumi is quite new, but in Japan it has been popular for several hundred years. The first toys in this technique were created especially for children, and also as home guardians. Such toys the Japanese gave each other as a token of gratitude.
- Little hedgehog
- Simple bear
- Toy Pak-men
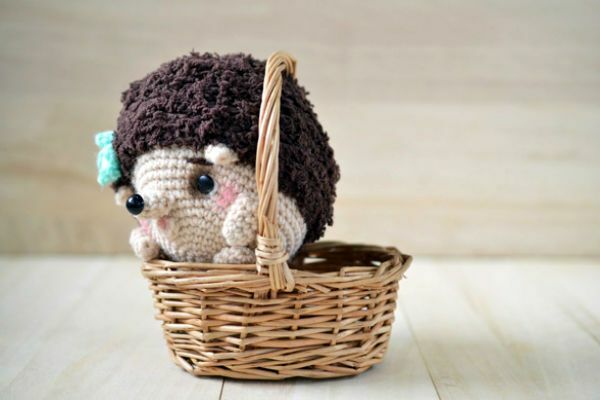
Little hedgehog
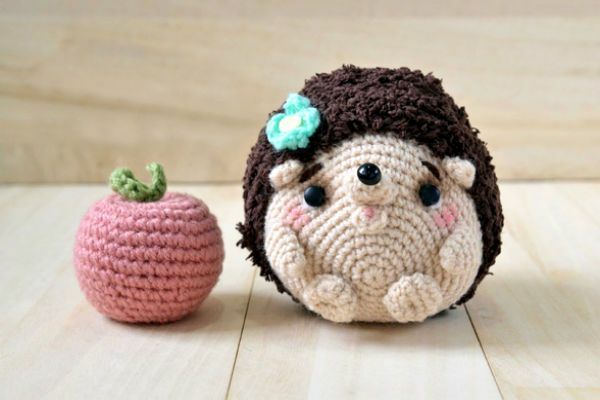
To create a hedgehog you will need:
- acrylic yarn of cream or flesh color( you can take a gentle pink);
- acrylic yarn of brown color;Yarn-grass or brown-crocheted yarn;
- hooks are 2.3 mm and 2.5 mm;
- ready-made plastic eyes for toys;
- white felt( 2 circles);
- filler for toys( sintepon, silicone or holofayber);
- scissors;
- needle;
- yarn for the flower of any bright color( you can use the ready bought floristic flower);
- spout with pin;
- adhesive;
- rouge;
- brown eye shadow;
- cotton swabs.
Legend:
x - column without crochet;
V - increment( in one loop to tie 2 posts without a crochet);
A - reduction( 2 loops tie one bar together without a crochet).
Knitting of details occurs in a circle, in a spiral.
Torso:
Knit to start yarn of light color. It will be the hedgehog's calf. Take the hook 2.3 mm.
1 row - ring amigurumi - 6x.
2 row - V on the whole ring amigurumi in a circle - 12x.
3rd row -( V, x) to the end of the series - 18x.
4th row -( V, 2x) to the end of the series - 24x.
5 row-( V, 3x) to the end of the series - 30x.
6 row -( V, 4x) to the end of the series - 36x.
7 series -( V, 5x) to the end of the series - 42x.
8 row -( V, 6x) to the end of the series - 48x.
9 row -( V, 7x) to the end of the series - 54x.
10 series -( V, 8x) to the end of the series - 60x.
11-14 rows - x in a circle( 60x in each row).
Change the thread to a brown color and a hook of 2.5 mm.
15-20 rows - x in a circle( 60x in each row).
21 series -( A, 8x) to the end of the series - 54x.
22 row -( A, 7x) to the end of the series - 48x.
23 row -( A, 6x) to the end of the series - 42x.
24 series -( A, 5x) to the end of the series - 36x.
25 series -( A, 4x) to the end of the series - 30x.
26 row -( A, 3x) to the end of the series - 24x.
27 row -( A, 2x) to the end of the series - 18x.
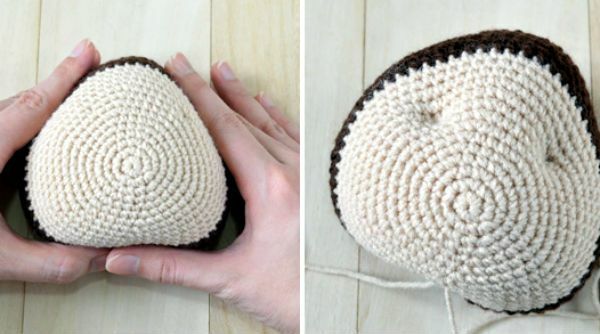
The resulting part must be filled with filler. When filling the calf, toys need to be shaped like a triangle, you can use the loose granulate at the beginning of the stuffing of the toy, and continue filling with soft fillers. When the toy is filled, the hole must be carefully pulled off the seam "over the edge" or tie up additional rows.
28 row -( A, x) to the end of the row - 12x.
29 row - A to the end of the row.
Thread on the finished part, trim and hide the excess inside.
Spout:
Knit with light thread color of calf crochet 2,3.
1 row - an amigurumi ring of 5x.
2 row - V on a circle to the end of the row - 10x.
3 row - x in a circle to the end of the series - 10x.
Thread the thread, cut off, leaving a small tail for sewing.
Lip:
Tie the amigurumi ring from 5x, fix the thread and leave the tail for sewing.
Ears( 2 pieces):
Knit with light yarn, crochet 2,3.
1 row - an amigurumi ring of 7x.
2 row - x in a circle to the end of the series - 7x.
Secure the thread and leave the tail for sewing.
Front feet( 2 parts):
Knit a light crocheted yarn 2,3.1 row - an amigurumi ring of 7x.
2-5 rows - x in a circle( 7x in each row).
Secure the thread and leave the tail for sewing.
Hind legs( 2 parts):
Knit a light crocheted yarn 2,3.
1 row - an amigurumi ring of 6x.
2 row - V in each loop in a circle - 12x.
3-4 rows - x in a circle( 12x in each row).
5 row - 6 times A - 6x.
Secure the thread and leave the tail for sewing.
The next step is to assemble the toy.
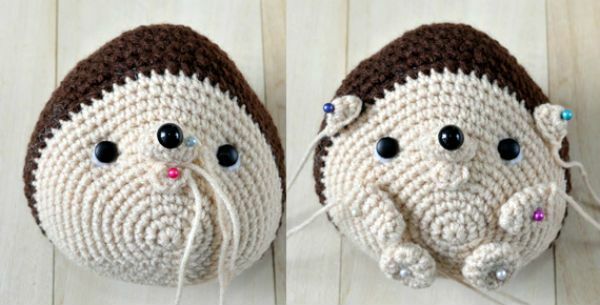
Make sure that the basic detail of the hedgehog body is triangular. If not, then by squeezing the part, achieve the desired shape. Determine where the muzzle will be placed, and where the bottom part.
You need to make a tightening under the eyes. From below, you need to insert a needle in the body and bring it to the light surface under the 9th row of mating. Make a small stitch and pull the thread back down the calf. Pull to get a deepening and fix the thread. Similarly do for the second eye observing the symmetry.
In the formed hollows paste the circles of white felt and glue them on the ready-made eyes. Sew a spout and a sponge. On the connected spout insert the purchased nosepiece with the pin on the glue.
Symmetrically sew a hedgehog to the ears and all the legs.
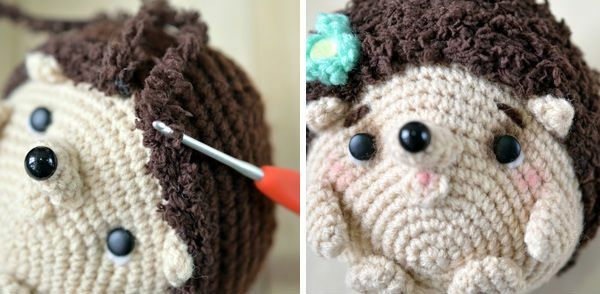
All brown knitting in a circle should be tied with sticks without a crocheted bead or yarn-brown grass. Thus our hedgehog will find spines.
A simple brown yarn can be embroidered with a hedgehog.
Brown shadows make small shadows around the glued eyes, and blush to paint a hedgehog with rosy cheeks.
Sew a ready-made or tied flower.
You can connect the flower according to the following description:
1 row - 4 air loops to fix in the ring.
2nd row - * 3 air hinges with 3 nacs, connecting column *.From * to * repeat 3 more times, so there will be 4 petals in the flower. You can decorate a flower with a bead or a small button.
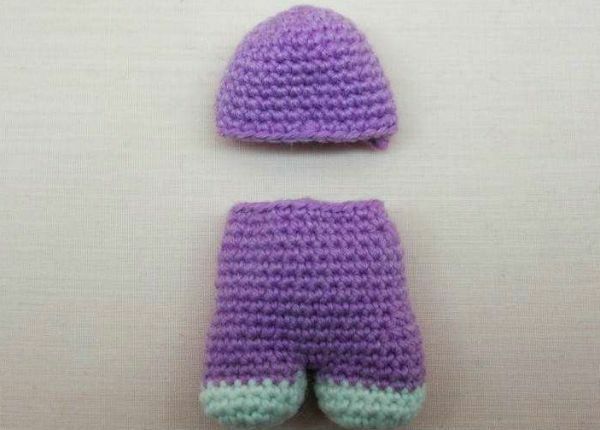
to contents ^Simple bear
For knitting a simple bear you will need:
- yarn of the main color( at your discretion);
- yarn additional color for the design of the feet and muzzle;
- two beads or beads;
- needle;
- scissors;
- adhesive;
- filler;
- hook.
The first thing you should learn to do is an amigurumi ring.
Take the thread, and form a small loop by crossing the long and short edge of the thread. The short edge should be on the left, and the long one on the right.
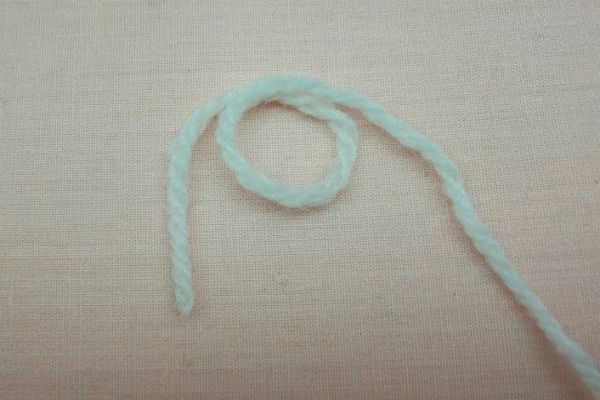
Hold the resulting ring, you need to get into it 6 columns without a crochet, not including the first.
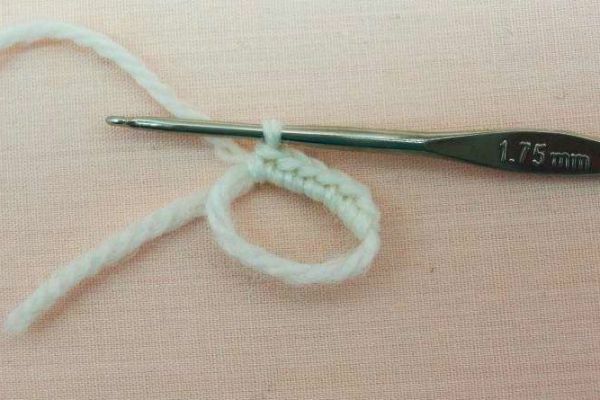
At the end of the embroidering, pull the resulting over a short edge so that there is no hole.
All the details are knitted in a spiral, in a circle, where the amigurumi ring is closed, there will be an end of each row.
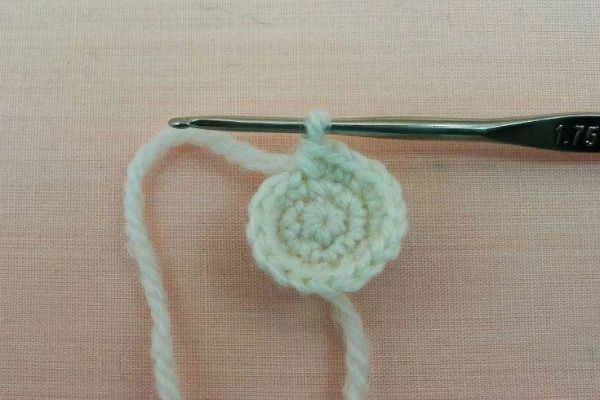
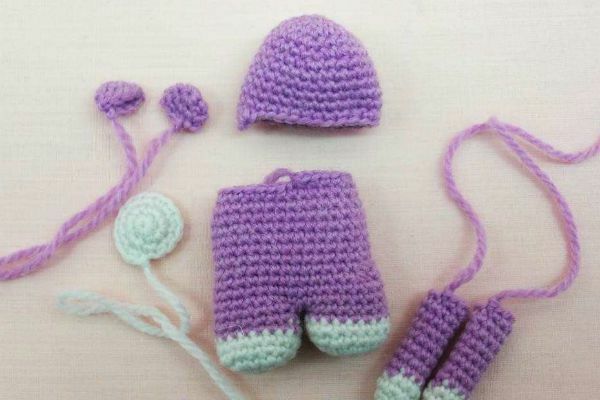
Feet( 2 pieces):
Begin to knit white yarn.
1 row - an amigurumi ring of 6 scents.
2 rows - 2 sb each loop( extra) - 12 cb.
3rd row -( 1sb, increase) in a circle to the end of the series -18sb.
4-5 series - around the circle of sbn( 18 sb in each row).
Attach the main color thread with a connecting bar.
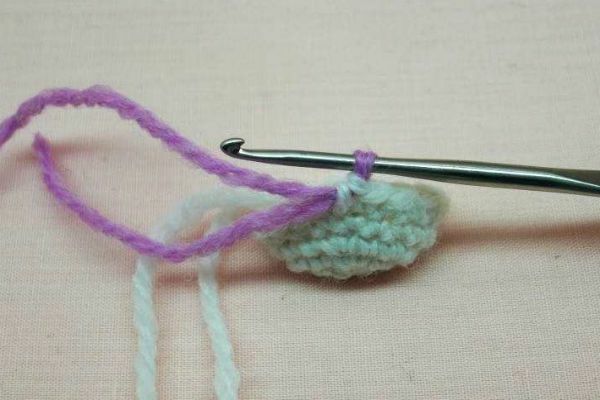
6-7 series - around the circle of sbn( 18 sb in each row).
Secure the thread and cut off excess.
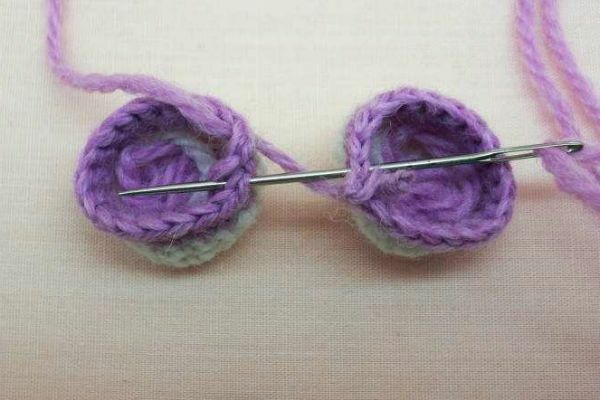
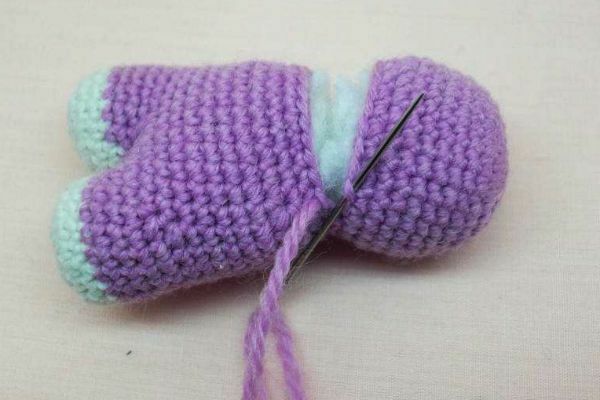
Feet sew together with a needle cross to the cross in the places where the knitting of the previous row ended. Use only one loop from each leg during stitching.
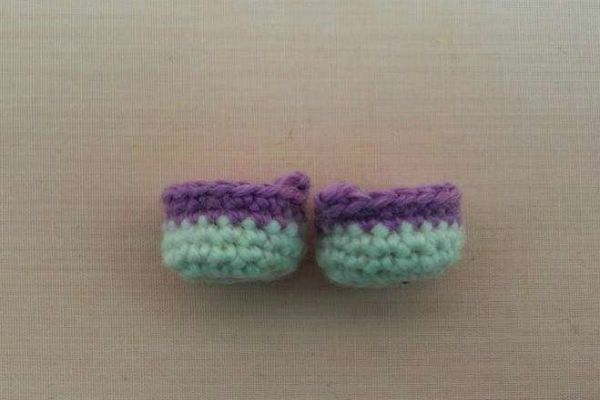
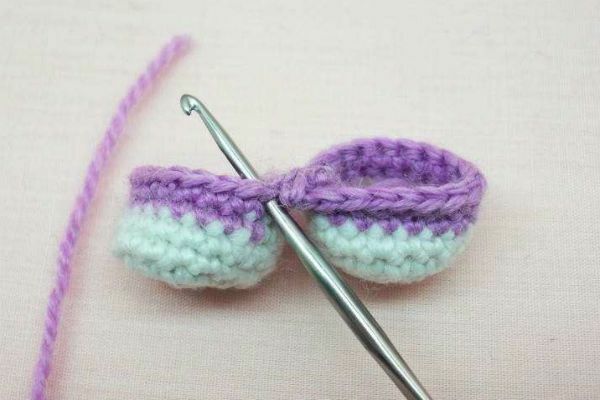
Attach the main color thread to the legs and knit in a circle grabbing all the loops, in the row should be 36 sb - this is 1 row of the trunk.
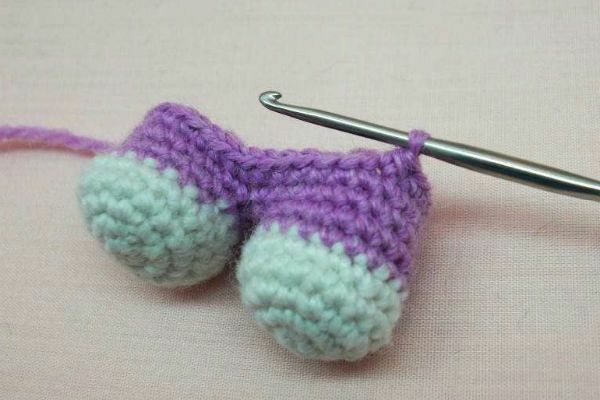
2nd row - around the circle 36 сбн.
3rd row - 11 sb, tie 2 sb of the previous row together( decrease), 16 cbn, decrease, 5 sb - in the series 34 sbn.
4th row - 10 cbms, decrease, 15 sc, decrease, 5 sb - in a row of 32 sc.
5-9 series - in a circle of Sb( 32 cb in each row).
10 series - 10 sb, reduction, 14 sb, decrease, 4 sbn - in the series - 3 0bn.
11 series - 9 sbn, decrease, 9 sbn, decrease, 8 sbn, decrease, connecting column - in the series of 27 sb.
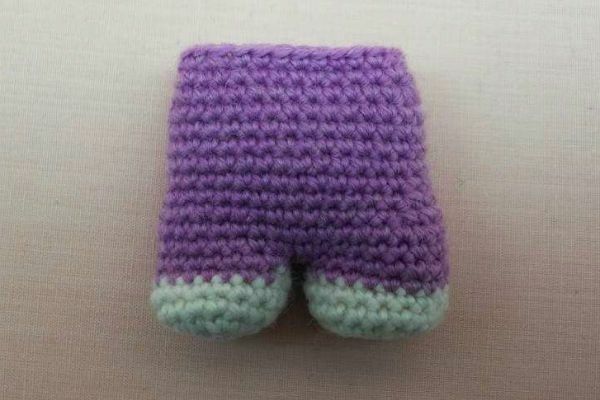
Cut and fasten excess thread.
Legs were obtained together with the trunk.
Head:
1 row - amigurumi ring from 6 сбн.
2nd row - increments in a circle - 12 sc.
3 series - in a circle( 1 sbn, increase) - 18 сбн.
4th row - in a circle( 2 sb, increase) - 24 sb.
5 series - in a circle( 7 sb, increase) - 27 sb.
6 row - around the circle of 27 сбн.
7 series - in a circle( 8 sbn, increase) - 30 sb.
8-11 series - knit sbn in a circle( in each row of 30 cbn).
12 series - in a circle( 8сбн, убавка) - 27 сбн.
The thread is fixed, the extra cut off.
Handles( 2 parts):
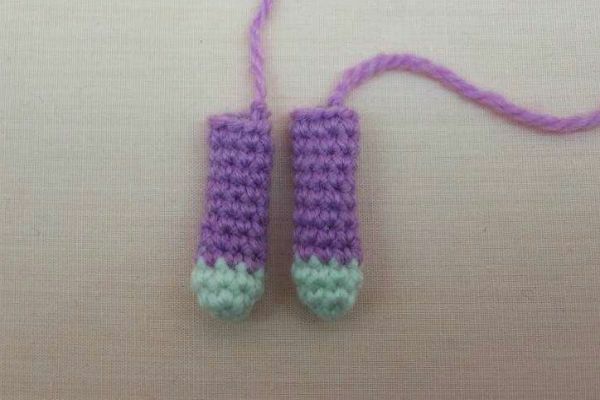
White yarn.
1 row - a ring of amigurumi from 6 сбн.
2nd row -( 1 sb, increase) * 3 times - 9 sb.
Beginning with the fourth row, change the white to the primary color.
3-11order - around the circle of sbn( in each row 9 sbn).
Attach the thread, leave the tail for sewing.
Ears( 2 pieces):
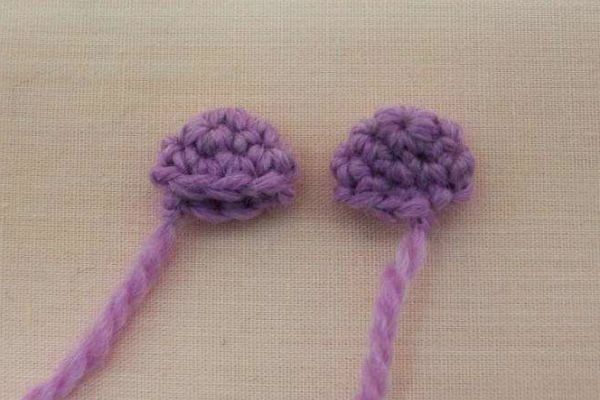
Knit the thread of the primary color of the toy.
1 row - an amigurumi ring from 6 сбн.
2nd row -( 1 sc, increase) * 3 times - 9 sc.
3rd row - around the circle 9 sb.
Attach the thread, leave the tail for sewing.
Muzzle:
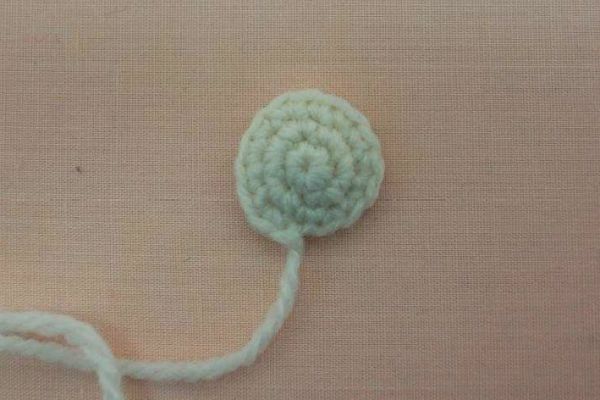
Knit with white yarn.
1 row - an amigurumi ring from 6 сбн.
2nd row - increases in the whole series - 12 sc.
3rd row -( 3 rolls, increase) * 3 times - 15 sc.
Attach the thread, leave the tail for sewing.
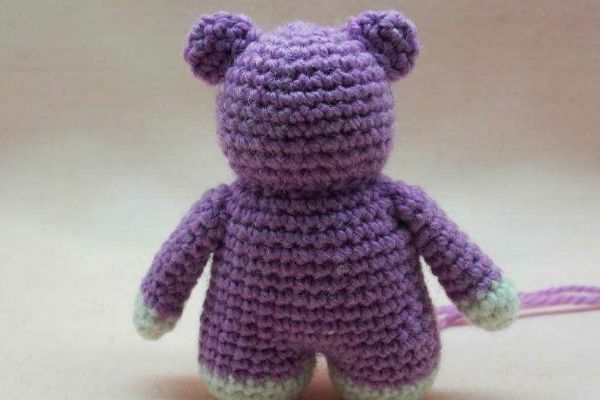
All parts are ready and you can start assembling.
The head and trunk should be filled with filler.
Next, sew the head to the body with a seam "over the edge", giving the neck a visually shaped shape. Remove the thread on any part of the body and hide it.
Sew the handles on the sides, slightly below the neck line.
First sew on the top edge, and then along the line of the armpit. But, so that the hand does not stick out of the way, the bottom edge is stitched to a row lower than the upper one.
Pin the ears and face to the sewn figure of the bear cub and sew details.
The muzzle needs to be sewn not flat by a circle, but to give a bump or slightly fill. In the sewing process, use the seam over the edge.
Embroider the spout and mouth.
Enter the needle between 2 and 3 rows of muzzle at the top, and poke in the bottom. After making a stitch, you need to roughly pull the needle to the top, where the spout will be located.
Embroider the spout with embroidery stitches. Fix the thread on the back of the head and hide the excess inside.
Sew or glue to the finished bear eyes or beads.
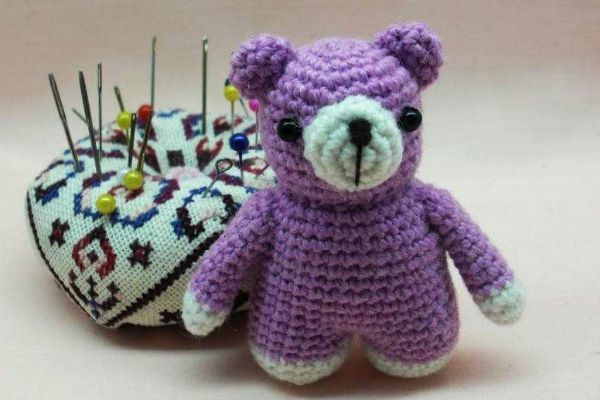
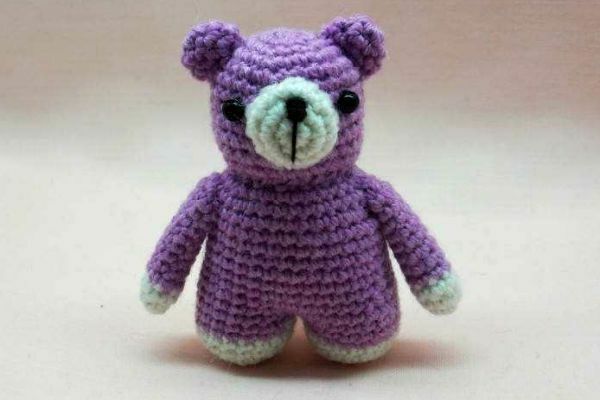
In this master class the bear is small, only 6 centimeters in height. The size of the toy directly depends on the thickness of the threads used and the size chosen for the hook operation.
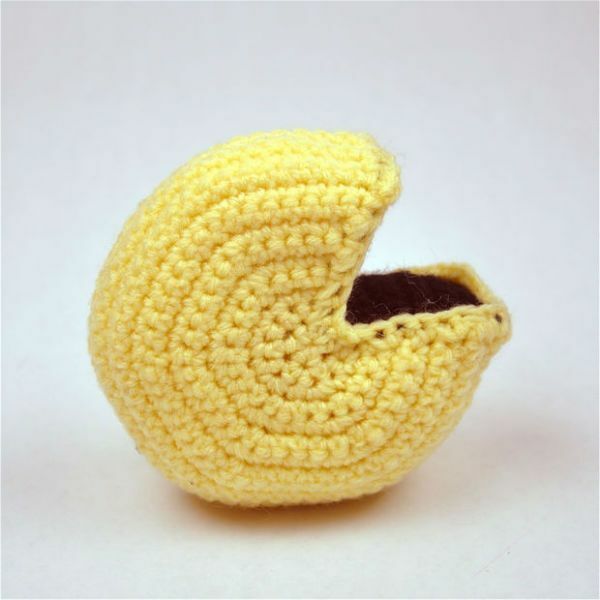
to contents ^Toy Pak-men
You will need to create a Pakman:
- yarn( yellow and black);
- hook of the appropriate size;
- needles;
- scissors;
- paper clips;
- thread.
Let's move on to creating Pak-Main. Make it simple enough. The main part will be executed in yellow color, its mouth needs to be made black.
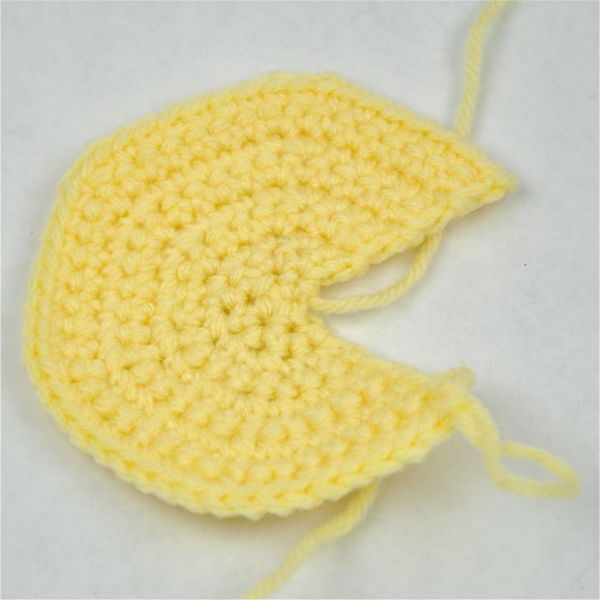
Do the main part.
We make five air loops, put them in a ring.
We skip the first loop, add 10 loops, rotate.
We pass the first loop,( we tie a loop with no crochet 1 loop, in the next we add), repeat( 15), turn.
We skip the first loop( we sew a loop without a cuff 2 loops, in the next we add), repeat( 20), turn.
We pass the first loop( we sew a 3-loop loop without a crochet, in the next we add), repeat( 25), turn.
We pass the first loop( we sew a loop without a crochet 4 loops, in the next we add), repeat( 30), turn.
We skip the first loop( we sew 5 loops with a cake without a crochet, in the next we add), repeat( 35), turn.
We skip the first loop( we sew 6 loops with a cake without a crochet, in the next we add), repeat( 40), turn.
We skip the first loop( we sew a loop with 7 round loops without a cuff, in the next we add), repeat( 45), turn.
The next eight rows are tying 45 loops of a table without a crochet.
We skip the first loop( we sew it with 7 loops without a crochet, in the next we add), repeat( 40), rotate.
We skip the first loop( we tie 6 loops without a crochet, in the next we subtract), repeat( 35), turn.
We pass the first loop( we sew 5 loops with a crochet, in the next we subtract), repeat( 30), turn.
We skip the first loop( we sew a loop without a crochet 4 loops, in the next we subtract), repeat( 25), turn.
We pass the first loop( we tie a 3-loop loop without a crochet, in the next we subtract), repeat( 20), turn.
We skip the first loop( we sew a loop without a crochet 2 loops, in the next we subtract), repeat( 15), turn.
We pass the first loop,( we tie a loop with no crochet 1 loop, in the next we subtract), repeat( 10), turn.
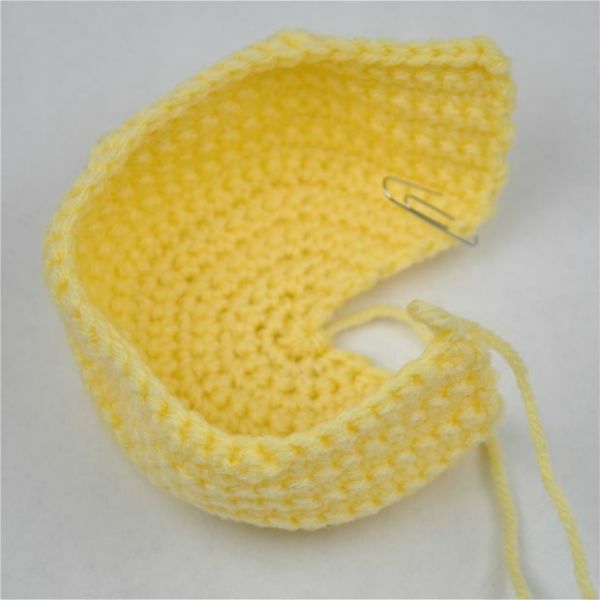
We pass the first loop, we subtract 5, we make a half-shell without a crochet.
We make 8 loops.
We irradiate 17 rows with a column without a crochet, we sew a half-string to the eighteenth and tie a string.
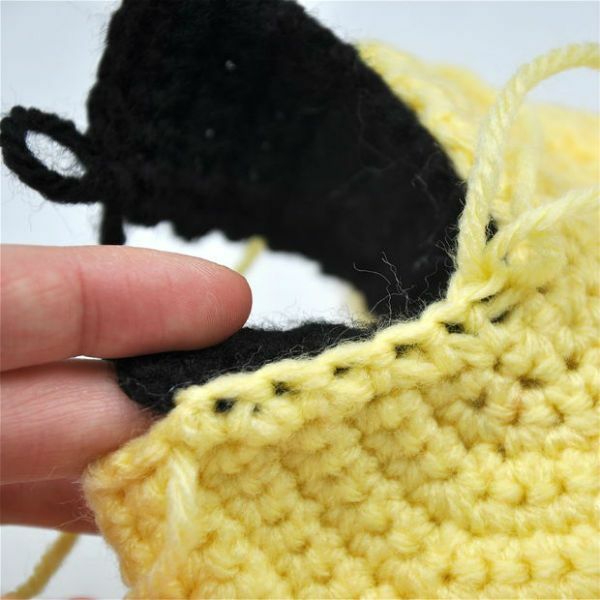
Now you need to connect the parts. Connect one corner of the mouth of the Pakman and one corner of the mouthpiece. To fasten for a swipe, use a paper clip. The resulting toy should be stuffed with suitable material, and then connect the details using crochet.